
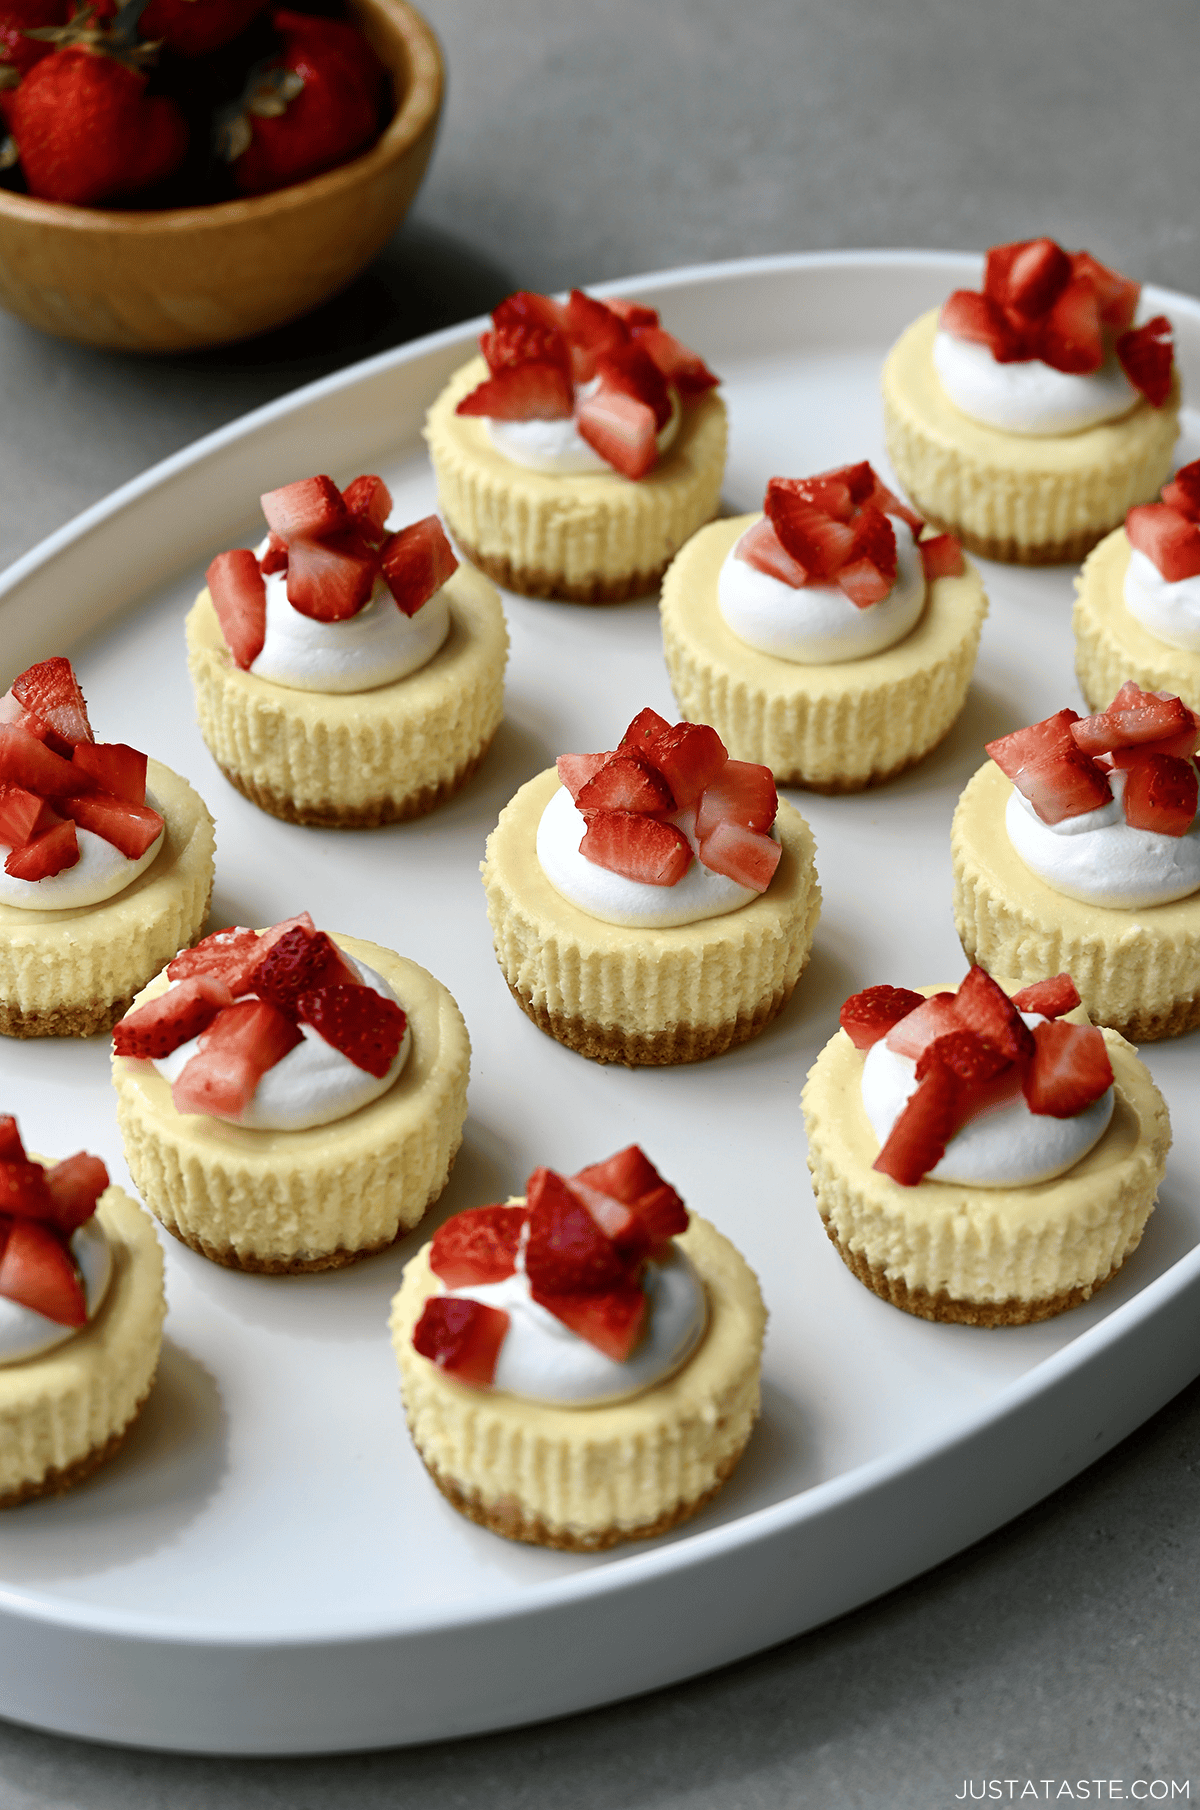
Grab your muffin pan for the best mini cottage cheese cheesecakes that are creamy, tangy and packed with 6 grams of protein each! Made with blended cottage cheese, cream cheese, and a hint of lemon, they’re baked on a buttery graham cracker crust and chilled until perfectly set. They’re a great make-ahead dessert for parties, potlucks, holidays… or just because. Serve with your favorite cheesecake toppings for a sweet treat that feels indulgent but packs a protein punch!
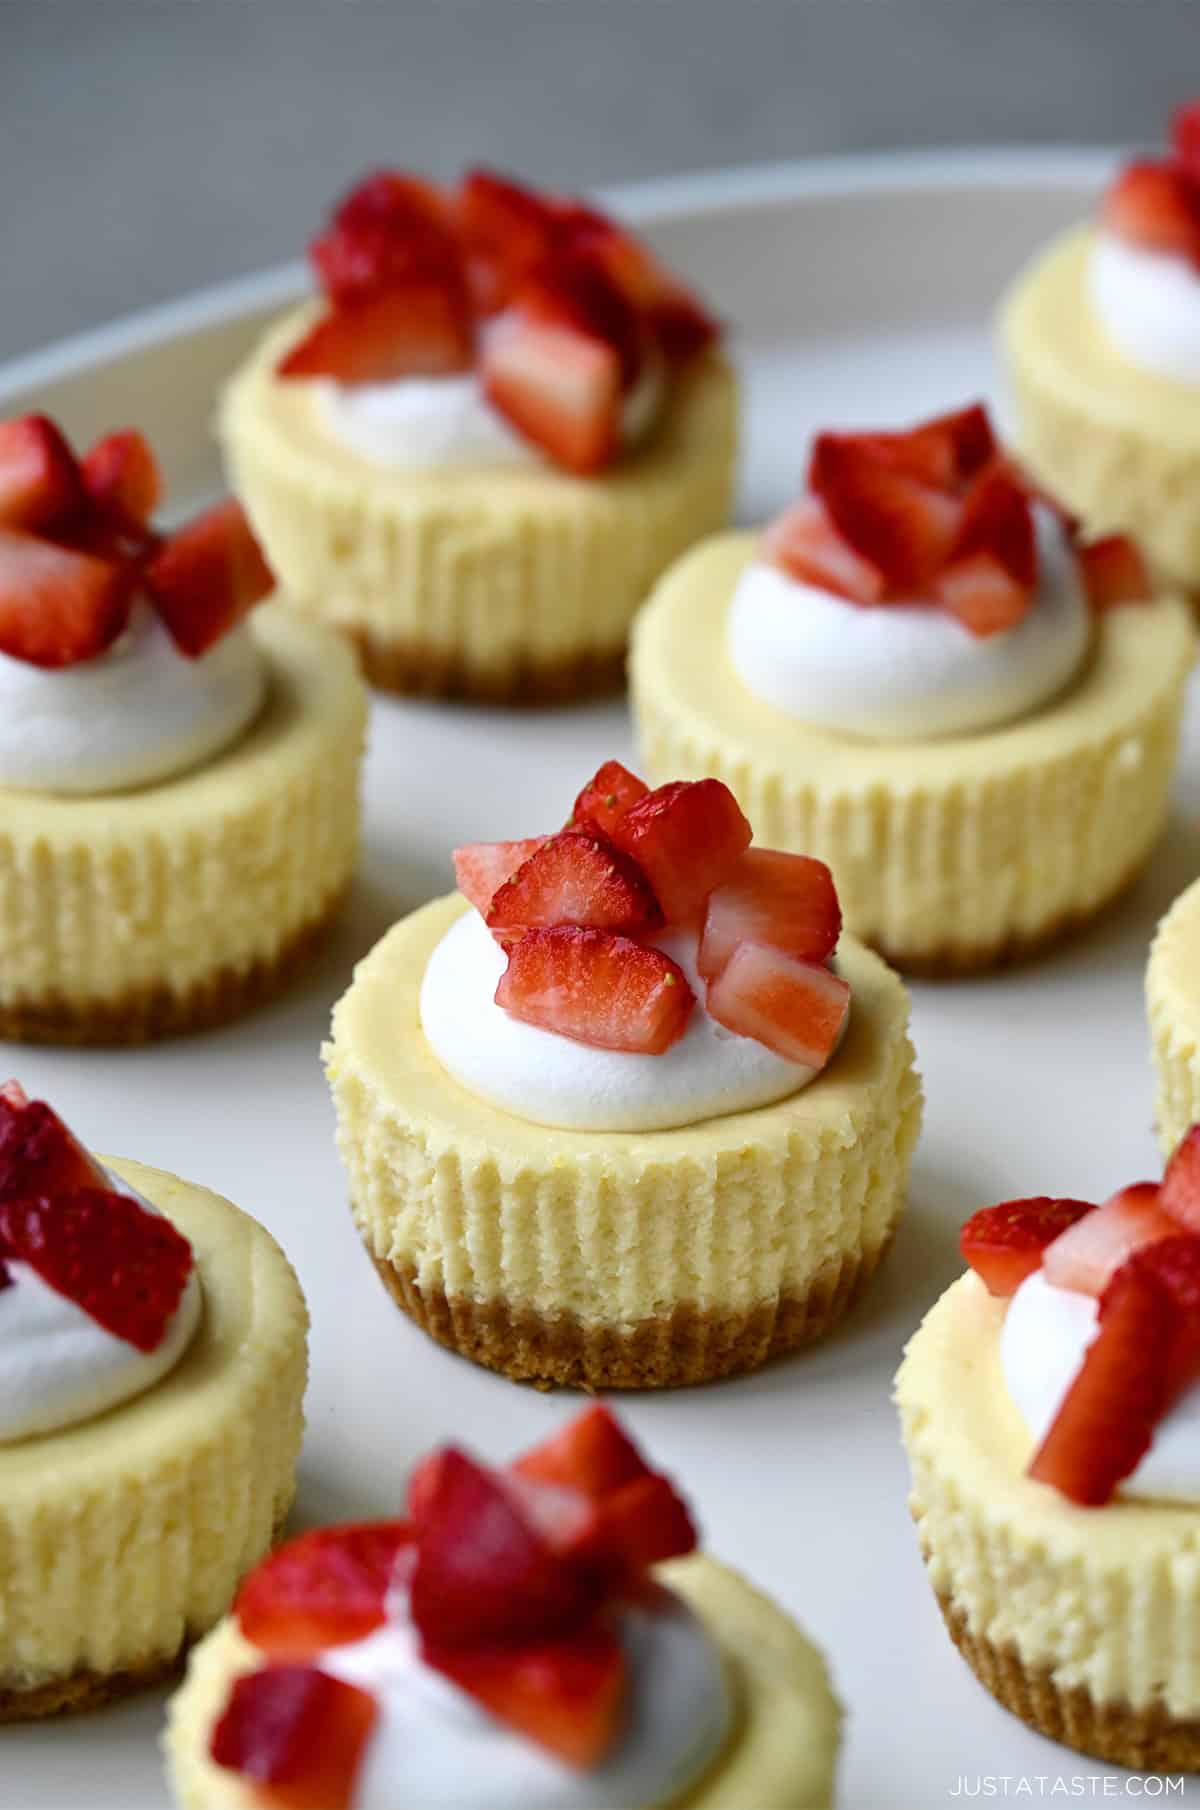
Table of Contents
These mini cottage cheese cheesecakes might be my new favorite way to sneak in a little extra protein—dessert edition. They’re light, tangy, just sweet enough and perfectly portioned thanks to a good ol’ muffin pan. No water bath, no cracking stress, no springform pan required.
And yes, we’re blending the cottage cheese so it’s ultra creamy. Think classic cheesecake texture with a subtle tang and a nutritional glow-up. Each one clocks in around 6 grams of protein and tastes like it belongs on a dessert tray at your next party—or, let’s be honest, in your fridge for late-night snacking.
Why Cottage Cheese? Can’t I Just Use Greek Yogurt?
You could, but I recommend sticking with whipped cottage cheese for this recipe. Greek yogurt has a similar tang and protein boost, but it’s a bit softer and holds more moisture. While I haven’t tested this exact recipe with yogurt, my guess is that the texture would turn out a little looser and less classic. If you’re after that traditional cheesecake feel, blended cottage cheese is the way to go. I know it sounds a little weird, but you won’t taste the difference!
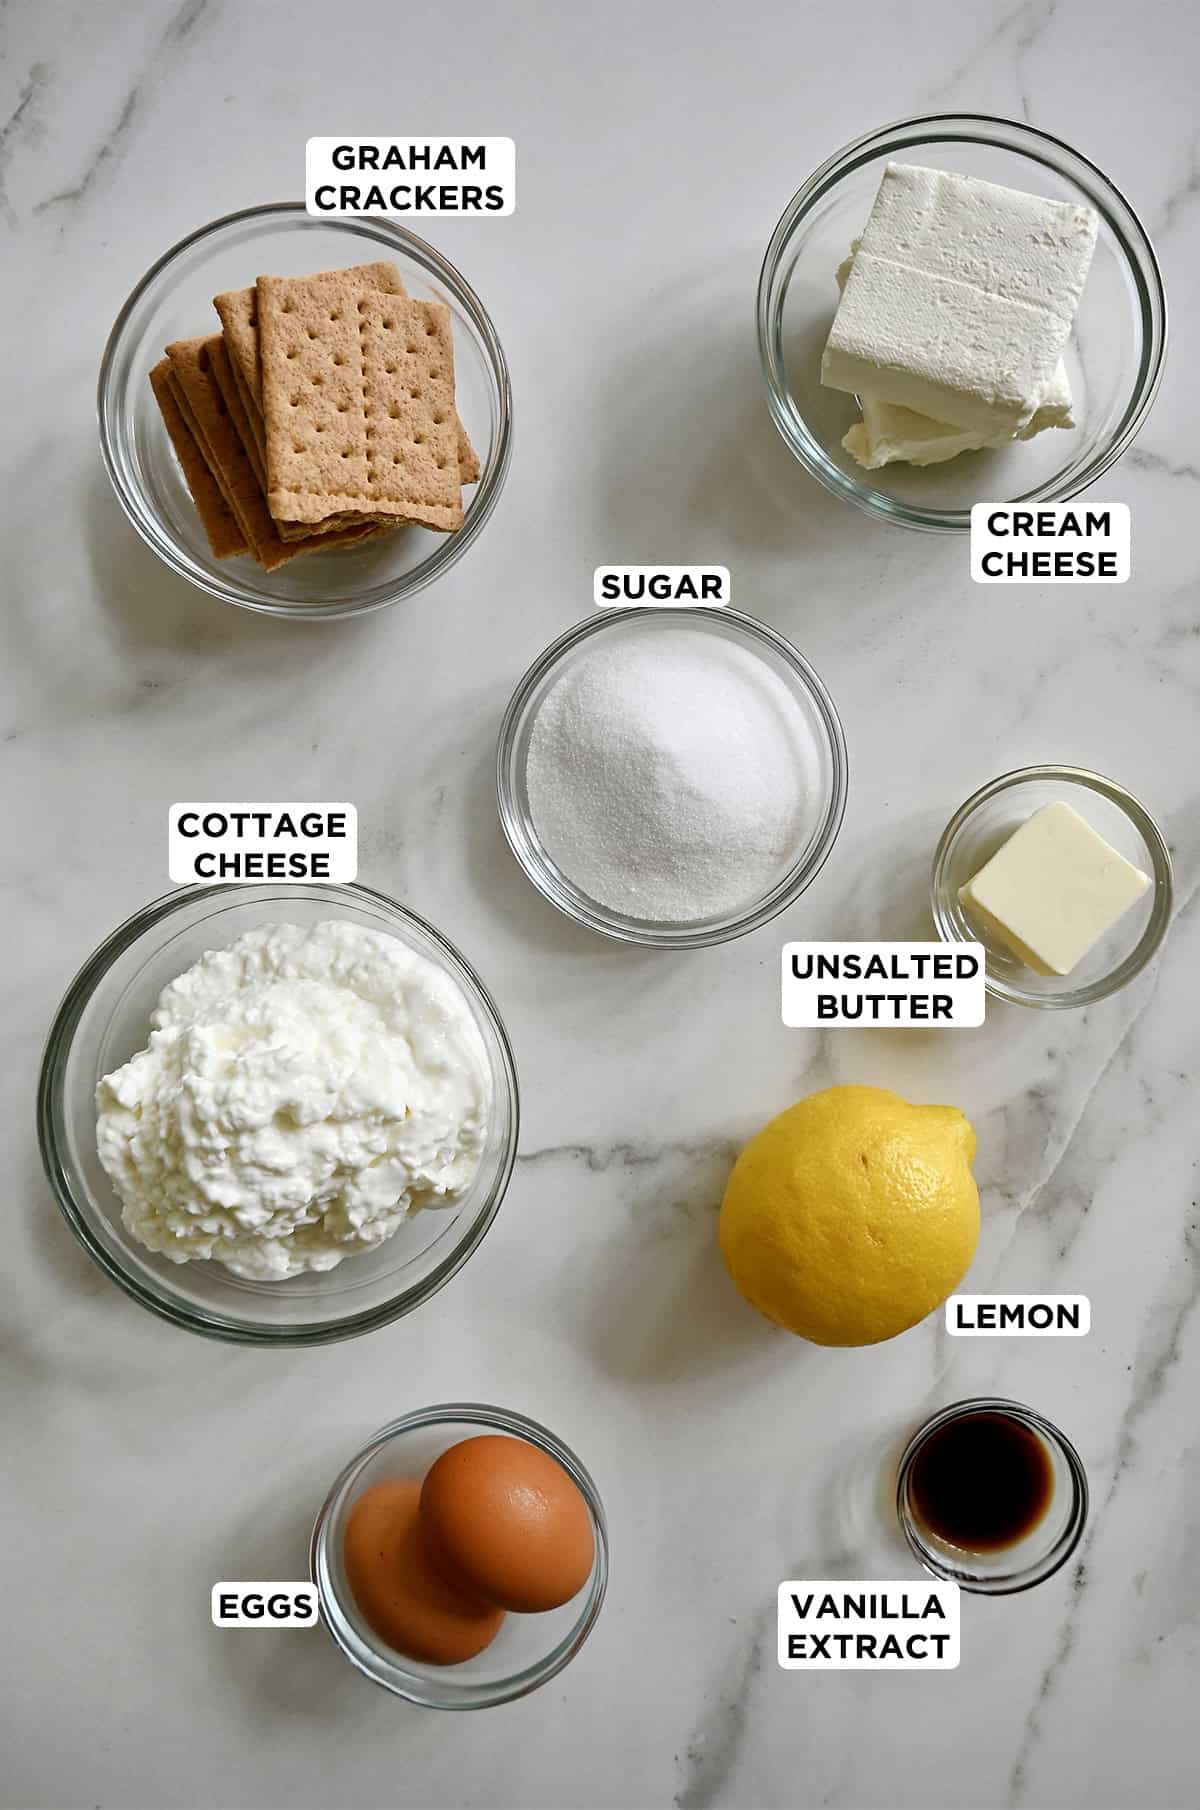
- Cottage cheese: Blended cottage cheese is the not-so-secret ingredient that gives the filling its ultra-creamy texture, adds a boost of protein and brings a subtle tang. Be sure to use full-fat cottage cheese (I use 4% milkfat for best results).
- Cream cheese: To keep that classic cheesecake flavor and texture, we still use a block of cream cheese. Let it come to room temp so it blends smoothly with the other ingredients.
- Sugar: Just enough to sweeten the filling and balance the tang from the dairy and lemon.
- Lemon zest & lemon juice: Add a subtle brightness and zing that cuts through the richness. Be sure to zest your lemon before juicing it.
- Vanilla extract: I always recommend using pure vanilla extract for the best flavor.
- Eggs: Help the mini desserts set and hold their shape once baked.
- Graham crackers + melted butter: For that classic buttery graham cracker crust we all love. You can blitz the crackers in a food processor or crush them in a zip-top bag until super fine.
- Cupcake liners: These make it easy to remove the cheesecakes from the pan without sticking or crumbling. I like to use parchment-style liners for the cleanest release, but any standard paper liner works.
See the recipe card for full information on ingredients and quantities.
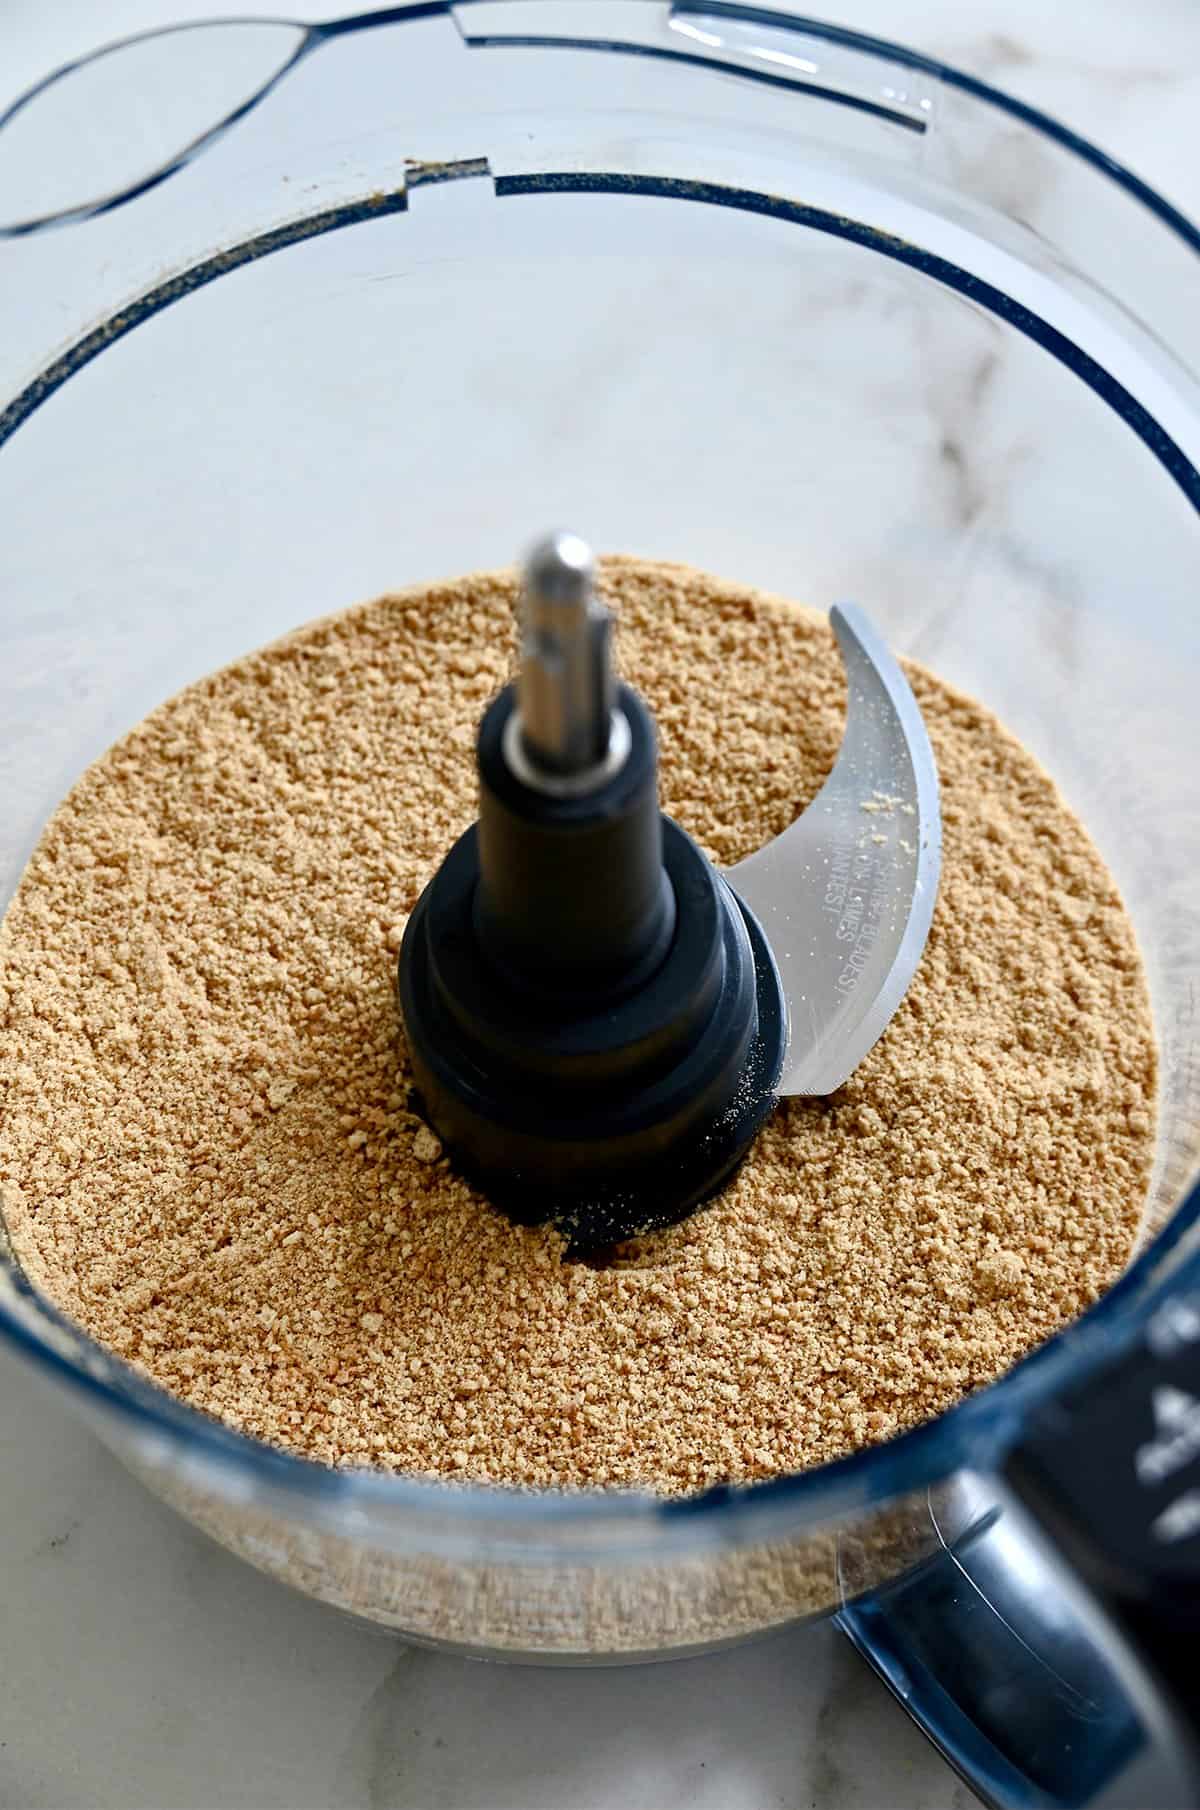
- Pulse your graham crackers to a fine crumb. Add graham crackers to a food processor and pulse until they reach a fine, sandy consistency. (Think beach sand—not chunky gravel!) This step makes all the difference in helping the crust hold together and bake evenly.
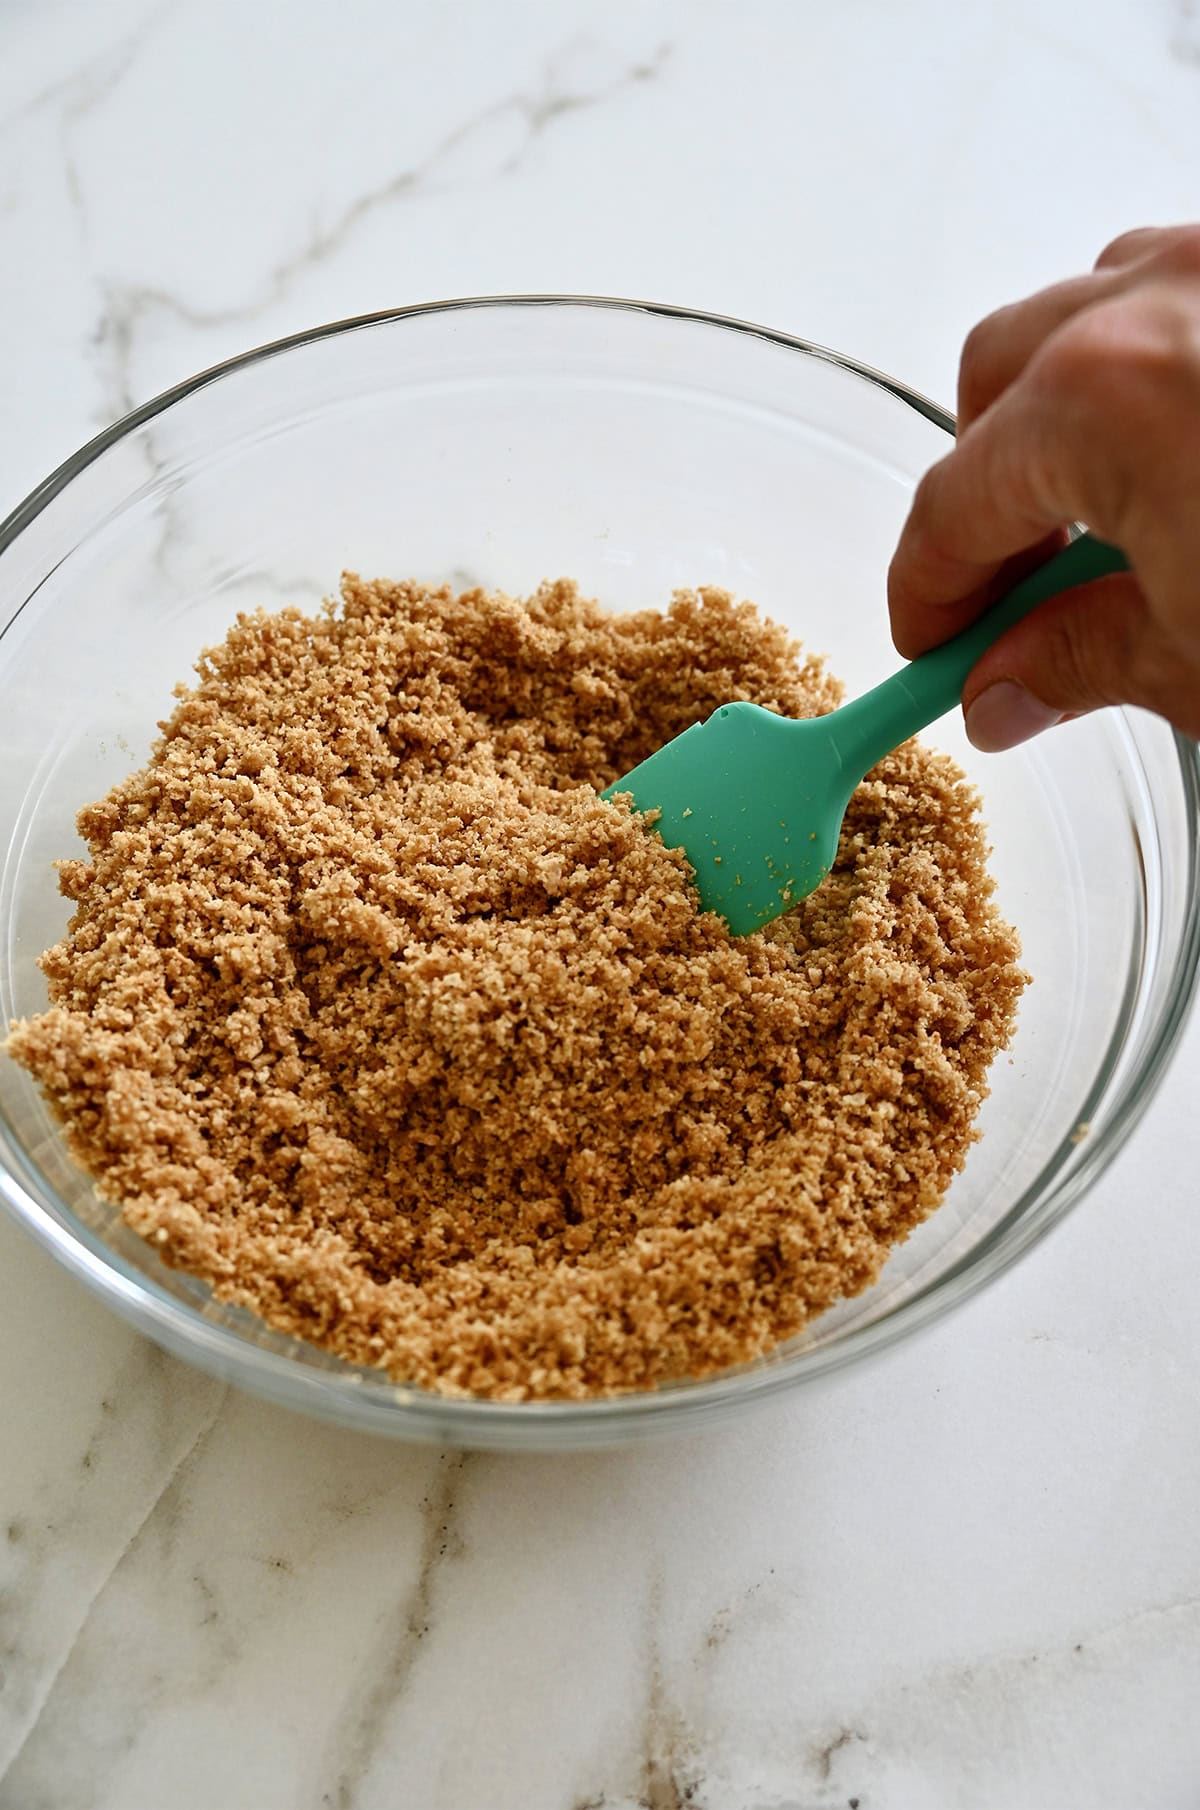
- Mix the crumbs with melted butter. Add 1 cup of the finely crushed graham crackers to a bowl. Stir the crumbs with melted butter until they’re evenly moistened.
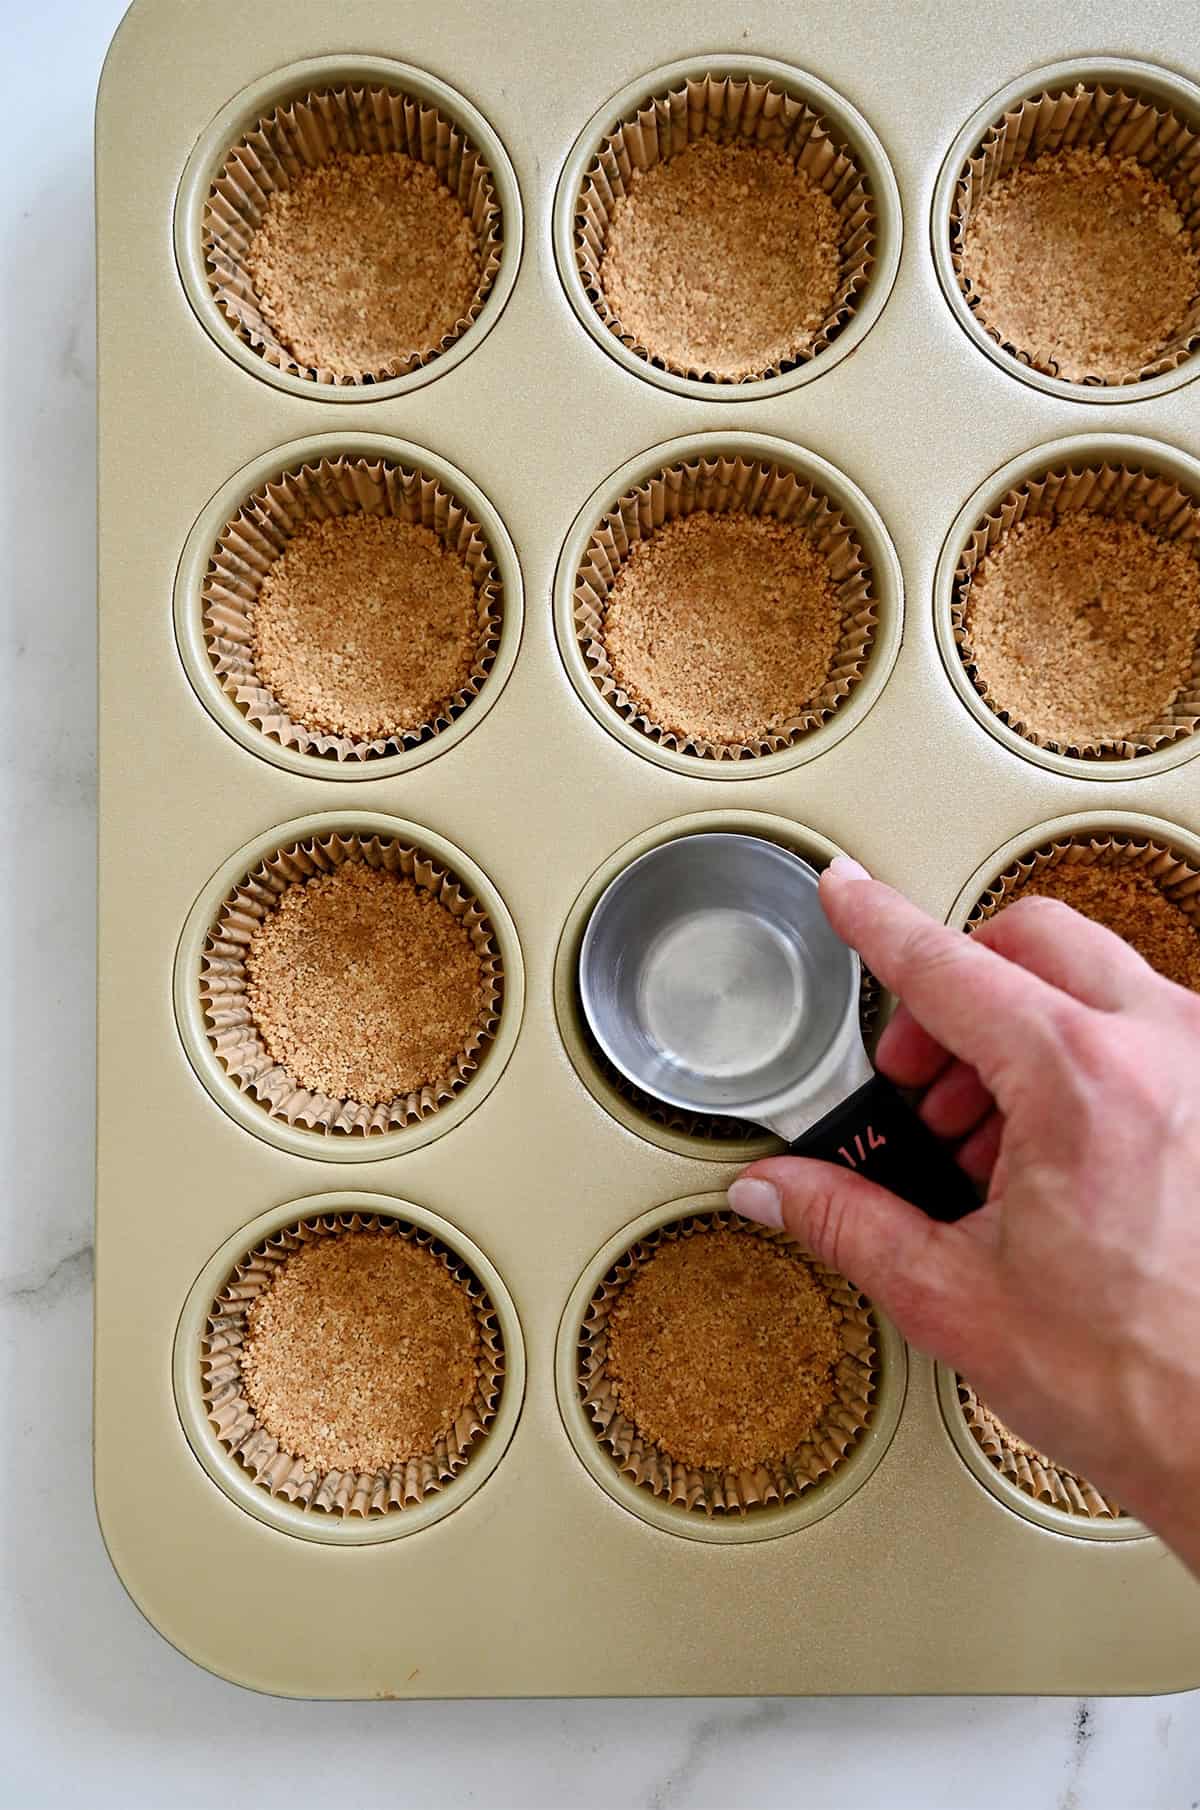
- Divide the graham cracker mixture between the muffin liners and press firmly into the bottoms. (A small measuring cup or shot glass works great here!) Bake at 325°F for 5 minutes, then let cool.

- Blend the cottage cheese. Add the cottage cheese to a food processor and blend until smooth and creamy—no lumps! This gives the cheesecake its silky texture.
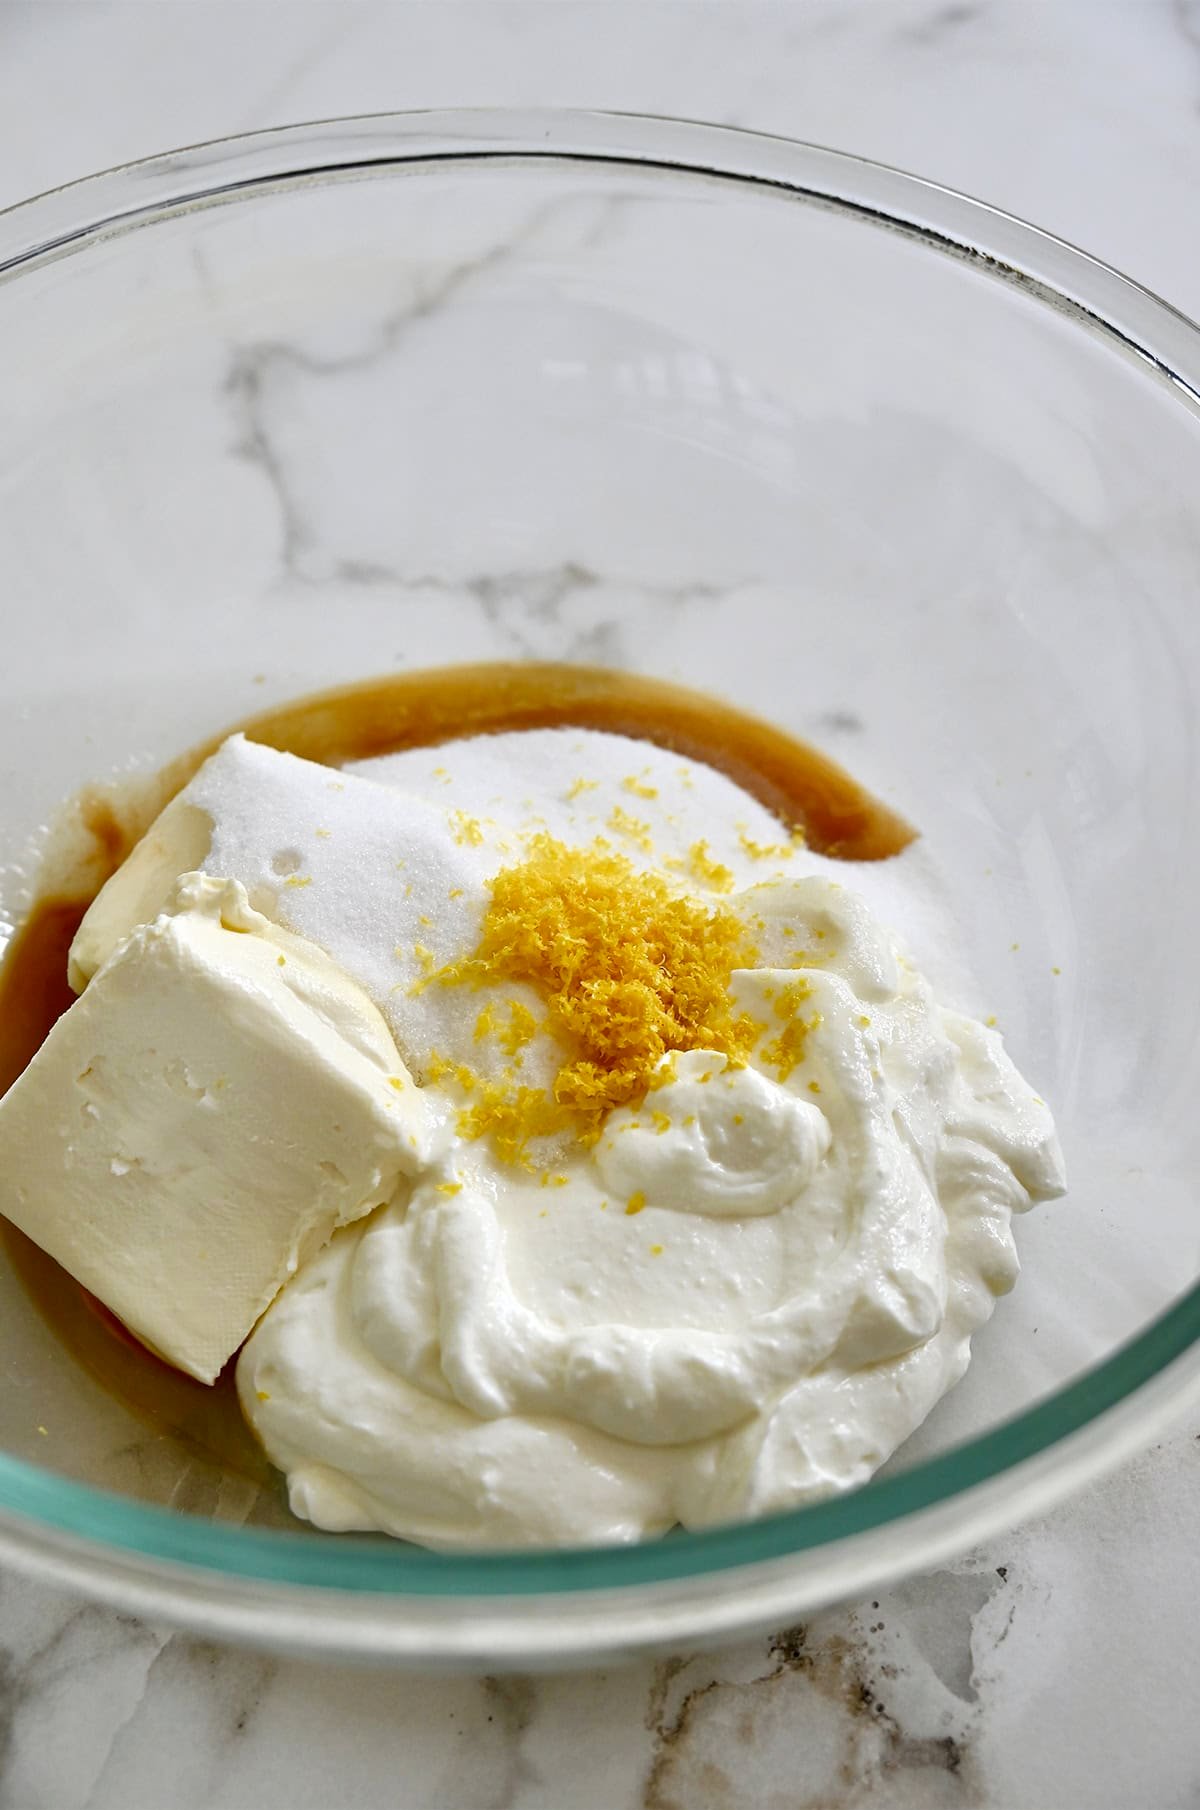
- Add the blended cottage cheese along with the other filling ingredients to a bowl.
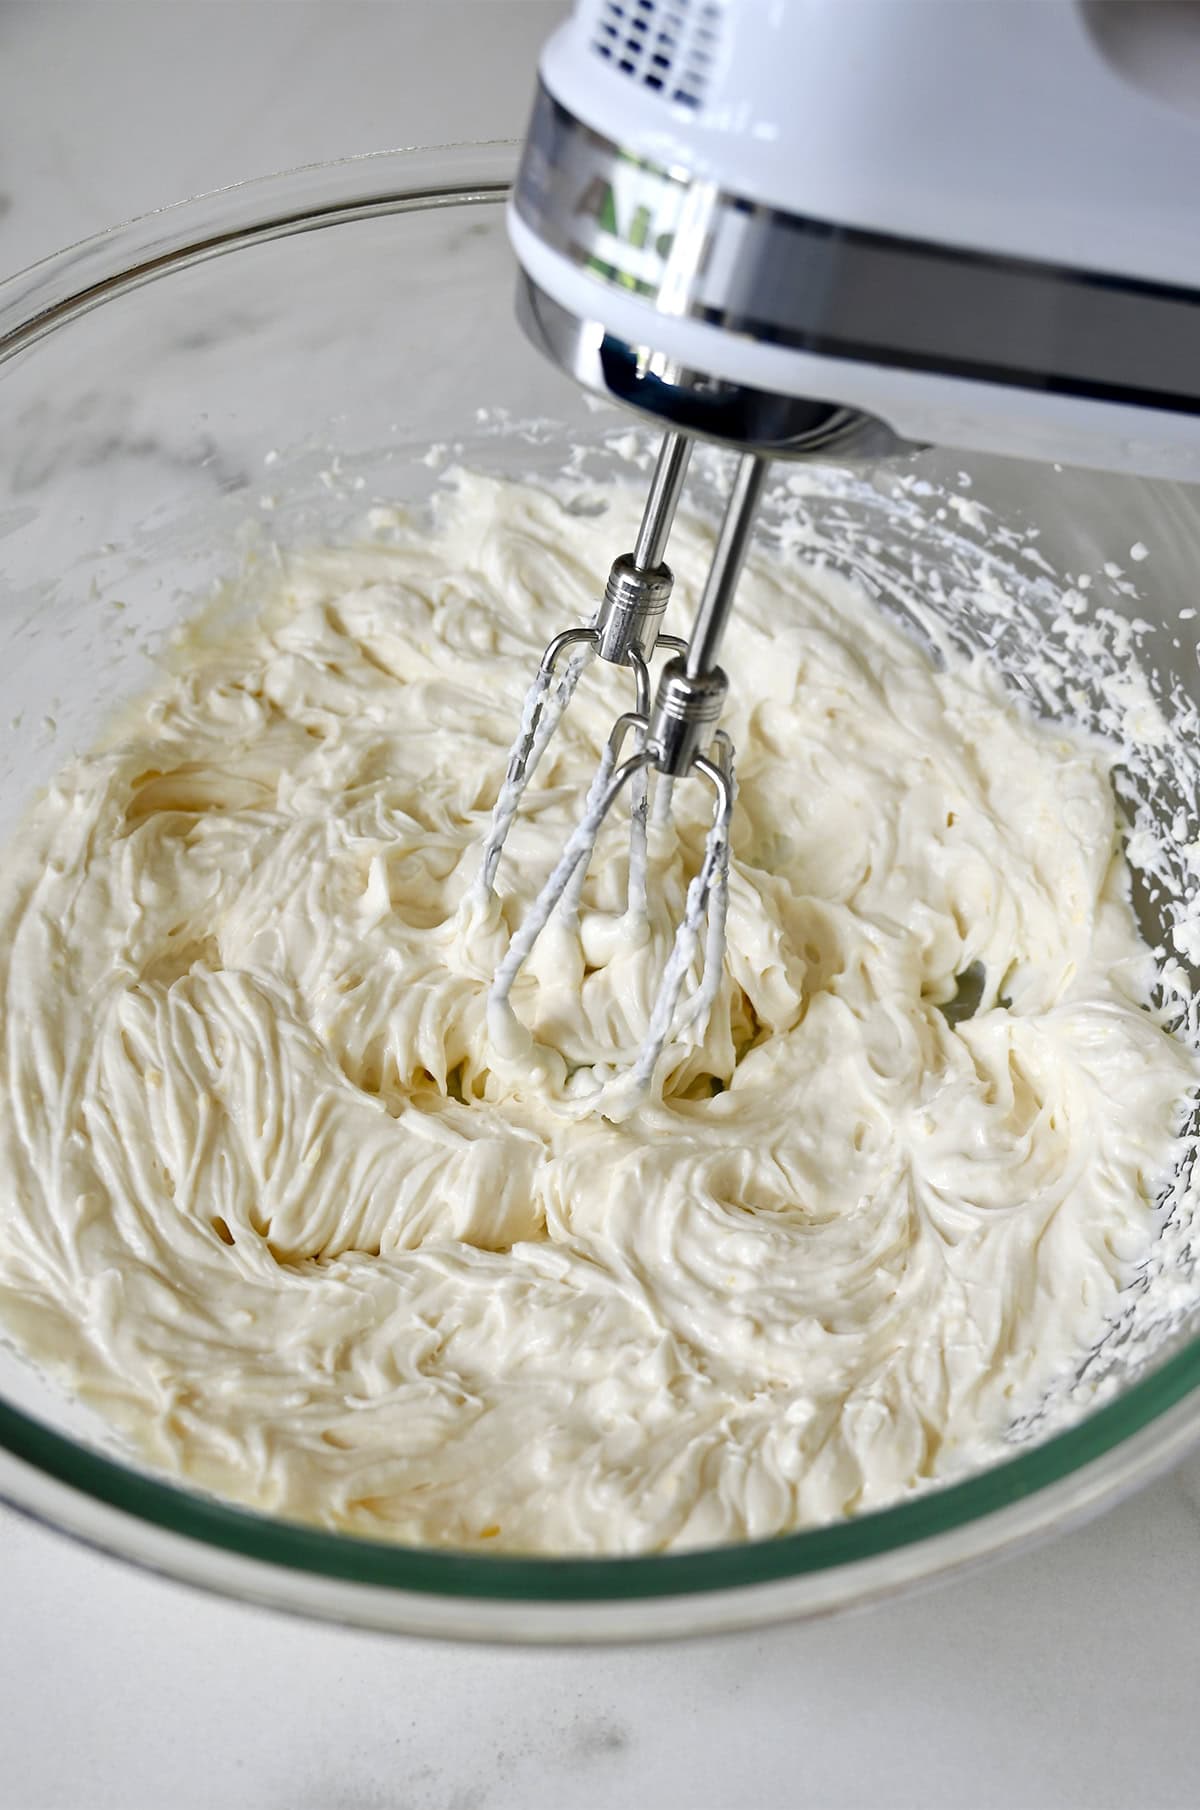
- Beat until smooth, then add the eggs one at a time.
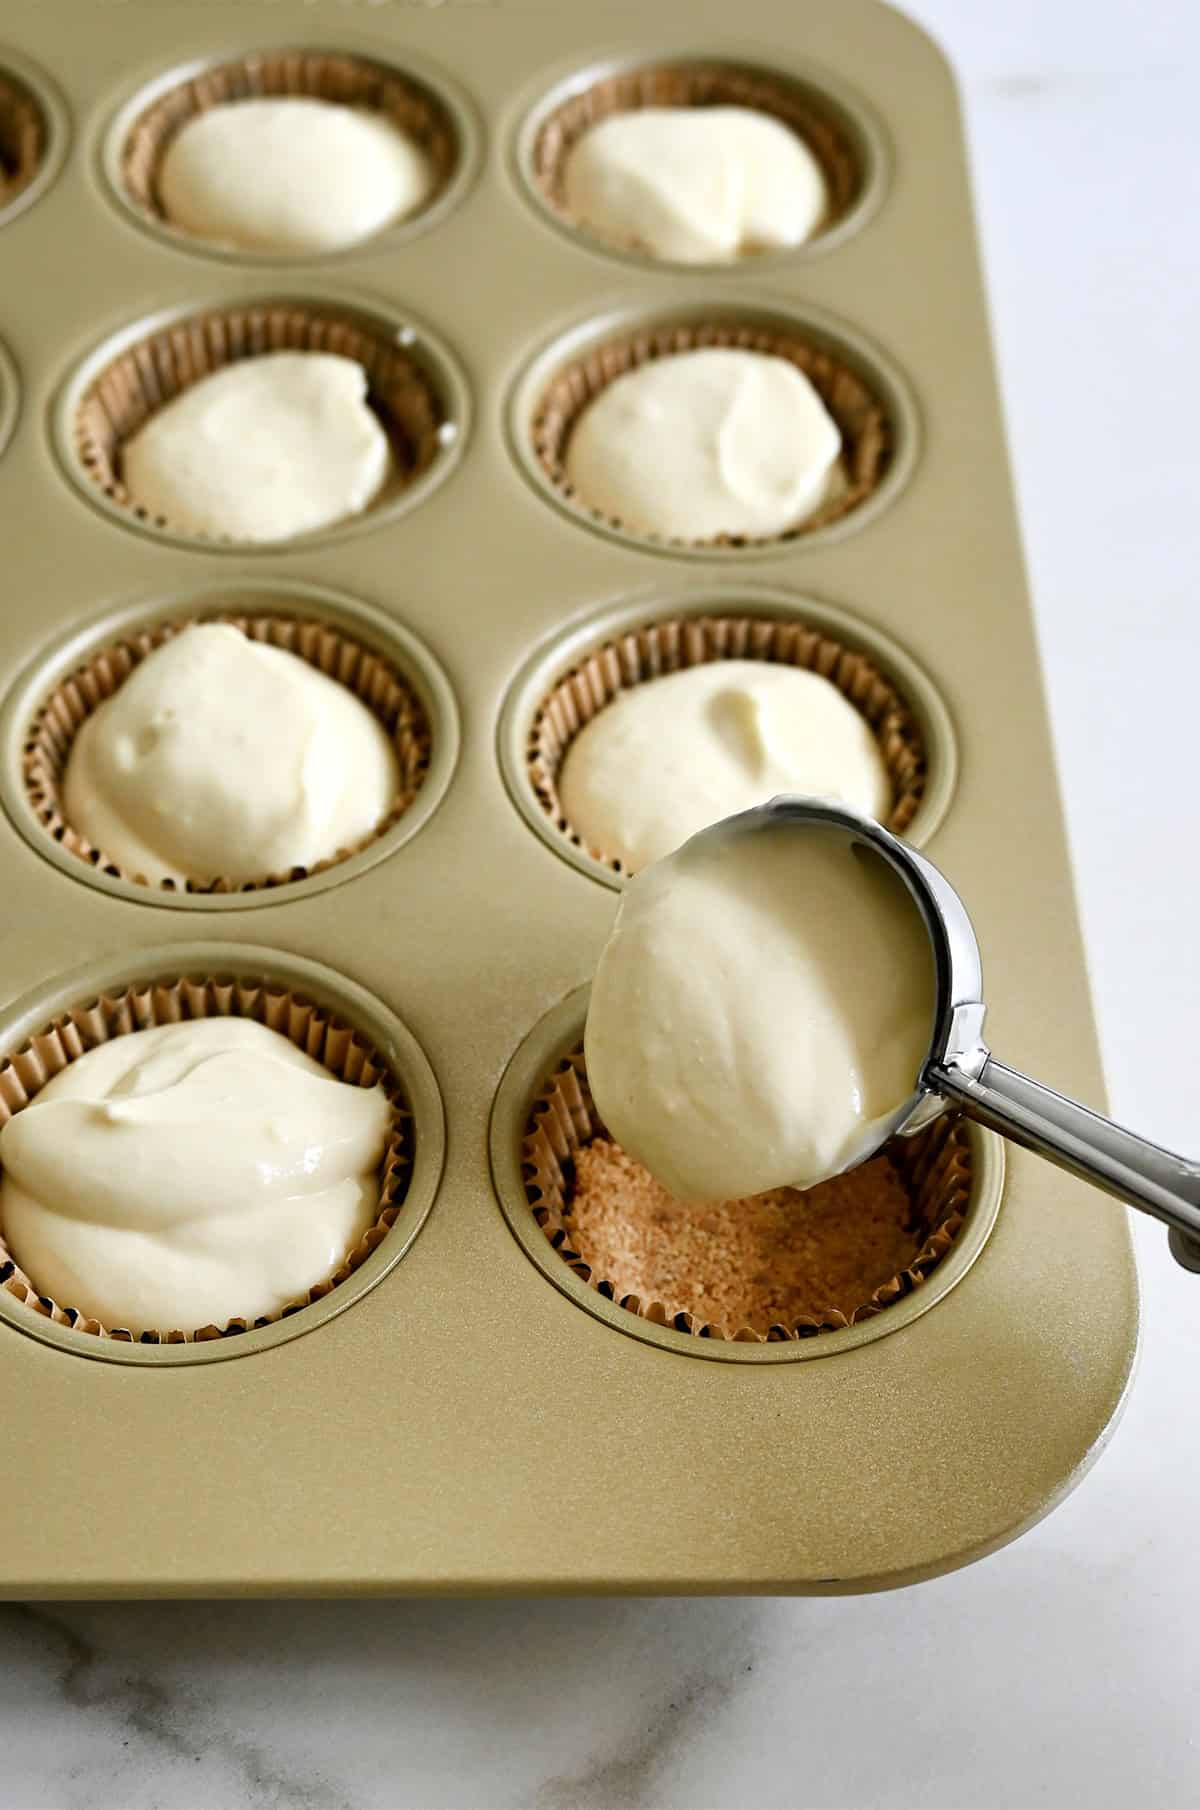
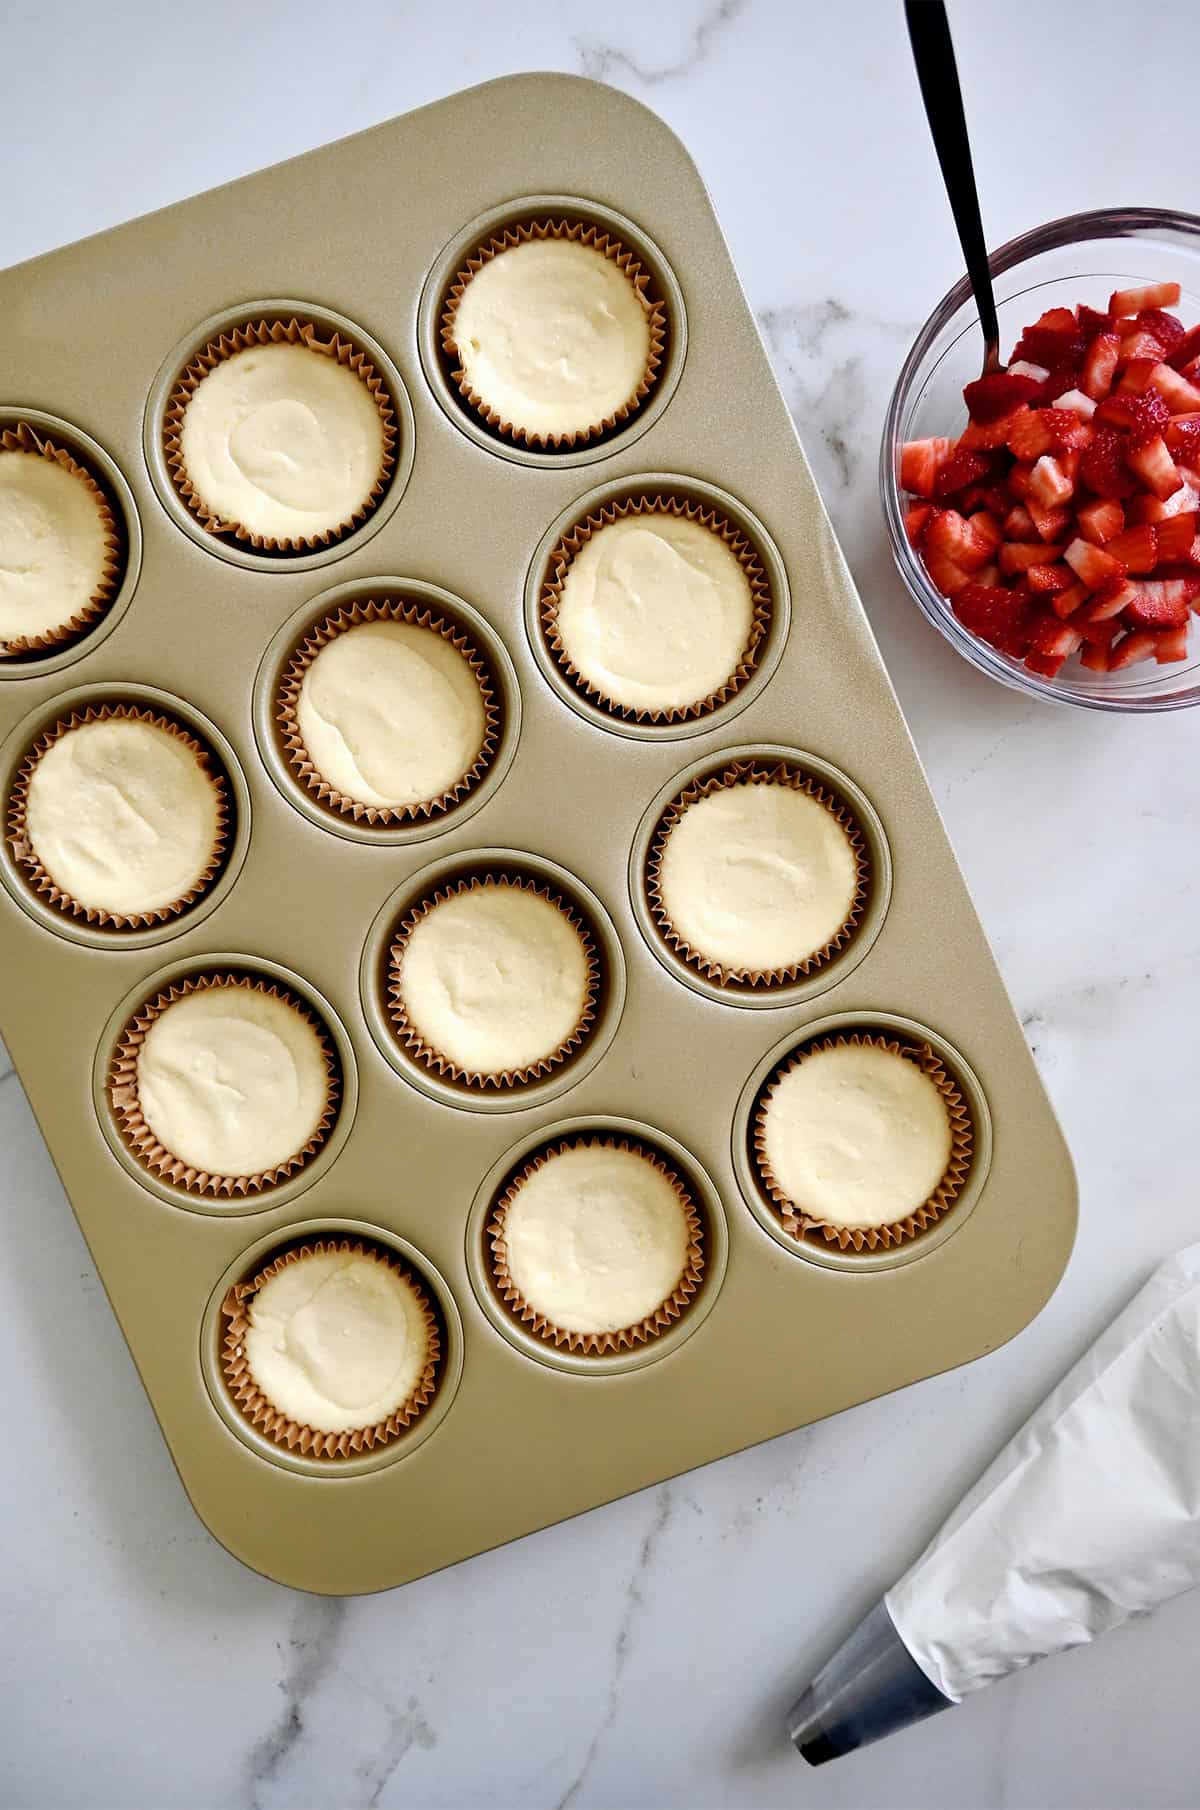
- Fill and bake. Spoon the cheesecake mixture evenly over the cooled crusts (fill to the top!). Bake for 20–23 minutes, or until just set in the centers.
- Cool and chill. Let the mini cheesecakes cool completely in the pan. Transfer to the fridge and chill for at least 3 hours (or overnight!) before serving.
Baker’s Tip: You’ll know the cheesecake cups are done baking when the edges look set and slightly puffed, but the centers still have a gentle jiggle—like Jell-O, not soup. That little wobble means they’re perfectly baked! They’ll continue to set as they cool, so resist the urge to bake until they look firm or dry. Cracks = overdone.
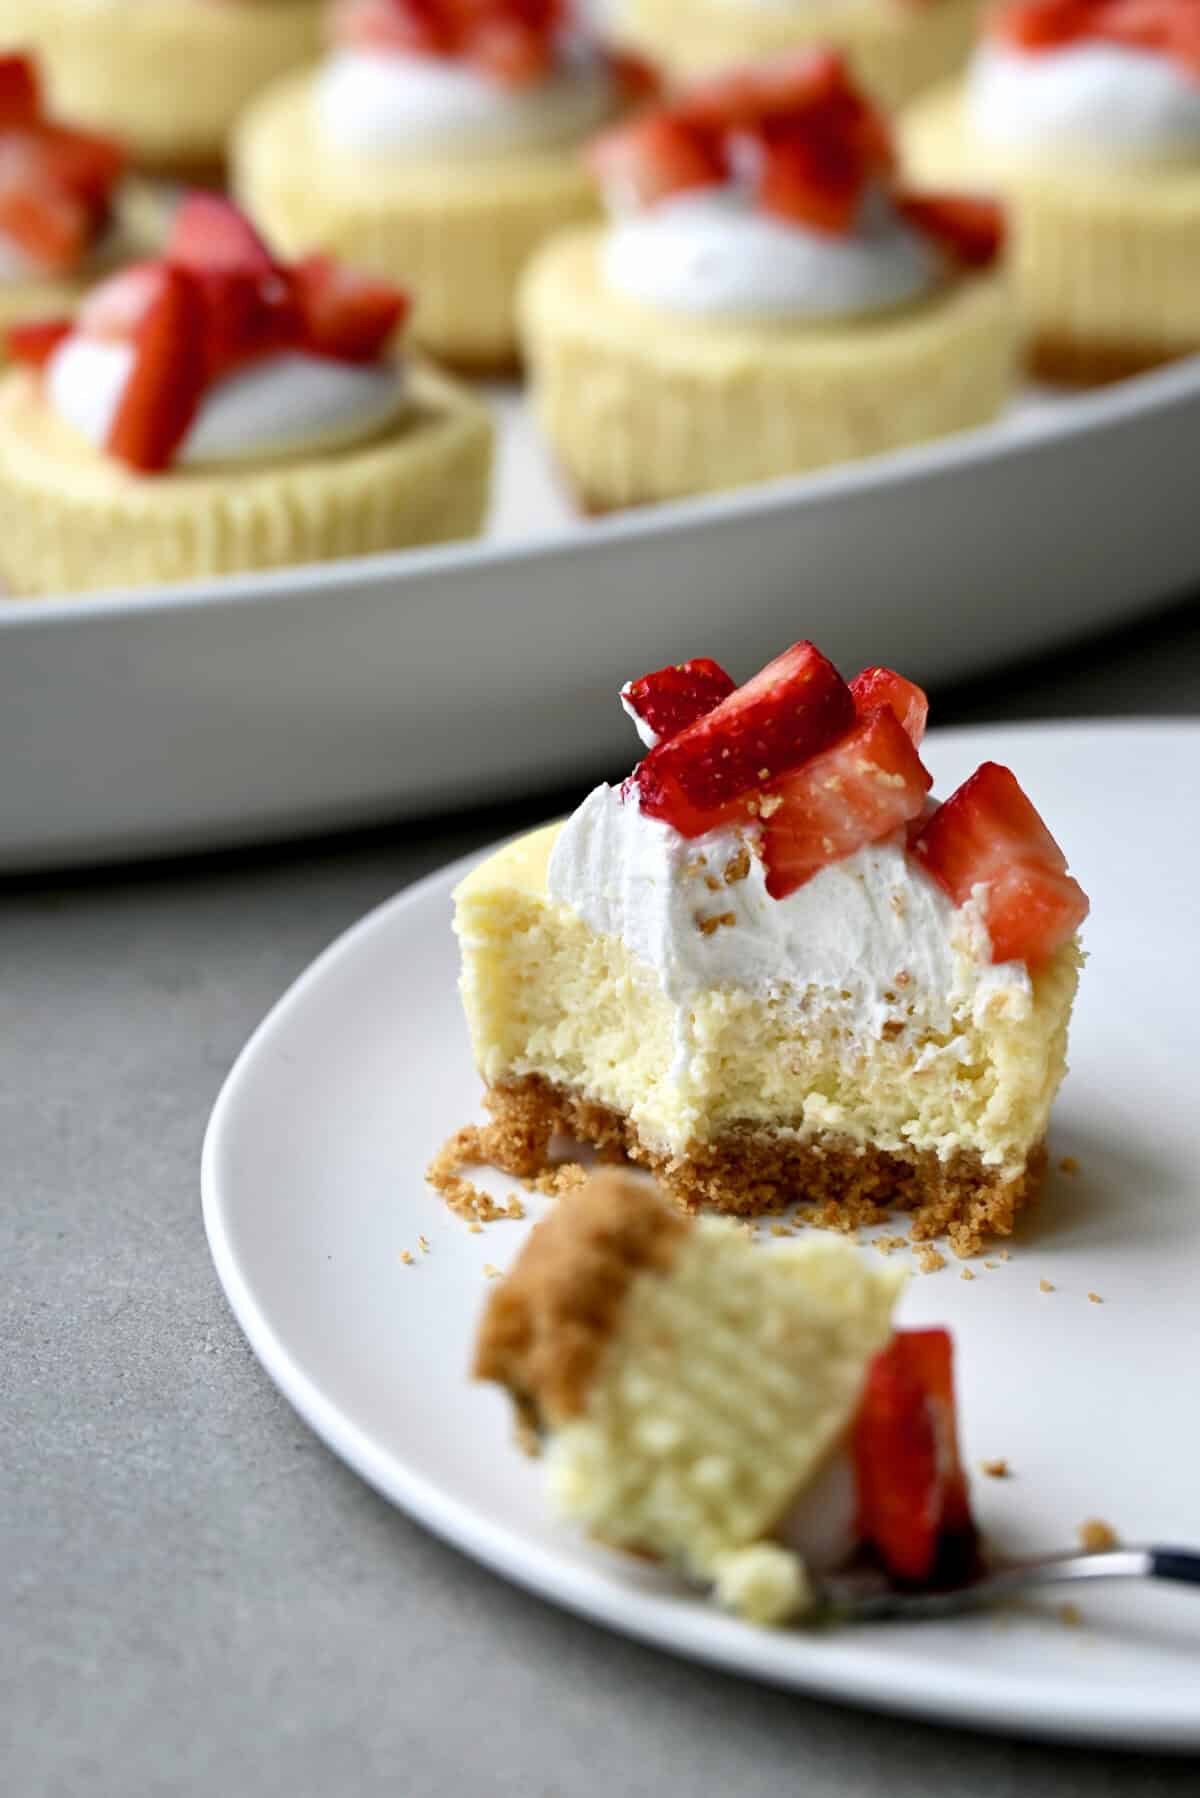
These mini high-protein desserts are a blank canvas for all your favorite cheesecake toppings. I kept mine simple with a dollop of homemade whipped cream and juicy diced strawberries, but the options are endless. Blueberry sauce, a drizzle of chocolate, crushed graham crackers, butterscotch sauce, lemon curd or even a spoonful of jam would all be delicious. Dress them up for a party or keep them plain, either way, they’re a win.
Storage Instructions
Once your mini cheesecakes are fully cooled and chilled, store them in an airtight container in the fridge. They’ll stay fresh and creamy for up to 5 days.
Want to stash some for later? These freeze beautifully! Just leave off any toppings, wrap each cheesecake cup tightly in plastic wrap, and pop them into a freezer-safe bag or container. They’ll keep for up to 1 month. Thaw them overnight in the fridge before adding your favorite topping and serving.
Frequently Asked Questions
Yes! Just swap in gluten-free graham crackers for the crust. Everything else is naturally gluten-free.
I highly recommend using cupcake liners for easy removal and cleanup. If you skip them, grease the muffin pan well and consider using parchment circles in the bottom of each cup.
You can, but full-fat gives the best creamy texture and flavor. Low-fat versions might be more watery and less rich.
A high-speed blender will work too! The key is whipping the cottage cheese until it’s completely smooth—no lumps allowed.
Still Have Cottage Cheese in the Fridge? Make These Next!
Ingredients
- 1 cup finely crushed graham crackers
- 2 Tablespoons unsalted butter, melted
- 1 cup 4% cottage cheese
- 1 (8-oz.) package cream cheese, at room temp
- 1/2 cup sugar
- 1 teaspoon lemon zest
- 1 Tablespoon lemon juice
- 1 1/2 teaspoons vanilla extract
- 2 large eggs
Instructions
- Preheat the oven to 325°F. Line a 12-cup muffin pan with cupcake liners.
- In a medium bowl, stir together the graham crackers and melted butter until well-combined.
- Evenly divide the graham cracker mixture among the muffin cups, pressing it firmly into the bottoms of the cups. (A small dry measuring cup or the bottom of a shot glass work best for this.)
- Bake the cups for 5 minutes then remove them from the oven and let them cool while you prepare the filling.
- Add the cottage cheese to the bowl of a food processor and process until it is smooth and creamy. Transfer the cottage cheese to a medium bowl then add the cream cheese, sugar, lemon zest, lemon juice and vanilla extract. Using a handheld mixer, beat the ingredients until combined then add the eggs one at a time, between each addition. (Alternately, combine the ingredients in a stand mixer fitted with the paddle attachment.)
- Divide the cheesecake mixture evenly among the muffin cups. (It should be to the top of each wrapper.)
- Bake the mini cheesecakes until they are just set in the centers, 20 to 23 minutes.
- Remove the mini cheesecakes from the oven and let them cool completely in the pan. Transfer the mini cheesecakes to a baking sheet and refrigerate them for a minimum of 3 hours and up to overnight before serving.
Kelly’s Notes
- You’ll know the cheesecake cups are done baking when the edges look set and slightly puffed, but the centers still have a gentle jiggle. They’ll continue to set as they cool, so resist the urge to bake until they look firm or dry.
- To store: Keep cheesecake cups in an airtight container in the fridge for up to 5 days.
- To freeze: Freeze (without toppings) for up to 1 month. Wrap each cooled cheesecake in plastic wrap, then place in a freezer-safe bag or airtight container. Thaw overnight in the fridge before serving.
- ★ Did you make this recipe? Don’t forget to give it a star rating below!
Nutrition
Did you try this recipe?
Leave a comment below with your star rating!
This post may contain affiliate links.


These were excellent! Love the addition of the cottage cheese. Sooooo smooth. And easy to take to a friends potluck!
So glad you enjoyed the recipe, Amanda!