All you need is 4 simple ingredients for homemade cheese crackers that are crispy, salty and packed with real cheddar flavor. Ditch the Cheez-Its in favor of this easy, from-scratch snack that’s perfect for lunchboxes, snack boards and beyond.
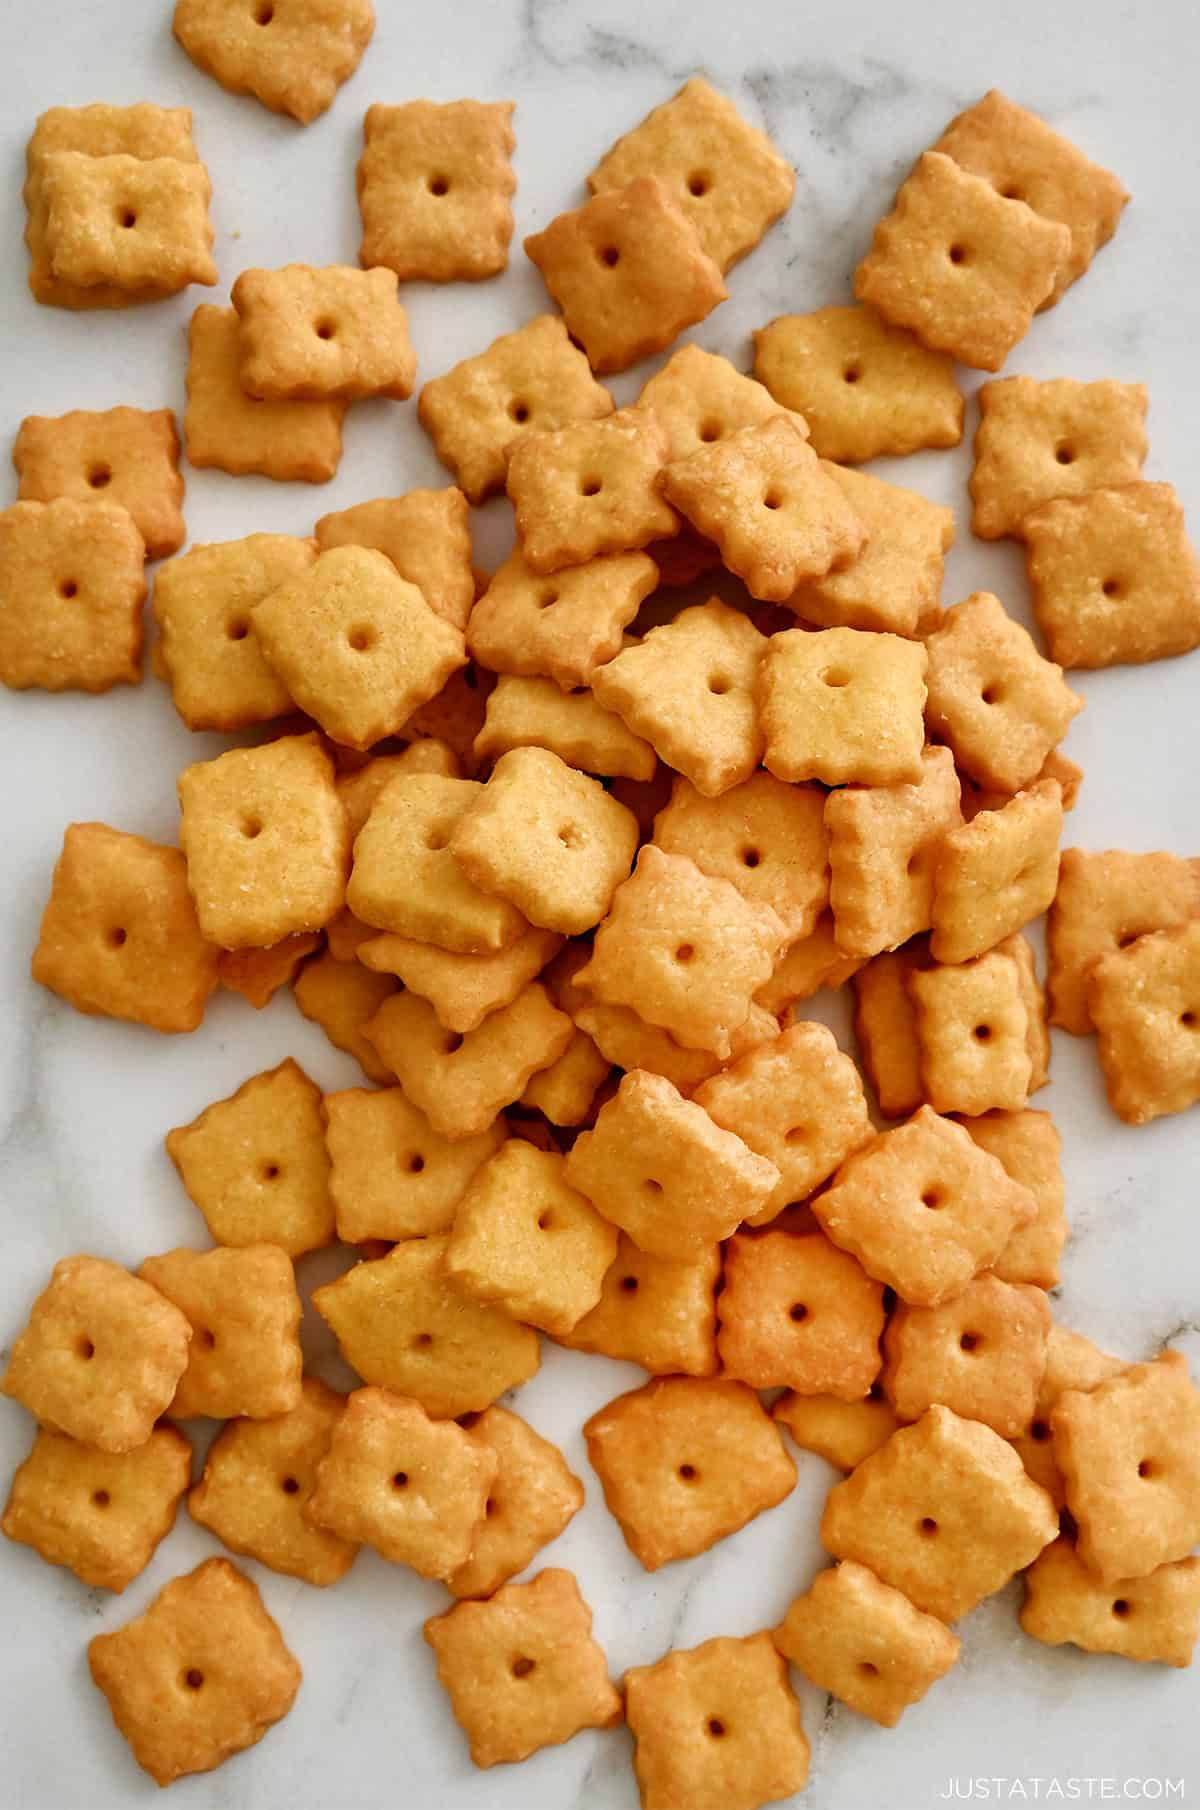
Table of Contents

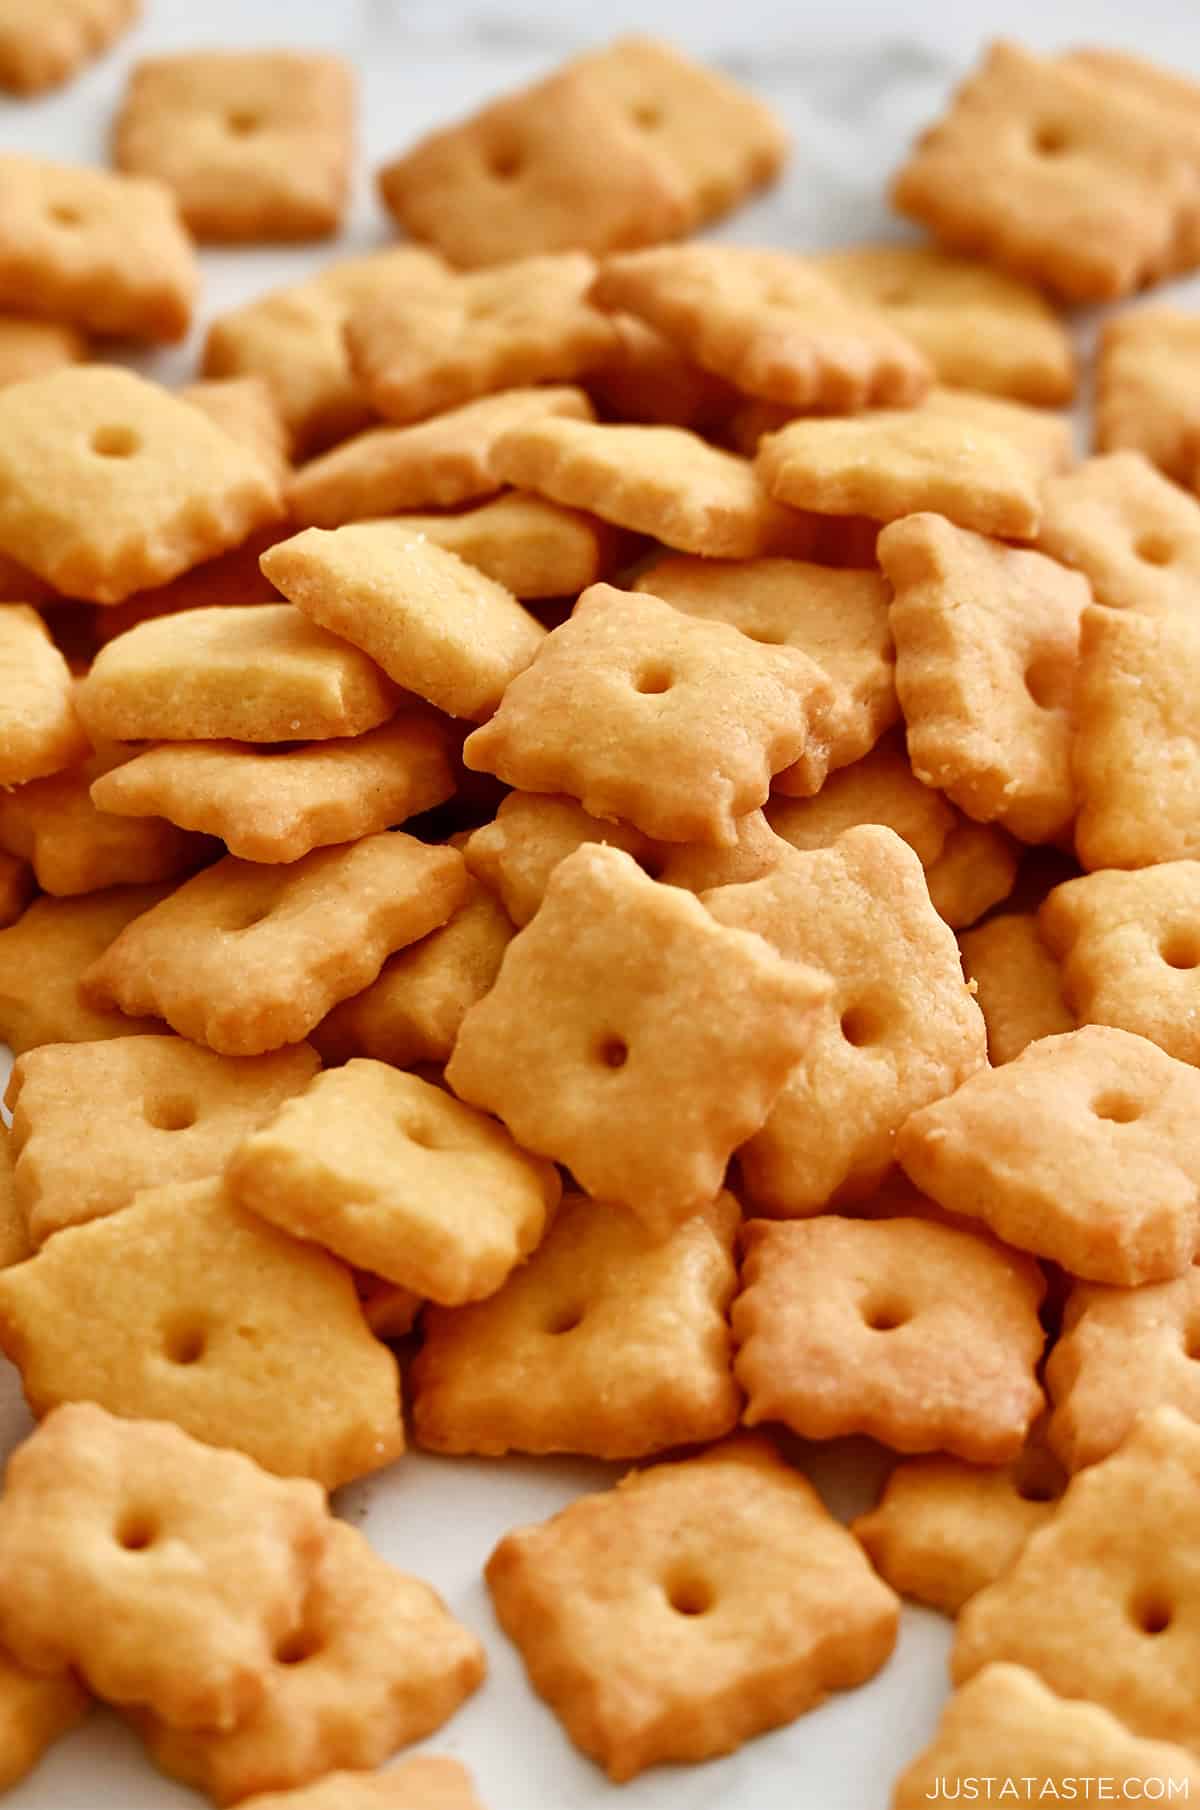
Three words: homemade cheese crackers.
If Cheez-Its were your go-to after-school snack growing up (same), this recipe is about to feel like a full-blown glow-up. We’re ditching the box in favor of buttery, sharp cheddar crackers made with simple, clean ingredients—and somehow, they taste even better than the original.
I’m currently eating these warm, straight from the baking sheet, with a cold glass of Champagne and I can confidently say: these are INSANE. Salty, cheesy, crisp around the edges, and wildly snackable in a way that should probably come with a warning label.
They’re everything I loved about Cheez-Its as a kid, just… elevated. Less processed, more real cheese, and equally at home in a lunchbox or on a charcuterie board next to olives and bubbly. Once you make them, you’ll never look at the red box the same way again.
What’s to Love About These Homemade Cheese Crackers
- Made with real cheese
- Only 4 ingredients
- Crispy, cheesy and totally snackable
- A healthier, homemade alternative to store-bought crackers
- Unmistakable salty-cheddar flavor
- Perfect for kids and grown-ups
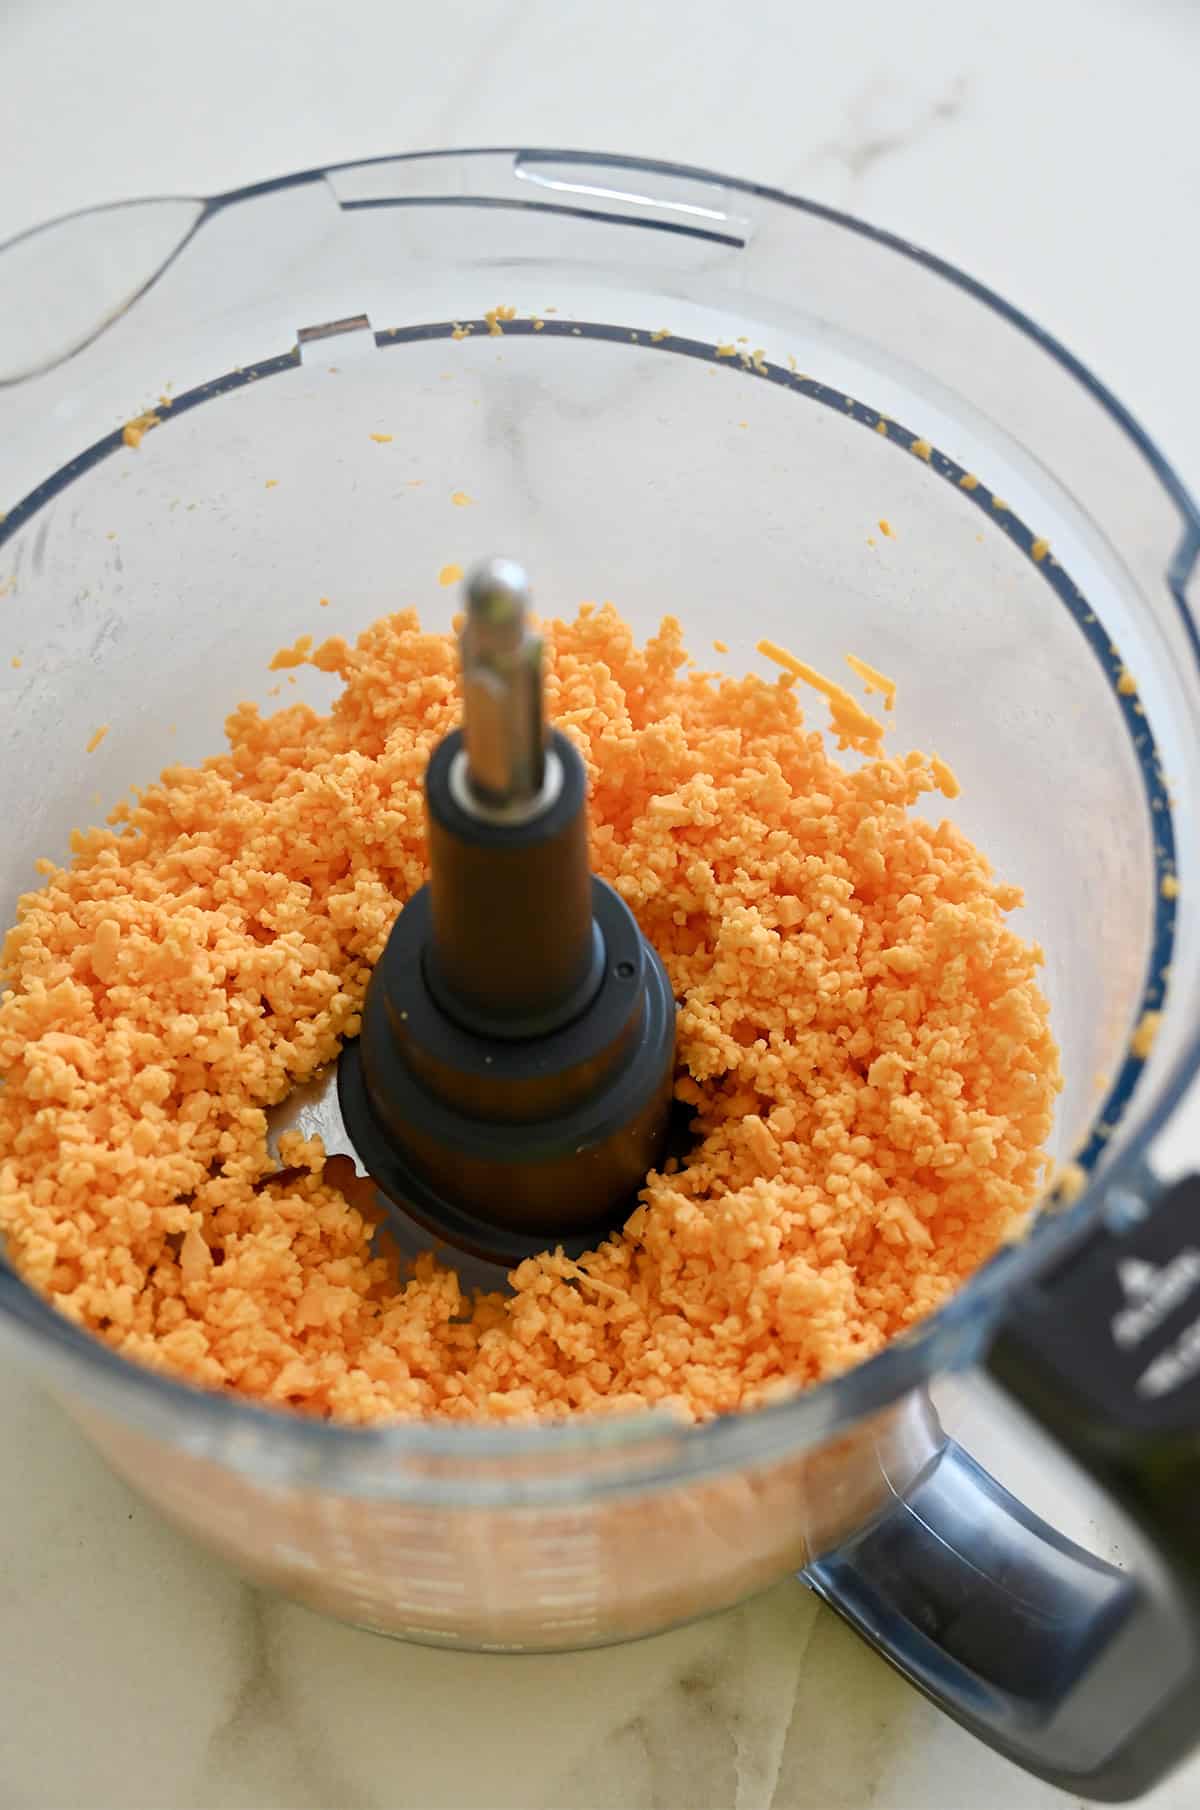
My #1 Tip for Success: Grate Your Own Cheese
Grating cheese fresh off the block is key to this recipe. I’ve tested this dough enough times to say it confidently—pre-shredded cheese just doesn’t work the same. It’s coated in anti-caking agents that prevent the dough from coming together properly. I recommend sharp cheddar for that unmistakable salty, savory bite, but you could also use mild or white cheddar.
To keep things easy (and dishes to a minimum), I use my food processor for this step. Just attach the shredding blade and grate the cheese directly in the bowl. If you don’t have a food processor, a box grater works perfectly fine, too.
Here’s what you’ll need to make these homemade cheese crackers:
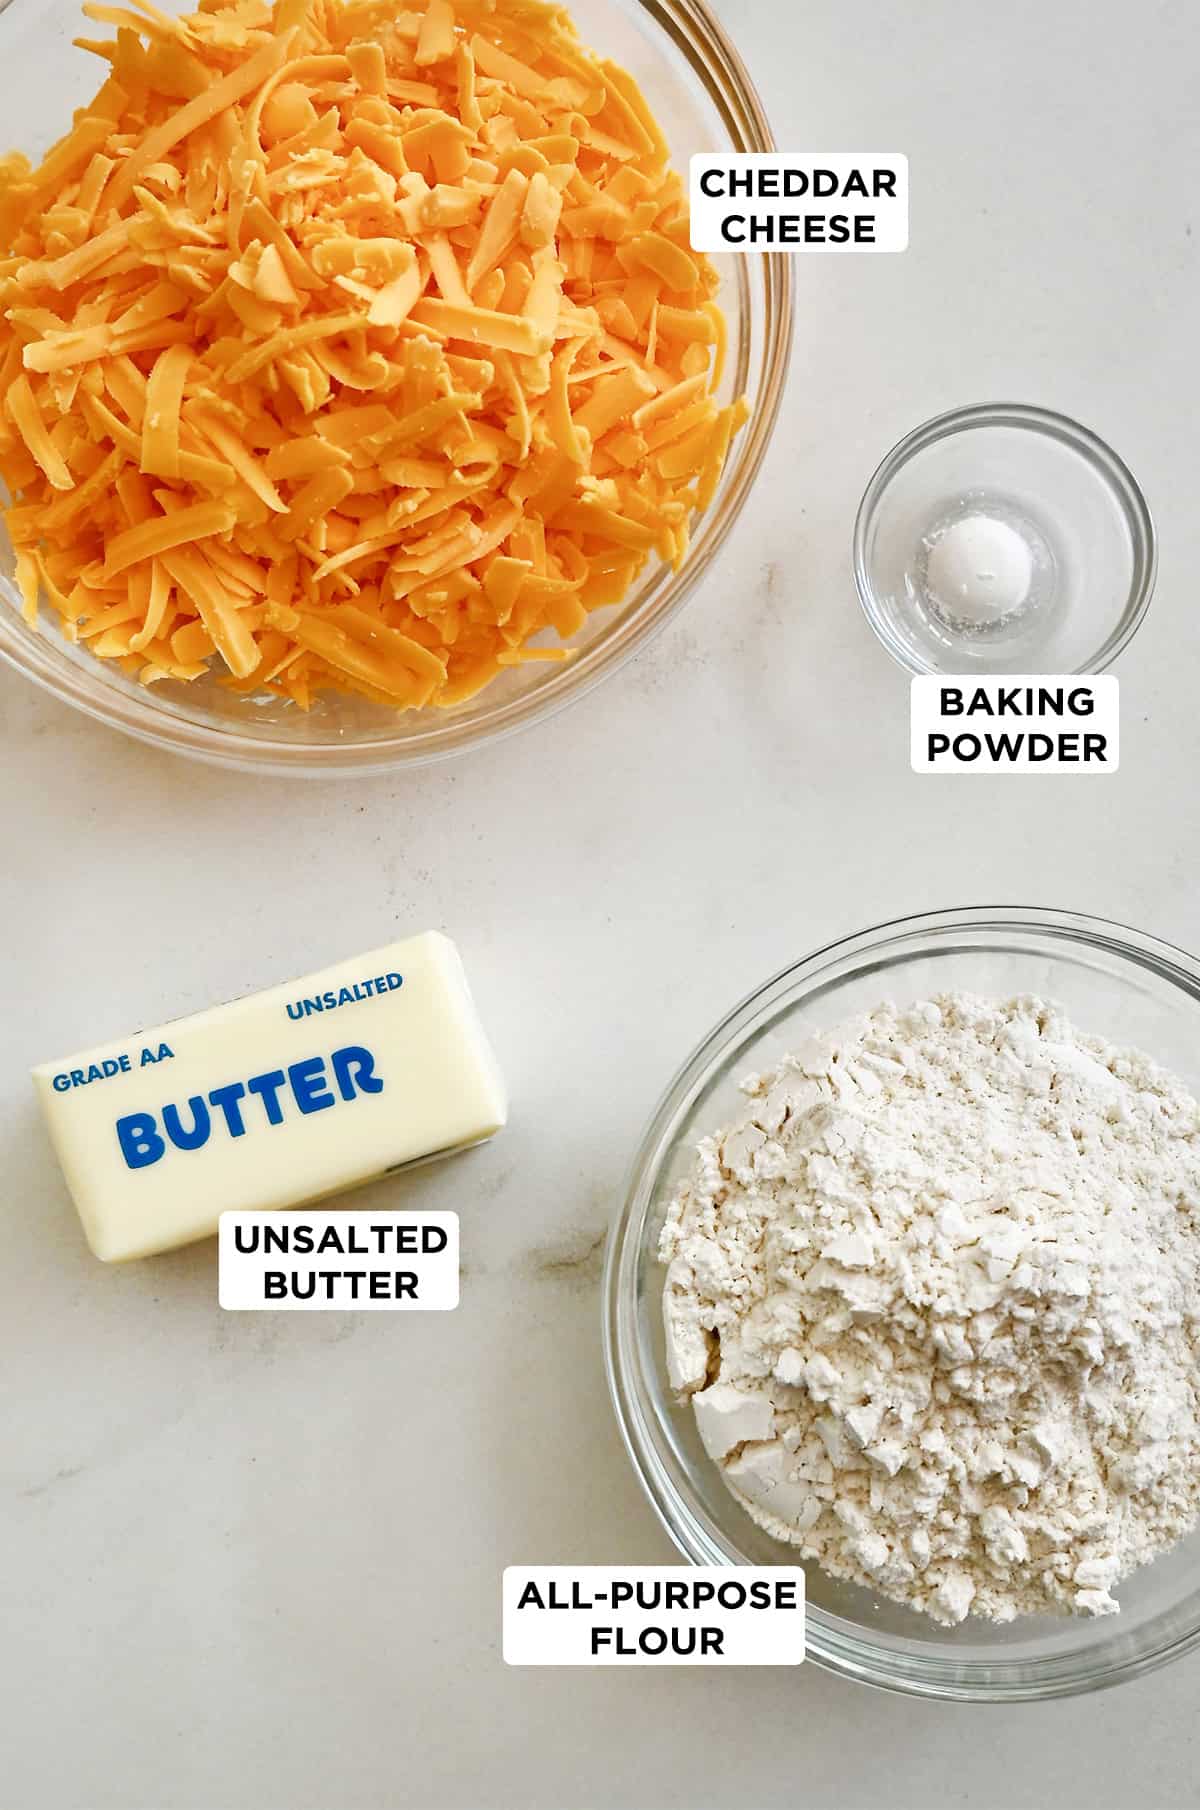
The rest of the ingredients are simple pantry staples—flour for structure, butter for richness, and a touch of baking powder to help the crackers bake up light and crisp.
I’ve tested this dough a few different ways, and using a food processor really is the most reliable method for this recipe. Once the cheese is shredded, swap in the standard blade, then add the dry ingredients and pulse until everything is evenly combined.
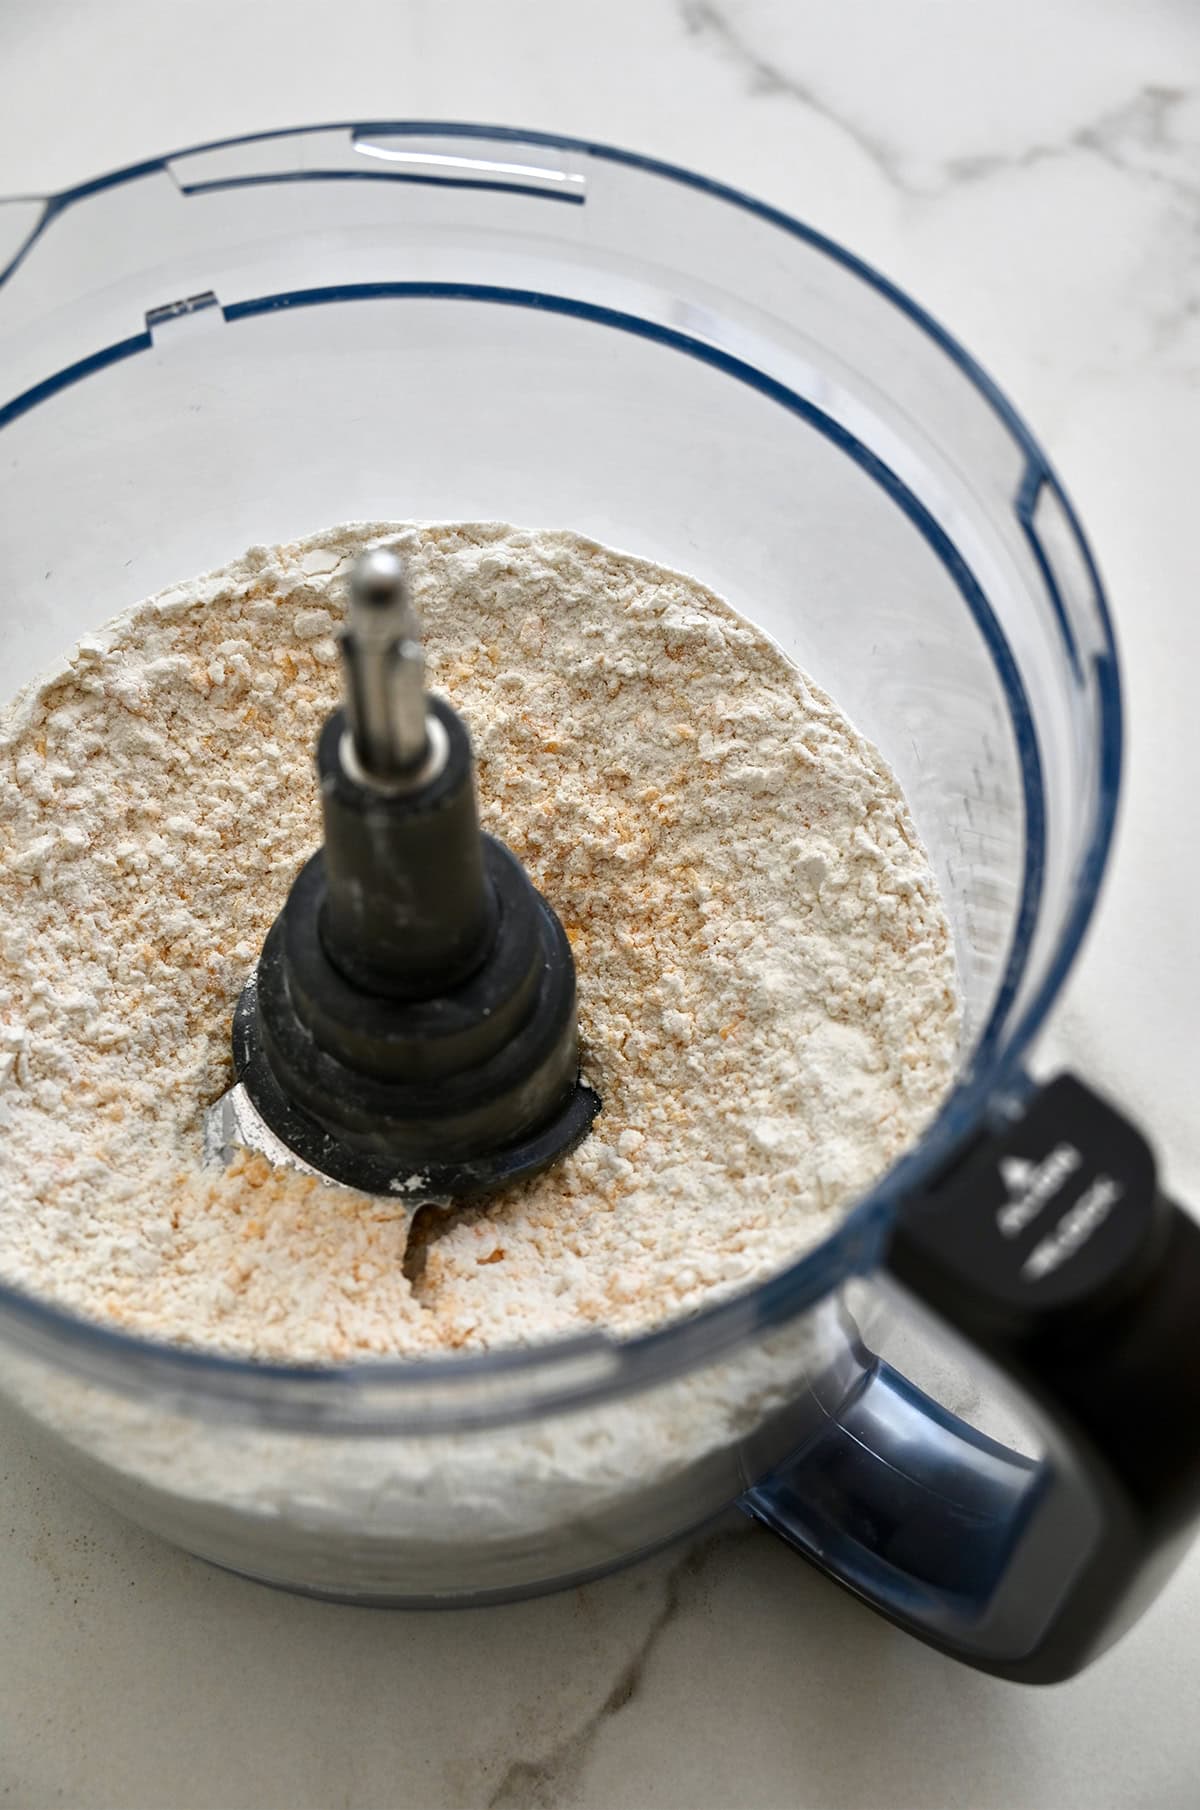
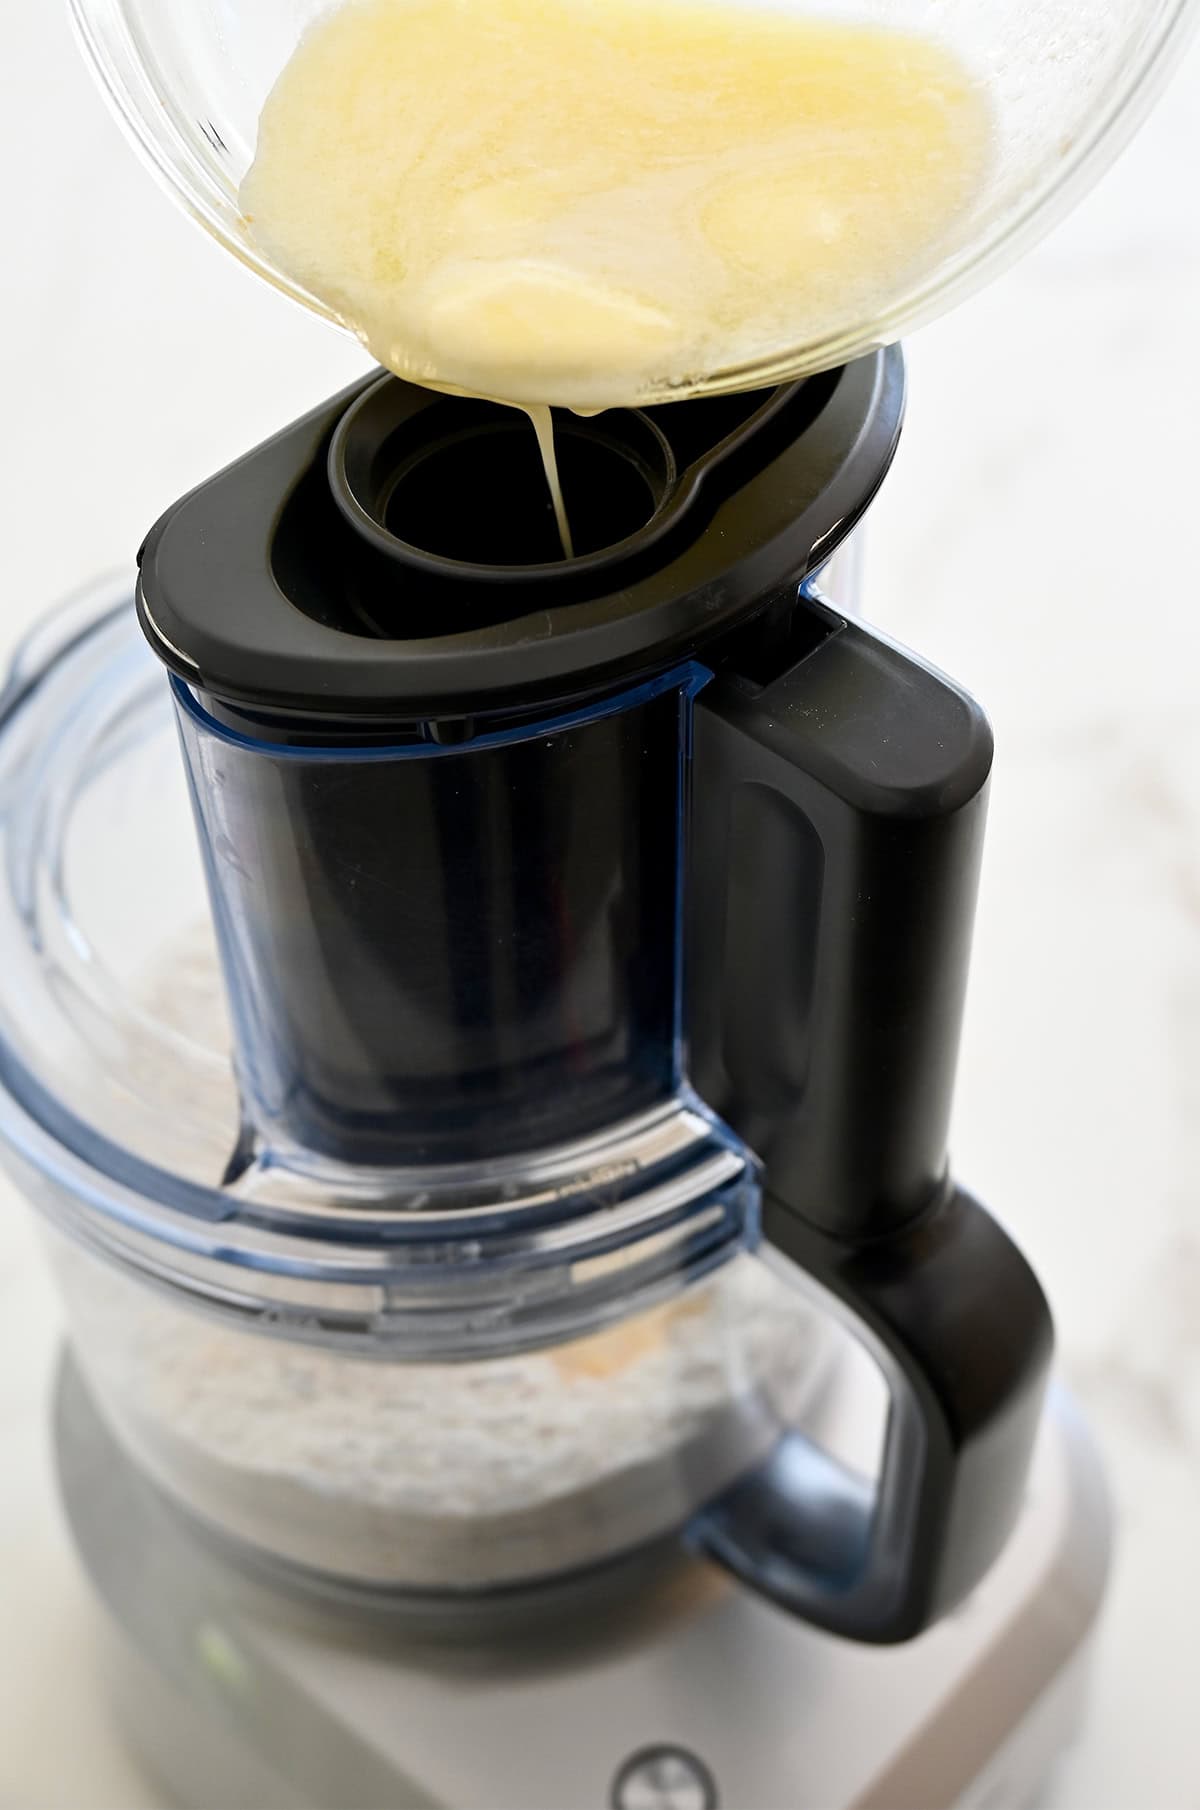
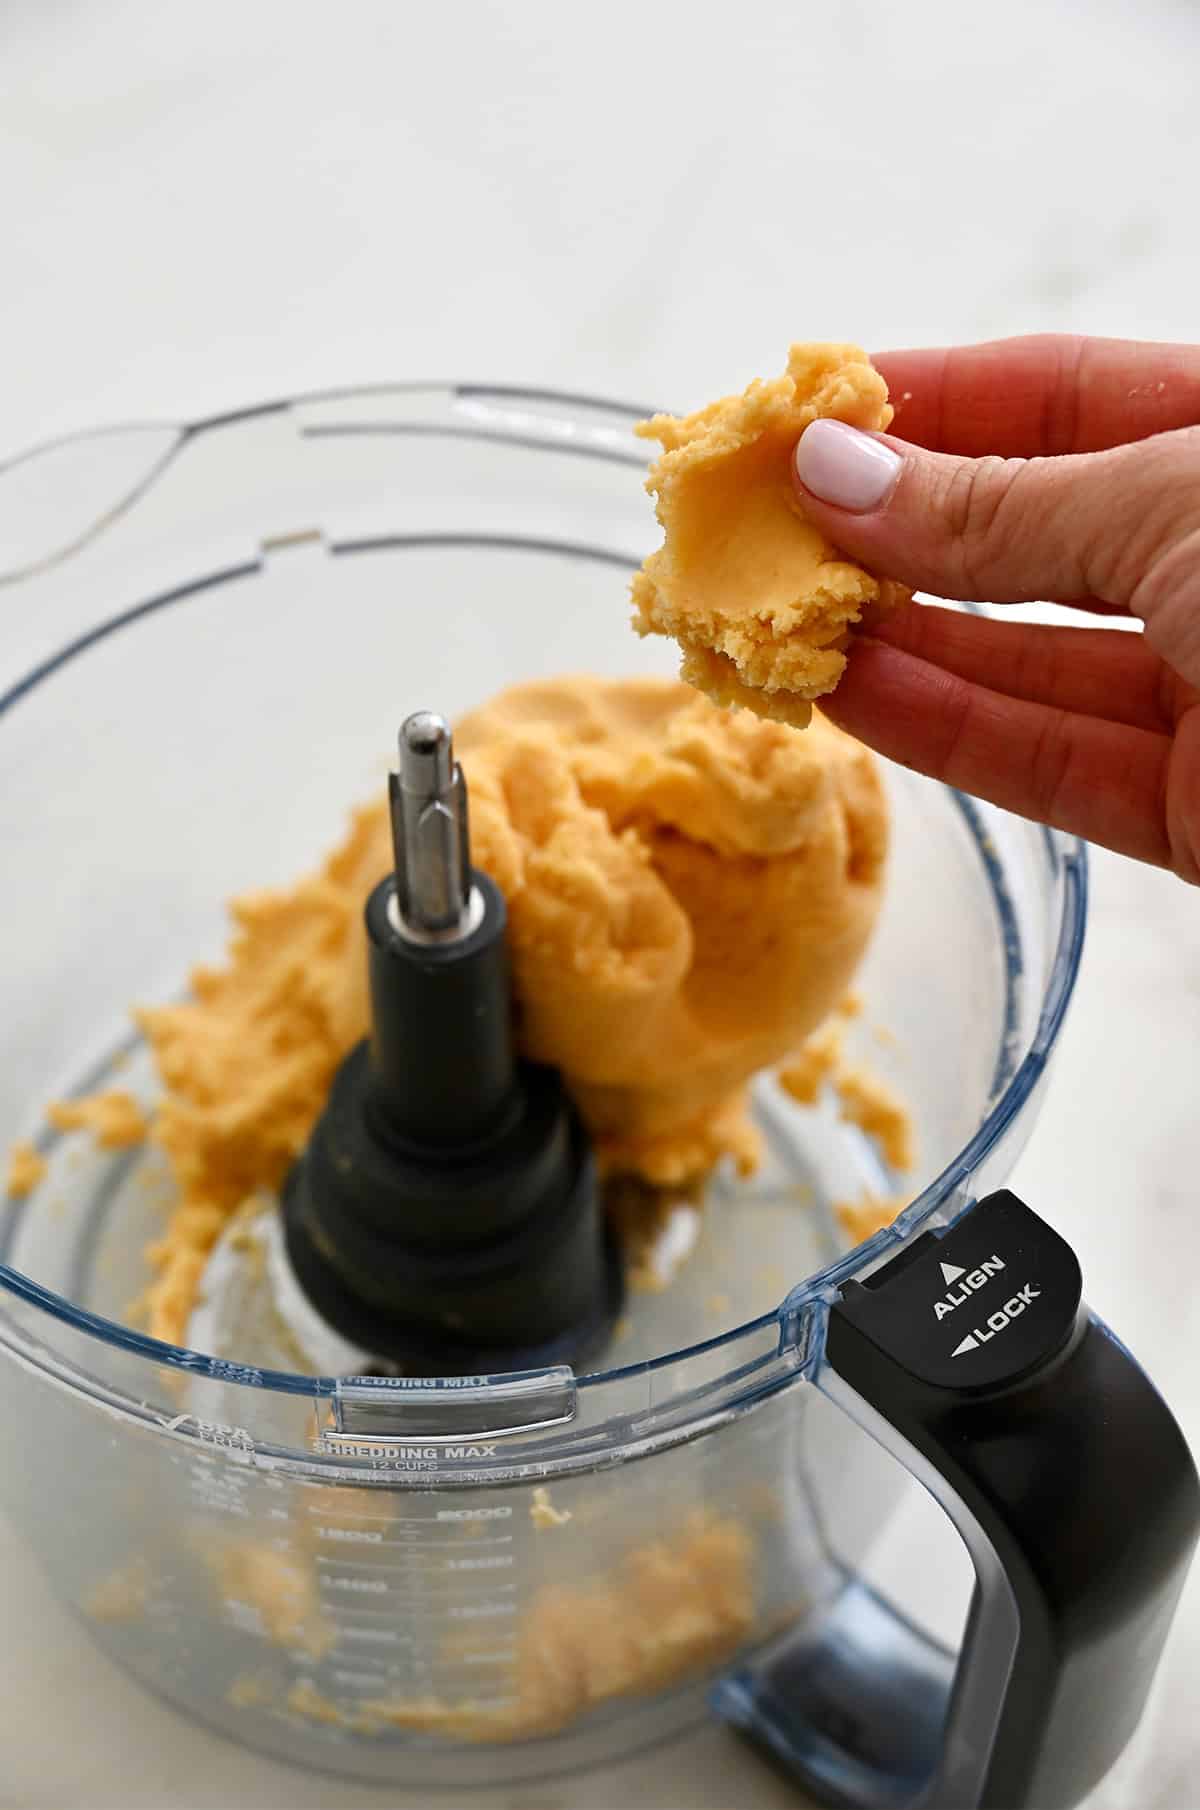
With the food processor running, slowly stream in the melted butter. In about 30 seconds, the mixture goes from crumbly to cohesive and forms a soft dough that pulls away from the sides of the bowl.
You’ll end up with a dough that looks like this:
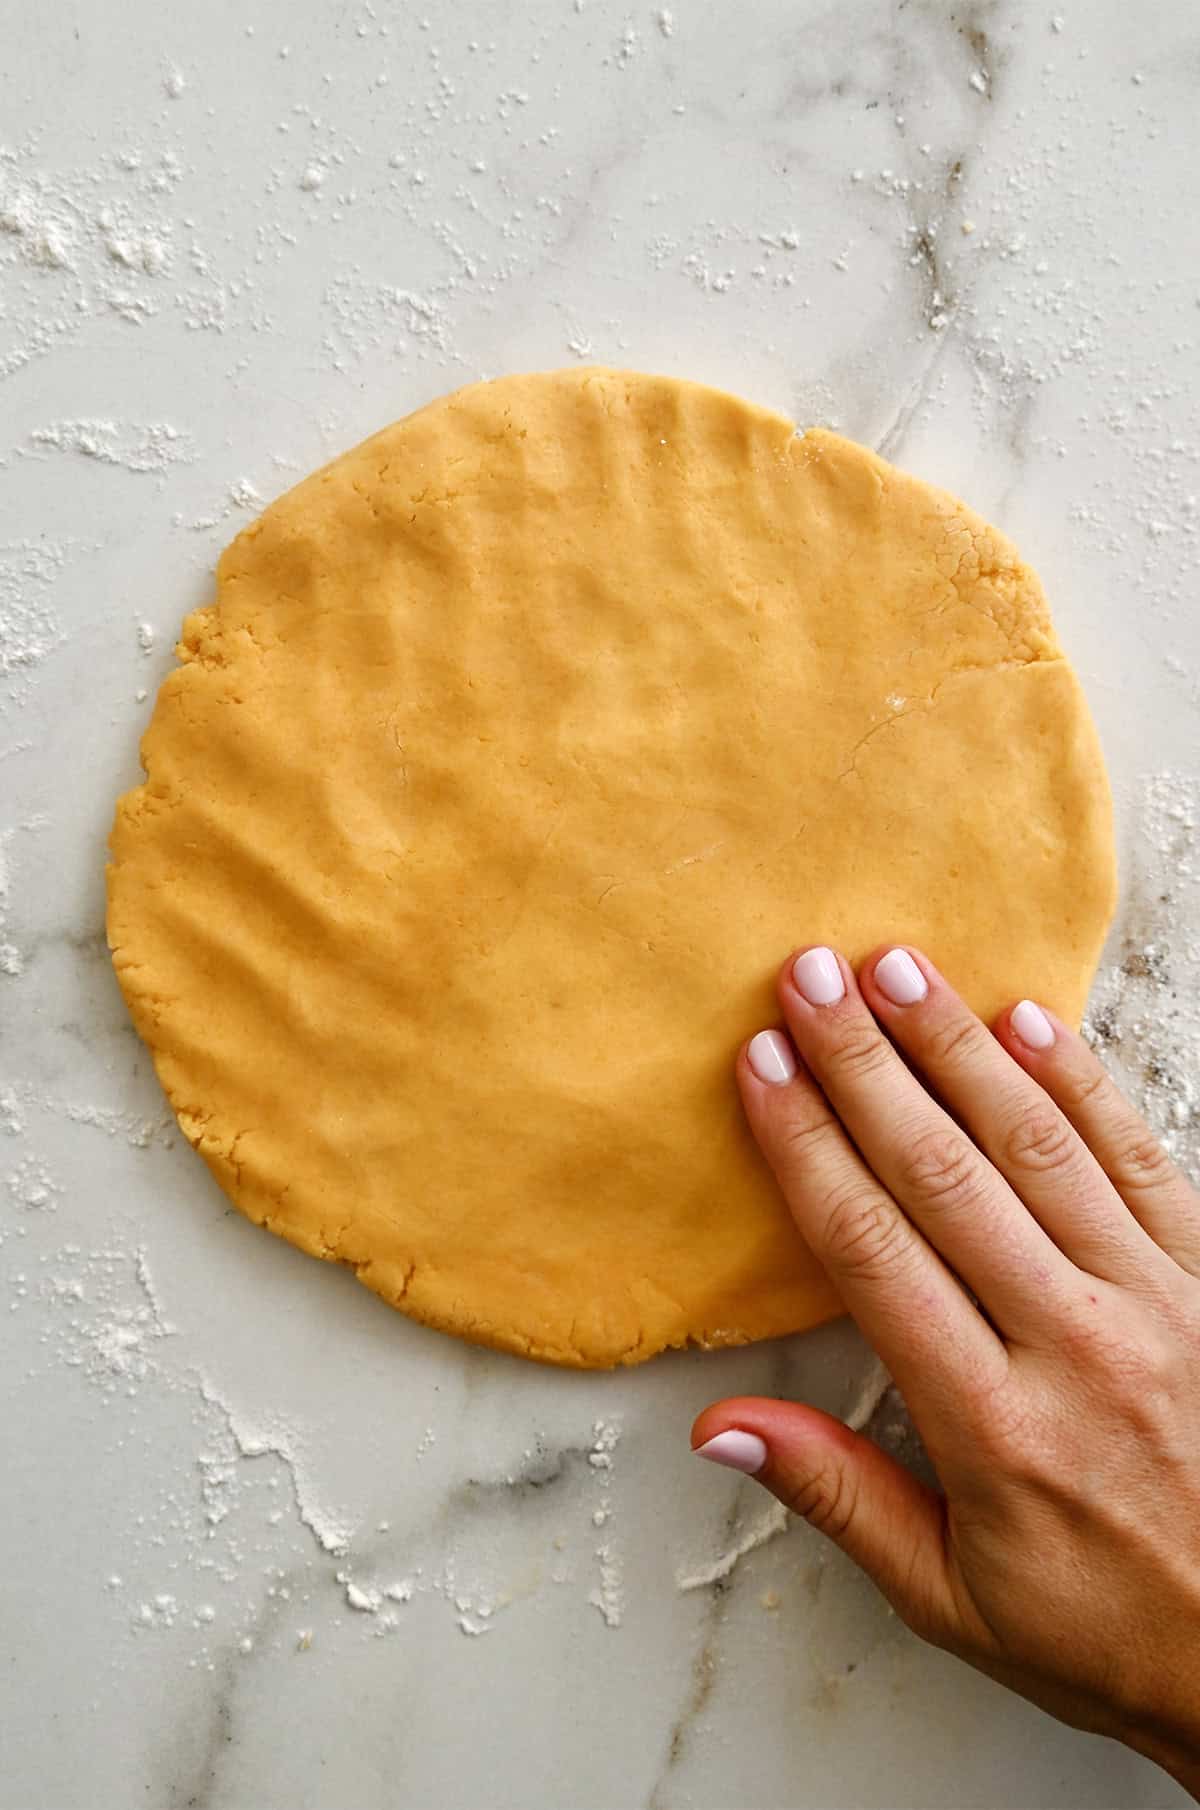
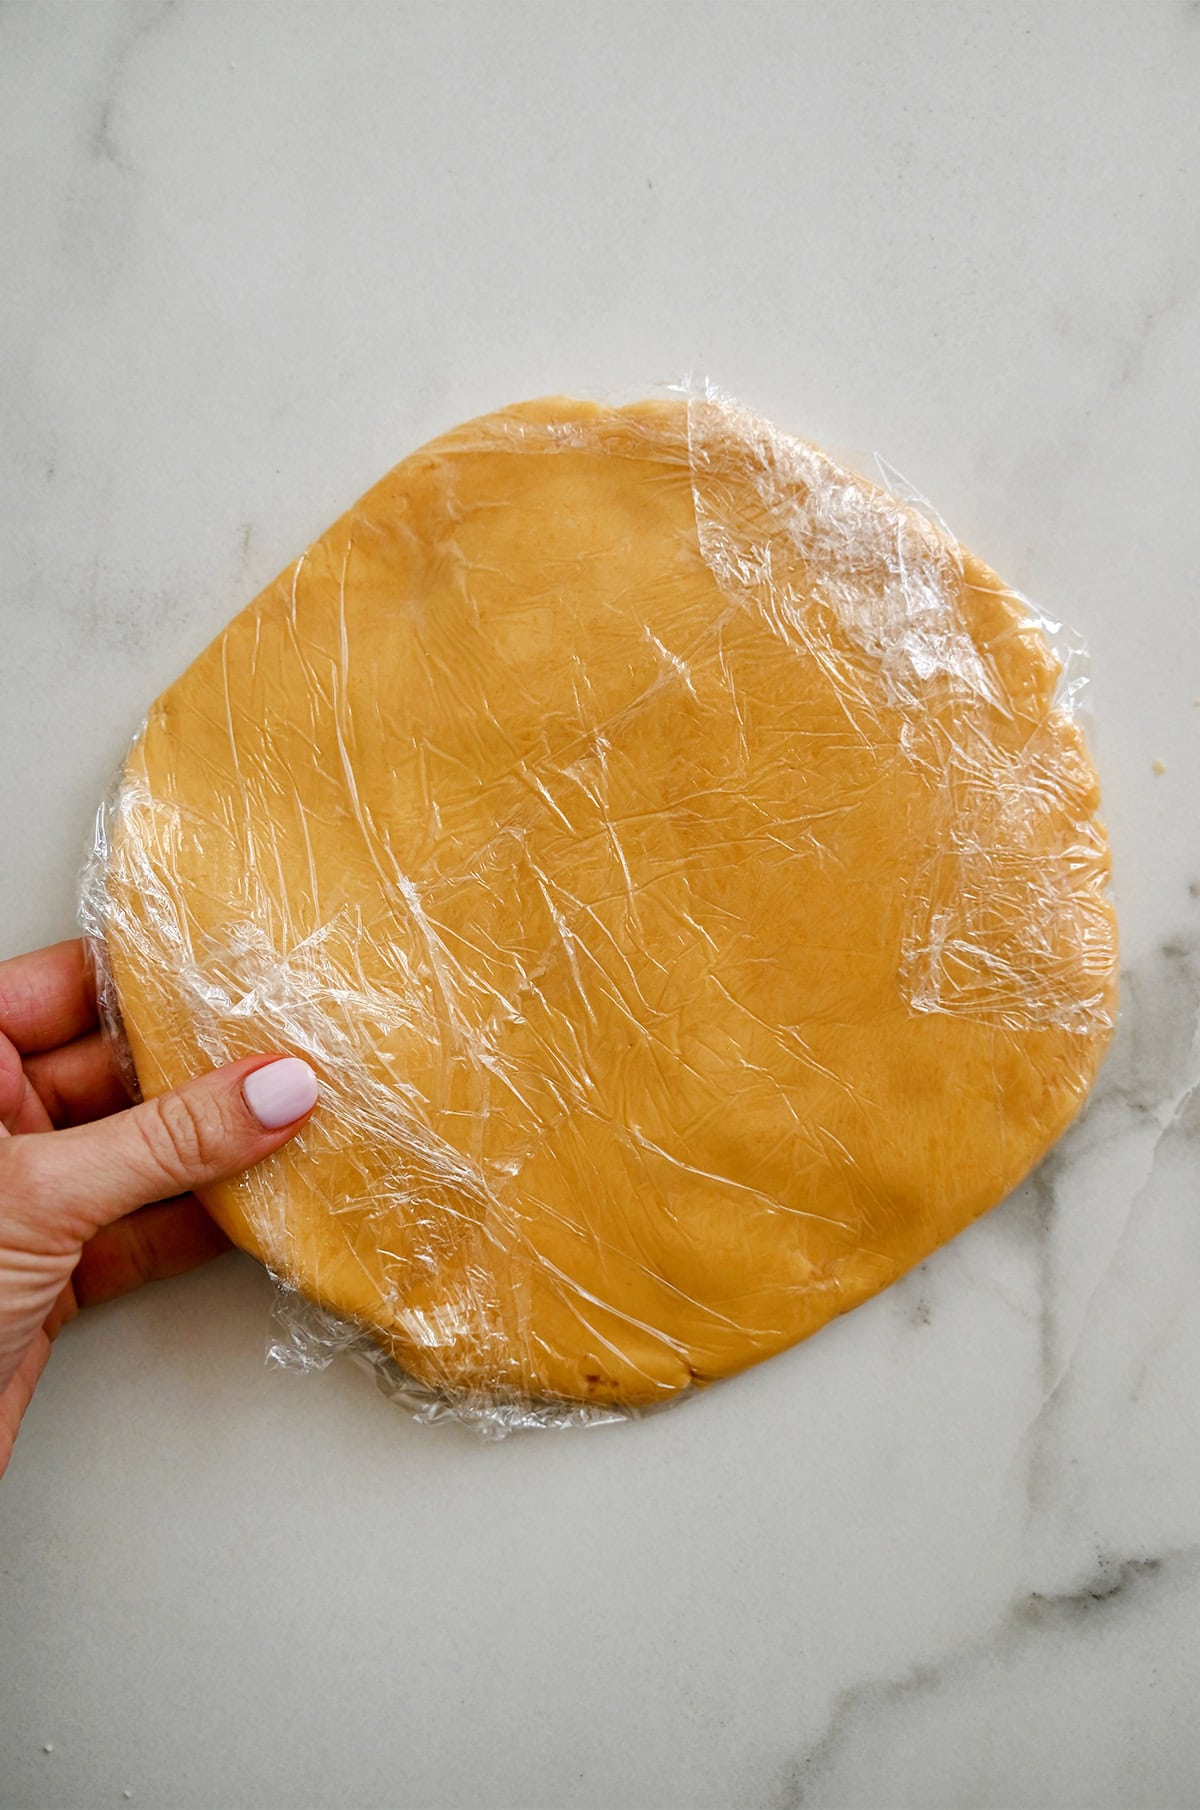
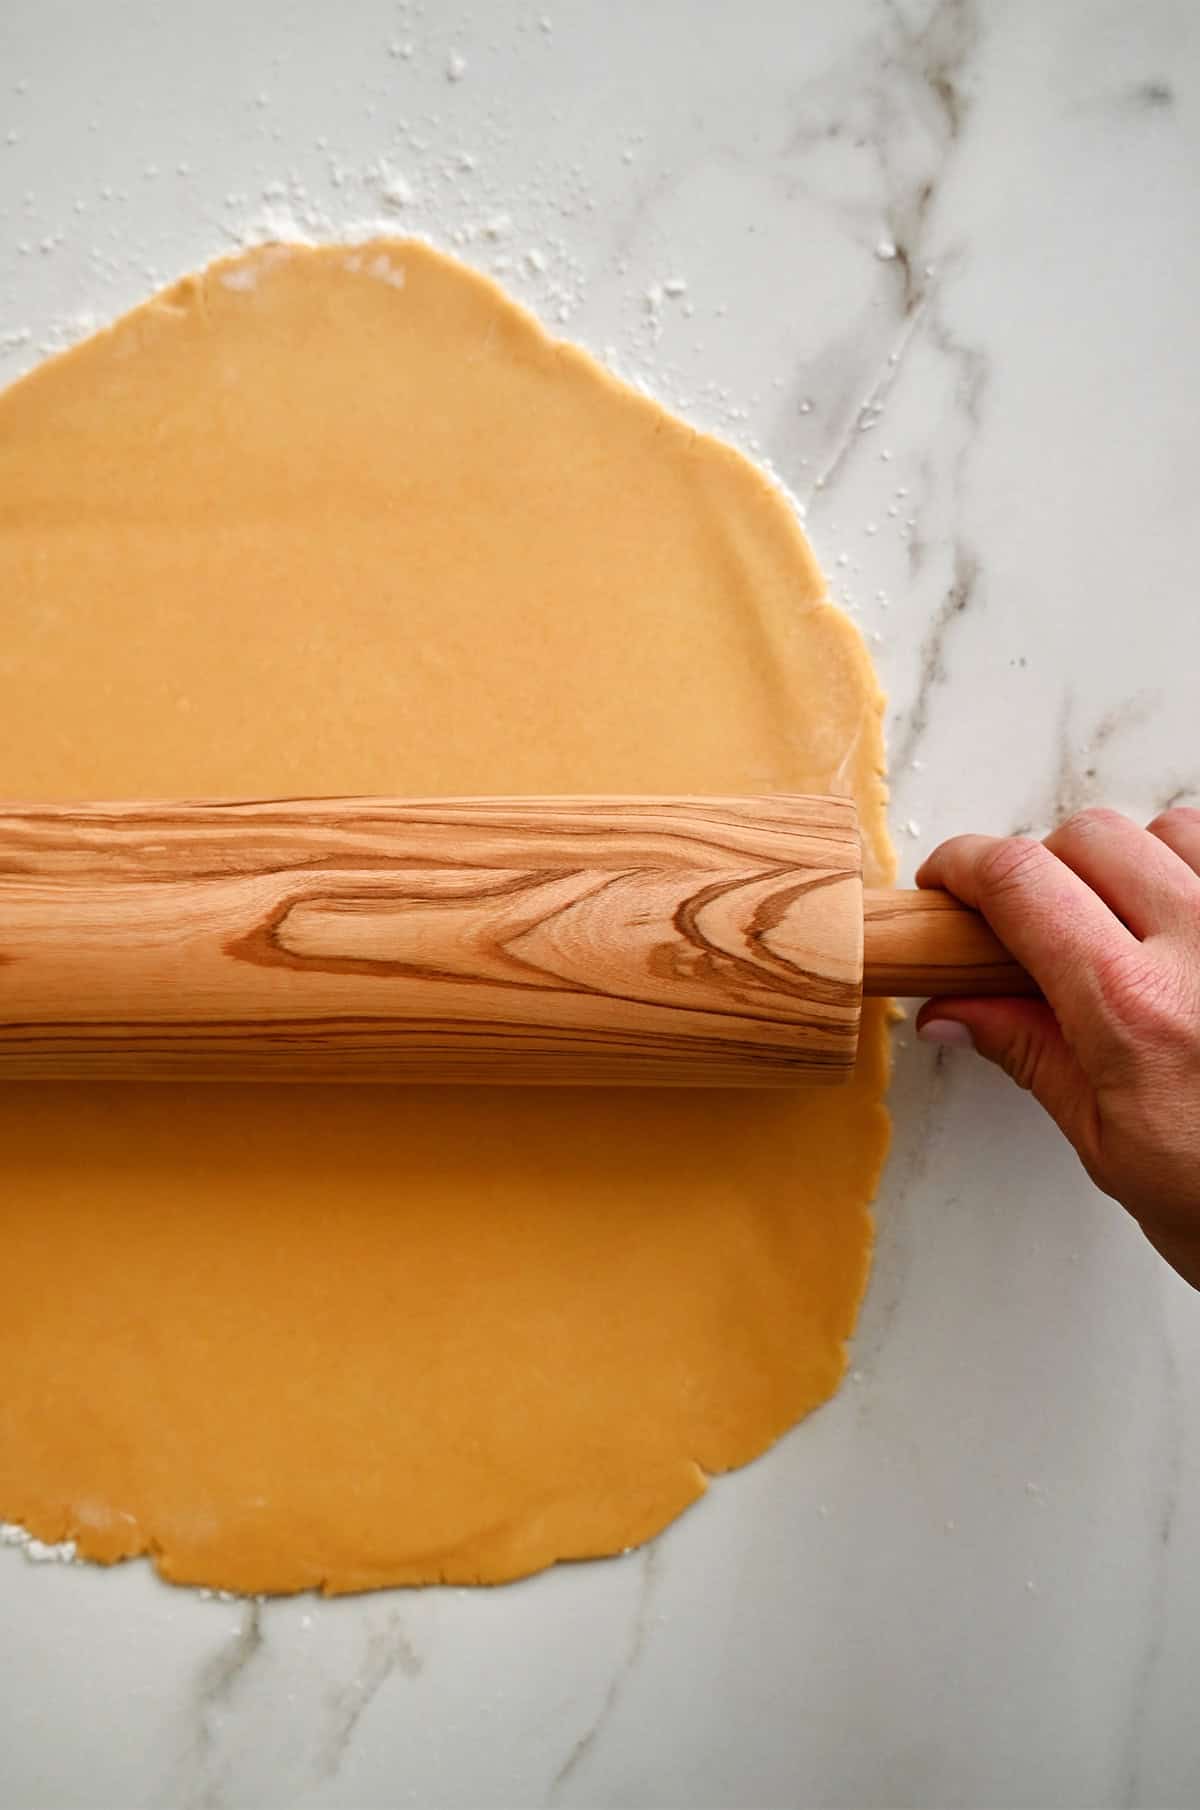
Turn the dough out onto a lightly floured surface, shape it into a thick disk, wrap it tightly, and refrigerate it for at least 1 hour. Chilling is key for crackers that hold their shape and bake up crisp instead of spreading.
You can refrigerate the dough for up to 2 days. If it’s been chilling longer than an hour, I like to let it sit at room temperature for about 20 minutes before rolling so it’s easier to work with.
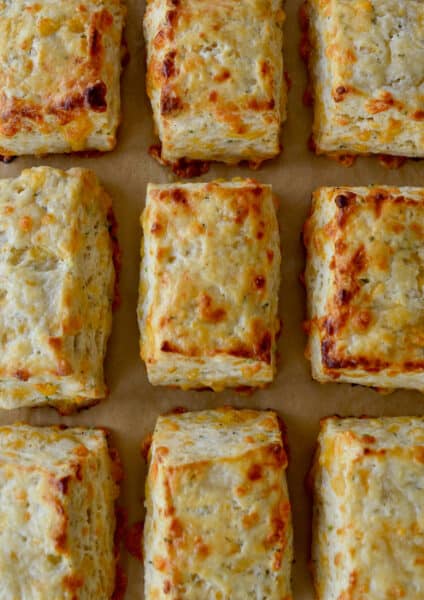
After refrigerating, roll the dough out to about 1/4-inch-thick, then use a sharp knife or pizza wheel to cut into 1-inch squares. I used a fluted ravioli cutter to make copycat Cheez-It shapes. Re-roll any scraps as needed.
Transfer the crackers to parchment-lined baking sheets, then use the bottom of a bamboo skewer or toothpick to poke a small hole in the center of each one. It’s mostly for looks, but it also helps steam escape so the crackers don’t puff up too much and instead bake into that classic snappy, crunchy texture.

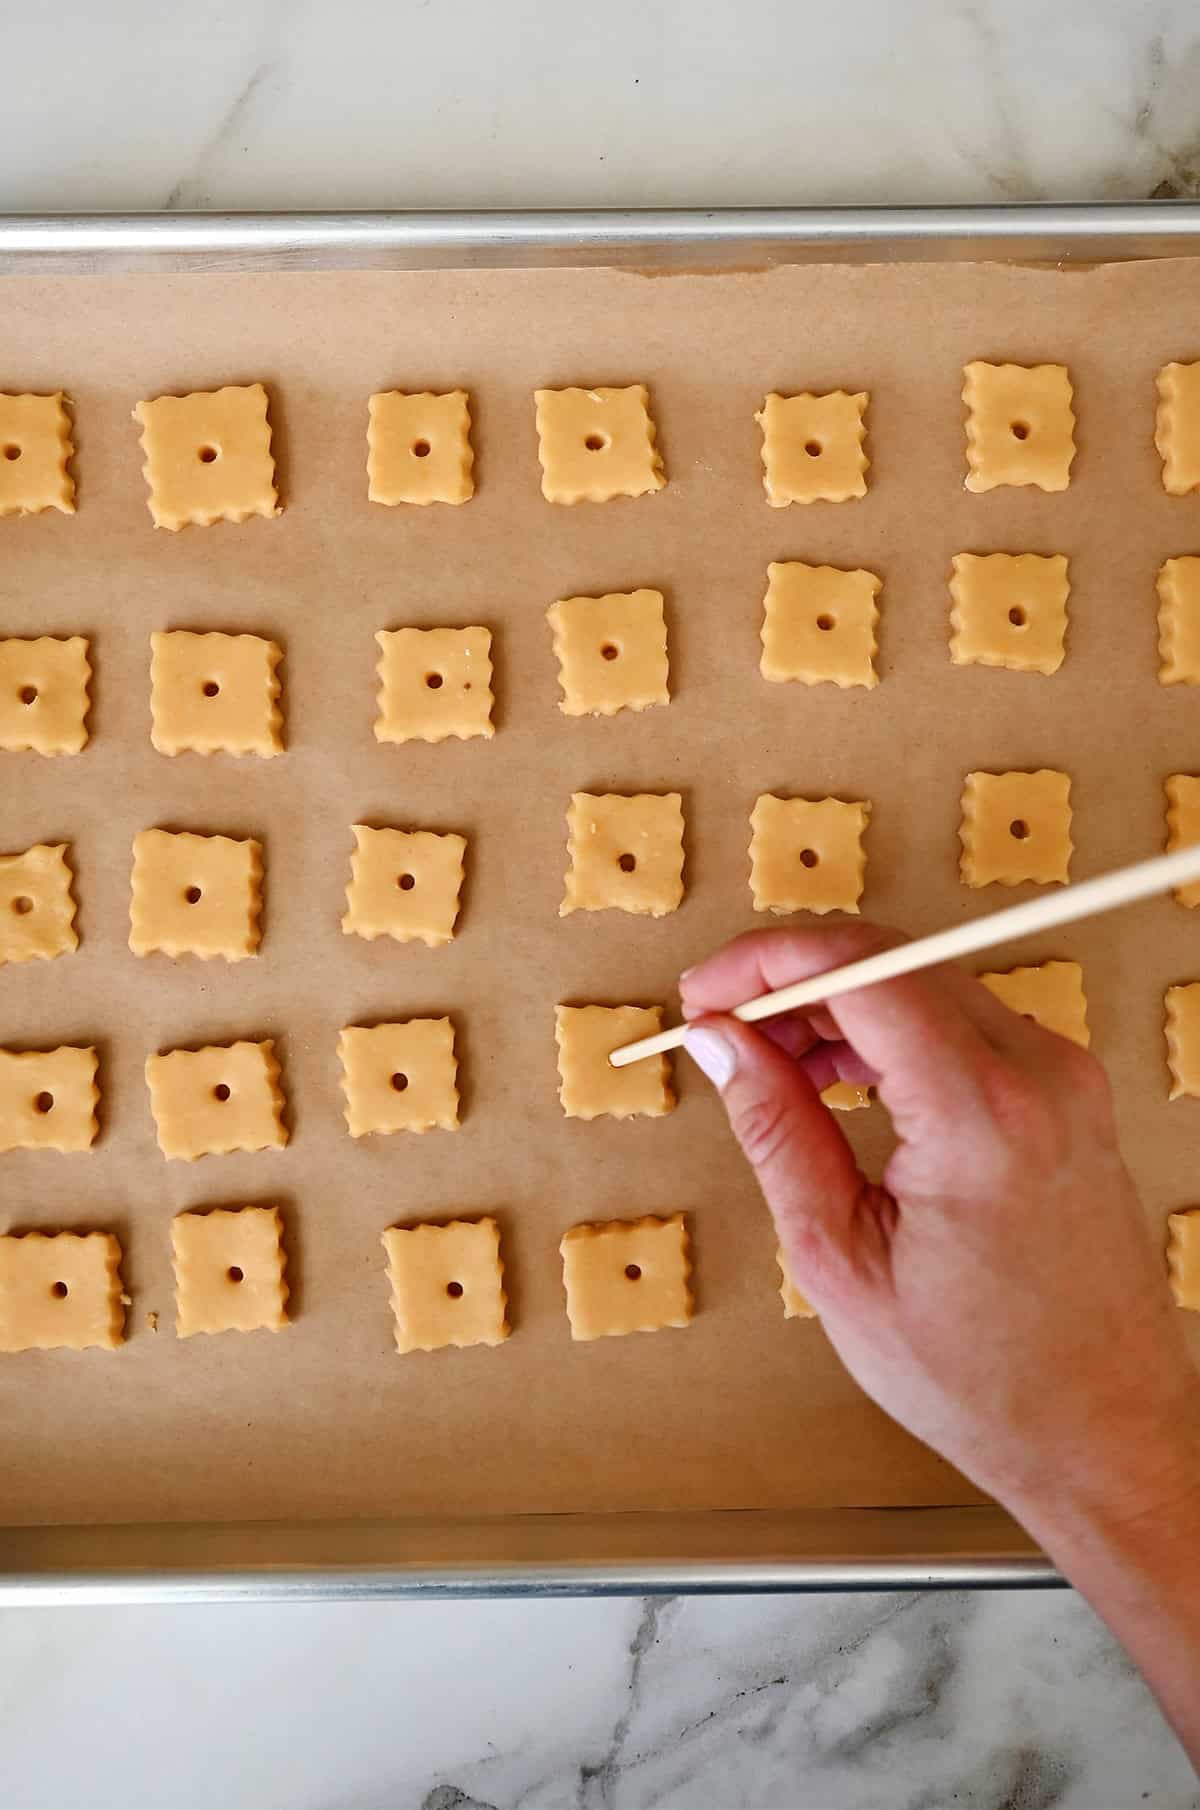
I like to sprinkle a little kosher salt over the crackers before baking—it’s optional, but highly recommended.
Bake at 350°F until the crackers are golden brown around the edges, usually 12–15 minutes. If you’re like me and love an extra-toasty Cheez-It, feel free to leave them in a minute or two longer. Just keep a close eye on them. Once they start browning, they move fast.
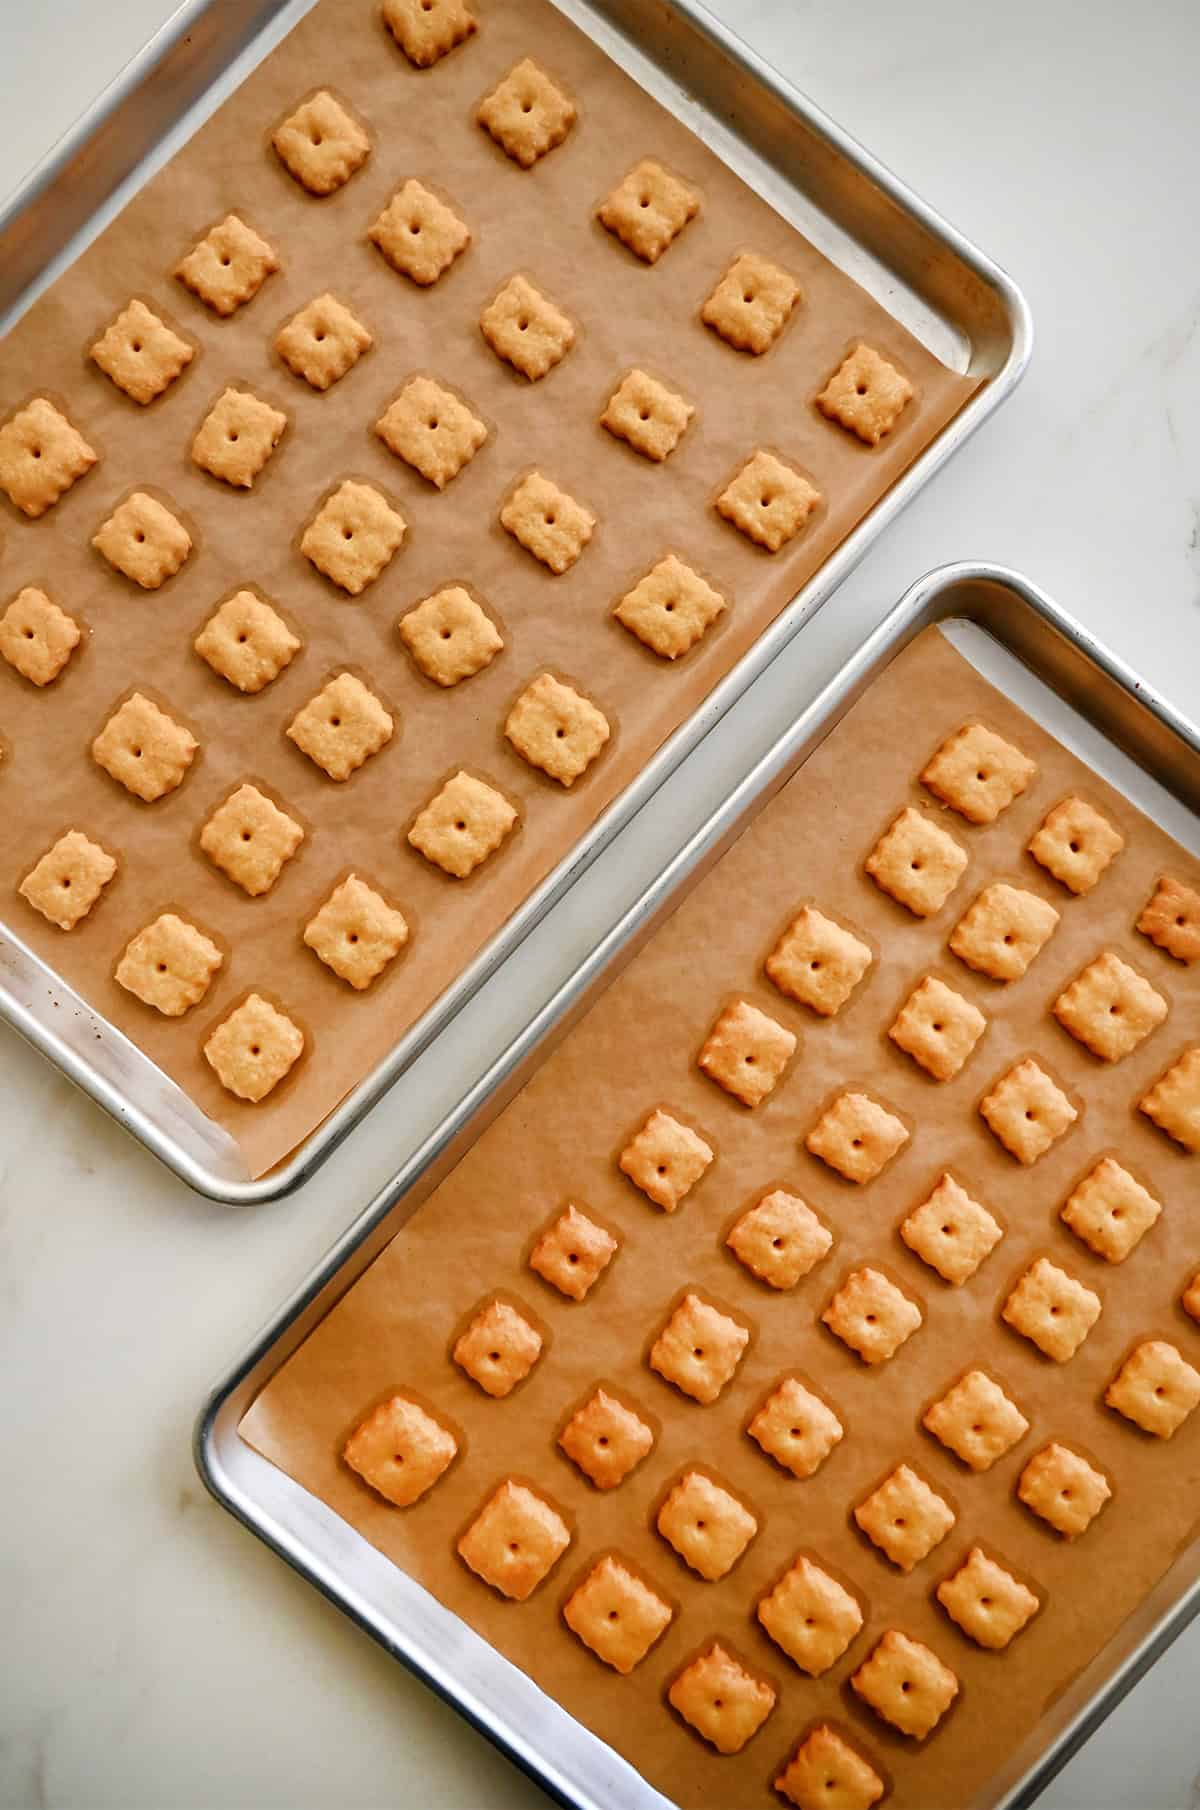
I let the crackers cool completely on the baking sheet so they crisp up fully… but I’ll be honest, I always snack on a few while they’re still warm. Consider yourself warned: once you start, it’s very hard to stop at just one!
FAQs
Yes! These bake up crispy and crunchy, not soft or crumbly. The key is rolling the dough thin and baking for closer to 17 minutes. As they cool, they crisp up even more, giving you that classic snap you expect from a Cheez-It–style cracker.
It depends on how you define “healthy!” You’re trading processed vegetable oils and shelf-stabilizing preservatives for real butter and sharp cheddar. They are much more filling than the store-bought version, so a small handful actually goes a long way.
The most common culprit is moisture. If the crackers are stored before they’re completely cool, steam gets trapped in the container and softens them. To keep them crunchy, let the crackers cool completely on the baking sheet, then store them in an airtight container at room temperature.
If they do soften a bit, don’t toss them! Just spread the crackers on a baking sheet and pop them into a 350°F oven for 3–5 minutes, then let them cool again. Crunch restored.
Timing is everything here. I like to sprinkle a light pinch of kosher salt right after the crackers are cut and placed on the baking sheet, before they go into the oven. At that point, the surface of the dough is still slightly tacky, which helps the salt adhere as they bake.
Another trick I love: lightly spritzing the tops with water using a spray bottle. You don’t need them wet—just a quick mist is enough to help the salt stick.
If you wait until after baking, the salt won’t stick nearly as well and will mostly fall off when you pick them up (trust me, I tested several batches before landing on salting before baking). A little goes a long way here, the cheese already brings plenty of salty flavor.
P.S. If you love these cheesy crackers as much as I do, don’t miss my recipes for cheddar chicken tenders (my kids love these!) and broccoli cheese casserole topped with crushed Cheez-Its.
Equipment
Ingredients
- 8 oz. sharp cheddar cheese
- 1 1/4 cups all-purpose flour, plus more for dusting work surface
- 1/4 teaspoon baking powder
- 1/2 cup unsalted butter, melted and cooled
Instructions
- Attach the shredding attachment to the food processor and shred the cheese. (Alternately, grate on the large hole of a box grater.)
- Add the cheese, flour, baking powder and ½ teaspoon kosher salt to the bowl of a food processor. Process until combined, about 30 seconds.
- With the food processor running, stream in the melted butter and continue processing until the dough forms a ball.
- Lightly flour your work surface. Turn out the dough onto the flour and shape it into a 1-inch-thick disk. Wrap the disk in plastic wrap and refrigerate it for a minimum of 1 hour and up to 2 days. (If the dough has been chilling longer than an hour, let it sit at room temperature for about 20 minutes before rolling so it’s easier to work with.)
- When ready to bake, preheat the oven to 350°F. Line two baking sheets with parchment paper.
- Lightly flour your work surface then use a rolling pin to roll out the dough until it is 1/4-inch-thick. Use a knife (or fluted ravioli cutter) to cut out 1-inch squares. (Scraps can be re-rolled.) Transfer the crackers onto the prepared baking sheets then make a small hole in the center of each cracker using the bottom of a bamboo skewer. Sprinkle with salt (optional).
- Bake the crackers until they are golden brown on the edges, 12 to 15 minutes. Remove them from the oven and let them cool completely on the baking sheet before serving.
Kelly’s Notes
- Freshly grated cheese is essential for the dough texture; do not use pre-shredded cheese.
- If you like extra-toasty Cheez-Its, leave the crackers in the oven for 1–2 minutes longer—just keep a close eye on them.
- Make-Ahead: The dough can be made up to 2 days in advance and stored in the refrigerator. Let it come to room temp for 20 minutes before attempting to roll it out.
- This is the fluted ravioli cutter I used to make copycat Cheez-It shapes. A pizza wheel works great, too.
- Storage: Once completely cooled, store the crackers in an airtight container at room temperature for up to 1 week.
- ★ Did you make this recipe? Don’t forget to give it a star rating below!
Nutrition
Did you try this recipe?
Leave a comment below with your star rating!
This post may contain affiliate links.


Would love to make these but…..I am probably one of the only people without a food processor.
Any way to make them without one?
Hi Jan! I don’t currently have an alternate method, unless you very finely grate the cheese, you may be able to do these by hand or in a stand mixer!
First recipe of yours I tried and let’s just say I’ll be trying many more!! Instructions were so clear. Easy to print recipe. Yummy, yummy crackers!
Love reading this, Kimberly!
Can these be made gluten free in some way? Us celiac patients would really enjoy them! I’ve seen posts looking for a recipe. The gluten free 1:1 flour is supposed to replace all purpose flour. I have never done it though. Please let me know what you think and thanks for this recipe! Sue Foley
Hi Sue! This recipe should absolutely work with a GF flour like Cup4Cup that’s a 1:1 sub for all-purpose. Keep me posted if you try it!
My snack game will never be the same!!! Easiest recipe ever. Going to buy a little fish cookie cutter and make them like Goldfish dupes :)
So glad you enjoyed the recipe, Tanya!
These were so good, they’re dangerous! And easy to make! Thanks!
So glad you enjoyed them, Laurie!
Tested these out to make as a Christmas appetizer and they were surprisingly easy to make and so tasty. A fun addition to my cheese spread!
So glad you enjoyed the recipe, Lily!