
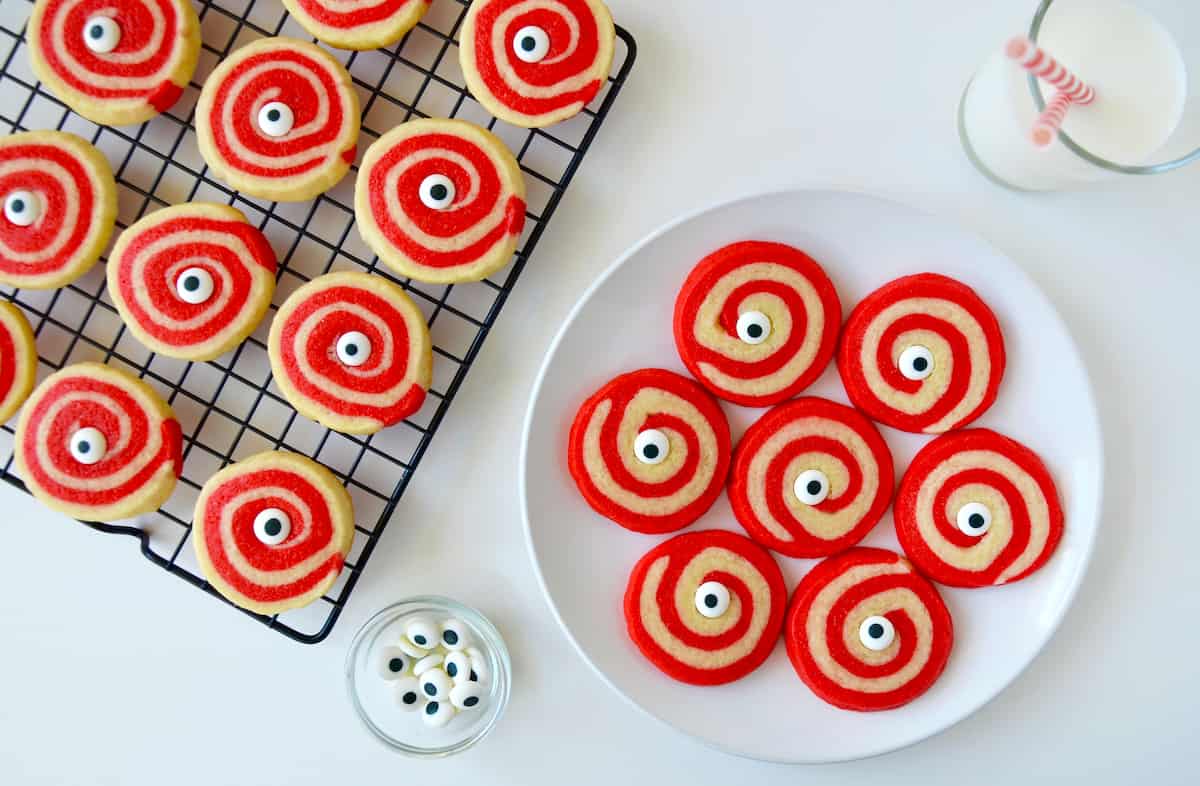
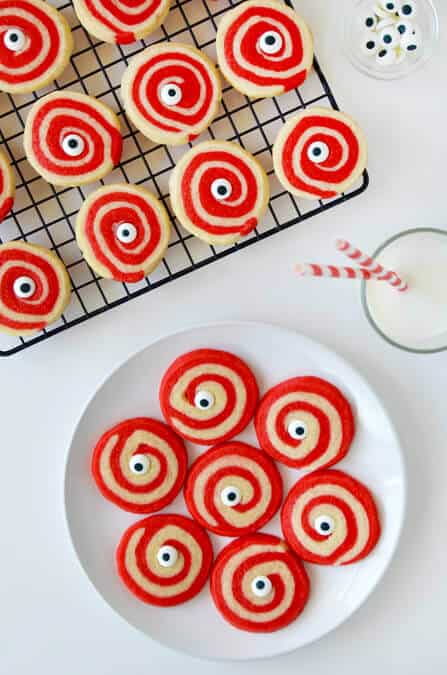
These Halloween Sugar Cookies are buttery, soft, and crispy—basically melt-in-your-mouth good! They’re also slightly spooky, thanks to their candy eyeballs.

Table of Contents
Now, I love Halloween. It’s one of the best food holidays around! There are breadstick bones, creepy chocolate chip cookies, ghoulish pretzels and, of course, my monster eyeball cookies!
While these Halloween cookies take a bit of time to make, the perfect pinwheels are worth it. Once you’ve rolled, stacked, and formed the cookie dough into logs, you’ll just have to slice and bake! The resulting cookies are so buttery, too, with soft centers and crispy edges.
Of course, the edible monster eyes take the cookies from pretty red and white pinwheels to a Halloween dessert. You should be able to find the candy eyes in most grocery stores or online.
Why You’ll Love This Recipe
- The cookies can be made ahead. While you’ll want to chill the cookie dough logs for at least 4 hours before slicing them, you can make them up to four days ahead of time.
- They look impressive. While these monster eyeball cookies may take a while to make, the pinwheel looks so beautiful—and it’s as simple as stacking, rolling and slicing!
- An easy, festive treat. Food coloring and candy eyeballs mean these sugar cookies are ready for your next Halloween bash!
- All-purpose flour: All-purpose flour gives the cookies structure. You wouldn’t be able to roll or slice the cookies without it!
- Unsalted butter: Butter makes these cookies wonderfully rich.
- Sugar: These are Halloween sugar cookies after all! Granulated sugar also lends moisture and flavor and gives these cookies their crispy edges.
- Red food coloring: Dying one piece of dough red will give the cookies their festive pinwheel appearance!
- Candy eyes: Adding edible monster eyes to the center of the pinwheels after baking completes the spooky look.
See the recipe card for full information on ingredients and quantities.
- Choose a different food coloring. Instead of red, you could use orange food coloring, leave off the candy eyeballs and have candy corn cookies!
- Combine the dry ingredients. In a medium bowl, sift the flour, baking powder and salt together.
- Cream the butter and sugar. In the bowl of a stand mixer fitted with a paddle attachment, cream together the butter and sugar until light and fluffy.
- Add eggs, vanilla and the dry ingredients. To the stand mixer bowl, add the eggs one at a time, then add the vanilla extract. Add the flour and mix until just combined, scraping down the bowl as necessary.
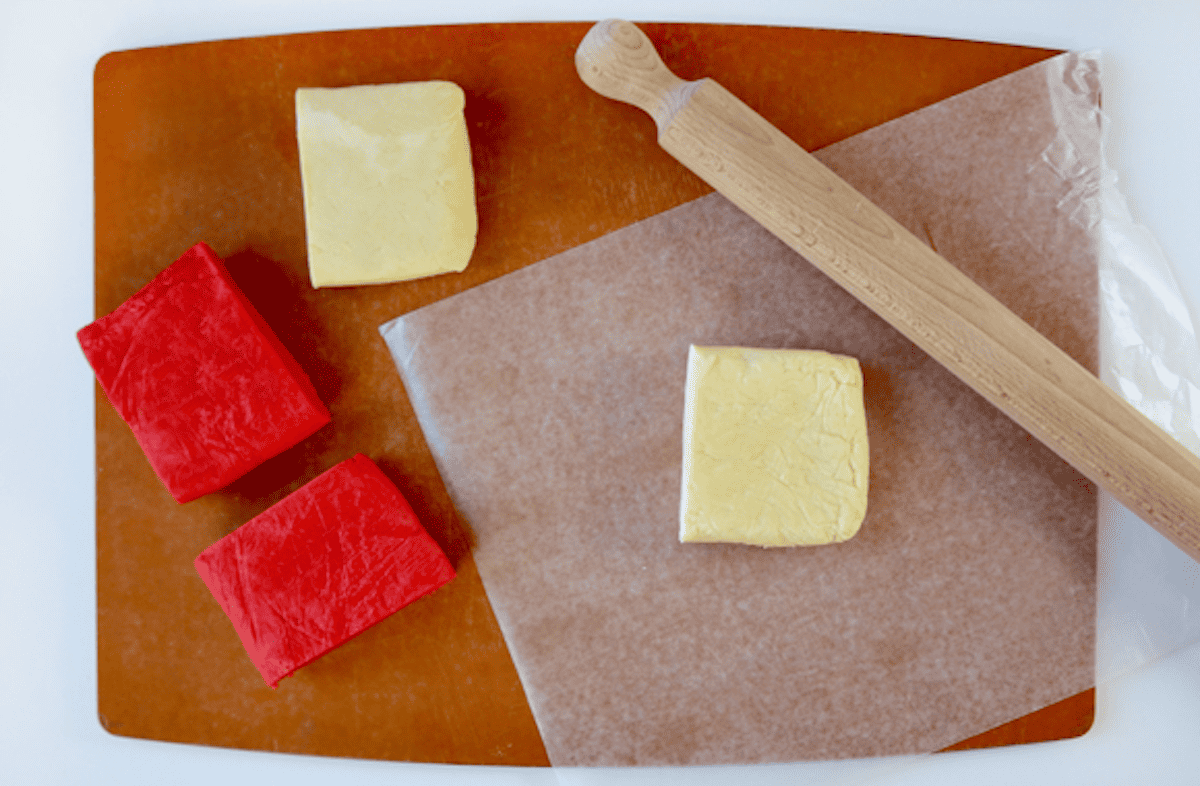
- Remove half of the sugar cookie dough. Remove half of the dough, form it into a square, then cover it with plastic wrap and place it into the refrigerator.
- Add the red food coloring to the remaining dough. To the bowl of the stand mixer, add several drops of red food coloring and mix until incorporated.
- Shape, wrap and chill the remaining dough. Form the second half of the dough into a square, cover with plastic wrap and place in the refrigerator. Allow both pieces of dough to chill for 2 hours.
- Roll the dough into rectangles. Remove both squares of dough from the fridge, unwrap and cut in half so you have two red and two white rectangles. One at a time, place a rectangle of dough between two sheets of wax paper and use a rolling pin to roll the dough until it’s 1/8-inch thick. Remove the top sheets of wax paper from the white dough sheets.
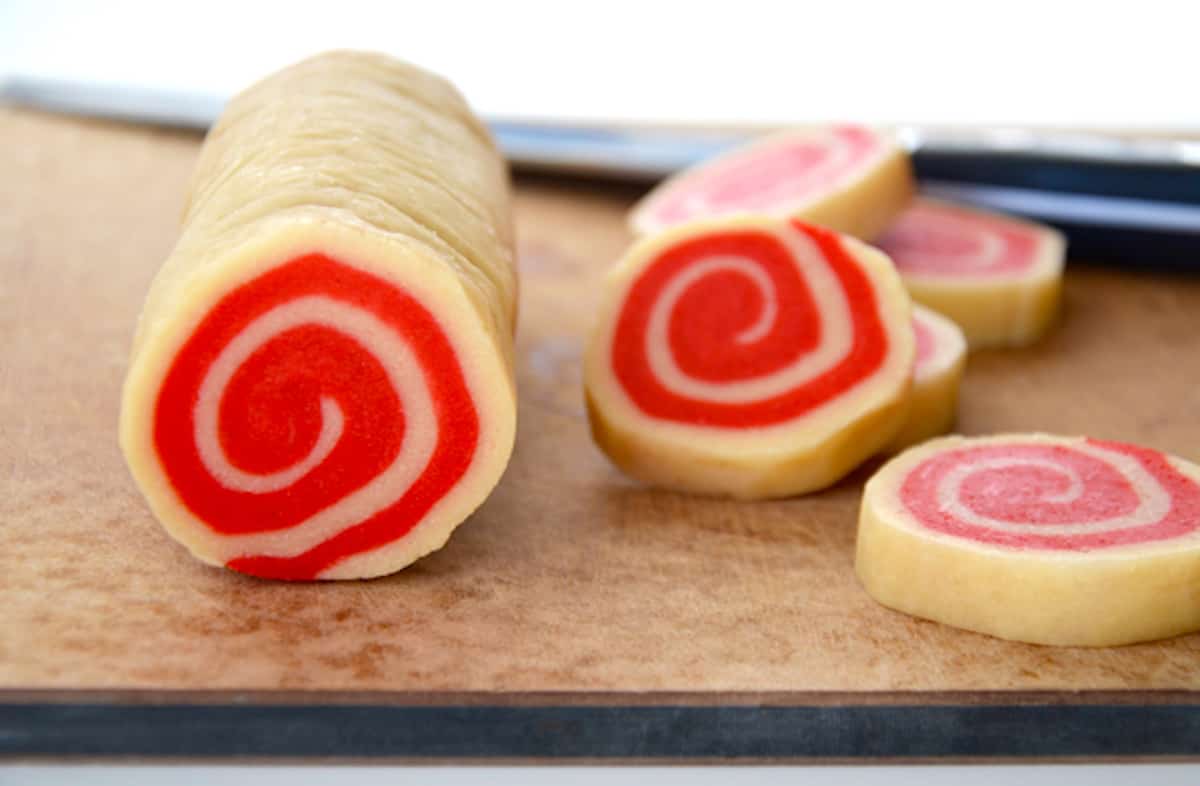
- Stack the dough and roll it into logs. Remove the top sheet of wax paper from the red dough sheet and place one on each white sheet of dough. You will have two stacks with white and red layers. Starting at the short end, roll one of the stacks of dough as tightly as possible into a log. Repeat with the other stack, then separately wrap both stacks in plastic wrap.
- Place the logs into glasses, then put them in the fridge. After placing the cookie dough logs into tall drinking glasses, chill them for at least 4 hours.
- Preheat the oven and prep your baking sheets. When ready to bake the cookies, preheat the oven to 350ºF and line two baking sheets with parchment paper or silpat.
- Slice the cookies. Slice the cookies into 1/4-inch slices and place them on the prepared baking sheet, spacing them 2 inches apart.
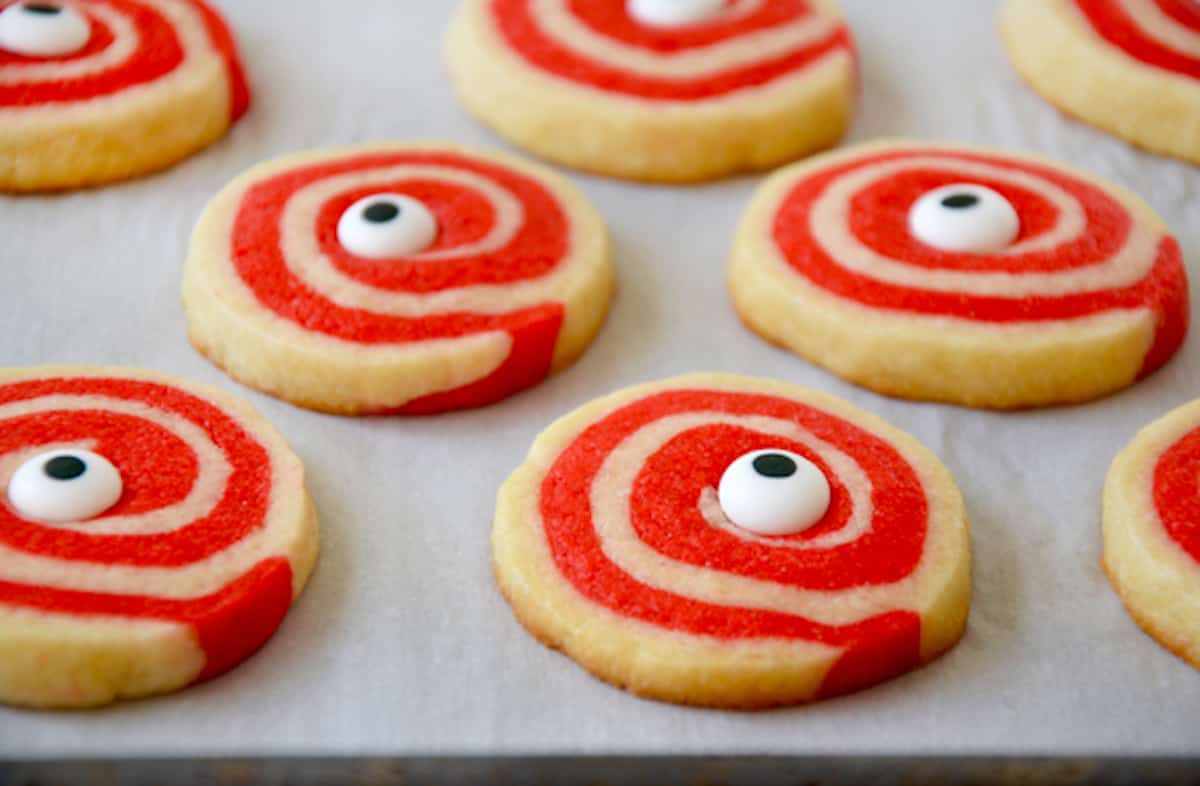
- Bake. Bake the cookies for 10 to 12 minutes, removing them when they just begin to turn golden brown around the edges.
- Add the candy eyeballs. As soon as the cookies come out of the oven, place a candy eyeball directly in the center of the cookies. Transfer to a wire rack to cool.
Pro Tip: It may seem funny to store the dough logs upright, but laying them in the fridge forms flat sides! A tall drinking glass will help your cookies come out round.
- Chill Your Cookie Dough Properly: Chilling the dough properly will help the gluten relax, making for tender cookies. It will also ensure the cookies keep their pretty round pinwheel shape!
- Buy Pre-Cut Sheets of Parchment Paper: If you find parchment paper rolls to be annoying, just buy pre-cut sheets of parchment paper.
- Add the Eyes Right Away: You should add the candy eyes as soon as the cookies come out of the oven, then transfer to a wire rack to cool for a few minutes.
If you’re planning ahead, you can store the logs of cookie dough for up to 4 days in the fridge before slicing. You can also store the formed logs in the freezer for a few months (thawing them in the fridge before baking).
Frequently Asked Questions
This totally depends on the cookies in question! For my Halloween Sugar Cookies, you’ll want to use granulated sugar. This will give the cookies moisture and their crispy edges.
For my Halloween Pinwheel Sugar Cookies, I recommend rolling the dough to 1/8-inch thick.
To roll sugar cookies so they don’t stick, grab a roll of wax paper. Placing the cookie dough between two sheets of wax paper and then rolling it out with a rolling pin will prevent sticking.
- Chocolate Halloween Pretzels
- Halloween Snack Mix
- Halloween Dirt Cups
- Easy Halloween Hand Pies
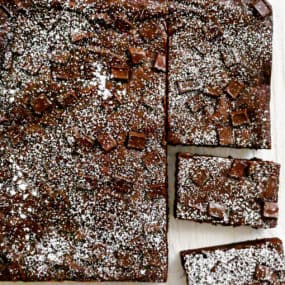
- Leftover Halloween Candy Blondies
Ingredients
- 3 cups all-purpose flour
- 1/2 teaspoon baking powder
- 1/2 teaspoon salt
- 1 cup (2 sticks) unsalted butter
- 1 1/3 cups sugar
- 2 large eggs
- 2 teaspoons vanilla extract
- Red food coloring
- Candy eyes
Instructions
- In a medium bowl, sift together the flour, baking powder and salt.
- In the bowl of a stand mixer fitted with the paddle attachment, cream together the butter with the sugar until light and fluffy. Add the eggs, one at a time, mixing between each addition, then add the vanilla extract. Add the flour mixture and beat just until combined, scraping down the sides as needed.
- Remove half of the dough and pat it into a square. Wrap the dough securely in plastic wrap then refrigerate it.
- Add several drops of food coloring to the stand mixer and mix the dough until the color is uniform. Remove the dough, shape it into a square, wrap it securely in plastic wrap and refrigerate it. Allow both pieces of dough to chill in the fridge for 2 hours.
- Remove the dough from the fridge. Cut each dough square in half to form four rectangles (two white and two red). Place each piece of dough between two sheets of wax paper. Using a rolling pin, roll each piece of dough into a rectangle that’s about 1/8-inch thick. Peel back the top piece of wax paper from each piece of dough then transfer each sheet of red dough on top of each sheet of white dough. (You will have two stacks of dough, each with a red and white layer.)
- Starting at the shorter end of each rectangle, roll the dough as tightly as possible into logs. Wrap up the logs securely in plastic wrap then stand each log up inside a glass and place the glasses in the fridge for a minimum of 4 hours. (Standing the dough upright, rather than laying it directly in the fridge, will prevent any flat sides from forming and ensures the cookies will be round.)
- When ready to bake, remove the dough logs from the fridge and preheat the oven to 350ºF. Line two baking sheets with parchment paper or Silpats. Using a sharp knife, cut each log into 1/4-inch slices then arrange the cookies on the baking sheets, spacing them about 2 inches apart.
- Bake the cookies for 10 to 12 minutes or until they just begin to turn golden brown around the edges. Remove the cookies from the oven and immediately press a candy eye into the center of each cookie. Transfer the cookies to a cooling rack to cool completely.
Kelly’s Notes
- Chill Your Cookie Dough Properly: Chilling the dough properly will help the gluten relax, making for tender cookies. It will also ensure the cookies keep their pretty round pinwheel shape!
- Buy Pre-Cut Sheets of Parchment Paper: If you find parchment paper rolls to be annoying, just buy pre-cut sheets of parchment paper.
- Add the Eyes Right Away: You should add the candy eyes as soon as the cookies come out of the oven, then transfer to a wire rack to cool for a few minutes.
- ★ Did you make this recipe? Don’t forget to give it a star rating below!
Nutrition
Shoutout
Did you try this recipe?
Share it with the world! Mention @justataste or tag #justatasterecipes!
This post may contain affiliate links.
Recipe adapted from Pink Pinwheel Sugar Cookies.


Love these!
These are so fun! My kids would get a kick out of them!
I must try to make these while they are on fall break next week.
Thanks, Jessica!
How super cute and fun for Halloween! Love these!
Wow these cookies look so great. They will be saved under ‘funky food’ on my pinterest account. Great fun thank you for sharing. SammiE
Thanks so much, Sammie!