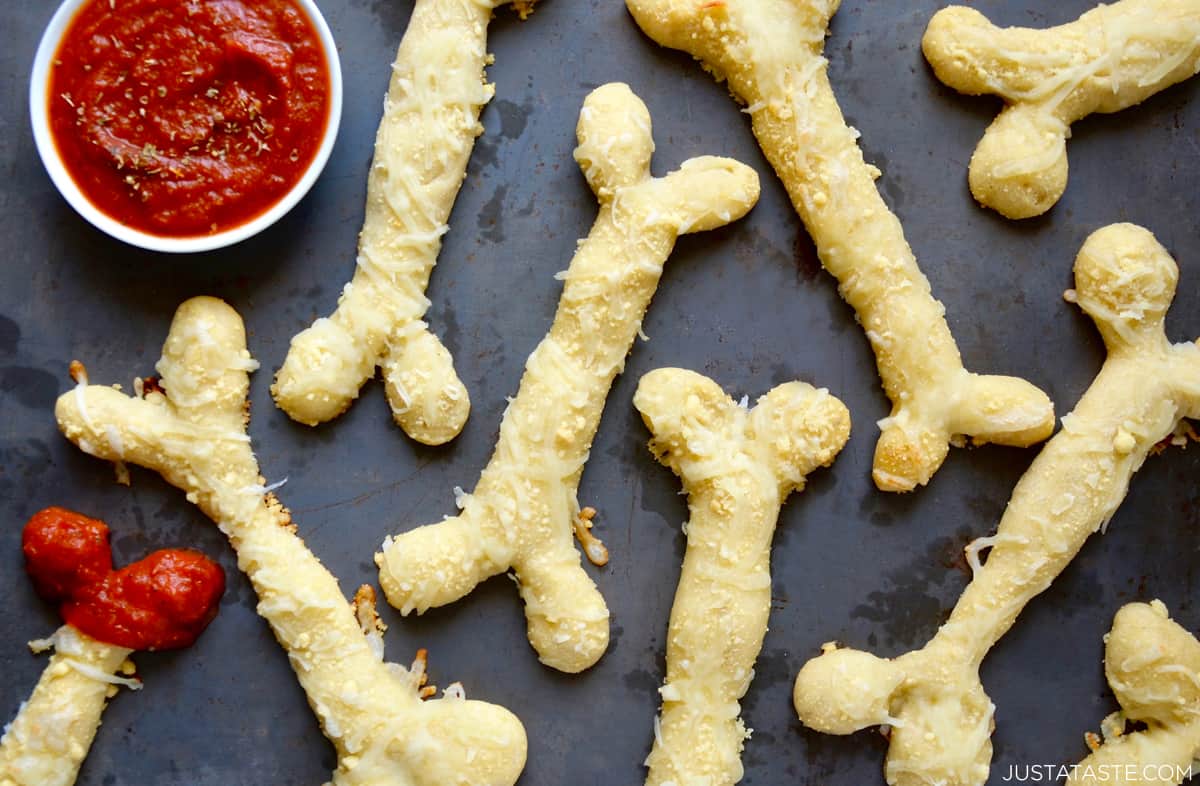
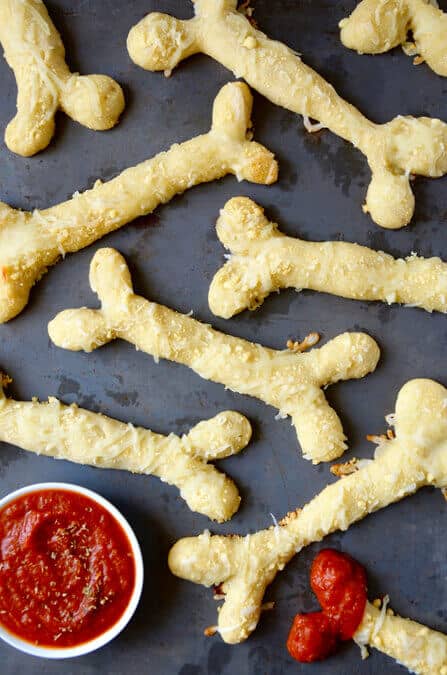
Turn store-bought pizza dough into a spooky snack or side with this easy recipe for Cheesy Halloween Breadstick Bones, complete with marinara “blood” for dunking.
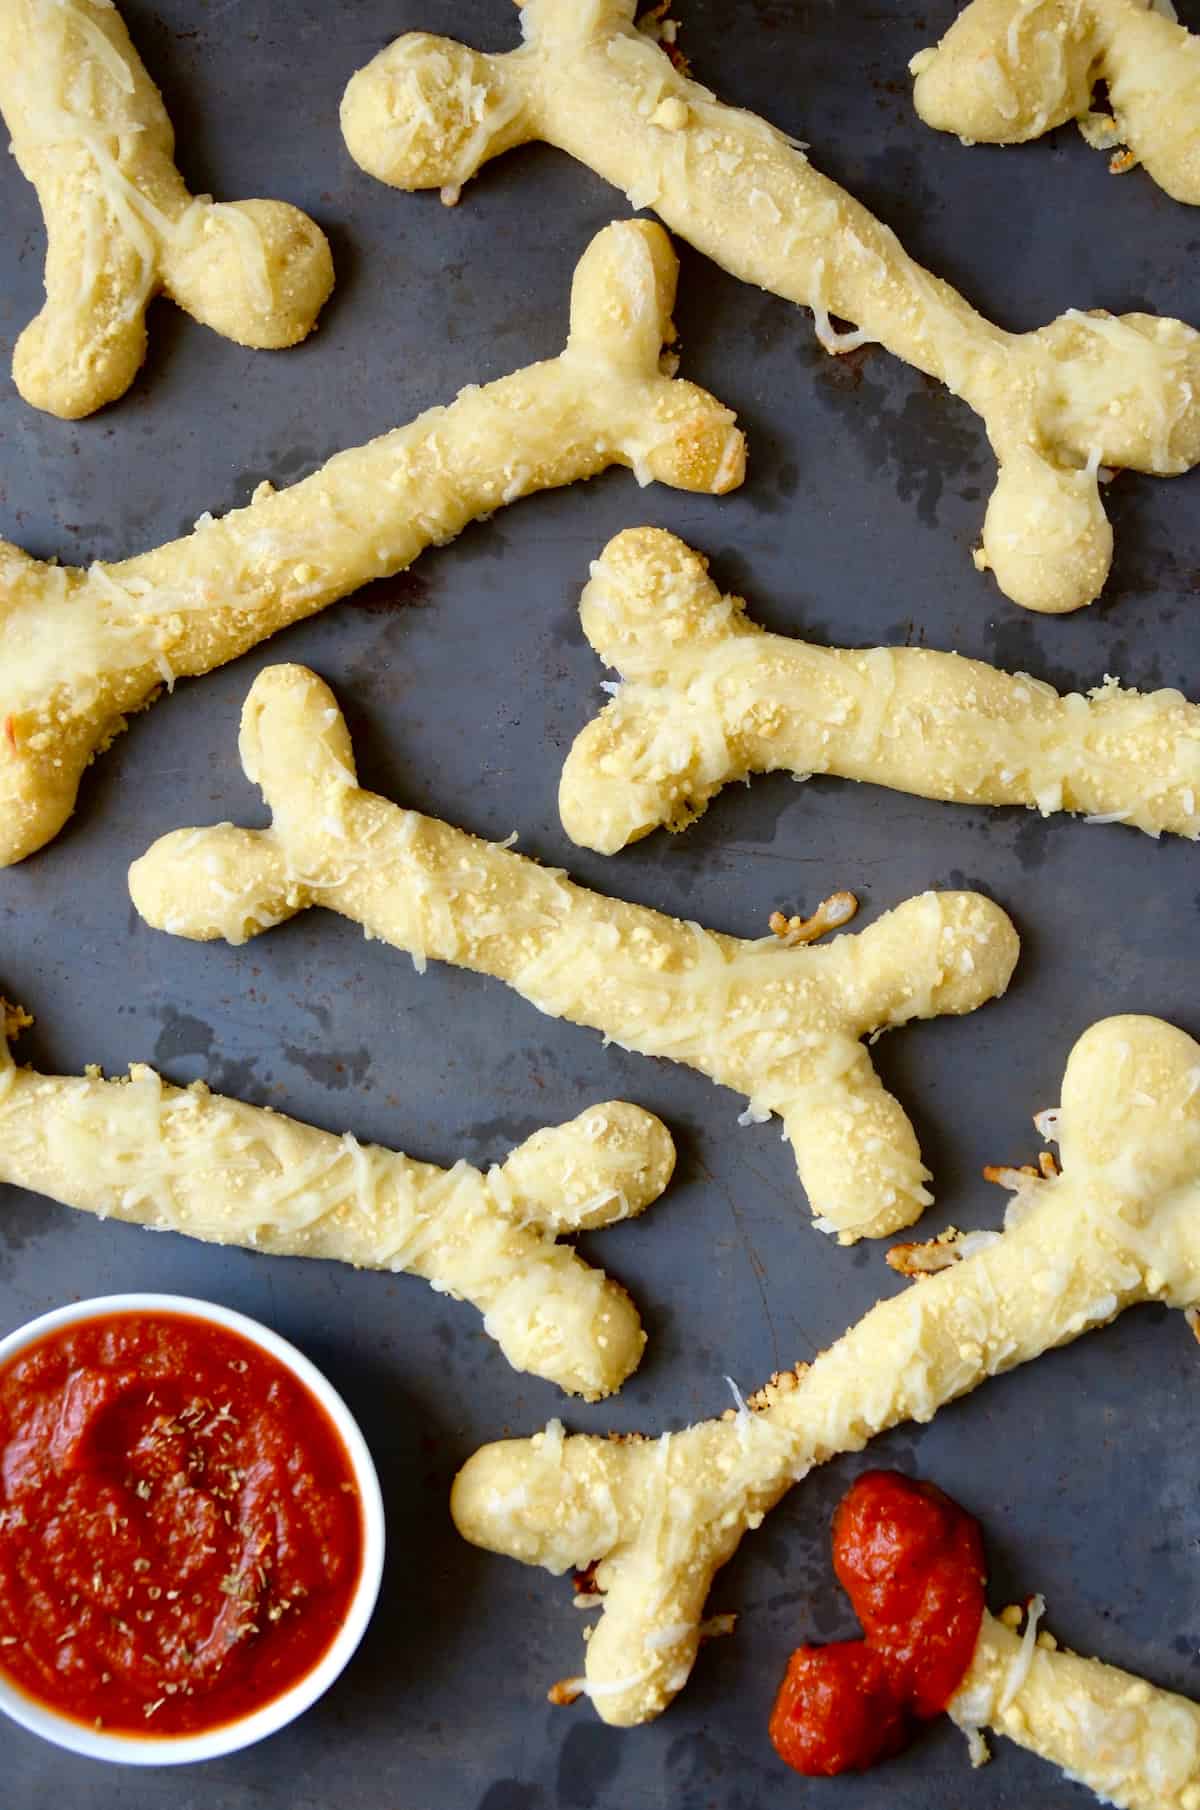
Table of Contents
I can hardly wait for the month of October to roll around every year because it signals many a good thing in the world of food. First and foremost, football season is in full swing, so chicken wings, pizza pockets and my go-to gameday beef chili enter the regular weekly rotation. And second, it’s finally acceptable to share the creepy, crawly creations I’ve been dreaming up all year.
I realize we are still a few days shy of October 1, but I have so many Halloween-inspired treats to share this year that I couldn’t wait another week to break out the first recipe: Cheesy Halloween Breadstick Bones.
This recipe can be as homemade or as store-bought as your heart desires. Opt for my Ultimate Homemade Pizza Dough paired with 10-Minute Marinara Sauce, or use your favorite supermarket alternatives. Regardless of what route you go, the result is the easiest, cheesiest breadstick bones complete with marinara “blood” for dipping.
Not sufficiently creeped out yet? Don’t miss my Frankenstein Marshmallow Pops, Halloween Chex Mix, Halloween Candy Bark and more Halloween dessert recipes.
- All-purpose flour: A dusting of all-purpose flour will keep the pizza dough from sticking to the countertop as you roll and shape the Halloween bread.
- Pizza dough: You can use store-bought or homemade pizza dough to make these breadsticks.
- Unsalted butter: Melted unsalted butter will help the grated cheese stick to the dough, but also help the breadsticks brown and add flavor.
- Parmesan cheese: Grated Parmesan adds cheesy goodness (and some nutty flavor) to this recipe. You can use pre-grated Parmesan if you prefer.
- Mozzarella cheese: Mozzarella cheese melts incredibly well, turning this Halloween bread from cheesy to CHEESY.
- Marinara sauce: Dipping these breadsticks in marinara is totally optional, but entirely delicious.
See the recipe card for full information on ingredients and quantities.
- Make it dairy-free. You could use your favorite dairy-free Parmesan and mozzarella cheeses and vegan butter instead of their dairy counterparts.
- Make it gluten-free. Swap in gluten-free flour for dusting and gluten-free pizza dough.
- Preheat the oven. Preheat the oven to 375°F and line two baking sheets with parchment paper.
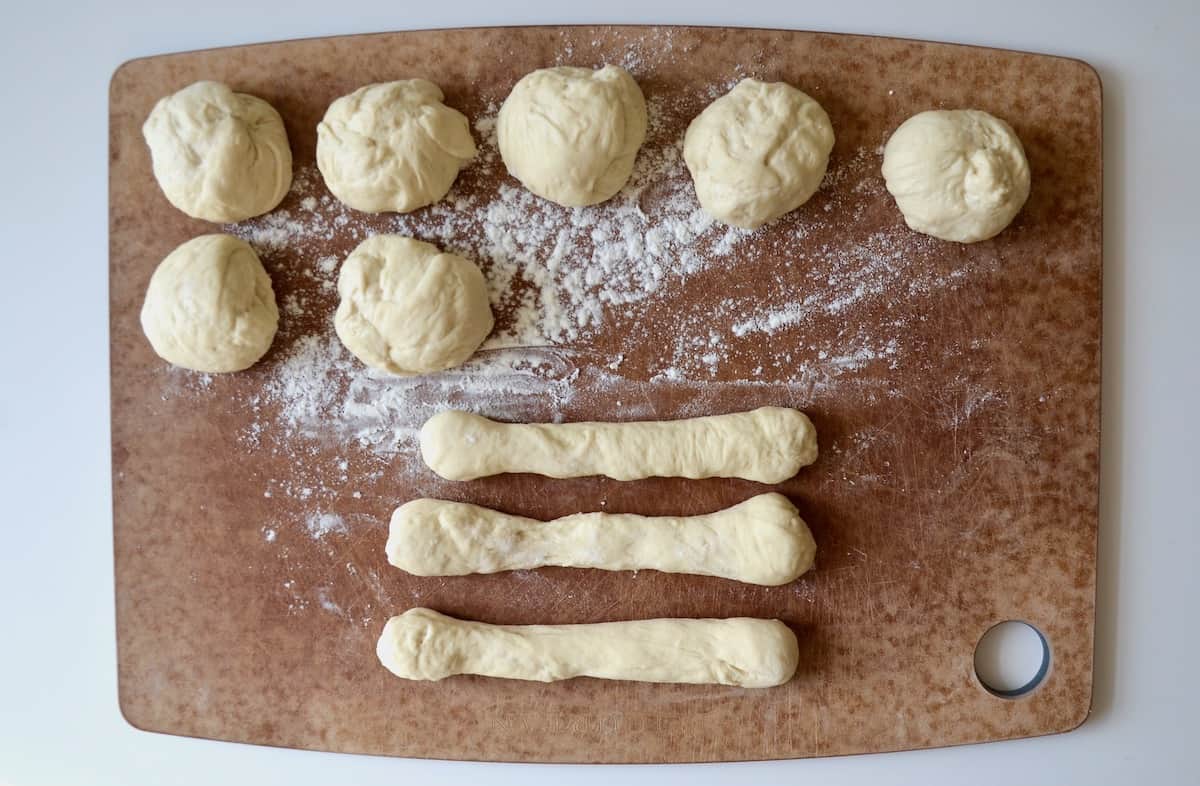
- Shape the breadstick bones. Divide the pizza dough into 10 equally-sized balls, then roll each ball into an 8-inch rope, keeping each rope’s end slightly larger than the middle. Place 5 ropes onto each baking sheet, spaced a couple of inches apart.
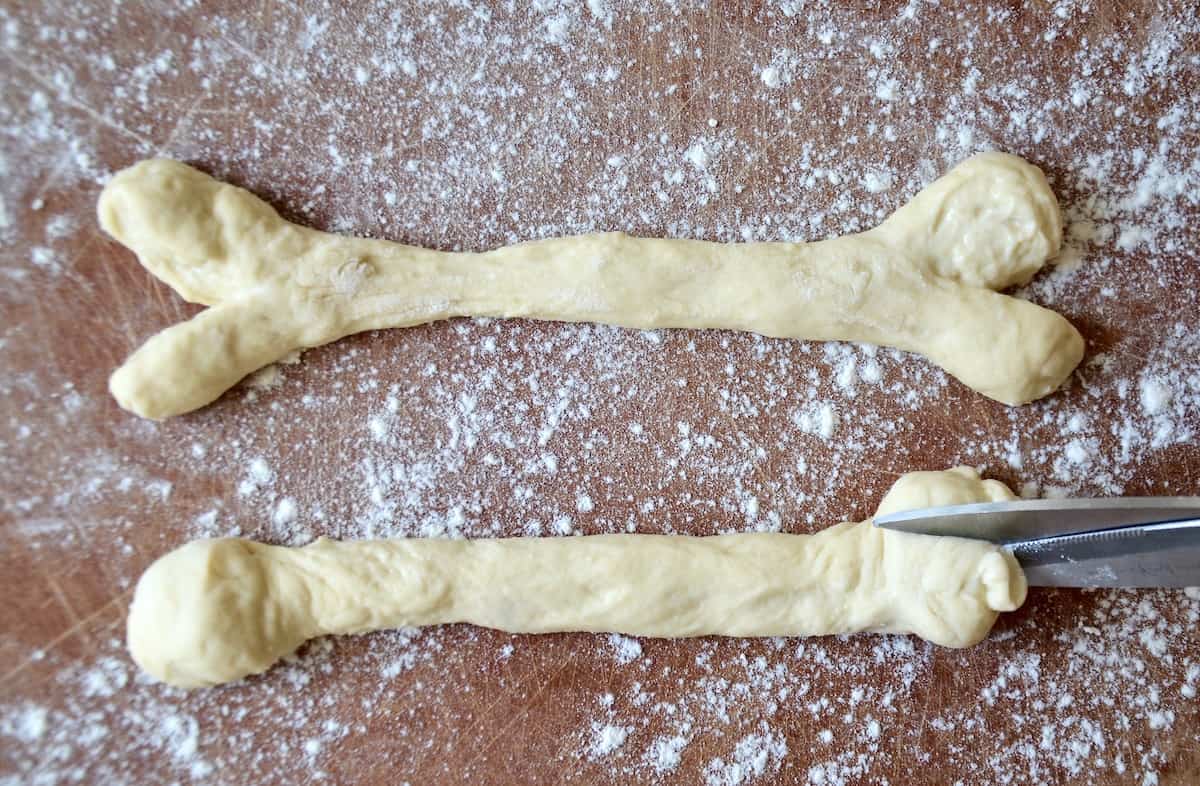
- Snip the breadsticks. Using scissors, cut a slit 1-inch into each end of the breadstick and use your fingers to lightly stretch the ends.
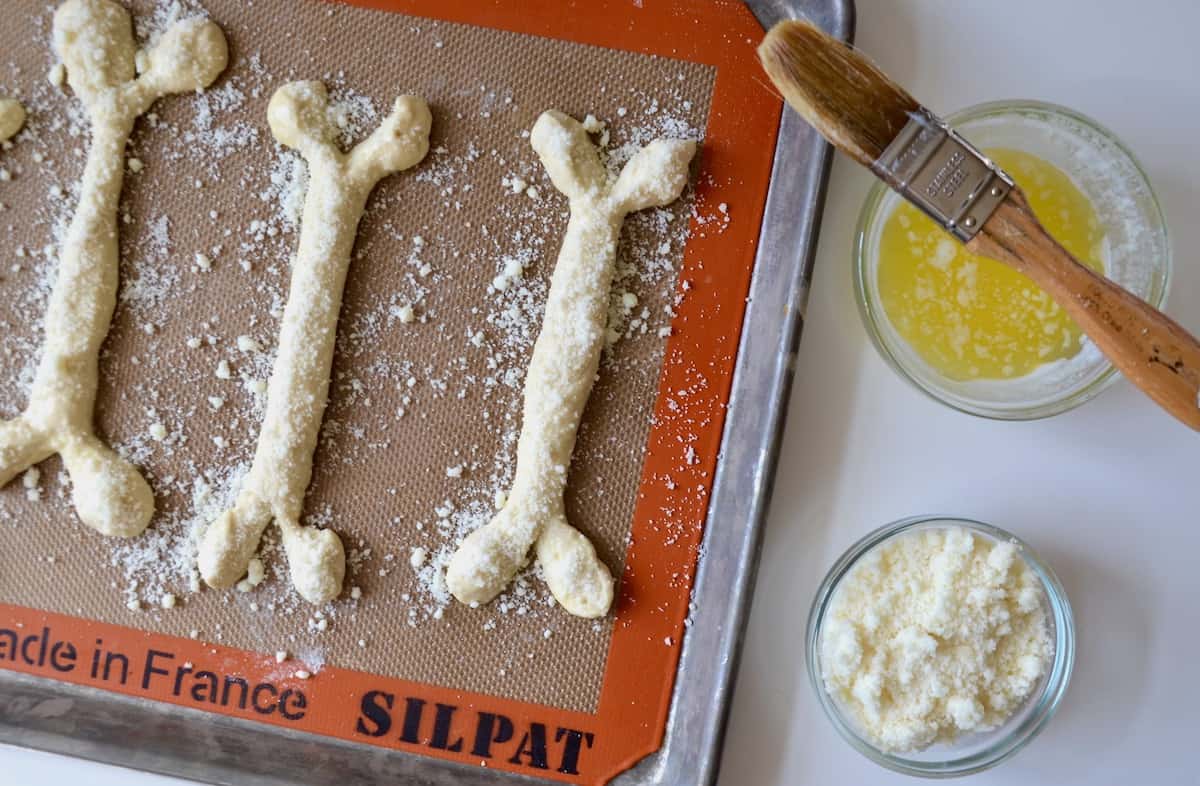
- Brush with butter and cheese. Brush each breadstick with the melted butter and sprinkle with the Parmesan cheese.
- Bake. Bake the breadsticks for 15 minutes, sprinkle with the mozzarella, then bake for 5 to 7 minutes more. Remove from the oven and serve with marinara for dipping (if you want!).
- Let the Pizza Dough Come to Room Temperature: Pizza dough is easiest to roll when it’s at room temperature, rather than chilled.
- Use Kitchen Scissors: Kitchen scissors are the perfect tool for snipping these breadsticks into bones. Don’t try to use a knife: It will be much harder to cleanly cut through the dough.
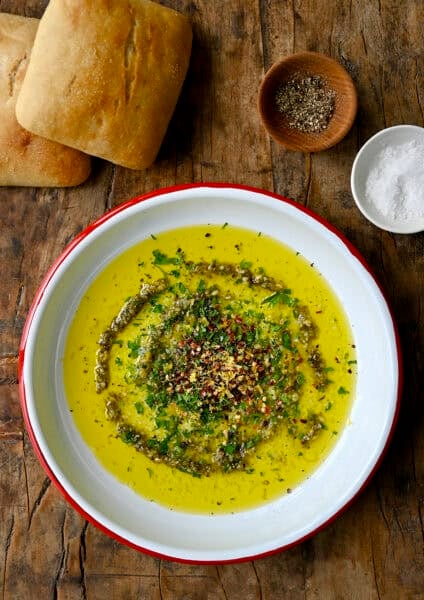
- Try a Different Dipping Sauce: While I love marinara sauce with these Halloween breadsticks, they’d also be great with Quick Beer Cheese Dip or Cowboy Butter.
Leftover breadsticks will last in the fridge for about 5 days when stored in an airtight container.
You can also freeze the baked, cooled bread. Placed in a zipperlock bag, the knots can be stored this way for up to 3 months. You can reheat the breadsticks at 375°F for 10 to 15 minutes (or until warmed through).
- Halloween Dirt Cups
- Easy Halloween Hand Pies
- Halloween Chocolate Chip Cookies
- Chocolate Halloween Pretzels
- Mini Bagel Mummy Pizzas
Ingredients
- All-purpose flour, for dusting work surface
- 1 pound homemade or store-bought pizza dough
- 2 Tablespoons unsalted butter, melted
- 1/2 cup grated Parmesan cheese
- 1 cup shredded mozzarella cheese
- Homemade or store-bought marinara sauce, for serving
Instructions
- Preheat the oven to 375°F. Line two baking sheets with parchment paper or Silpats. Lightly flour your work surface.
- Divide the dough into 10 equal balls. Roll each ball into an 8-inch rope slightly larger on the ends. Arrange five breadsticks on each baking sheet, spacing them at least 2 inches apart. Using scissors, cut a 1-inch slit on the ends of each breadstick and gently stretch each of the cut pieces apart to form the ends of the bones.
- Brush the breadsticks with the melted butter then sprinkle on the grated Parmesan cheese. Bake the breadsticks for about 15 minutes then remove them from the oven and top them with the mozzarella cheese. Return the breadsticks to the oven for an additional 5 to 7 minutes or until the cheese is melted. Remove the breadsticks from the oven and serve them warm with marinara sauce for dipping.
Kelly’s Notes
- Pizza dough is easiest to roll when it’s at room temperature, rather than chilled.
- Kitchen scissors are the perfect tool for snipping these breadsticks into bones. Don’t try to use a knife: It will be much harder to cleanly cut through the dough.
- While I love marinara sauce with these Halloween breadsticks, they’d also be great with Quick Beer Cheese Dip or Cowboy Butter.
- ★ Did you make this recipe? Don’t forget to give it a star rating below!
Nutrition
Did you try this recipe?
Leave a comment below with your star rating!
This post may contain affiliate links.
Recipe by Kelly Senyei of Just a Taste. Please do not reprint this recipe without my permission. If you'd like to feature this recipe on your site, please rewrite the method of preparation and link to this post as the original source.


How long will these stay fresh? Say if made them a day ahead?
Hi Diana! These breadsticks will last up to a few days when stored at room temp in sealed plastic bags.
How can I make these ahead of time and freeze?
Hi Shelly – I’ve never tried freezing them so I’m not sure what the texture would be like once they’re defrosted. Definitely let me know if you give it a shot!
you have put further up that you can freeze them, so which is it? you can or cant
Hi Stephanie! Since my initial comment in 2020, I have made and successfully frozen these breadsticks. It works very well. Hope this helps!
I made some. I got fatty bones haha! Still good.
I’m glad you enjoyed the recipe, François!
I made these for my grandchildren and mine were also “fatty bones” lol. But they smell amazing. We’ll see what the grandchildren think
p.s I originally had these at 8 inch lengths, but they kept shrinking back, which why I think they turned out fat bones
I hope your grandchildren enjoy the breadstick bones, Karleene!
Everything looks amazing I cannot wait to try this stuff
Thanks so much, Faith! I hope you enjoy the recipe!
Would refrigerated Cresent roll or biscuit dough work for this as well?
Hi Natalie! I haven’t tried that so I can’t say with certainty what the results would be, but I think it *should* work!
Can these be frozen ahead and if so at what stage?
Tnx
Hi Trish! I’ve never tried freezing them so I’m not sure what the texture would be like once they’re defrosted. Definitely let me know if you give it a shot!
Thank you for this recipe!!! I have a party coming up at work and these will be perfect!
You are so welcome, Christina!
I would make meringue bones but didn’t think to do breadsticks! I make pizza dough all the time so this is perfect for this year’s halloween party. Thanks! :)
You are so welcome – enjoy!
Oh, here comes my favourite holiday of all. I love Halloween so much, it’s all about creativity on this holiday. I already started to stash and try some recipes and this one looks really promising. The idea is really simple and I love that it looks quite safe to eat xD Not that the other recipes are not, it’s just most of them look packed with chemicals and this one is more natural, which is rare these days.
Agreed! Love Halloween :)
LOVE these! Not only are the perfect for a Halloween party but they look delish as well – pinned!