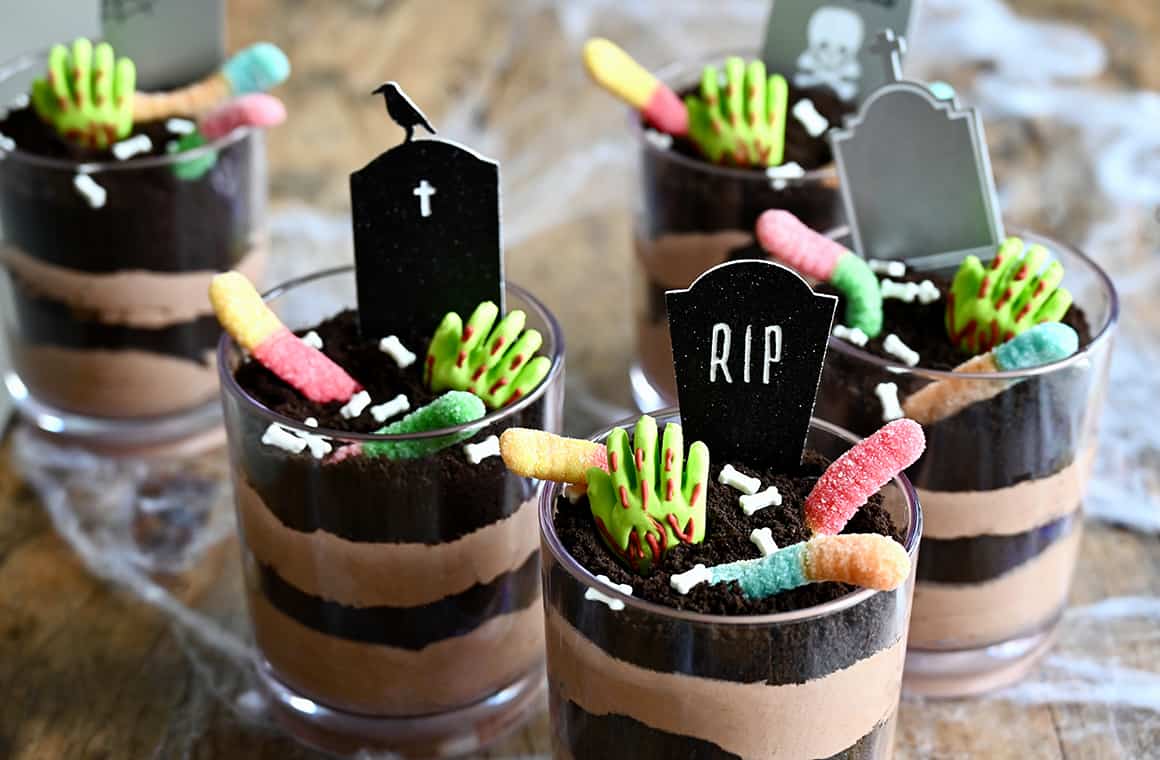
A classic quick-fix recipe for Halloween Dirt Cups does double-duty as the ultimate spooky sweet and festive tabletop décor! Creamy chocolate pudding, crushed chocolate cookies, gummy worms and more. It’s a kid-friendly dessert that’s sure to bring out the smiles and screams!
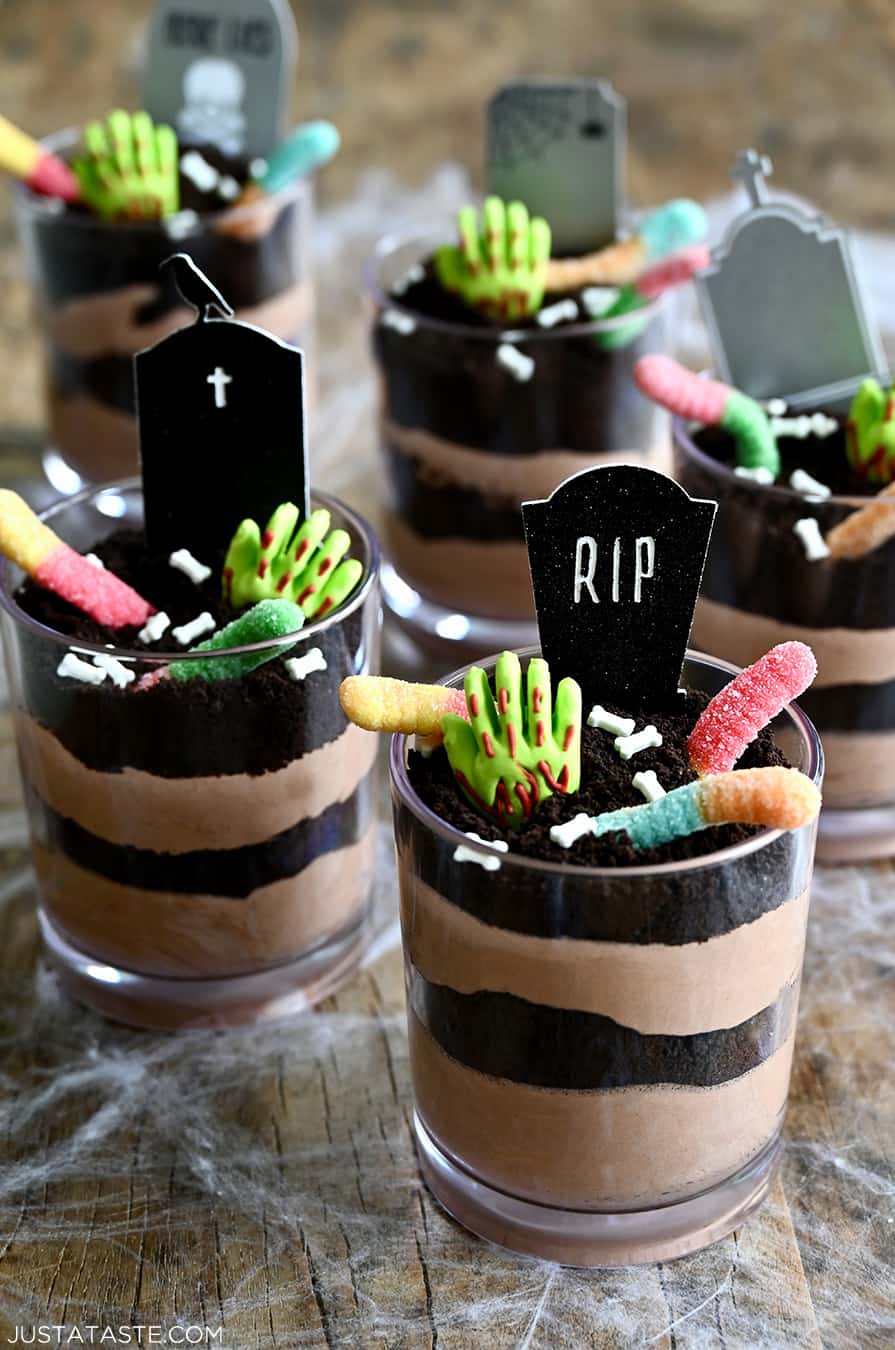
Dirt cups are one of those fun Halloween party desserts that adults are just as excited to eat as the kids. They have the delicious nostalgia of rich chocolate pudding, a crunch from chocolate cookie “dirt,” and all the classic, fun candy toppings like gummy worms, candy or meringue bones, and mummy hands.
With a sweet surprise in each creamy, chocolatey bite, my Halloween dirt cups recipe is the spooky sweet you can’t wait to serve at your next ghoulish bash.
How To Make Dirt Cups
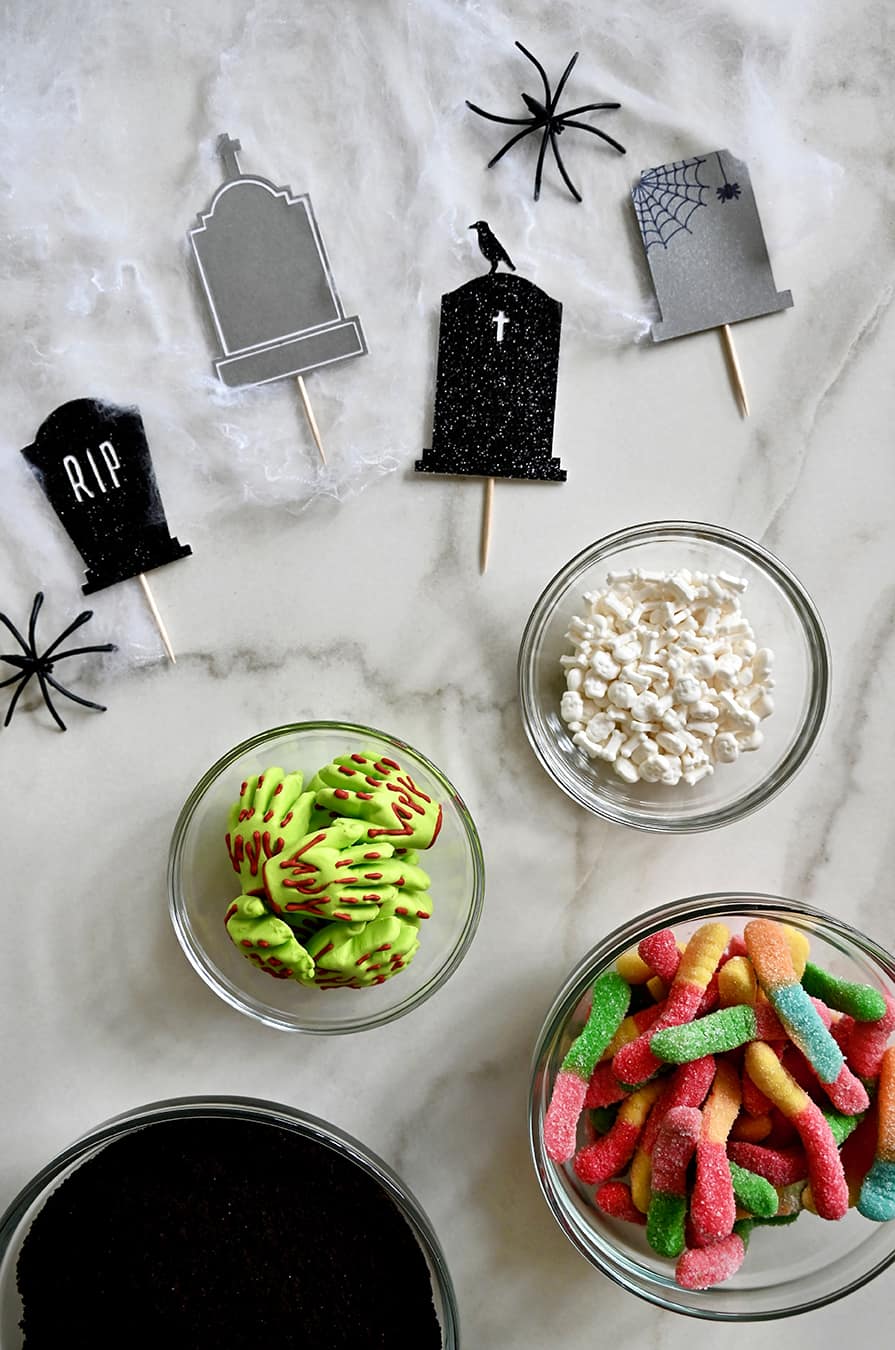
In a large bowl, whisk together the instant chocolate pudding mix and milk. Let sit until soft-set, about 5 minutes before folding in the whipped topping. Once the pudding has set, layer it with crushed Oreos (or chocolate wafers) in the serving cups of your choice. You can make individual puddings or one large trifle. Then it’s time to decorate with all the gummy worms, candy zombie hands and bones, and even cardboard tombstones!
What if My Pudding Doesn’t Set?
No need to worry! Maybe you added too much milk or stirred the pudding too little, but there are plenty of easy ways to fix a runny pudding. First, make sure the pudding is thoroughly mixed until there aren’t any lumps.
I like to slowly sprinkle more instant pudding or powdered sugar until I reach the desired consistency. Be sure to taste as you go if you opt for the powdered sugar route. A quick pop in the freezer for 10 to 15 minutes will also help the pudding thicken quickly.
How Far In Advance Can Dirt Cups Be Made?
The best part about Halloween dirt cups is that they actually get better if you make them ahead of time. You’ll need at least 2 hours of chill time for the pudding to fully set once it’s topped, but 24 hours of set time only improves these pudding cups.
You can absolutely make this dessert up to 2 days in advance, tightly sealing them with plastic wrap to store in the fridge. In general, you’ll want to eat these dirt cups within 3 days. After that, the cookies you use for layering will be less crunchy.
Dirt Cup Toppings
Wondering where to buy festive and flavor-packed dirt cup toppings? I’ve linked all of my favorites below!
- Easy Halloween Cupcakes with Chocolate Spiders
- Halloween Snack Mix
- Easy Halloween Hand Pies
- Halloween Chocolate Chip Cookies
- No-Bake Oreo Bat Cookies
- Frankenstein Rice Krispie Treats
Ingredients
- 1 (5.9-oz.) package instant chocolate pudding
- 3 cups whole milk, cold
- 3 cups store-bought whipped topping or homemade whipped cream
- 30 chocolate wafer cookies (See Kelly’s Note)
- Gummy worms, for decorating
- Candy bones, for decorating
- Candy mummy hands, for decorating
Instructions
- In a large bowl, whisk together the instant chocolate pudding and milk. Let sit until soft-set, about 5 minutes.
- Fold in the whipped topping then set the mixture aside.
- Crush the chocolate wafers in a food processor or sealable plastic bag until they resemble coarse crumbs.
- In serving bowls or glasses, layer the chocolate pudding and crushed chocolate wafers, ending with the chocolate wafers on top. Decorate with gummy worms, candy bones and candy mummy hands then serve.
Kelly’s Note:
- You can use classic chocolate wafer cookies or scrape the filling out from Oreo cookies.
- ★ Did you make this recipe? Don't forget to give it a star rating below!
Nutrition
Did you try this recipe?
Leave a comment below with your star rating!
This post may contain affiliate links.


I have tried to find a place to order the candy mummy hands and candy bones but cannot find them. Do you have a link where to order them from? Can ya hook a girl up!?
Hi Nora! Absolutely. Here’s an Amazon link to the zombie candy hands: https://amzn.to/3Xlfxyb
Made this for my son’s 2nd grade class. All of the kids loved the spooky snack! Thank you for this fun idea!
You are so welcome, Lacy! I’m thrilled everyone enjoyed the recipe!