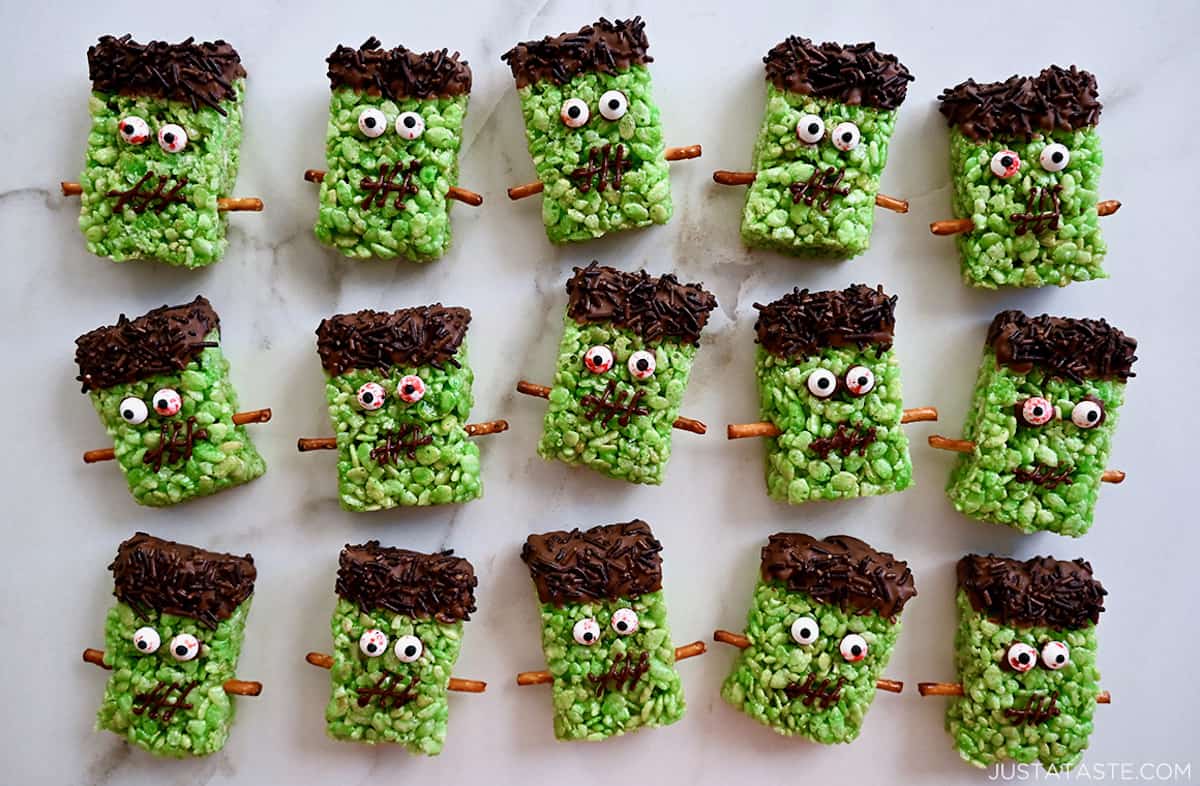
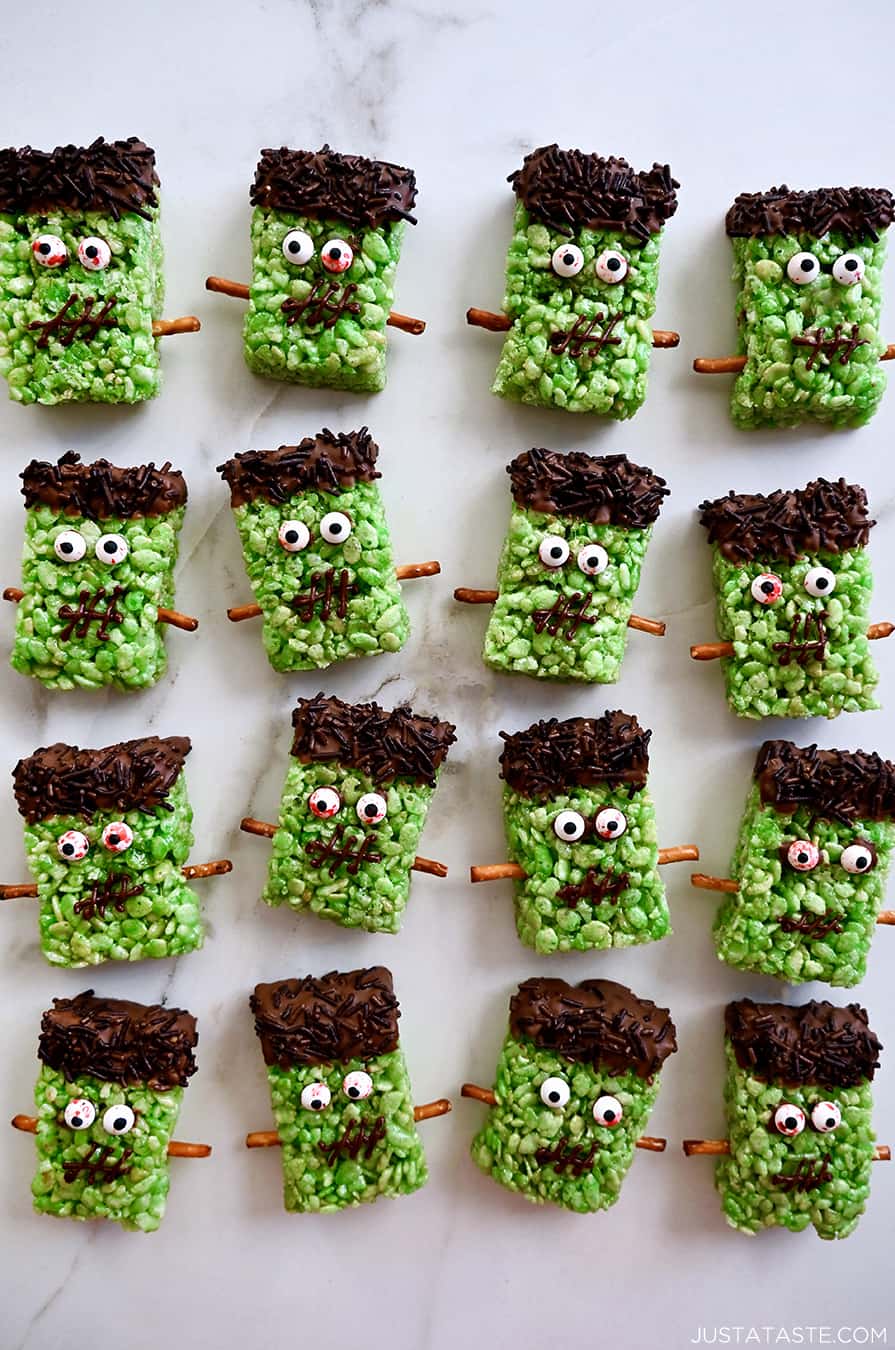
Transform classic marshmallow cereal treats into spooky Frankenstein Rice Krispie Treats perfect for Halloween! With melted chocolate, candy eyes, and pretzel bolts, these fun, easy treats will be a hit with kids and adults alike.

Table of Contents
These ghoulishly adorable snacks are not only easy to make but are sure to become a favorite for any goblin, ghoul or kiddo who tries them.
This recipe starts with basic marshmallow treats (melted butter, marshmallows and cereal). Then, it gets all Frankenstein-d with green food coloring, candy eyes and pretzel stick “bolts.” To create the monster’s mouth, you melt and drizzle on chocolate melting wafers. (You’ll use that same chocolate and sprinkles to make the hair, too.)
The hardest part about this soft, chewy treat is waiting 10 minutes for the chocolate to harden so you can eat it!
If you’re looking for more easy Halloween treats (because Frankenstein’s gotta have friends), try my No-Bake Oreo Bat Cookies and Easy Halloween Cupcake with Chocolate Spiders. Or maybe go all out with the green theme and make Frankenstein Marshmallow Pops.
Why You’ll Love This Recipe
- It’s fast. It takes just 20 minutes of prep time to make this dessert.
- It’s made with simple ingredients. The core ingredients are marshmallows, rice cereal, butter, green food coloring and chocolate melting wafers. You probably already have most of these items in your pantry!
- Creepy yet cute. Shaped like everyone’s favorite monster, they’re perfect for Halloween parties, gatherings or just as a fun project to do with kids.
- It’s no-bake. In about the time it takes for an oven to preheat, you’ll already have this spooky sweet well on its way.
- Unsalted butter: Eight tablespoons of butter gives these Rice Krispie treats their rich, buttery flavor. It also helps bind everything together with that signature gooeyness we all love.
- Mini marshmallows: Mini marshmallows melt faster, cutting down on cook time.
- Green food coloring: This is how you’ll get Frankenstein perfectly green! I prefer gel-based food coloring because it provides intense colors with just a few drops, unlike water-based options. Start with a few drops, give it a good stir, then add more as desired.
- Rice Krispies cereal: The classic cereal for Rice Krispie treats, of course.
- Pretzel sticks: For Frankenstein’s “bolts,” pretzel sticks work awesomely. Make sure you use the thin, small pretzel sticks, not rods.
- Chocolate melting wafers: Chocolate melting wafers are user to use than melted, regular chocolate because they have stabilizers in them, which makes them easier to melt (no seizing!) and for them to stay melted.
- Chocolate sprinkles: Chocolate sprinkles make Frankenstein’s hair. They are also delicious!
- Candy eyes: You can find candy eyes at most major grocery stores or online, such as the bloodshot candy eyes I used. If you have leftover eyeballs, use them in my Halloween Candy Bark.
See the recipe card for full information on ingredients and quantities.
It all comes down to my not-so-secret 8:8:8 ratio for perfectly soft and chewy cereal treats:
- 8 tablespoons unsalted butter
- 8 cups mini marshmallows
- 8 cups Rice Krispies cereal
Follow this easy-to-remember ratio and you’ll be snacking on extra-soft cereal treats that are equal parts chewy and delicious.
- Melt the butter. In a large, heavy-bottomed pot, melt the butter. Once the butter’s melted, add the marshmallows and stir until melted and smooth.
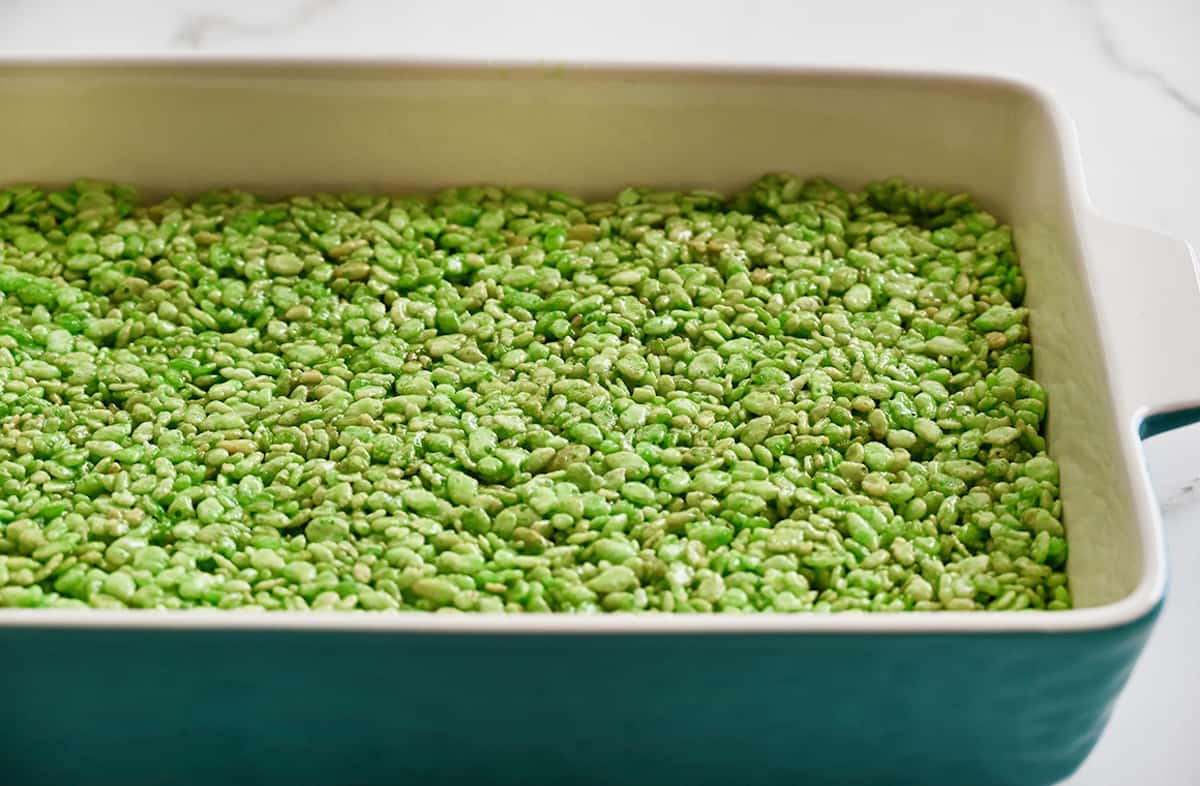
- Add the food coloring and Rice Krispies. Add the green food coloring to the marshmallow mixture until it’s green enough, then add the Rice Krispies and stir until the cereal is coated. Transfer the mixture to a 13×9-inch baking dish, then flatten the cereal until it’s in an even layer. Let cool for 15 minutes.
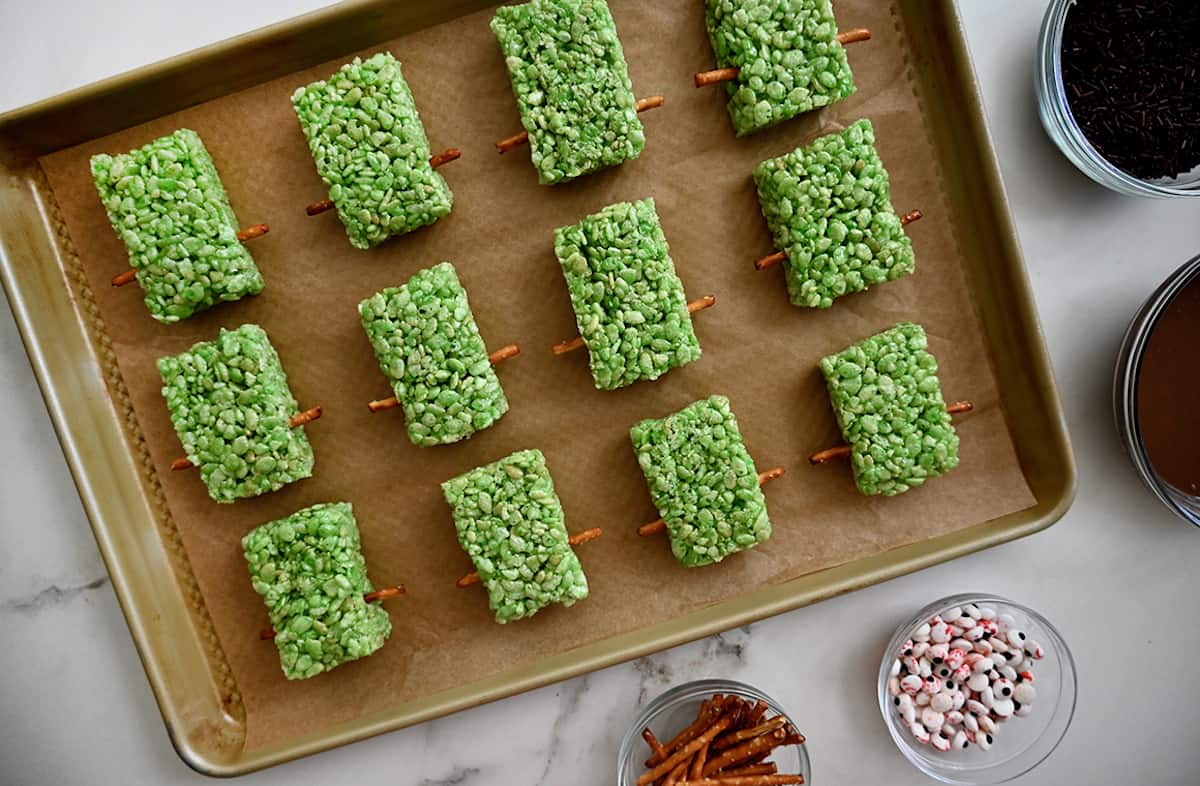
- Cut into rectangles. Invert the treats onto a cutting board, then cut into 12 or 18 rectangles.
- Make the bolts. Break each pretzel stick in half, then insert one half into each side of every rectangle.
- Melt the chocolate. Melt the chocolate until smooth. Dip the tops of the treats into the chocolate, then top with sprinkles.
- Add the mouth and eyes. Using the rest of the melted chocolate, affix the candy eyes to the treats (using a dot of chocolate to stick them on). Then, pipe candy mouths onto every rectangle. Wait until the chocolate is hardened (about 10 minutes) before enjoying.
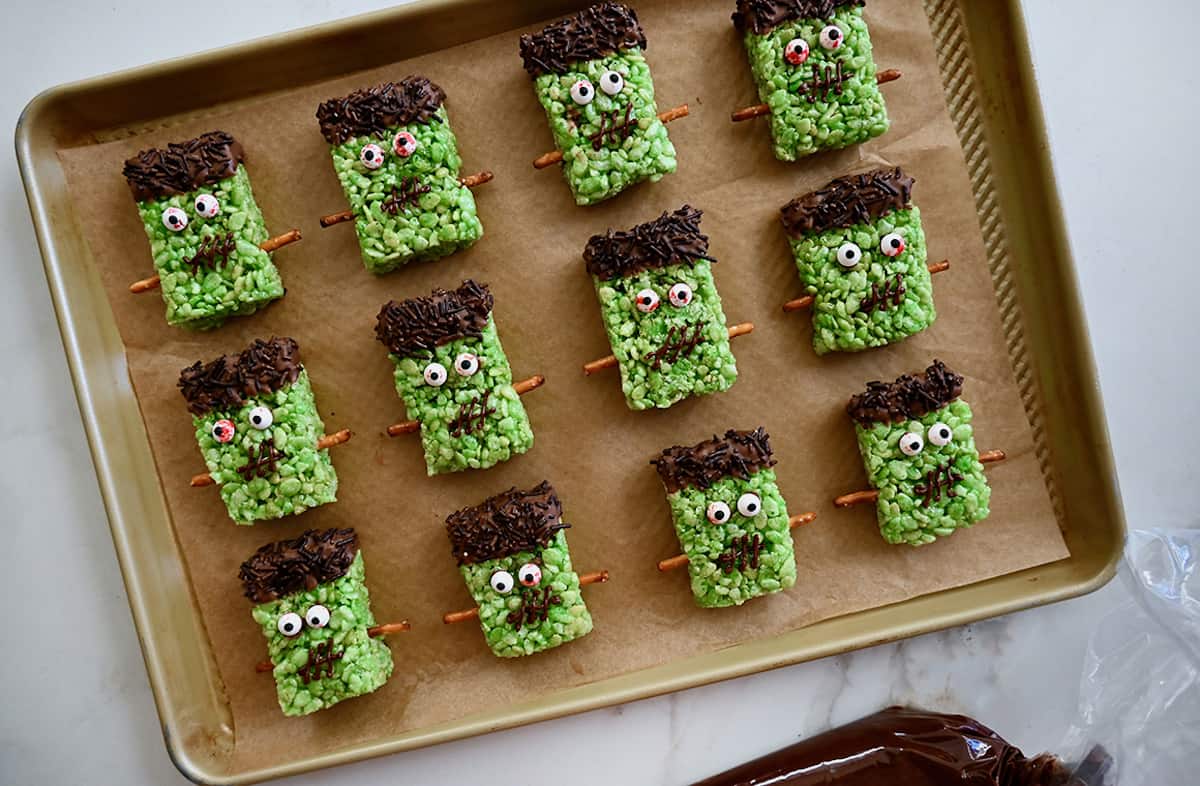
Pro Tip: To get neat-looking, crosshatched Frankenstein mouths, put the chocolate into a piping or zipperlock bag. Snip off the bottom of the bag, then pipe a horizontal line and a few diagonal lines onto each treat.
- Flattening the Rice Krispie Treats: An easy way to flatten Rice Krispie treats into an even layer is to use a piece of parchment or wax paper to press the marshmallow-cereal mixture down with your hands.
- Preventing Hard Cereal Treats: The two main culprits of cereal treats are not enough fat (i.e. butter) and too high of heat while cooking. Following my 8:8:8 ratio will solve the first issue, but it’s also important to keep an eye on that burner and not let the mallows get too hot or the sugars will cool firmer than desired.
- Go with Nonstick: If you’re worried about marshmallows sticking to your cookware, use a large nonstick pot. This will make it super easy to clean.
- For Evenly-Sized Treats: To make evenly sized Rice Krispie treats, make 2 horizontal cuts (dividing the treats into thirds), then make 4 or 6 evenly-spaced vertical cuts.
The key to keeping these Halloween marshmallow treats fresh is to store them in an airtight container at room temperature. You can use a plastic container with a tight-sealing lid or a resealable plastic bag. Make sure there is as little air inside as possible. They’ll keep for up to a few days.
If you need to stack the treats in the container, separate them with parchment paper or wax paper to prevent them from sticking together.
- Halloween Dirt Cups
- Leftover Halloween Candy Blondies
- Chocolate Halloween Cupcakes with Cream Cheese Frosting
- Easy Halloween Hand Pies
Ingredients
- 8 Tablespoons unsalted butter
- 8 cups mini marshmallows
- Green food coloring
- 8 cups Rice Krispies cereal
- Pretzel sticks
- 1 cup chocolate melting wafers
- Chocolate sprinkles
- Candy eyes
Instructions
- Add the butter to a large heavy-bottomed pot set over medium-low heat. Once the butter has melted, stir in the marshmallows and cook, stirring, until the mixture is smooth.
- Add food coloring until the mixture reaches your desired color then stir in the cereal until well-coated. Immediately pour the mixture into a 13×9-inch baking pan. (The pan does not have to be greased.) Flatten the cereal into an even layer then let the treats cool completely, about 15 minutes.
- Once the treats have cooled, invert them onto a cutting board and cut them into 12 or 18 rectangles.
- Break each pretzel stick in half, and then insert each half into the sides of the treats to form the "bolts" in Frankenstein's neck.
- Melt the chocolate per the package instructions until smooth. Dip the tops of the treats into the melted chocolate, and then immediately top with sprinkles.
- Use the remaining chocolate to adhere the candy eyes and pipe mouths. Let the treats set until the chocolate has fully hardened, about 10 minutes, then serve.
Kelly’s Notes
- An easy way to flatten Rice Krispie treats into an even layer is to use a piece of parchment or wax paper to press the marshmallow-cereal mixture down with your hands.
- The two main culprits of cereal treats are not enough fat (i.e. butter) and too high of heat while cooking. Following my 8:8:8 ratio will solve the first issue, but it’s also important to keep an eye on that burner and not let the mallows get too hot or the sugars will cool firmer than desired.
- If you’re worried about marshmallows sticking to your cookware, use a large nonstick pot. This will make it super easy to clean.
- To make evenly sized Rice Krispie treats, make 2 horizontal cuts (dividing the treats into thirds), then make 4 or 6 evenly-spaced vertical cuts.
- ★ Did you make this recipe? Don’t forget to give it a star rating below!
Nutrition
Did you try this recipe?
Leave a comment below with your star rating!
This post may contain affiliate links.


These were the perfect last-minute treat for Halloween! Thanks for such a fun and easy recipe, Kelly!
I’m so thrilled you enjoyed the recipe, Anita!