These easy homemade buttermilk biscuits are soft, fluffy and full of buttery layers—made from scratch with just 6 ingredients in under 30 minutes! If you’ve ever felt intimidated by biscuit-making, this foolproof recipe will change everything.
One reader, Jen, said: “This is hands down the easiest and best recipe for biscuits! And I learned what I’ve been doing wrong my whole life – the twist! I had no idea that’s why my biscuits never turned out. These were so good we had to go back to the store for more flour so that we could make more!! ⭐️⭐️⭐️⭐️⭐️“
Another reader, LC, said: “My husband made these this morning and they are perfection! They’re buttery and flaky; I told my husband he should make them every week for us! ⭐️⭐️⭐️⭐️⭐️“
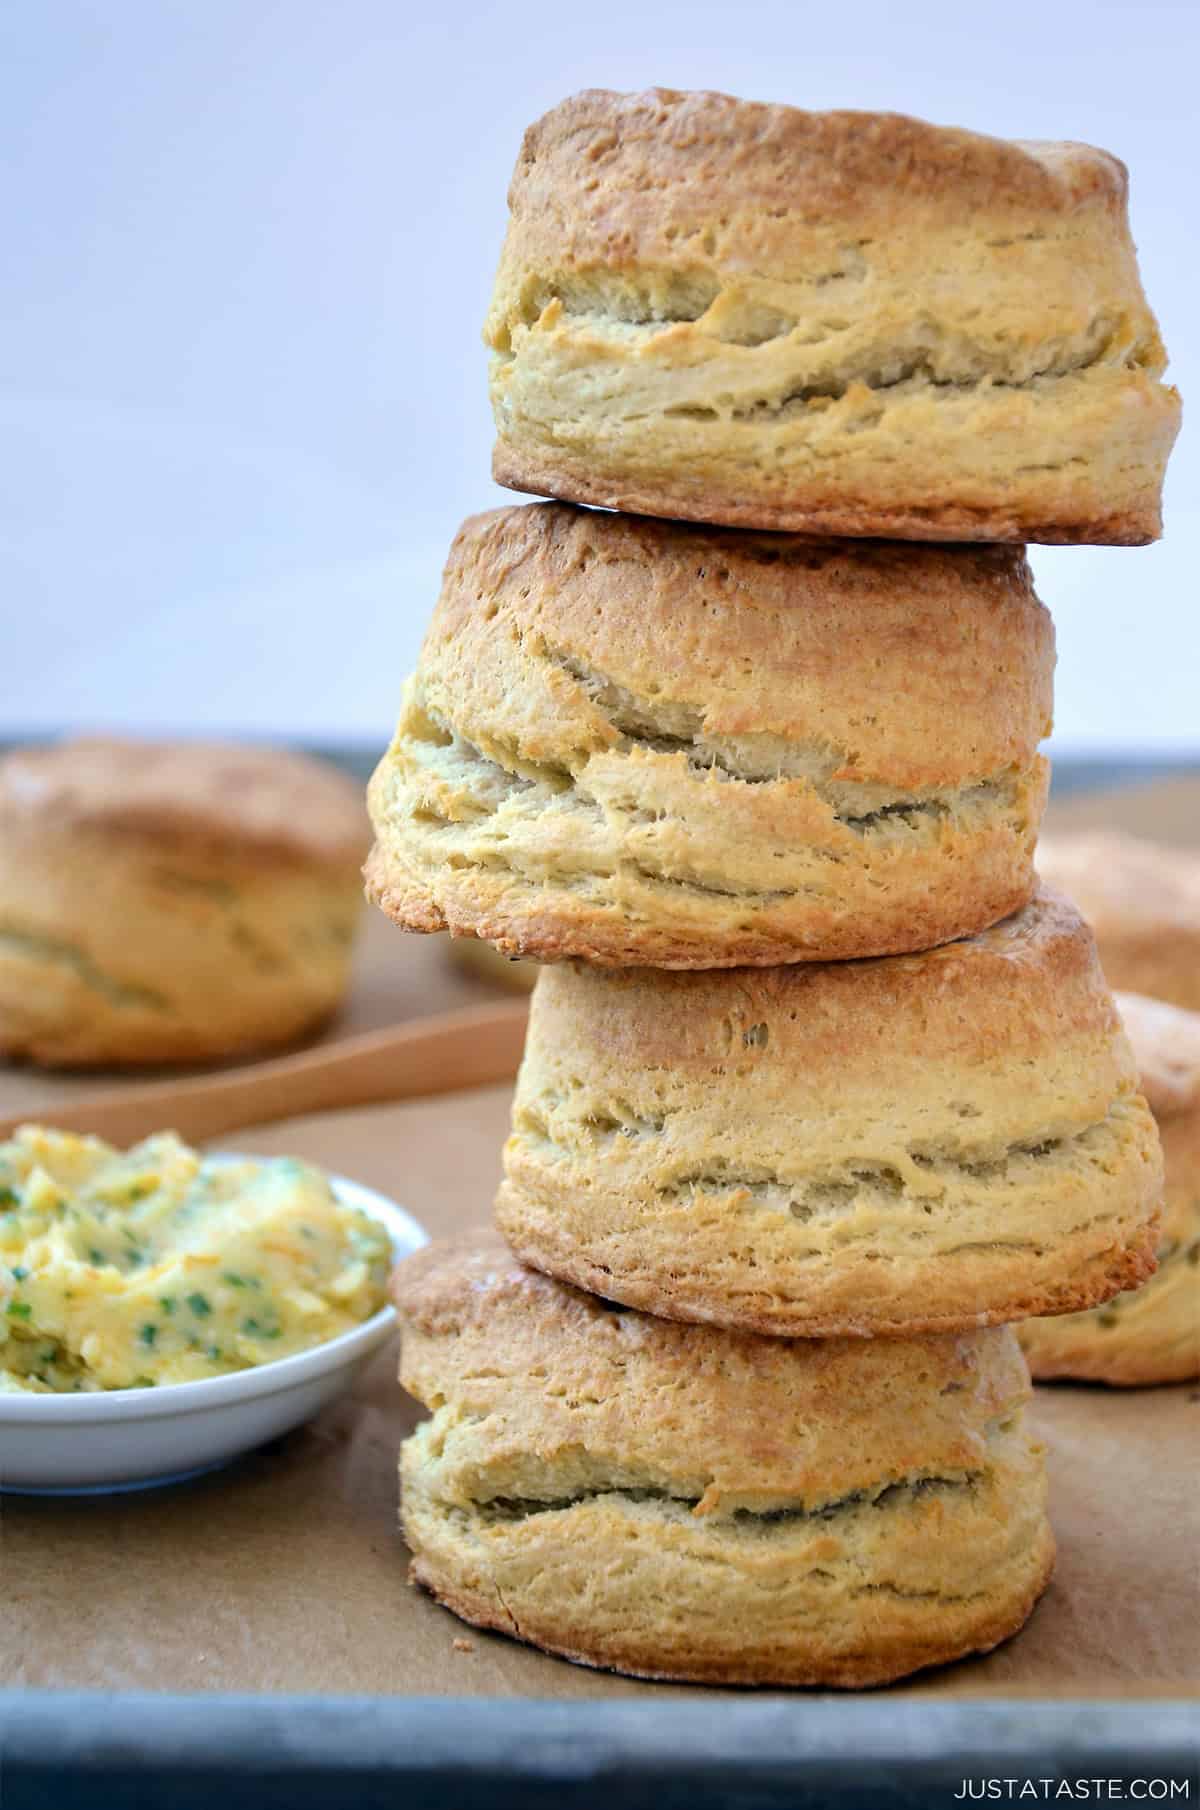
Table of Contents
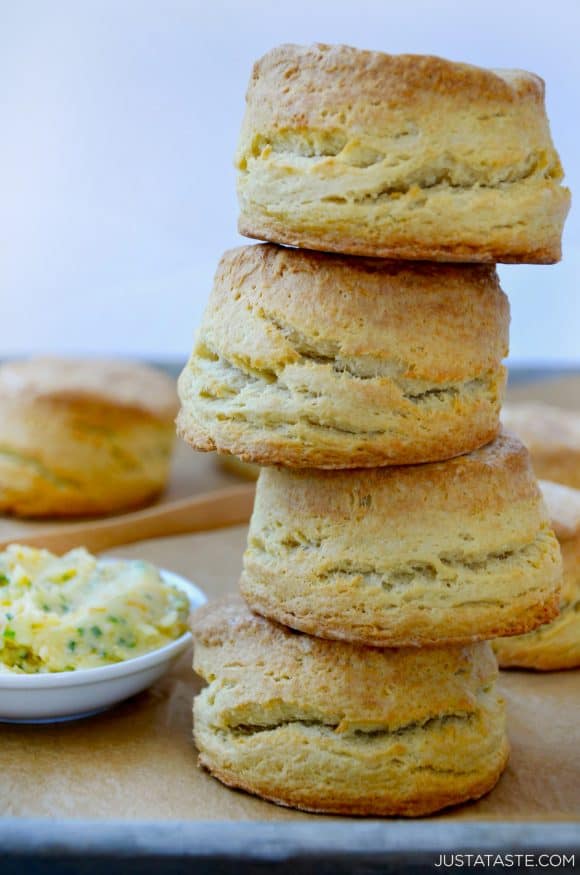
Six simple ingredients is all the separates you from that buttery tower of Easy Homemade Buttermilk Biscuits above. Just look at all those layers!
Buttermilk biscuits and I go way back to my elementary school days. My siblings and I would lunge for the tube of Pillsbury biscuits to see who could pop open the can with a single tug of the wrapper.
While the store-bought buttermilk biscuits were a childhood staple, it took me decades to realize how much additional buttery, flaky flavor I was missing out on by not making the biscuits from scratch.
But if baking anything from scratch makes you nervous, then this is the recipe for you. Six ingredients and a rolling pin bring these homemade biscuits to life.
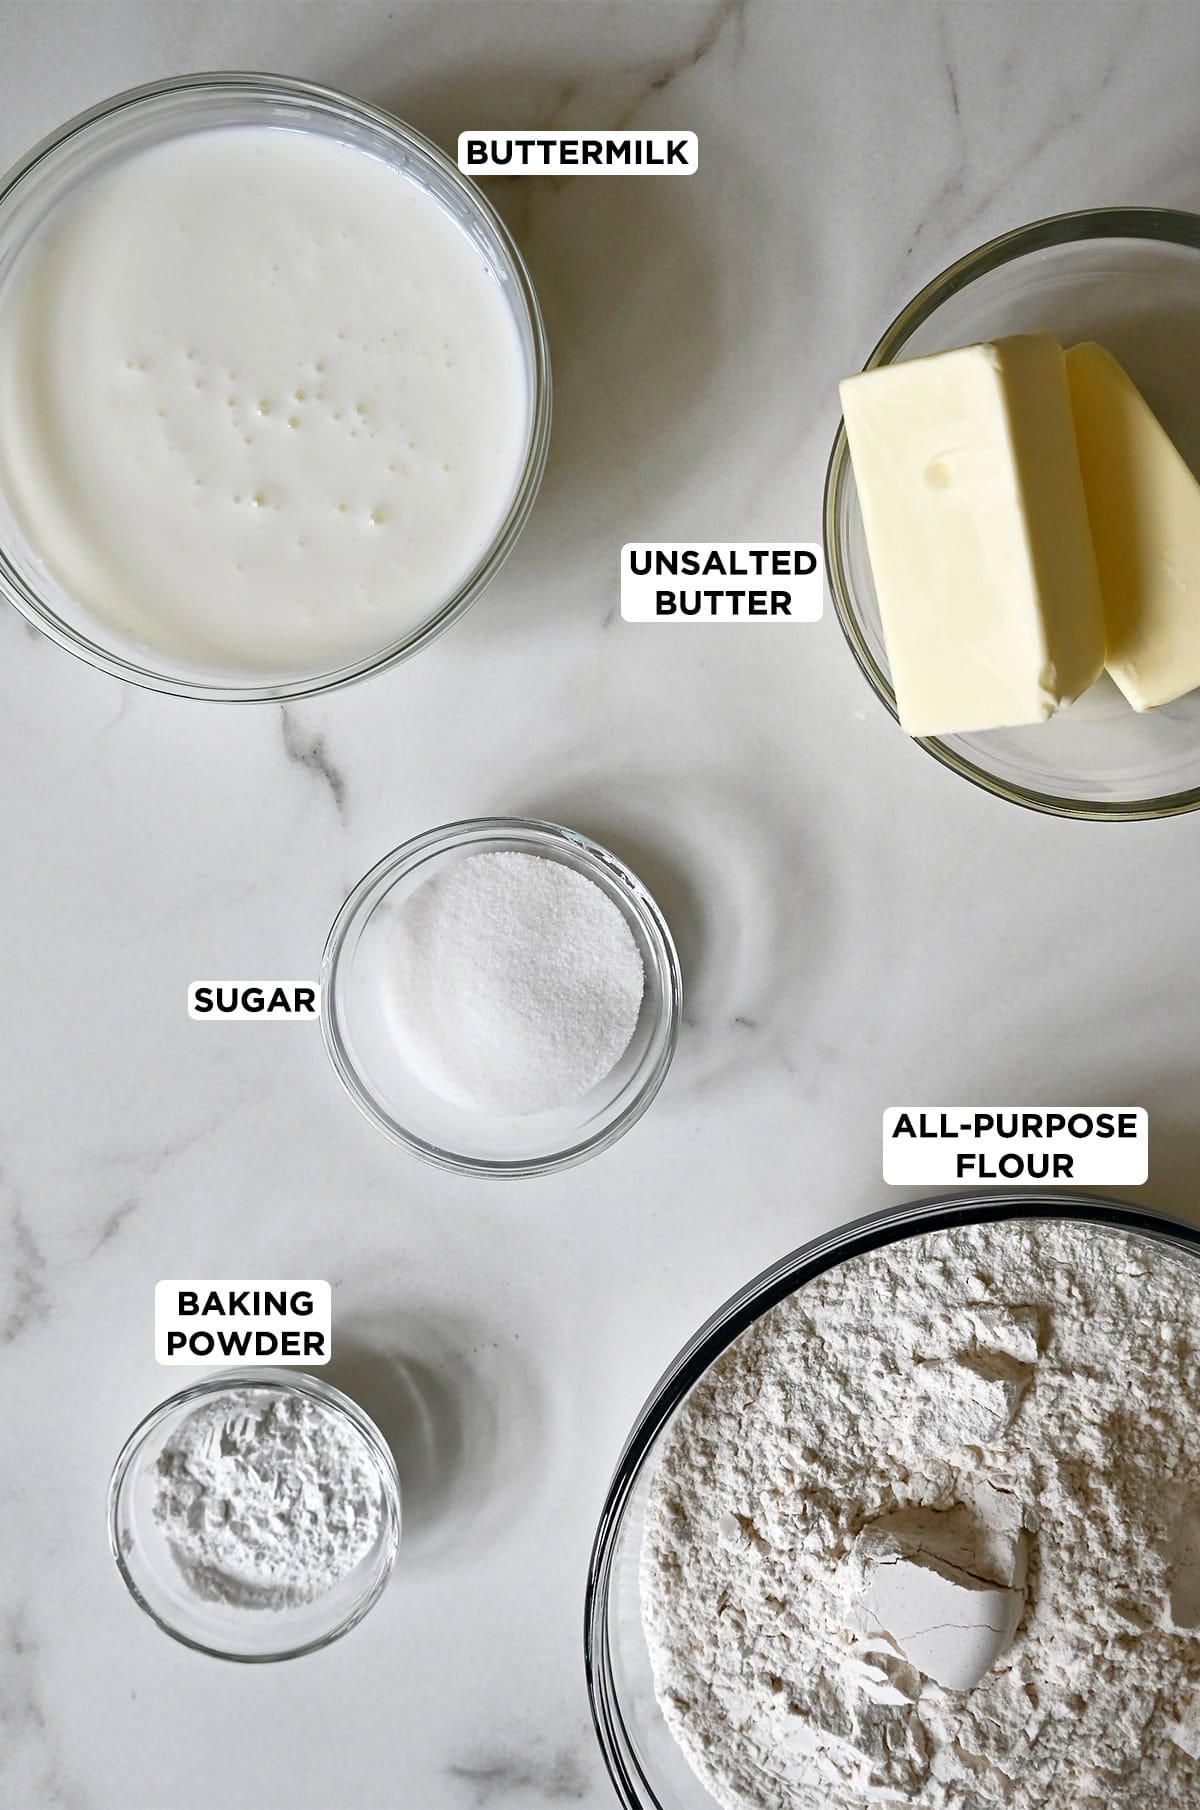
- All-purpose flour: I use all-purpose flour because it strikes the perfect balance between softness and structure. It’s sturdy enough to support all those buttery layers, but still gives you that tender, pull-apart texture you want in a biscuit.
- Baking powder: We’re leaning on this powerhouse leavener (yes, a full 2 tablespoons!) for that beautiful rise.
- Sugar: Just a touch of sugar helps balance the salt and brings out the richness of the butter. It won’t make your biscuits taste sweet, just well-rounded.
- Kosher salt: Enhances all the other flavors. I prefer kosher over table salt for its milder taste and how evenly it blends into the dough.
- Cold butter: Cold butter: For tall, flaky layers, cold butter is key. My go-to trick? Grating it. (Pop your sticks in the freezer for 10 minutes first — it makes the grating so much easier.) As those tiny bits of butter melt in the oven, they release steam, creating little pockets of air. That steam is what gives you a tender, airy inside and a crisp, golden exterior. It’s the same technique I use in my chocolate chip scones recipe.
- Cold buttermilk: Its acidity reacts with the baking powder to give your biscuits their rise. It also keeps them moist and tender inside, with just the slightest tang.
No buttermilk? No problem! I’ve got you covered with the five best homemade buttermilk substitutes for baking, including dairy-free options.
See the recipe card for full information on ingredients and quantities.
4 Tips for the Best Homemade Biscuits
There are four important tips that will guarantee homemade biscuit success:
- Be Grate: Grating the butter and then incorporating it into the flour ensures the fat is well distributed.
- Fold, Roll, Repeat: Folding, rolling and re-folding the dough as directed is what will allow all the layers to form, so don’t skip that step!
- Don’t Do the Twist: When using the cookie cutter, press down but do not twist, as twisting seals the biscuit edges and prevents them from puffing up properly in the oven.
- Chill Out: After cutting out the biscuits, it’s important to return them to the freezer so the butter gets a chance to re-solidify.
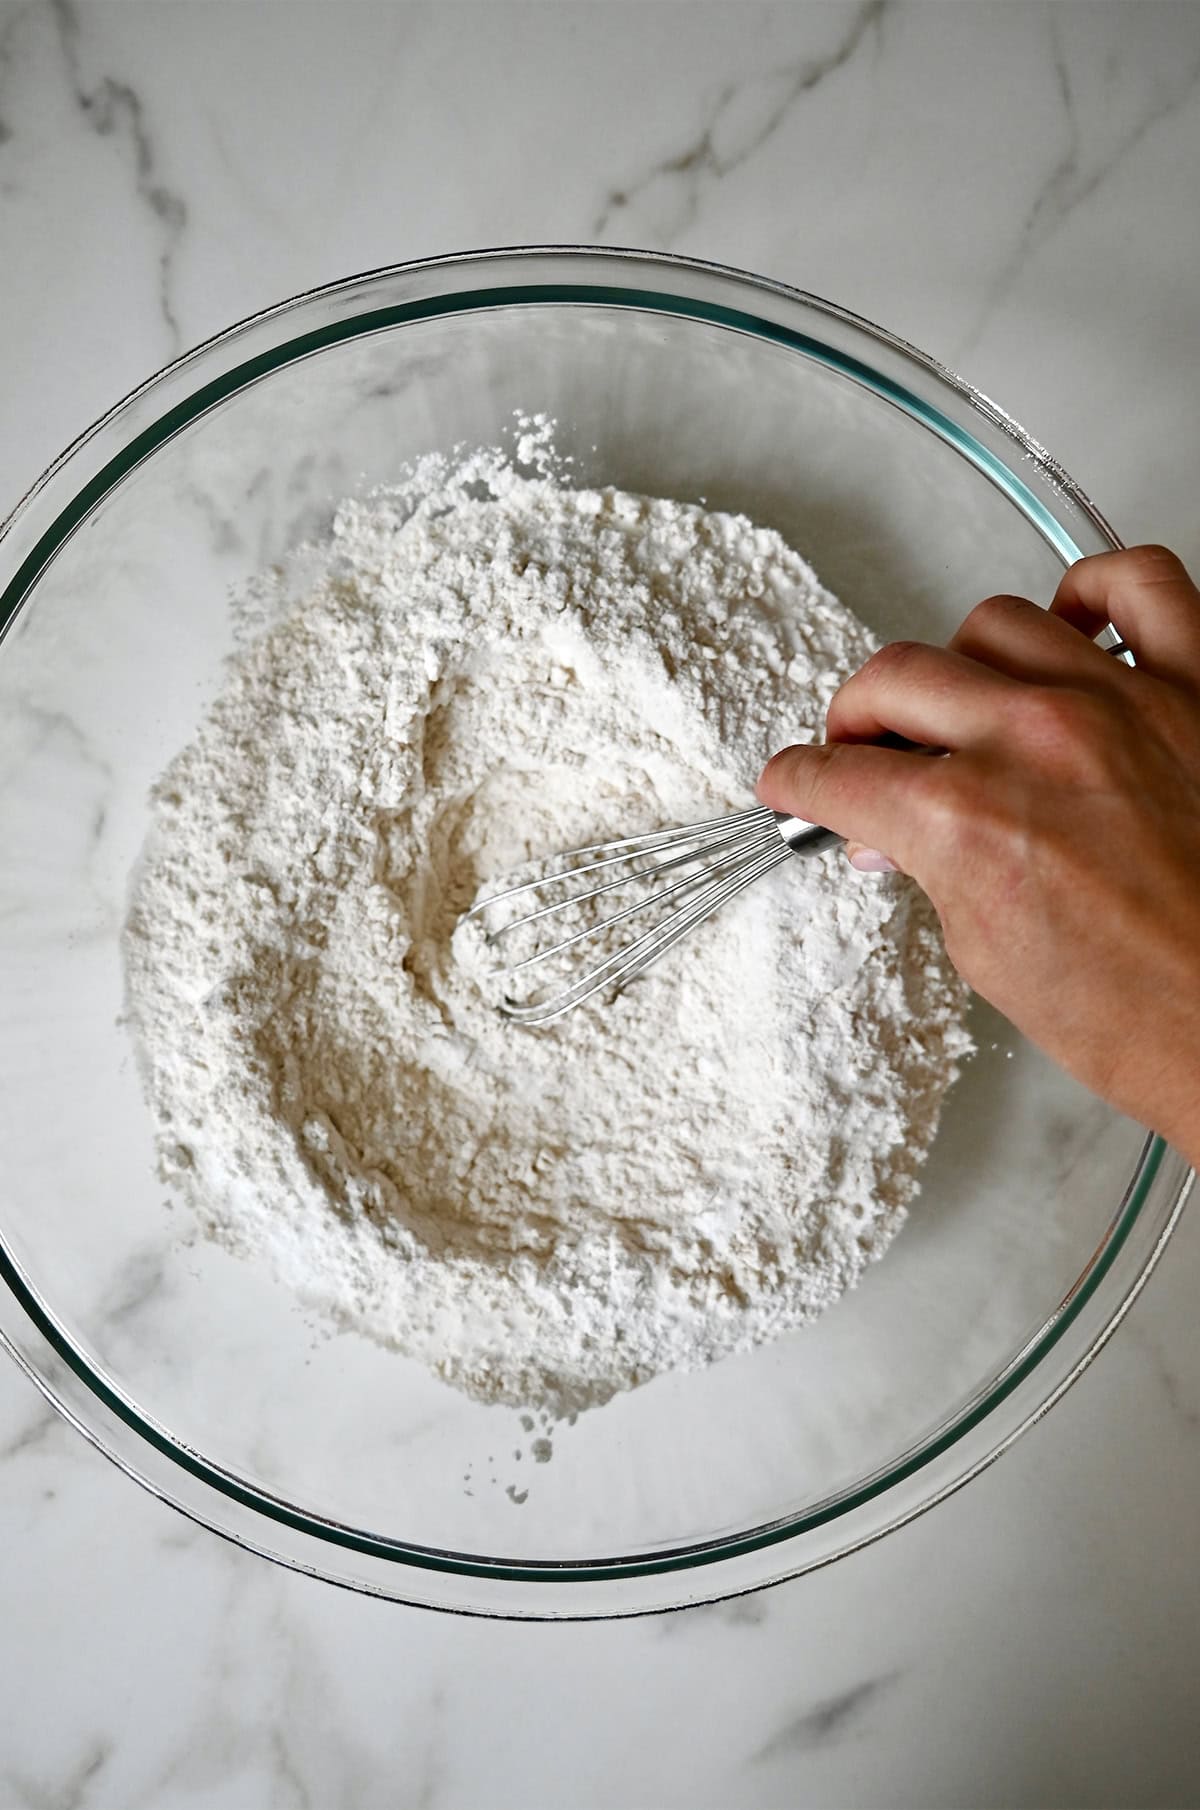
- Start with your dry ingredients. In a large mixing bowl, whisk together the flour, baking powder, sugar and salt. You want everything evenly distributed before adding any fat or liquid.
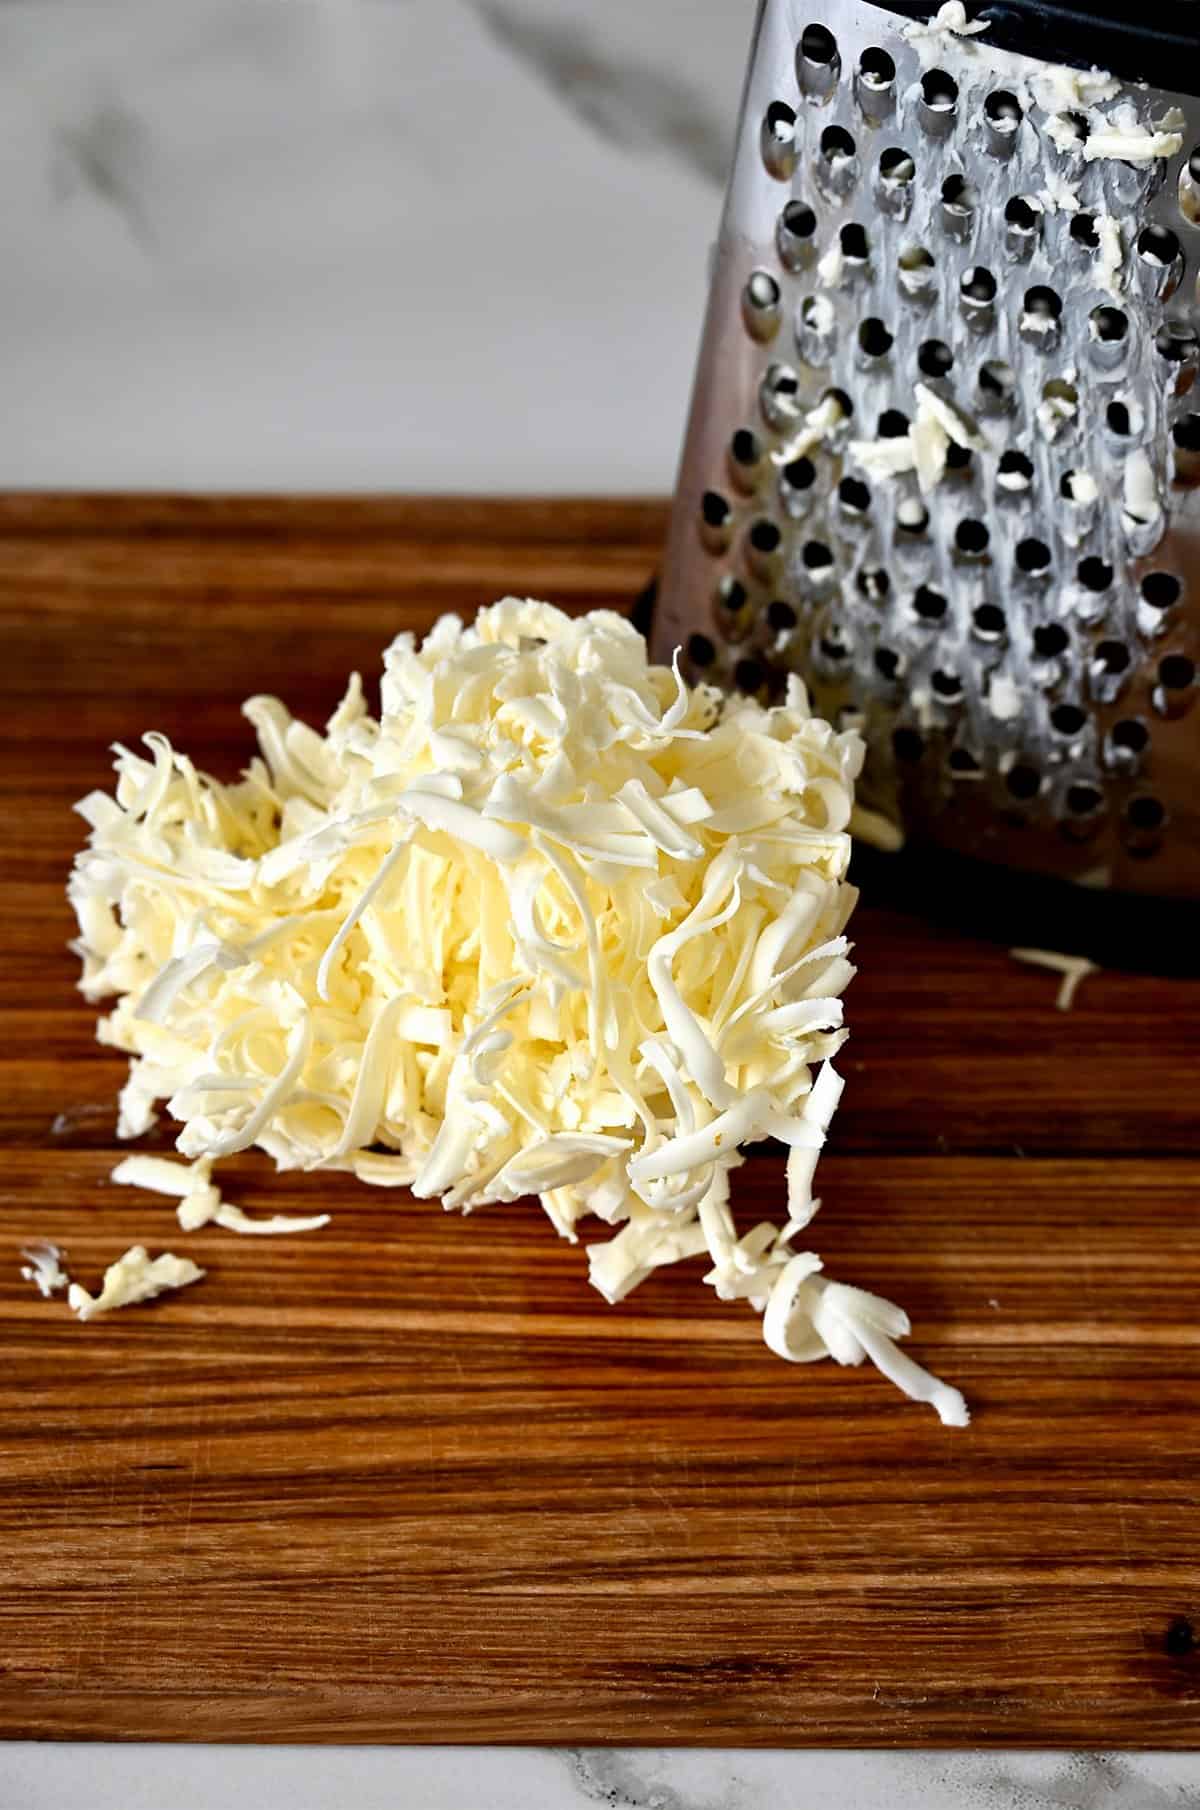
- Grate the butter. Instead of cubing the butter like in pie dough, I reach for a box grater and shred the butter right into the flour. It may sound odd, but this trick keeps the butter cold while helping it distribute evenly. Cold butter = flaky biscuits. Don’t skip it.

- Work the butter into the flour. Use your hands to gently toss the grated butter with the flour until the mixture looks shaggy and the butter is coated. You want little pebble-sized bits of butter throughout—these are what create pockets of steam and all those glorious flaky layers.

- Add the buttermilk. Pour in the cold buttermilk and stir just until you see a shaggy dough form. It should look a little rough and feel slightly sticky—that’s exactly what you want. Resist the urge to keep mixing! Over-mixing can make your biscuits tough instead of tender.
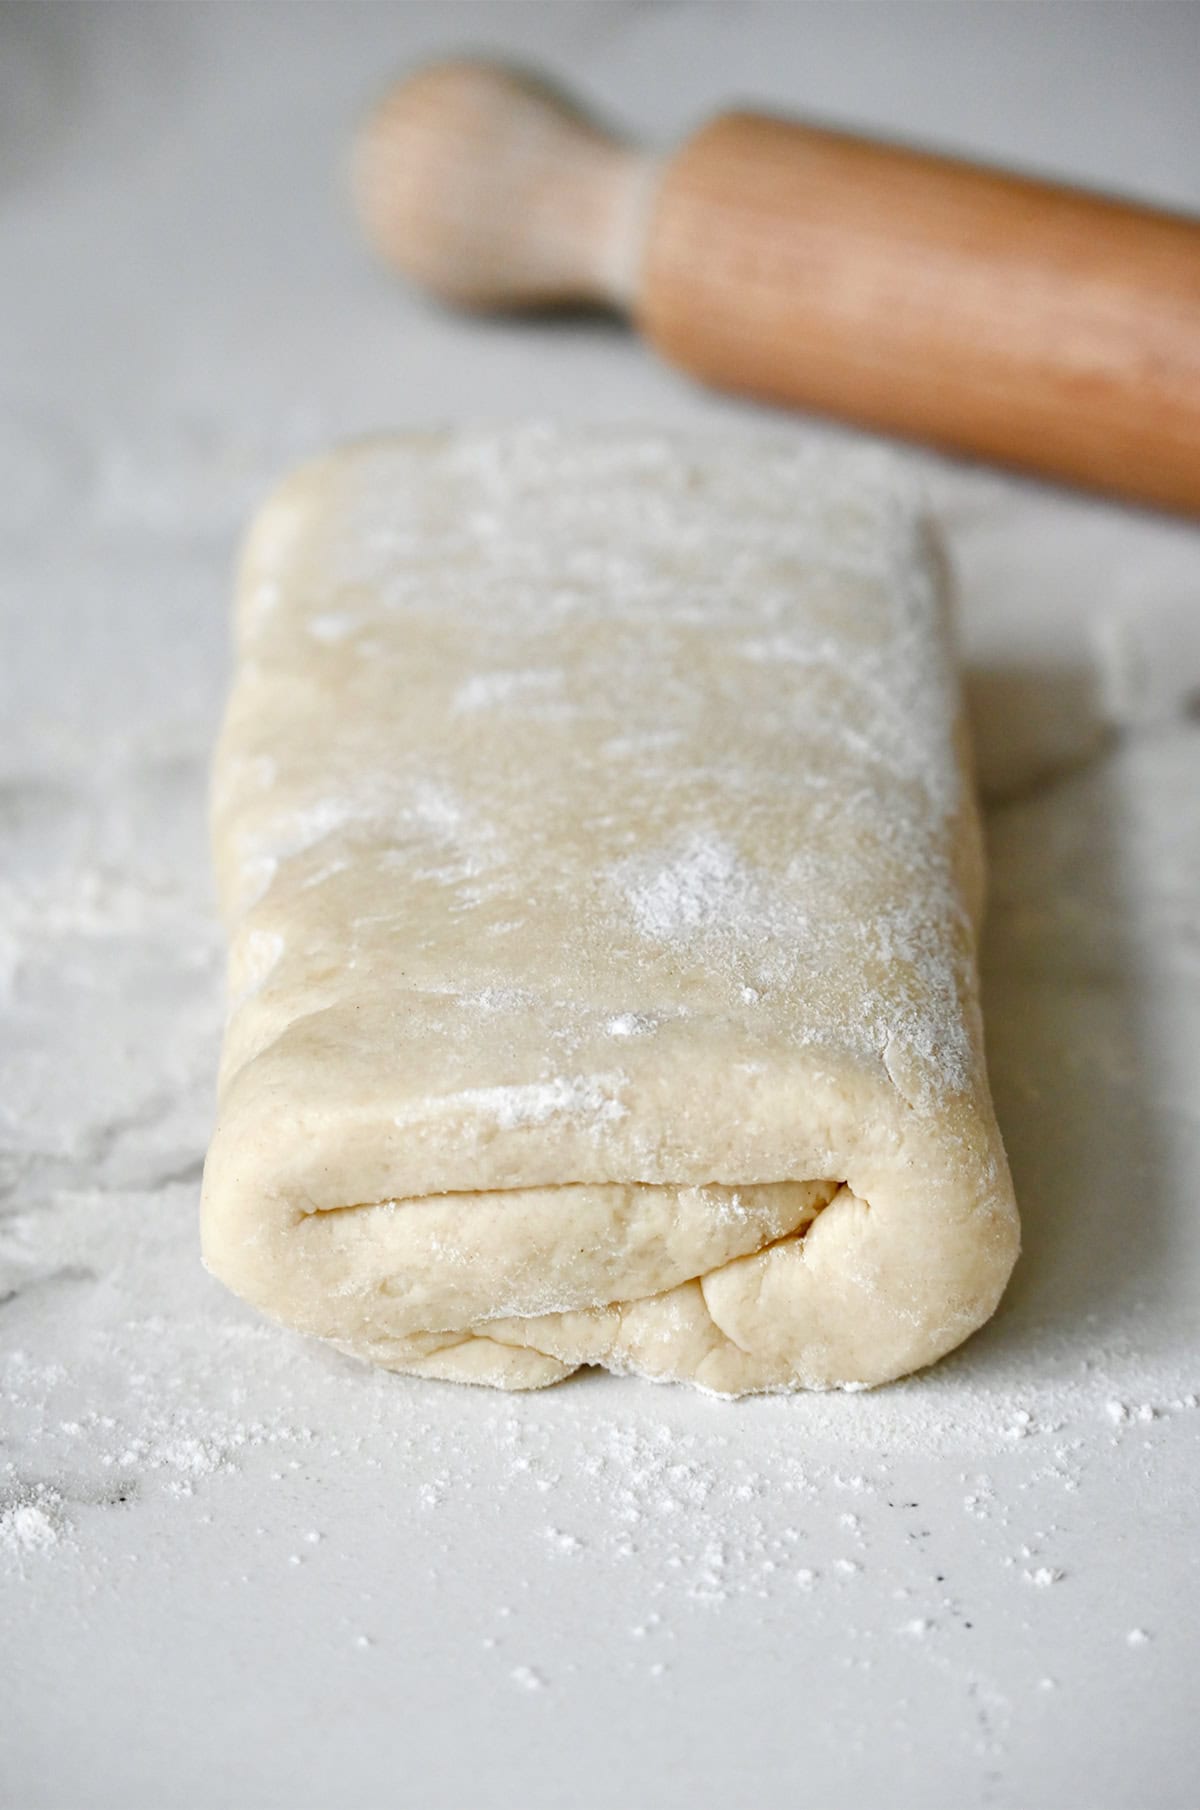
- Shape and fold. Turn the dough onto a lightly floured surface. Gently knead it a few times just until it comes together, then shape the dough into a rectangle, about 1/2-inch thick. Fold it in half, then in half again like a book. This quick fold creates layers without overworking the dough.
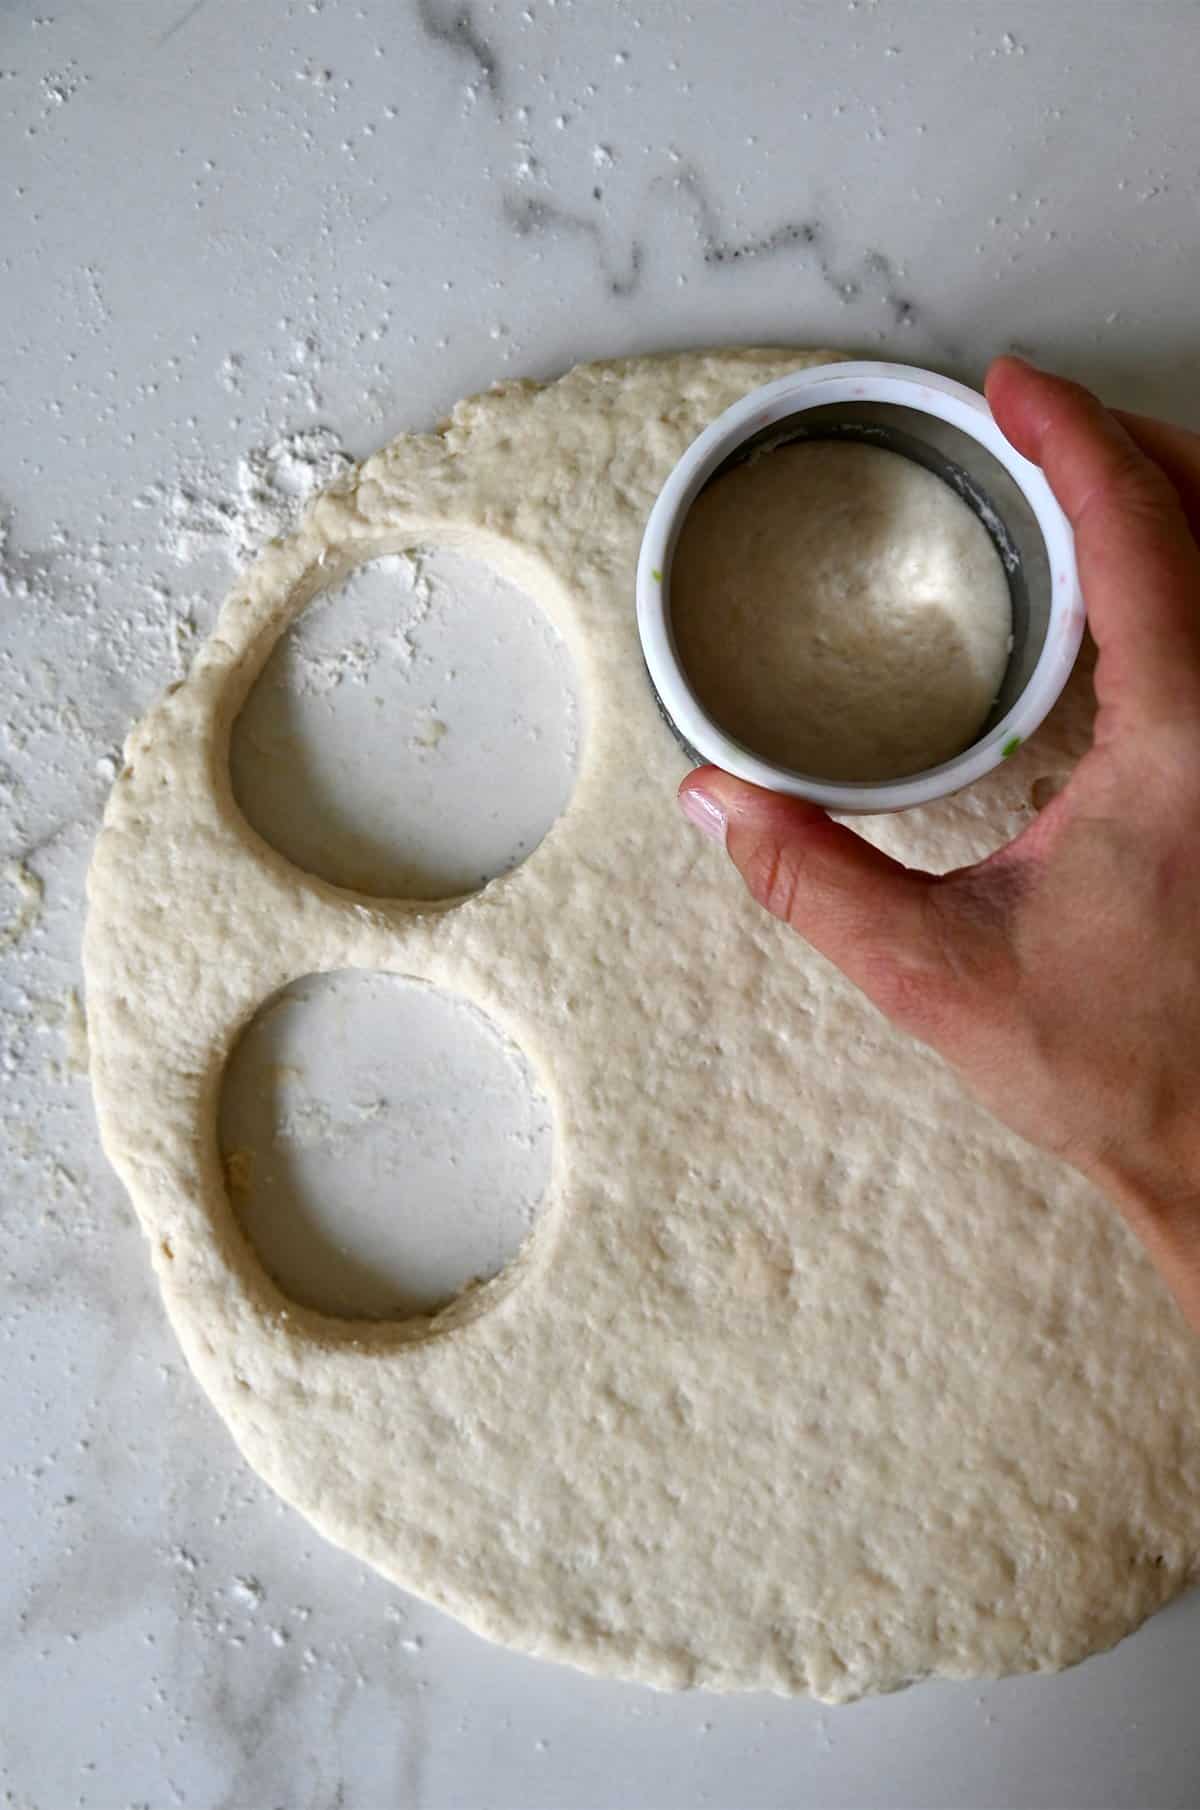
- Roll and cut. Once again, use a rolling pin to roll the dough into a rectangle about 3/4-inch thick, then cut into circles using a 3-inch biscuit cutter. Press straight down without twisting. Place the biscuits on a lined baking sheet. You can gently re-roll the scraps once, but don’t overdo it.
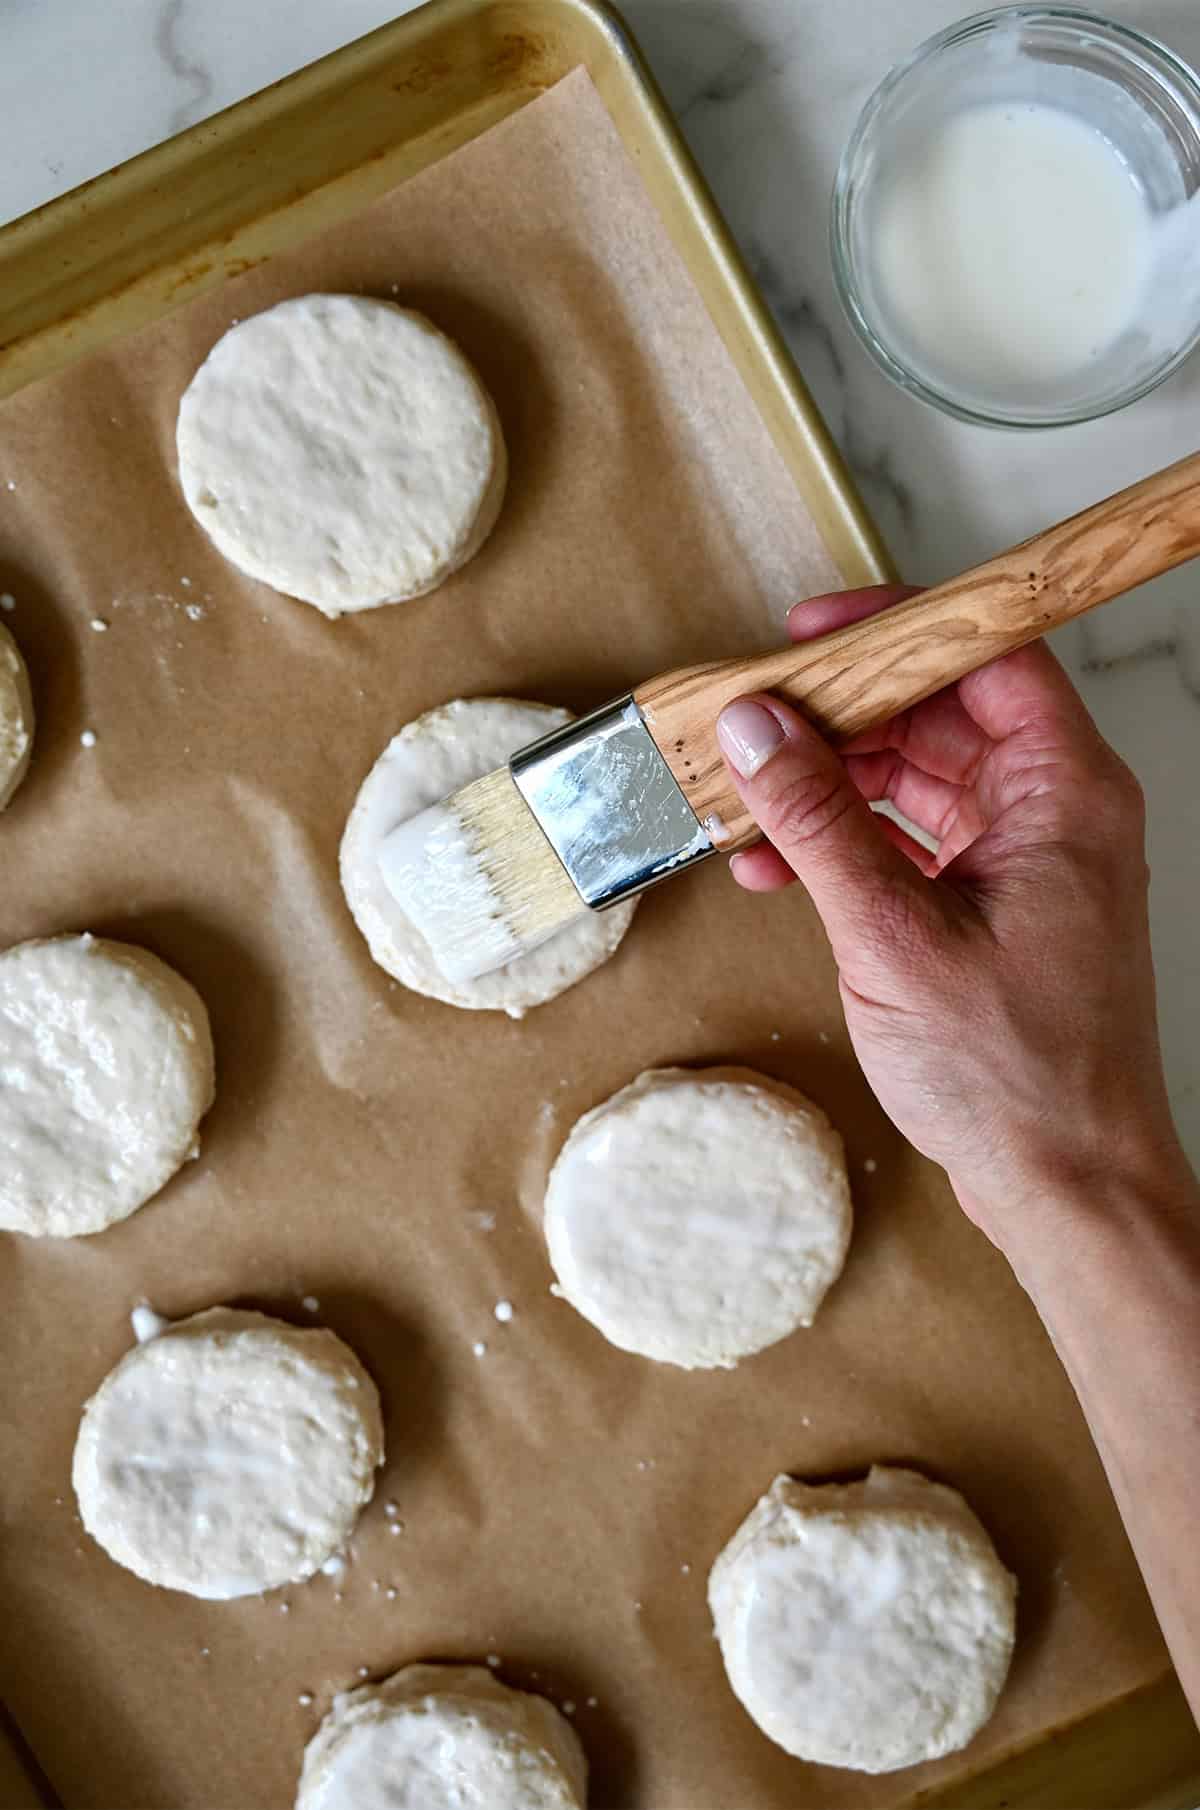
- Brush and chill. Brush the tops with a little buttermilk—this helps them brown beautifully. Then pop the tray in the freezer for 15 minutes while you preheat the oven. That cold blast firms up the butter again, which leads to extra flakiness in the oven.

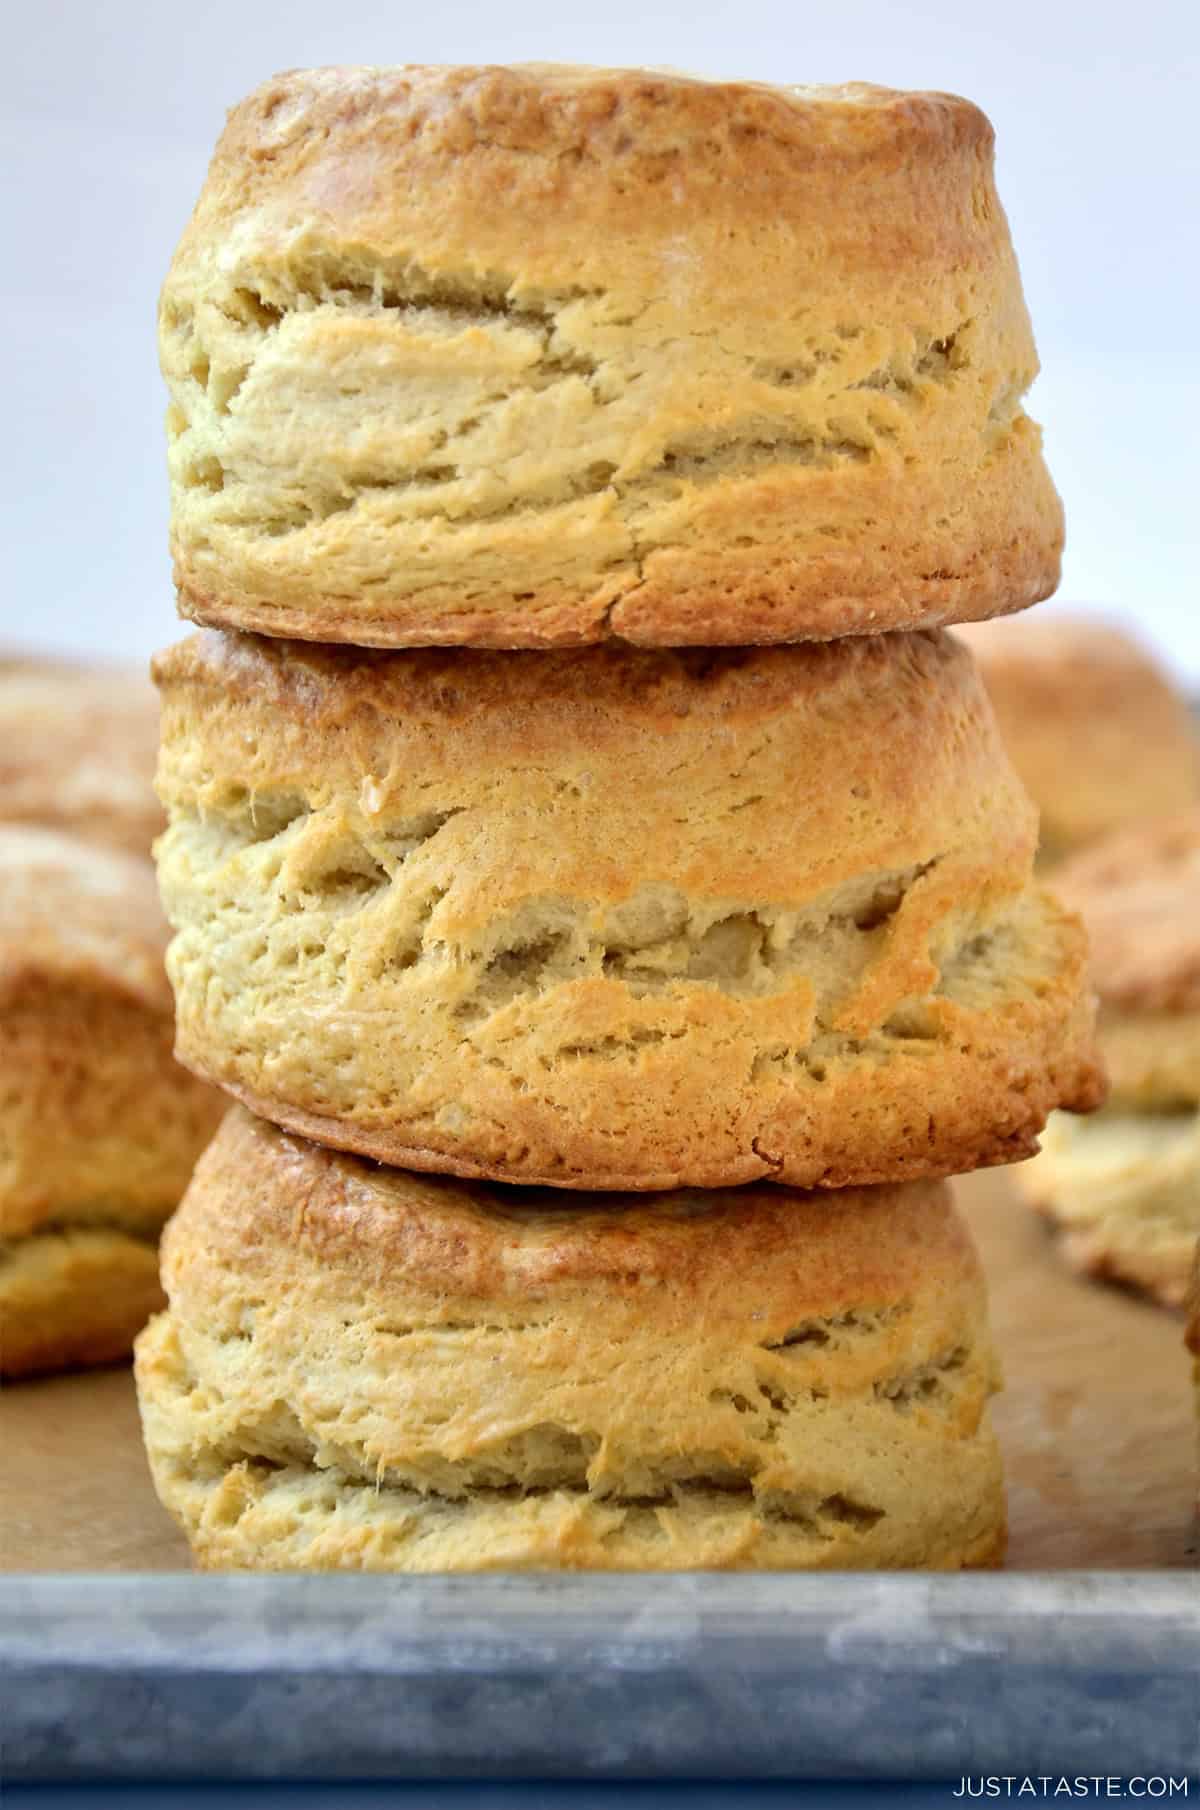
- Bake. Bake at 425°F for about 15 minutes, or until the tops are golden and the biscuits are sky-high and fluffy. Let them cool slightly before serving.
Serving Suggestions
These buttery, golden homemade biscuits are practically begging for something delicious on top. I love slathering them with my homemade honey butter, brightened with a touch of fresh orange zest and chopped chives. They’re also the perfect base for classic biscuits and gravy when paired with my favorite homemade sausage gravy. Or take the savory route with a stacked biscuit breakfast sandwich: fried eggs, smashed avocado, juicy tomato, peppery arugula, crispy bacon and melted cheddar. Yes, please!
Storage & Freezing Tips
- Room temperature: Once cooled, store biscuits in an airtight container at room temp for up to 3 days. I like to wrap them in foil or tuck them into a resealable bag to keep them soft and fresh. Warm biscuits in a 300°F oven for 5–7 minutes.
- Freezing baked biscuits: These freeze beautifully! Let the them cool completely, then freeze in a single layer until solid. Transfer to a freezer-safe bag and store for up to 2 months. Reheat straight from the freezer in a 325°F oven for 10–15 minutes, or until warmed through.
You can also freeze unbaked biscuits! After cutting out the biscuits, place them on a parchment-lined baking sheet and flash-freeze until solid. Wrap them tightly in plastic wrap or stash them in a freezer-safe bag for up to 3 months. Bake straight from frozen—just pop them onto a parchment-lined baking sheet and bake at 425°F for 20 to 25 minutes, or until puffed and golden.
More Biscuit Recipes to Love
Once you’ve got this easy buttermilk biscuit recipe down, it’s only the beginning. Because once you’ve tasted a flaky, buttery, golden, homemade biscuit still warm from the oven, there’s no going back.
My bacon-cheddar biscuits and extra-cheesy cheddar biscuits are our go-to for soups, stews, and everything in between. Come the holidays, my leftover turkey pot pie with a cheddar biscuit crust always makes an appearance. You’ll even find yourself whipping them up for dessert! From homemade strawberry shortcake or juicy peach cobbler topped with buttery thyme biscuits. And if you need them in a hurry, my drop biscuits have you covered.
Frequently Asked Questions
No worries! You can use a floured drinking glass or a sharp knife to cut the dough into squares or circles. Just avoid twisting the cutter or glass when pressing down, as this can seal the edges and prevent the biscuits from rising properly.
Buttermilk adds a unique tang and helps create those tender, flaky layers. If you don’t have any on hand, you can make a quick substitute: add 1 tablespoon of lemon juice or white vinegar to 1 cup of milk, stir, and let it sit for 5 minutes before using. Need more options? I share all my favorite swaps in this post: 5 Best Buttermilk Substitutes.
That’s a good sign! A shaggy, slightly sticky dough means you haven’t overworked it, which is key to tender biscuits. Once you gently pat it out, it will come together nicely.
Ingredients
For the biscuits:
- 4 cups all-purpose flour
- 2 Tablespoons baking powder
- 3 Tablespoons sugar
- 3/4 teaspoon kosher salt
- 1 cup unsalted butter, cold
- 1 1/2 cups buttermilk, cold, plus additional for brushing biscuits
Optional honey butter topping:
- 1/2 cup unsalted butter, at room temp
- 1 Tablespoon chopped fresh chives
- 1/4 teaspoon kosher salt
- 2 1/2 Tablespoons honey
- Zest of one orange
Instructions
Make the biscuits:
- Line a baking sheet with parchment paper or a Silpat baking mat.
- In a large bowl, whisk together the flour, baking powder, salt and sugar.
- Using a box grater, grate the cold butter into the flour mixture and gently use your hands to mix it together, working the butter into the flour mixture with your fingers.
- Stir in the buttermilk, mixing just until combined.
- Lightly flour your work surface. Transfer the dough to your work surface then gently knead it just until it comes together.
- Using a rolling pin, roll the dough until it is 1/2-inch thick. Fold it in half and then in half again (to form layers) then roll out the dough again until it is 3/4-inch thick.
- Using a 3-inch circular cookie cutter, cut the dough into biscuits then transfer them to the prepared baking sheet. (Scraps can be rerolled one time; See Notes)
- Brush the tops of the biscuits with buttermilk then place the baking sheet in the freezer for 15 minutes. (See Note.)
- Preheat the oven to 425°F.
- Bake the biscuits on the center rack for about 15 minutes or until they have risen and are golden brown. Remove them from the oven and allow them to cool slightly before serving with Honey Butter (recipe follows).
For the honey butter:
- Combine all of the ingredients in a small bowl and stir to combine.
- Refrigerate until ready to use.
Kelly’s Notes
- Make-ahead instructions: Prior to baking, the biscuits can be wrapped securely in plastic wrap and frozen for up to three months. There is no need to thaw them before baking. Simply arrange them on a parchment paper-lined baking sheet and bake them in a 425°F oven for 20 to 25 minutes or until they have risen and are golden brown.
- Cutting the biscuits: When cutting out the biscuits with a cookie cutter, simply press the cookie cutter down into the dough to form the biscuits. Do not twist it. Twisting the cookie cutter seals the edges of each biscuit and prevents them from properly rising while baking.
- Buttermilk: If you don’t have buttermilk, you can make a homemade buttermilk substitute. Add 1 tablespoon lemon juice or vinegar to 1 cup of milk—let it sit for 5 minutes before using.
- Storage: Once cooled, biscuits can be stored in an airtight container or resealable bag at room temp for up to 3 days. I like to wrap them in foil to keep them soft and tender.
- Biscuits and gravy: These fluffy biscuits were made for my homemade sausage gravy!
- ★ Did you make this recipe? Don’t forget to give it a star rating below!
Nutrition
Did you try this recipe?
Leave a comment below with your star rating!
This post may contain affiliate links.
Recipe by Just a Taste. Please do not reprint this recipe without my permission. If you'd like to feature this recipe on your site, please rewrite the method of preparation and link to this post as the original source.


My teenager requested biscuits and gravy. I’d had this recipe since early in the pandemic but had never made it as I was worried it’d be harder than it seemed. I decided to make them last night so I could just pop them in the oven today. Other than realizing I didn’t have enough baking powder and going on a late search for it (three attempts) these were as easy as you made them seem. Mine weren’t as thick, something to work on next time. Teen said they are so much better than those from the store-thank goodness. So good.
Yay! I’m so thrilled you enjoyed the recipe, Heather!
I made these biscuits a couple of times! First time I followed the recipe and they were really good. However, I realized that this recipe was a modified Puff Pastry recipe where the Baking Powder replaced the extra butter needed in Puff pastry: Puff pastry is basically 1 weight of flour to 1 weight of butter to half a weight of water + salt. One can see that that is a LOT of butter!! . . the butter is the leavening. So the second time I made the recipe I made it like I made puff pastry – I did not grate the butter, I simply chopped it up and incorporated CHUNKS of frozen (or very cold butter) into the flour and DID NOT “work the butter in to the flour mixture” – I left the pieces up to a half inch square – they can be easily seen as the dough is rolled out. I folded it and chilled it as instructed but the biscuits puffed up significantly more – you might want to try this. The butter sort of boils in between the layers making the biscuit puffy! The recipe is not different just the procedure. Either way, a great recipe! Thanks. PS – they (either procedure) really work well baked (at least 425) right out of the freezer. The high baking temp is critical.
Awesome! Thanks so much for your notes, David! I’m thrilled you’ve been enjoying the recipe.
My husband made these this morning and they are perfection! They’re buttery and flaky; I told my husband he should make them every week for us!
I’m thrilled you enjoyed the recipe!
Currently trying this receipe, however my dough came out soft after adding buttermilk.
I put the dough in the freezer should i add more flour?
Followed the measurements and use milk and vinegar as substitute for buttermilk
Hi there! You can just add more flour.
Kelly as a biscut maker from a young age, you have given me the biscut of my dreams. My father was always a good sport about what he called my sinkers. I think he’d really have loved my current biscuts. Thank you doesn’t seem enough. Jane
You are so welcome, Jane! I’m thrilled you enjoyed the recipe :)
This is hands down the easiest and best recipe for biscuits! And I learned what I’ve been doing wrong my whole life – the twist! I had no idea that’s why my biscuits never turned out. These were so good we had to go back to the store for more flour so that we could make more!!
Love this! I’m so thrilled you enjoyed the recipe, Jen!
Love these. Soo good even from frozen.
I’m so thrilled you enjoyed the recipe!
I can’t wait to try some of these and my 11 year old grandson is keen to help, its going to be a great weekend. Thaankyou for taking the time to put these receipes online.
You are so welcome, Jane! Enjoy baking with your grandson!
WOW. They really look Amazing. Like they could melt right in your mouth.
Making me hungry for some of these homemade biscuits and sausage gravy
Thanks so much, Colleen! I hope you enjoy the recipe!
Kelly, these biscuits look amazing!!!
Thank you so much, Sheenam!