
Nothing says “Happy 4th of July!” quite like an array of glittering Red, White and Blue Oreo Cookie Pops. These finger-friendly treats are the triple threat when it comes to entertaining with ease: They take just minutes to make, don’t require an oven, and, perhaps best of all, can be made up to a day in advance.
The setup couldn’t be simpler: Combine your Oreo cookie flavor of choice with tangy cream cheese in a food processor, then roll the mixture into balls, skewer them with lollipop sticks, dunk them in candy melts and finish ’em off with a shower of sprinkles. The result is a crowd-friendly dessert that does double duty as tabletop décor! Put them on display at your summer barbecue or wrap one or a few in cellophane paper for an edible party gift.
Looking for more ways to add red, white and blue flair to your 4th of July feast? Don’t miss recipes for Patriotic Pavlova with Watermelon Stars, Red, White and Blue Cheesecake Parfaits, American Flag Cookie Cake and more sweet treats.


Craving more? Subscribe to Just a Taste to get new recipes, meal plans and a newsletter delivered straight to your inbox! And stay in touch on Facebook, Twitter, Pinterest and Instagram for all of the latest updates.
Disclosure: This post contains affiliate links.
Ingredients
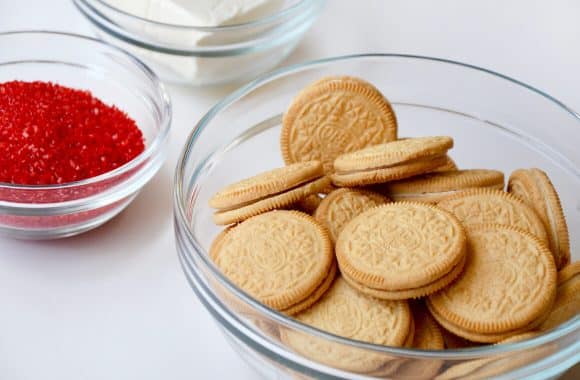
- 18 Golden Oreo Cookies (or other sandwich cookies with cream filling)
- 4 ounces cream cheese
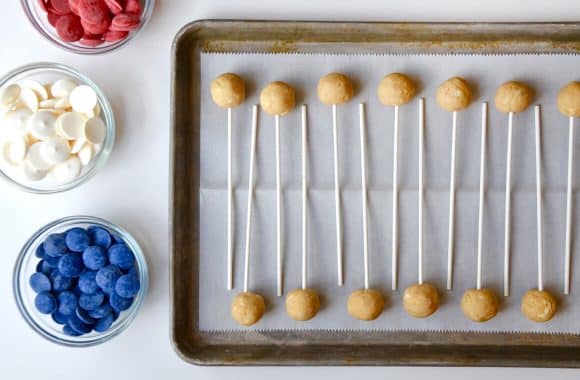
- 1 cup red candy melts
- 1 cup white candy melts
- 1 cup blue candy melts
- Red, white and blue sprinkles, for topping
Equipment:
- Food processor; Lollipop sticks
Instructions
- Add the sandwich cookies to the bowl of a food processor and pulse just until roughly chopped. Add the cream cheese and continue pulsing until the mixture is smooth and there are no large visible pieces of cookie.
- Line a baking sheet with parchment paper. Using your hands, pinch off pieces of the mixture and roll it into 1-inch balls. Arrange the balls on the baking sheet then insert a lollipop stick into each and freeze them for 20 minutes.
- Once the cookie pops have hardened, melt the red, white and blue candy melts in separate bowls according to package instructions. Dip the chilled cookie pops into each of the candy melt colors, shaking off any excess, and then immediately top them with the corresponding red, white or blue sprinkles.
- Return the cookie pops to the baking sheet. Refrigerate them an additional 5 minutes until the candy melt has fully hardened then serve. (See Kelly's Note.)
Kelly's Note:
- To avoid a flat edge, insert the cookie pops into a styrofoam block to chill standing upright.
- ★ Did you make this recipe? Don't forget to give it a star rating below!
Nutrition
Did you try this recipe?
Leave a comment below with your star rating!
This post may contain affiliate links.
Recipe by Kelly Senyei of Just a Taste. Please do not reprint this recipe without my permission. If you'd like to feature this recipe on your site, please rewrite the method of preparation and link to this post as the original source.


These are addicting! Over-mixed the first batch, but nailed it on the second. Thanks for this fun, kid-friendly recipe!
So glad you enjoyed the recipe, Lesley!
I wanted to make more so I made a double batch but it’s like the 8 oz of cream cheese was still too much for the 36 cookies. It’s way too sticky and won’t roll into a ball. Add more cookies maybe?
Hi Heidi – Did you over-process the mixture? It shouldn’t be too sticky if you blend it just until combined.
how long will be the shelf life of the cookie pops?
thanks.
Hi Joy! You can refrigerate the pops in an airtight container for up to 3 days.
I am a diabetic & I’m asking if you could give the number of carbs alongalong with serving size please? Both are equally important to me for controlling my sugar intake. And stop me (hopefully!) fr giving myself too much or too little.
Laura Allen
Hi Laura! Thanks so much for your comment. I’m not a nutritionist so unfortunately I cannot provide that info, as I’d have no way of guaranteeing it’s 100% accurate, which is super important to me!
Directions don’t say when to add lemon juice and lemon zest.
I assume they would be added to the mixture in the food processor.
Apologies, Bob! I’ve removed the lemon juice and zest from the ingredient list. You could add it if you’d like but it was an error in the list. Thanks for letting me know!
Hi Kelly
The lemon zest an d juice made them awesome! Although, you mentioned that you added in error, do you remember the qualities for both? I would like to remake these with the lemon.
Thanks for any help
Hi Sarah! Absolutely! It was 1 tablespoon lemon juice + 2 teaspoons lemon zest. Enjoy!
please add
I would like to receive new recipes, as I enjoy cooking vegetarian food.
Hi Karen – You can sign up to receive new recipes to your inbox here: https://www.justataste.com/subscribe