
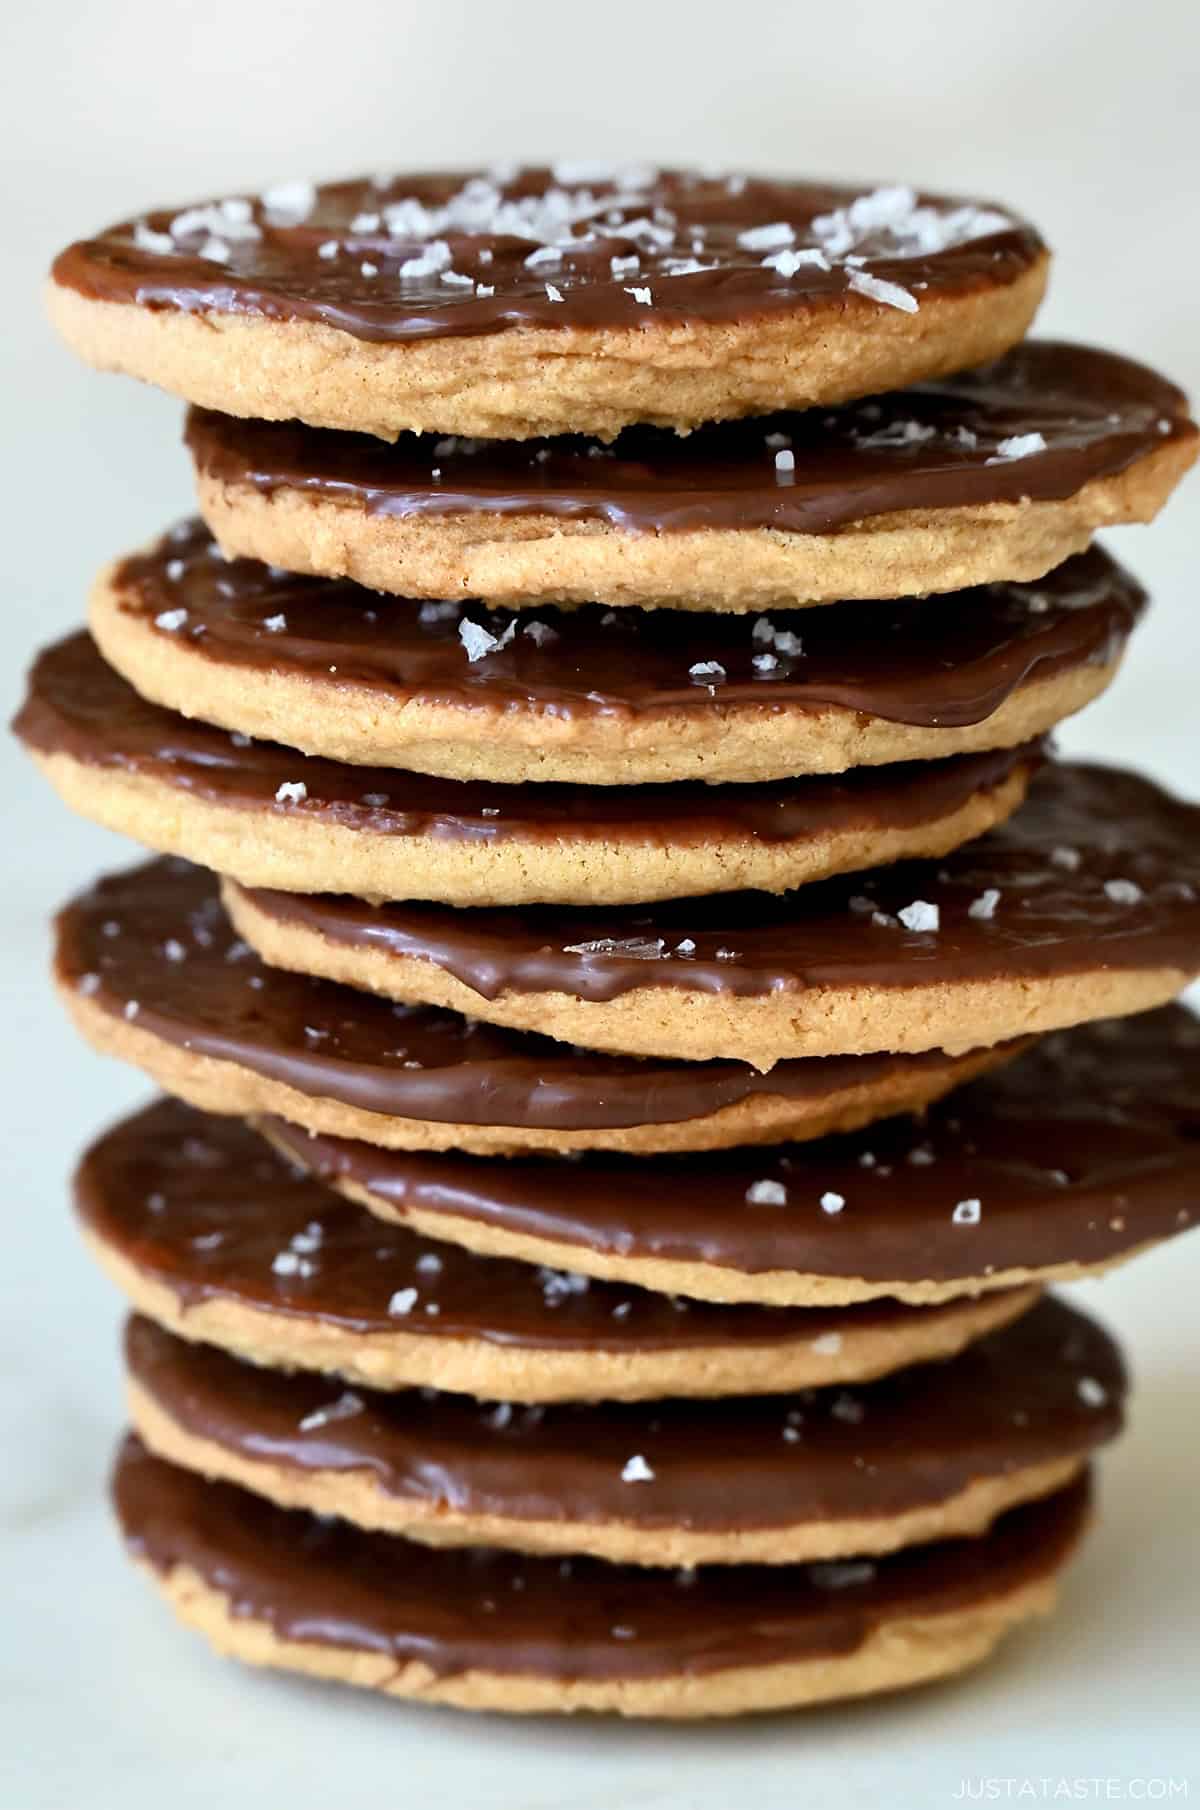
Ditch the chocolate chips in favor of chewy chocolate chipless cookies! They’re soft, buttery and full of rich caramel flavor. Enjoy them as-is or dip the bottoms in chocolate and finish with a sprinkle of flaky sea salt for a sweet-and-salty upgrade.
Whether you’re craving a chocolate chip cookie without the chocolate chips, baking with what you have in your pantry, or (gasp!) just not that into chocolate, this recipe’s for you.
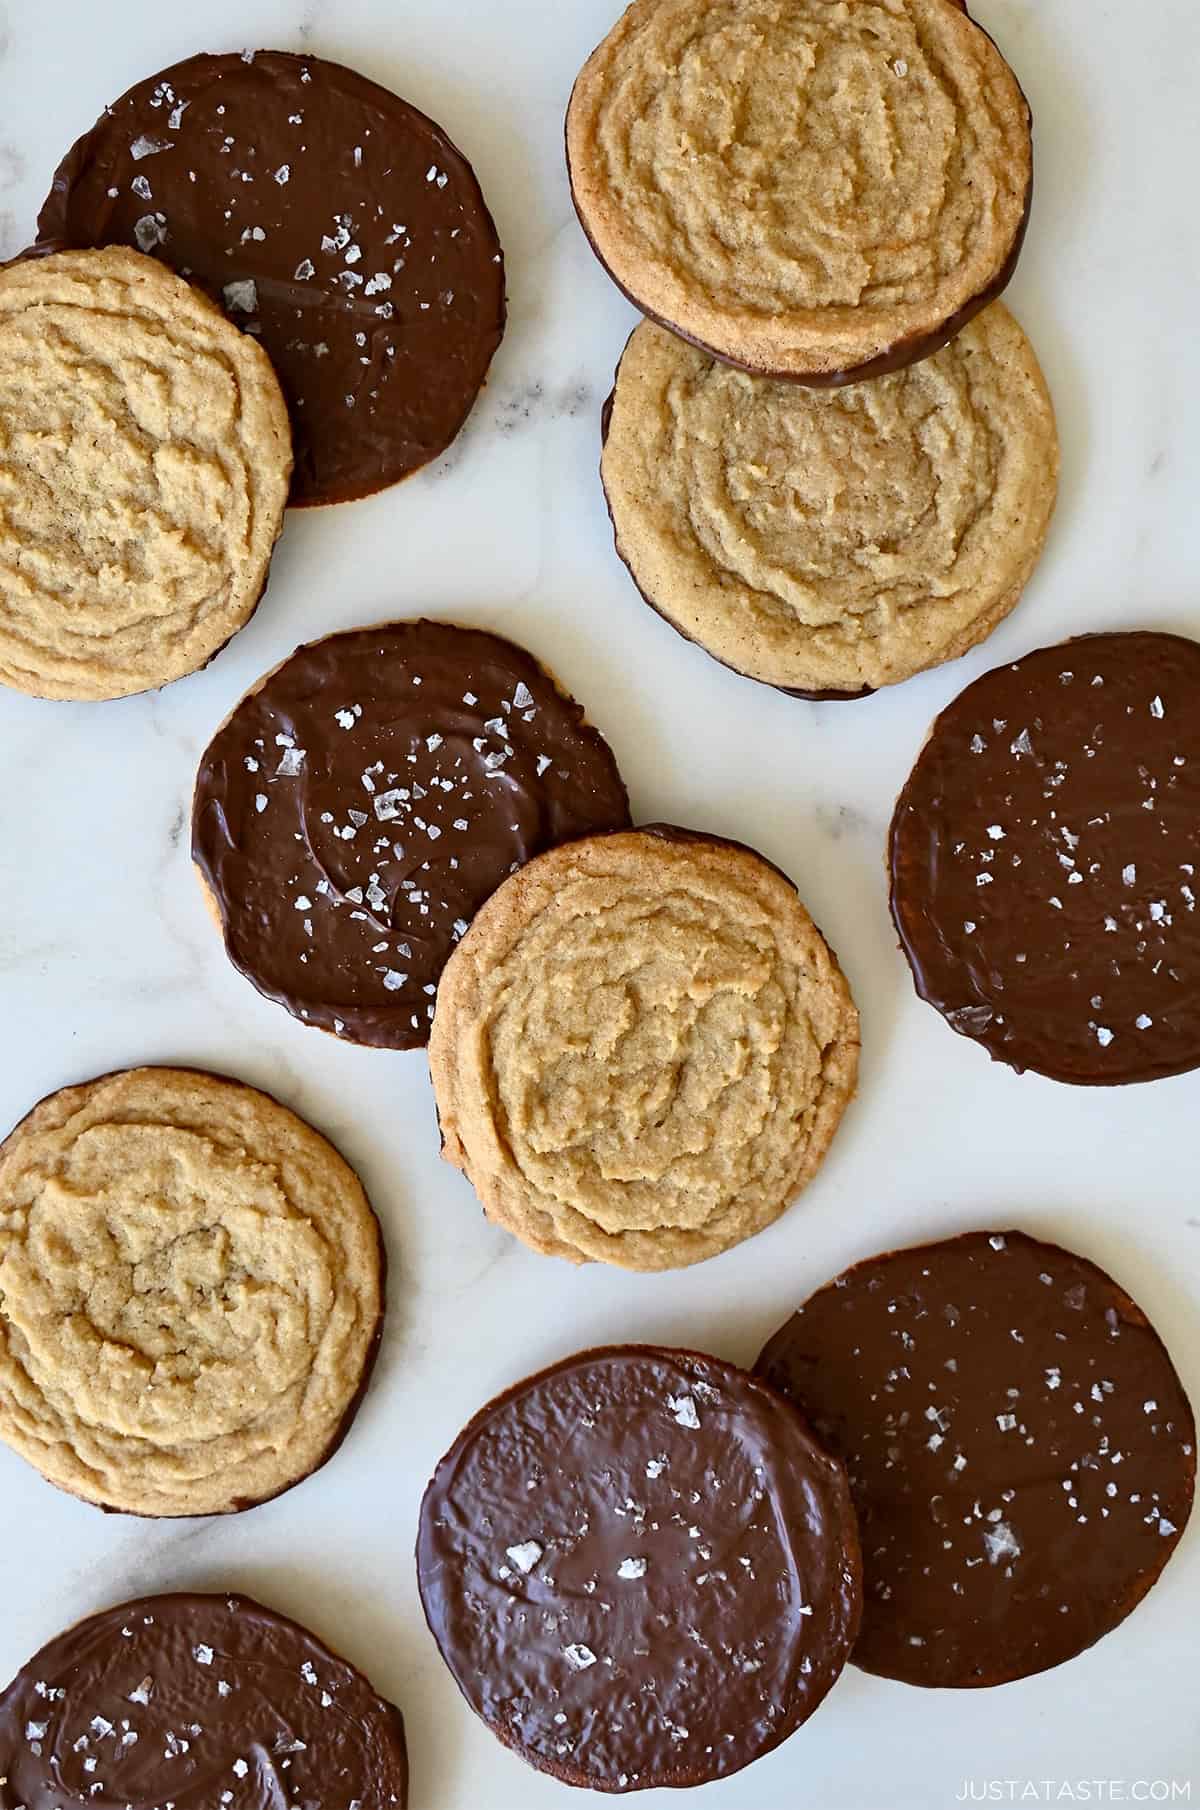
Table of Contents
- Everything You Love About the Classic Cookie, But Better
- Ingredients
- How to Make Chocolate Chipless Cookies
- Dipping These Cookies in Chocolate (Optional, But Delicious!)
- Kelly’s Recipe Tips
- Decorating These Cookies for Any Occasion
- Storage and Freezing Instructions
- More Cookie Recipes You’ll Love
- Chocolate Chipless Cookies Recipe
Everything You Love About the Classic Cookie, But Better
I have a confession to make. Chocolate chip cookies are better without the chocolate chips. There, I said it. While some people reach for the cookie packed with the most chocolate chips in every bite, I’m searching out the one with the least amount. Enter, chocolate chipless cookies. They’re everything you love about my chewy chocolate chip cookies—soft, incredibly chewy centers with crisp edges—just minus the chocolate chips and with maximum caramel notes.
I know what you’re thinking, “Kelly, isn’t a chocolate chip cookie without chocolate chips… just a sugar cookie?” Nope! And it isn’t a brown sugar cookie either. It’s somewhere in the middle. You get the perfect balance of buttery, caramel flavor and soft texture thanks to equal amounts of white and brown sugars and plenty of vanilla extract in this simple cookie dough (no chilling required!).
I dipped these chewy cookies in chocolate for a bakery-worthy finish (shoutout to Emily from My Messy Kitchen for the inspo!). But if you’re making chipless cookies because you don’t have chocolate chips on hand or prefer to skip the chocolate, you can absolutely leave that step out.
I walk you through the entire process (plus my favorite chocolate-dipped twist!) in the video below, so you can see exactly how I get that perfect snap on the bottoms.
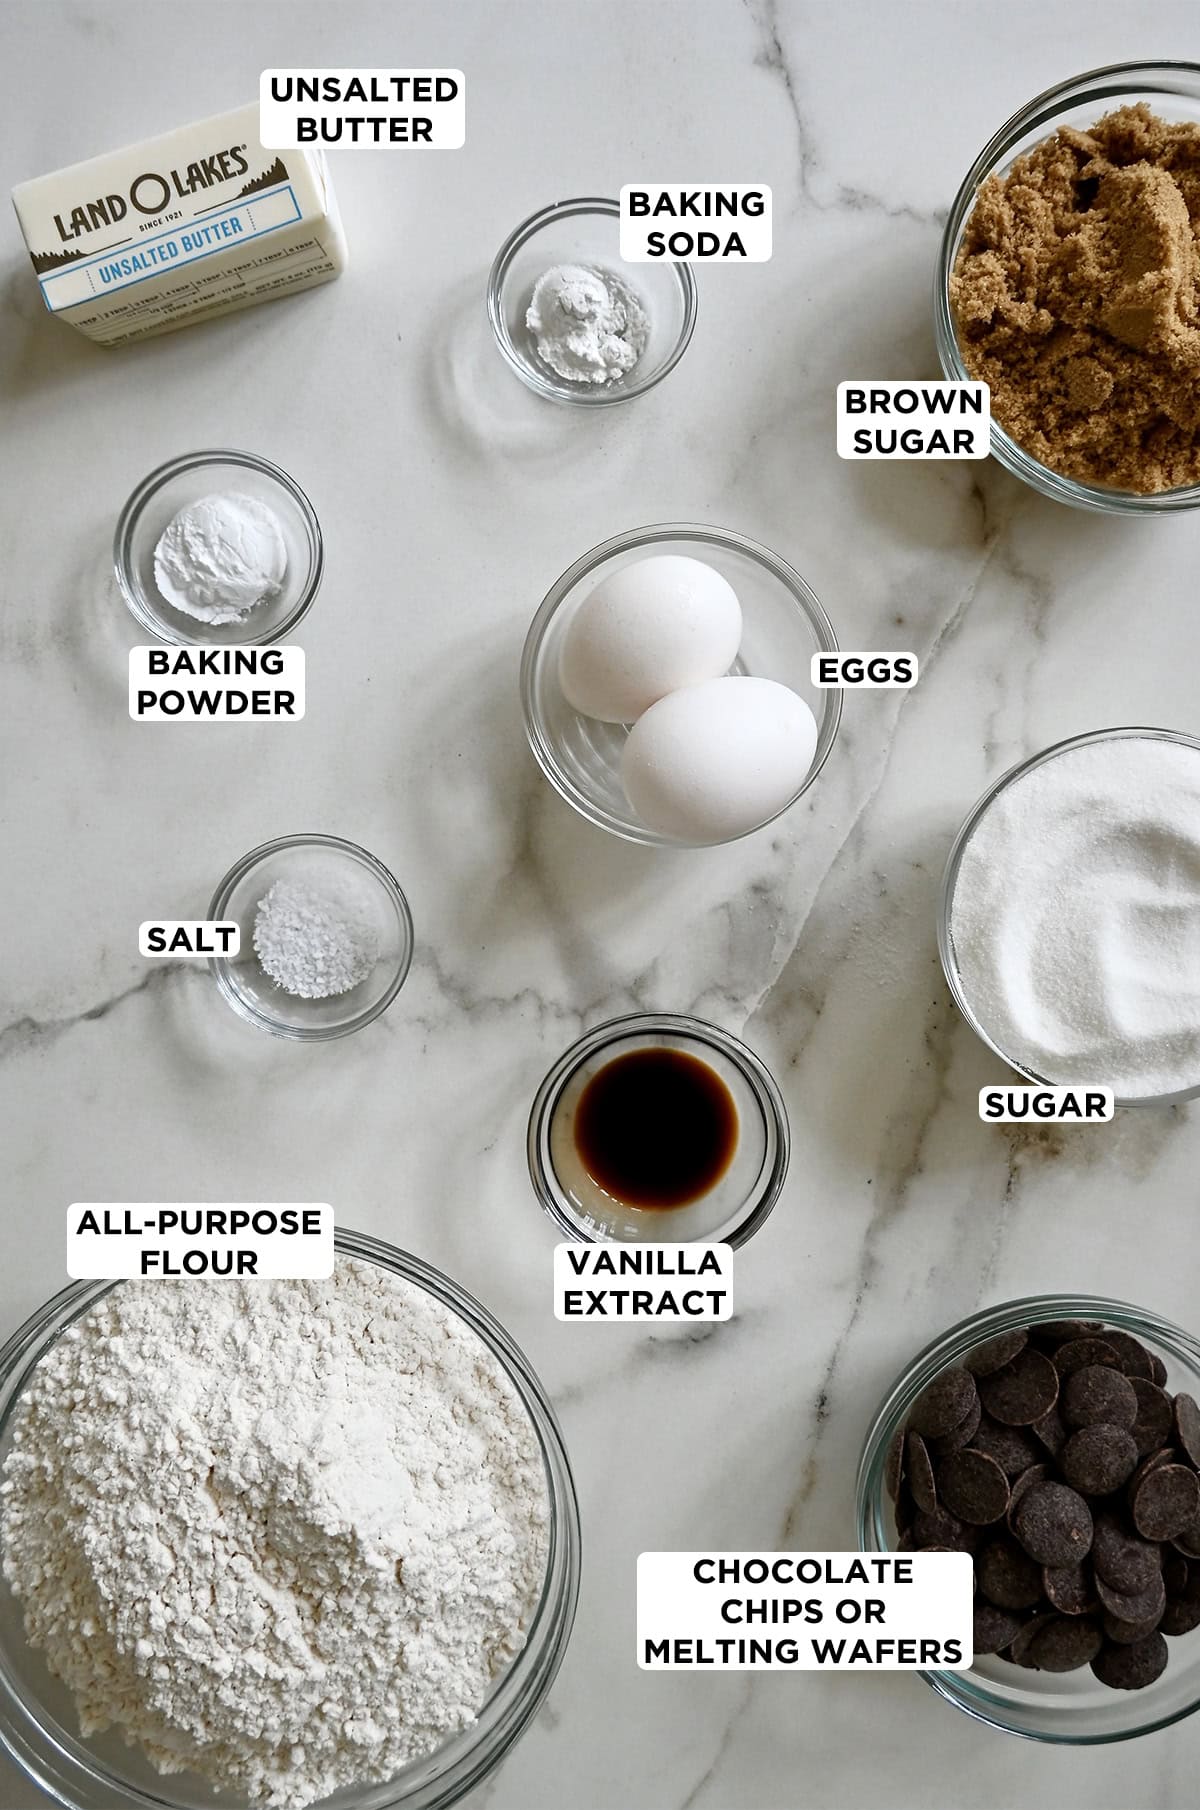
- Unsalted butter: Soften your butter to room temp, which means it should be soft enough to make a slight indent when pressed but not melty.
- White sugar + brown sugar: Using equal parts of both sugars gives you the best of both worlds: white sugar for structure and crispiness, brown sugar for moisture and those chewy centers that last for days. If you love a more molasses-y flavor, use dark brown sugar.
- Eggs: Cold eggs straight from the fridge work best for this cookie dough because we aren’t chilling it.
- Vanilla extract: Use pure vanilla extract for the best flavor.
- All-purpose flour: Measure your flour using the fluff-and-spoon method to avoid packing in too much. Too much flour = dry cookies.
- Baking soda & baking powder: The dynamic duo of leaveners. A little of both ensures the cookies spread just enough while staying thick, soft, and chewy.
- Kosher salt: A pinch of salt makes all the difference in baked goods. It balances the sweetness and brings out the caramel-y notes from the brown sugar.
- Chocolate chips or melting wafers (optional): If you’re going for cookies with a chocolate-dipped bottom (like the ones in my photos), you can use your favorite chocolate chips or chocolate melting wafers. I prefer wafers—they melt smoothly, harden quickly and have a satisfying snap when you bite in.
See the recipe card for full information on ingredients and quantities.

- Cream the butter and sugars. Use a hand or stand mixer to beat the butter, white sugar, and brown sugar until the mixture looks light and fluffy. This step aerates the dough and helps create those tender, chewy centers we’re after.
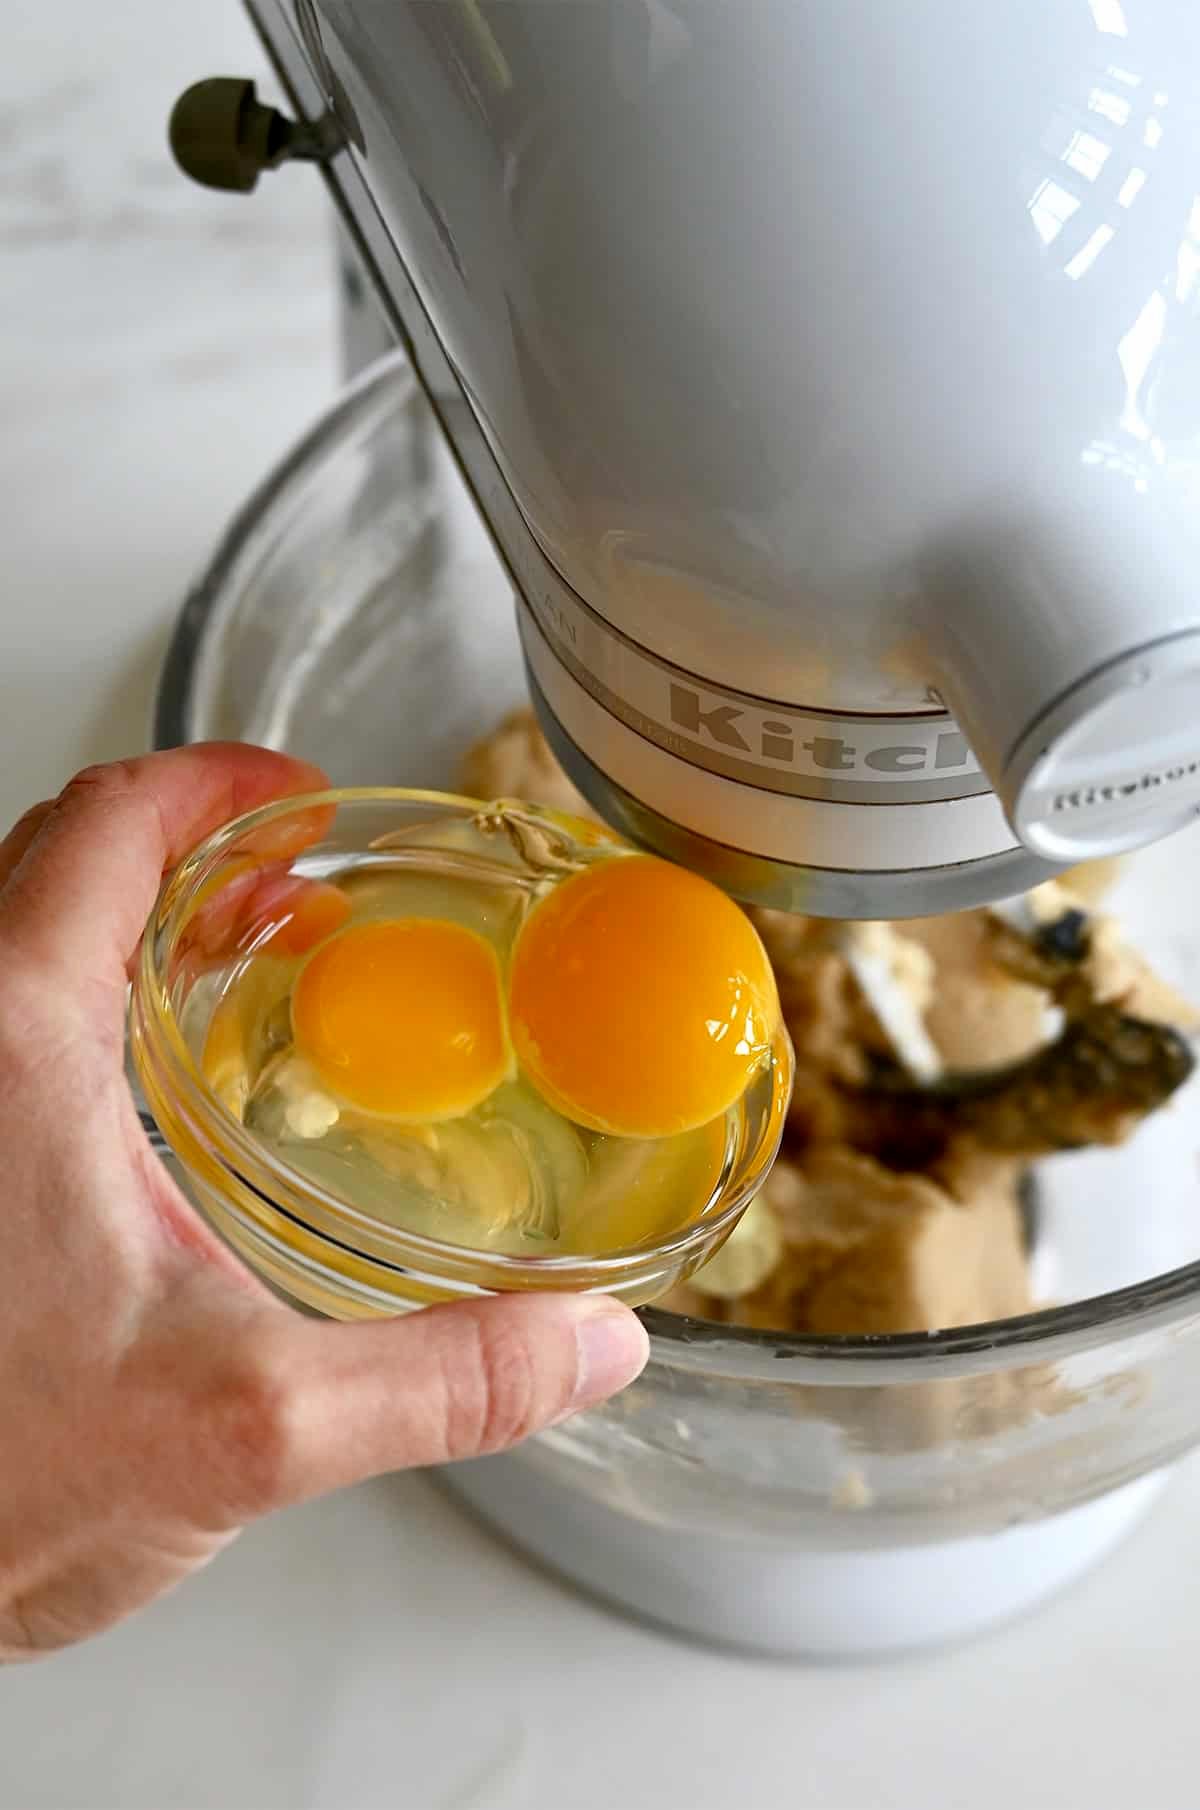
- Add the eggs one at a time, mixing well after each, then pour in the vanilla extract. The dough might look a bit loose or glossy at this stage—that’s totally normal.
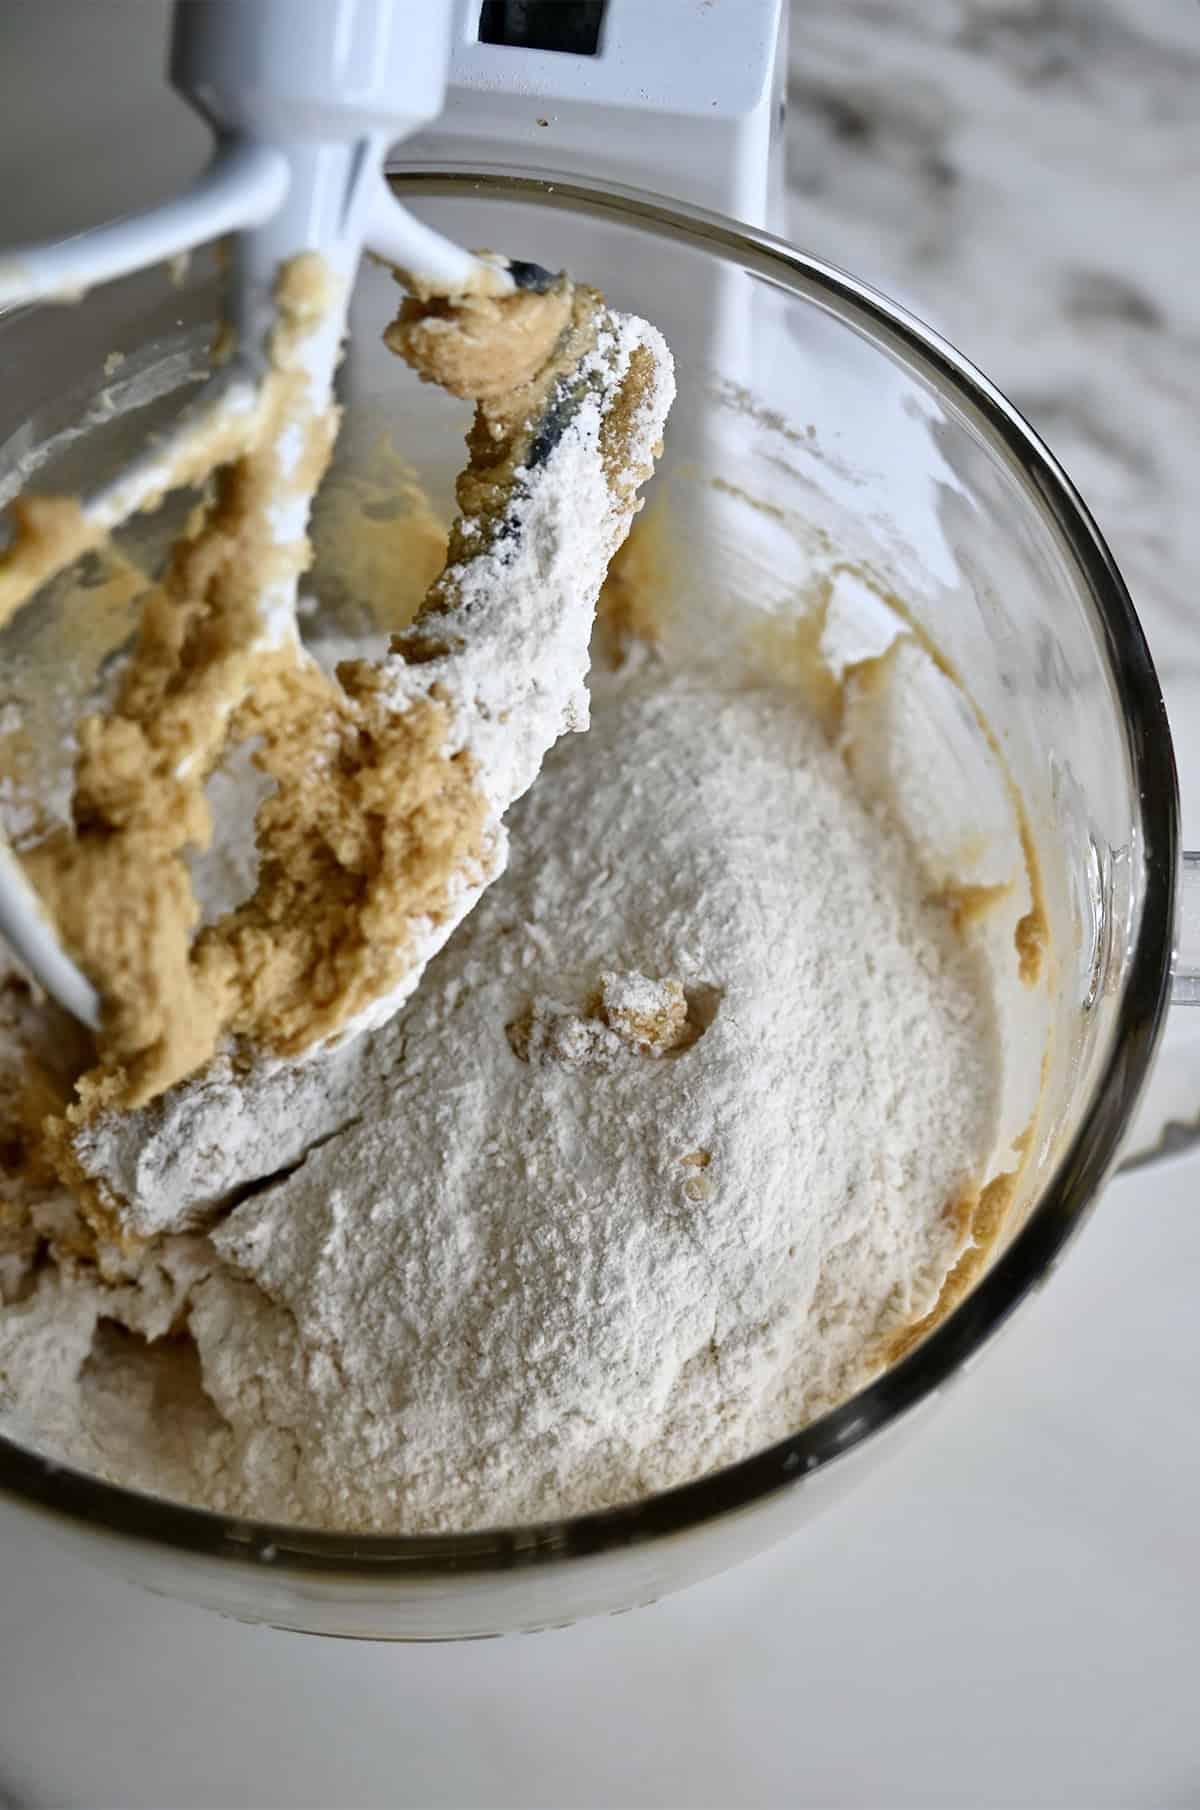
- Add the dry ingredients to the wet, mixing on low speed until just combined. Stop mixing as soon as you no longer see streaks of flour.
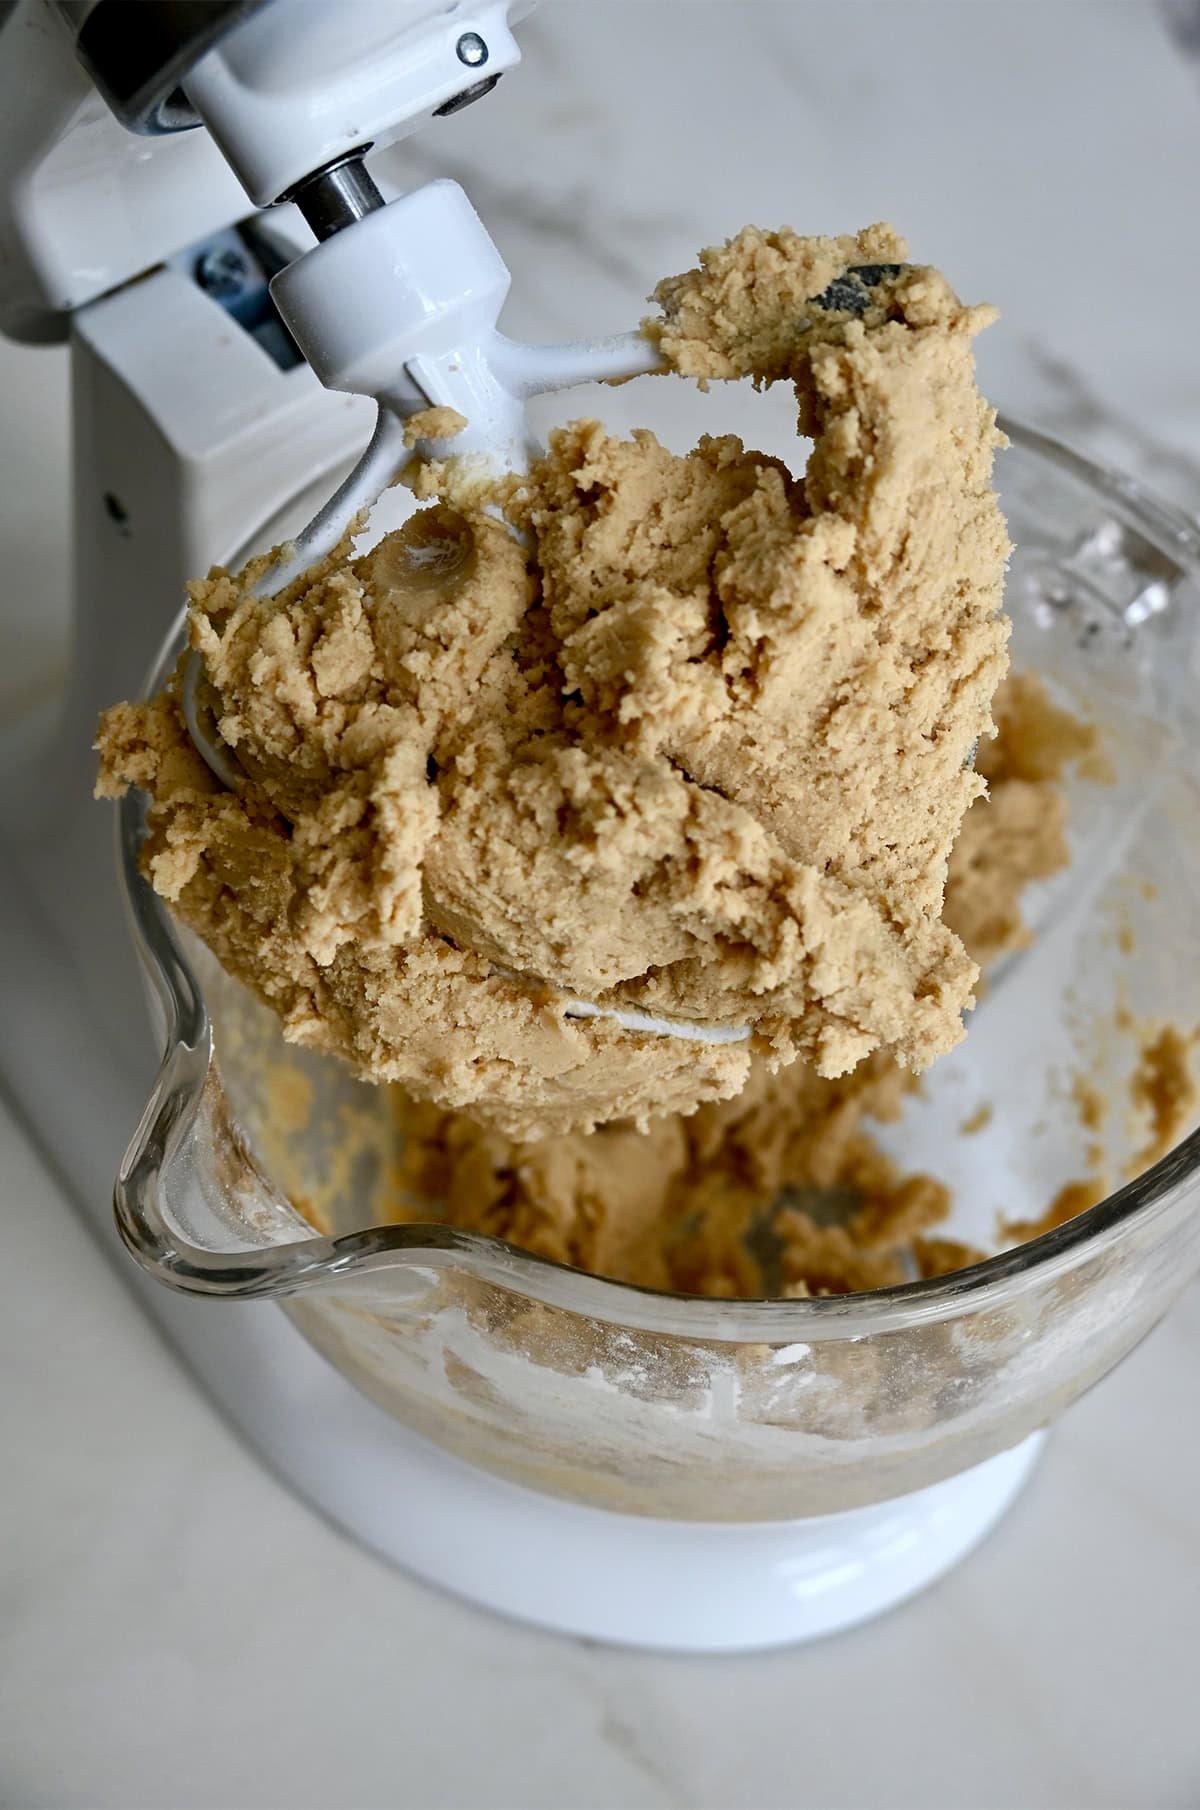
- Your chipless cookie dough is ready to scoop. You can bake it right away or chill it to deepen the flavor (and if you want extra-thick cookies!).

- Use a cookie scoop or two spoons to scoop the dough onto parchment-lined cookie sheets, spacing the dough balls a few inches apart to allow for spreading.
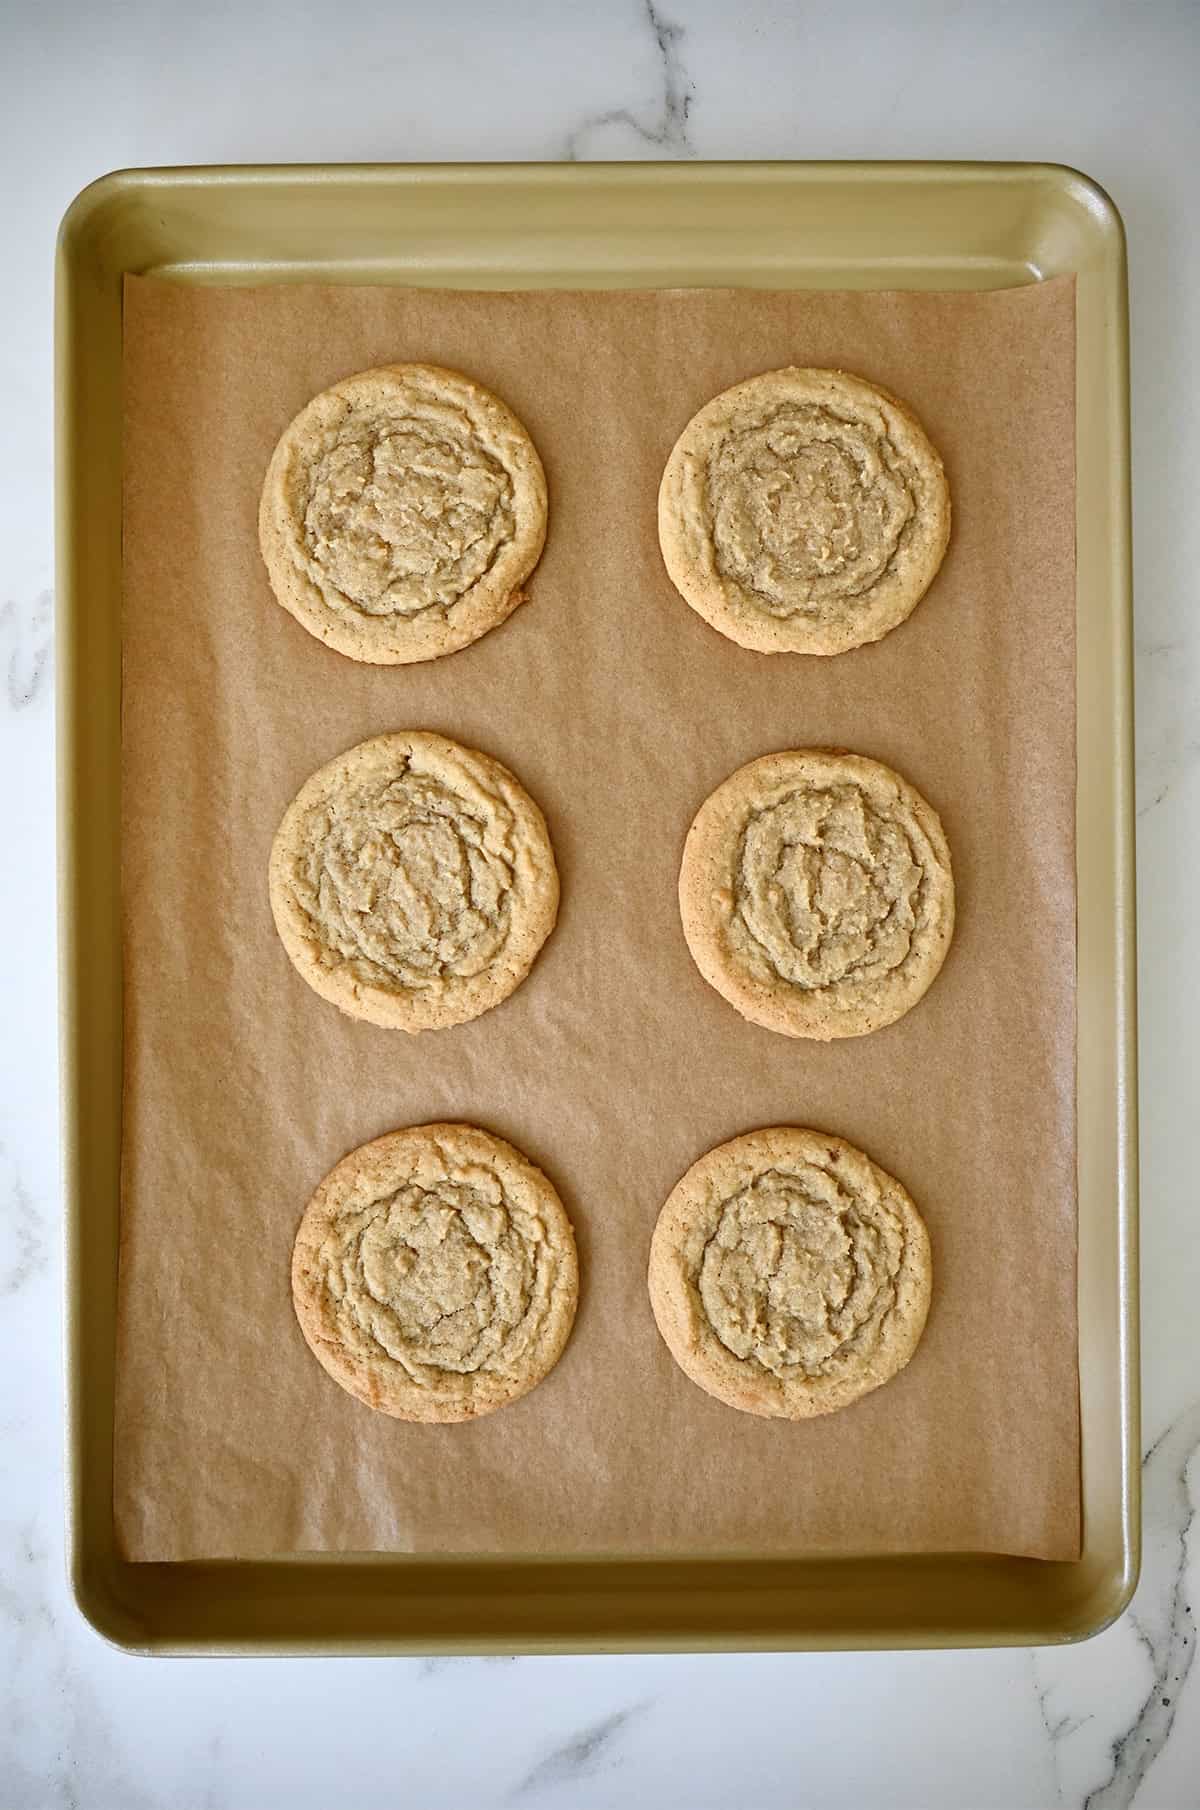
- Bake at 350°F for 12 to 15 minutes until the edges are just golden and crisp, and the centers look slightly underbaked—they’ll finish setting as they cool.
Dipping These Cookies in Chocolate (Optional, But Delicious!)
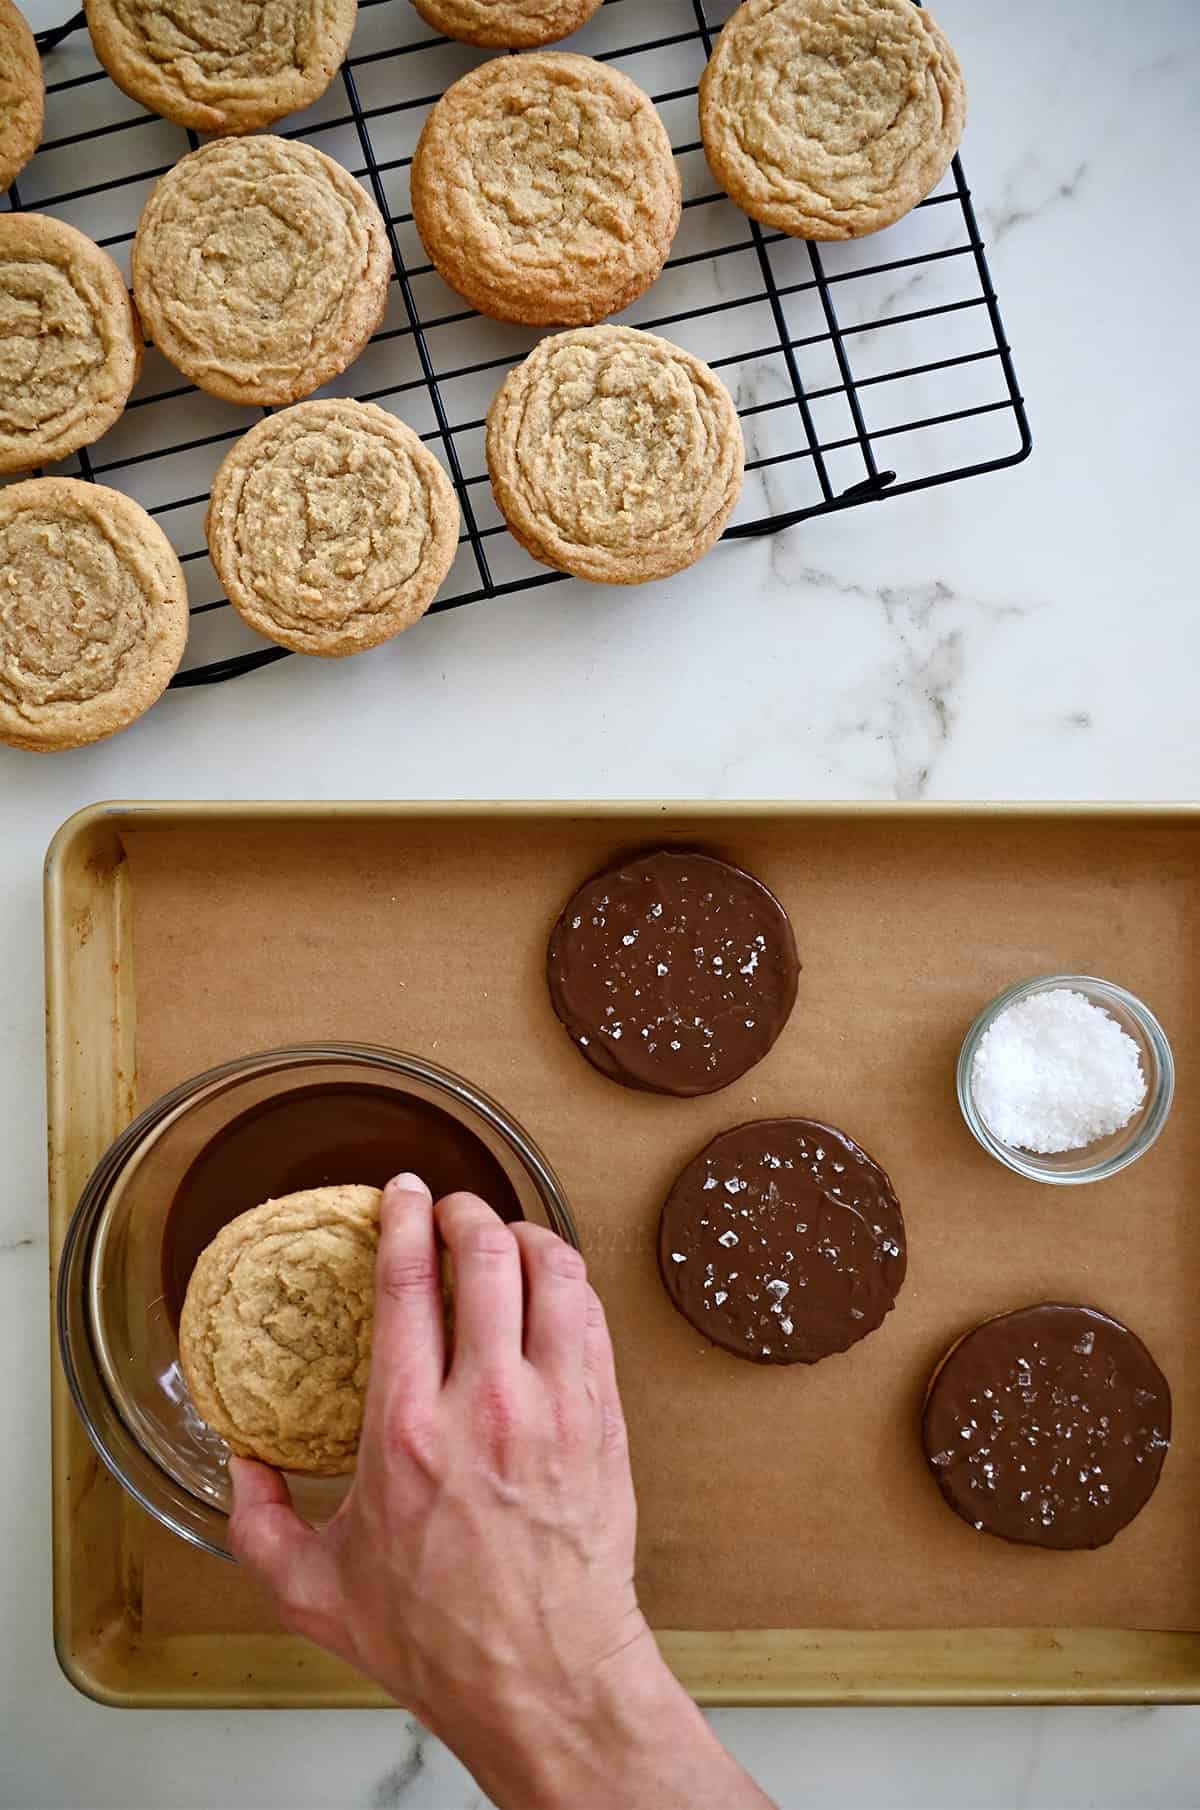
Now, for the fun part—dipping these chipless cookies in chocolate! Once the cookies are completely cooled, melt your chocolate chips or melting wafers. You can do this in a double boiler or microwave in 20-second intervals, stirring between each until smooth. Dip the bottom of each cookie into the melted chocolate, then place them on a parchment-lined tray to set.
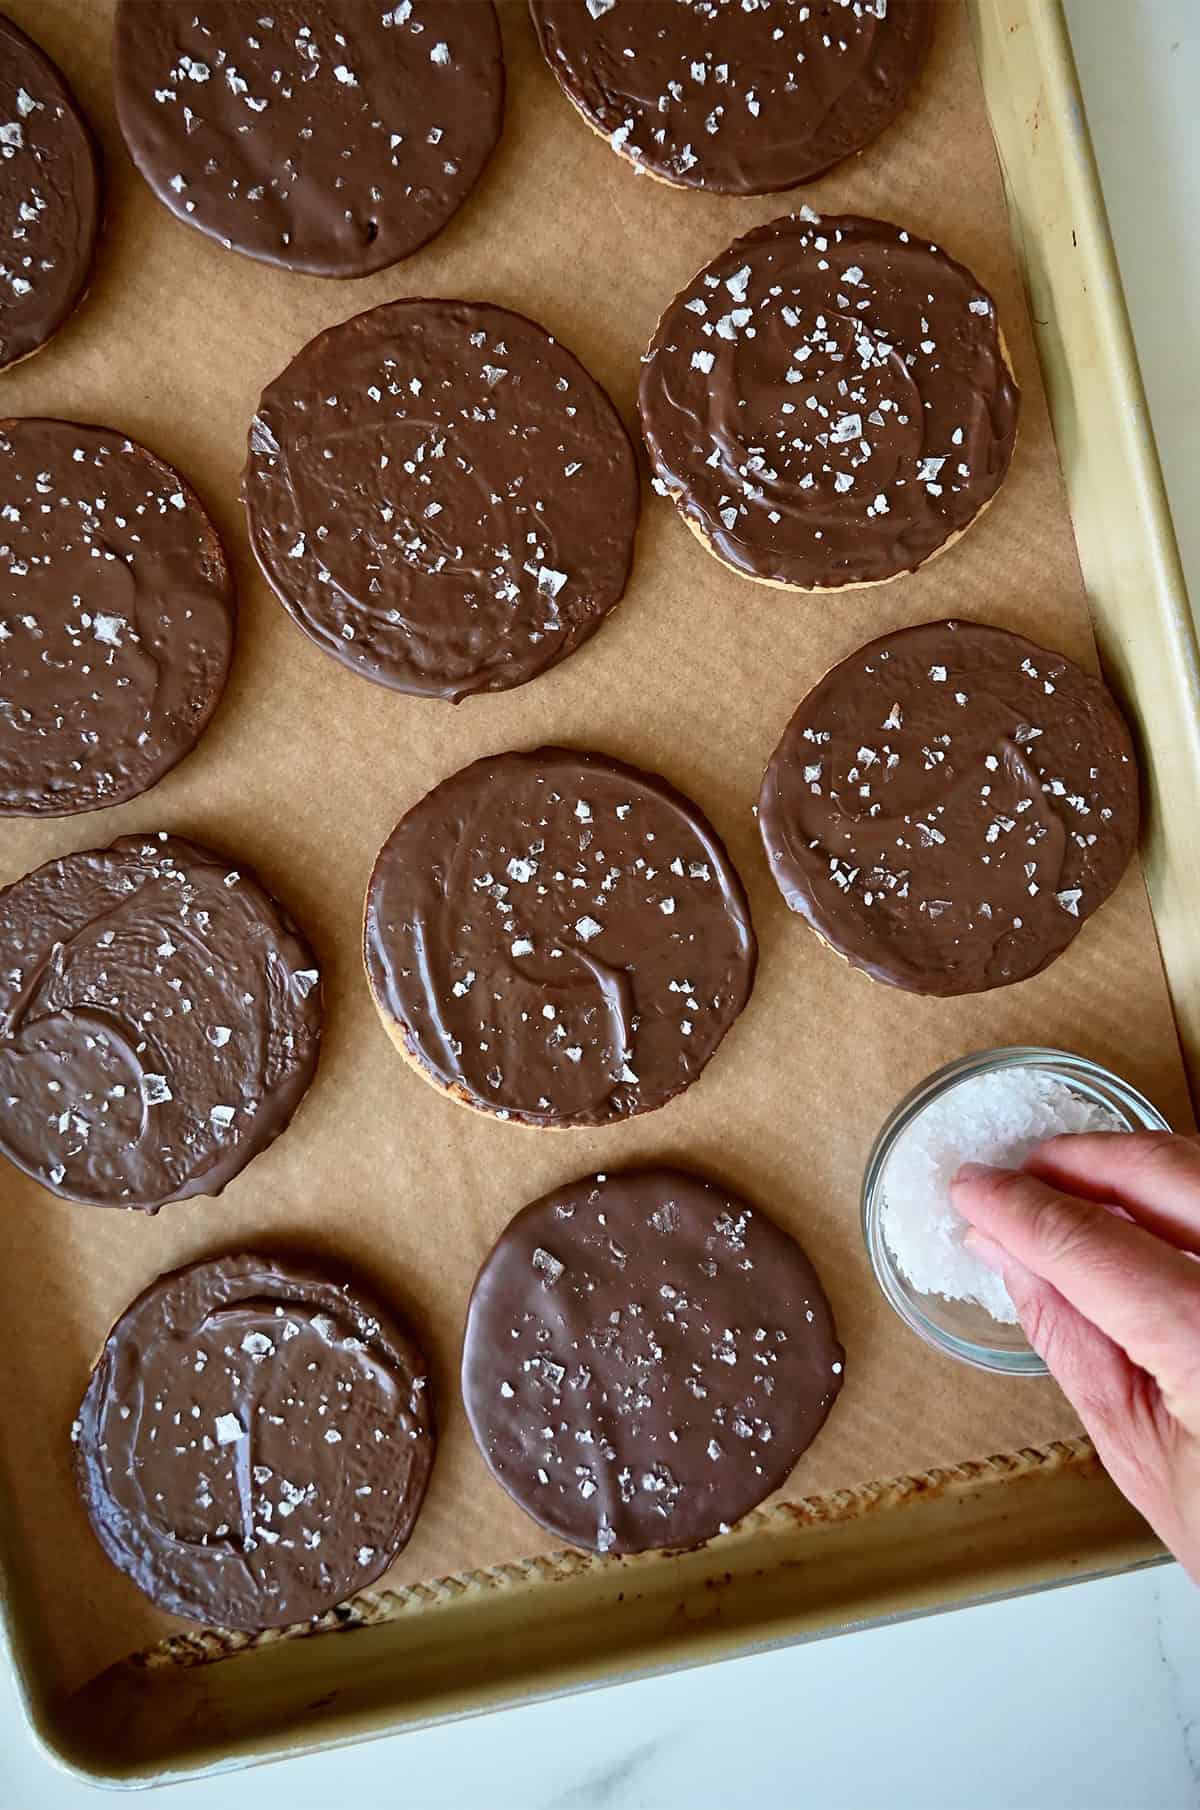
And now for my not-so-secret trick for the ultimate sweet-and-salty combo—the one I use on everything from brookies to these chewy, chocolate-dipped cookies: a sprinkle of flaky sea salt while the chocolate is still wet. It enhances all the flavors and makes these look straight out of a fancy bakery.
Kelly’s Recipe Tips
- Underbaking is the secret to soft and chewy cookies. Letting them finish “baking” on the hot baking sheets outside the oven (until they cool completely) keeps them from overbaking and helps lock in that perfect texture.
- I use a 2-tablespoon cookie scoop to portion these evenly. It keeps the cookies uniform, helps them bake consistently and honestly just makes scooping so much easier.
- I recommend adding a little coconut oil if you’re dipping your cookies in chocolate. It helps thin the chocolate for a smoother, glossier finish—and once it sets, you get that hard, magic shell effect.
- Chilling the dough isn’t required, but if you’ve got the time, I highly recommend it. Even just a 1-hour chill can make a difference! It helps the flavors deepen and the texture firm up, which means extra-delicious cookies.
- Turn these into ice cream sandwich cookies! Just grab your favorite flavor (plus, my fave cylindrical ice cream scoop) and smoosh it between two chipless cookies for the ultimate summer treat.
- The dough can be made, scooped and refrigerated for up to 3 days in an airtight container (see more storage tips below).
Decorating These Cookies for Any Occasion
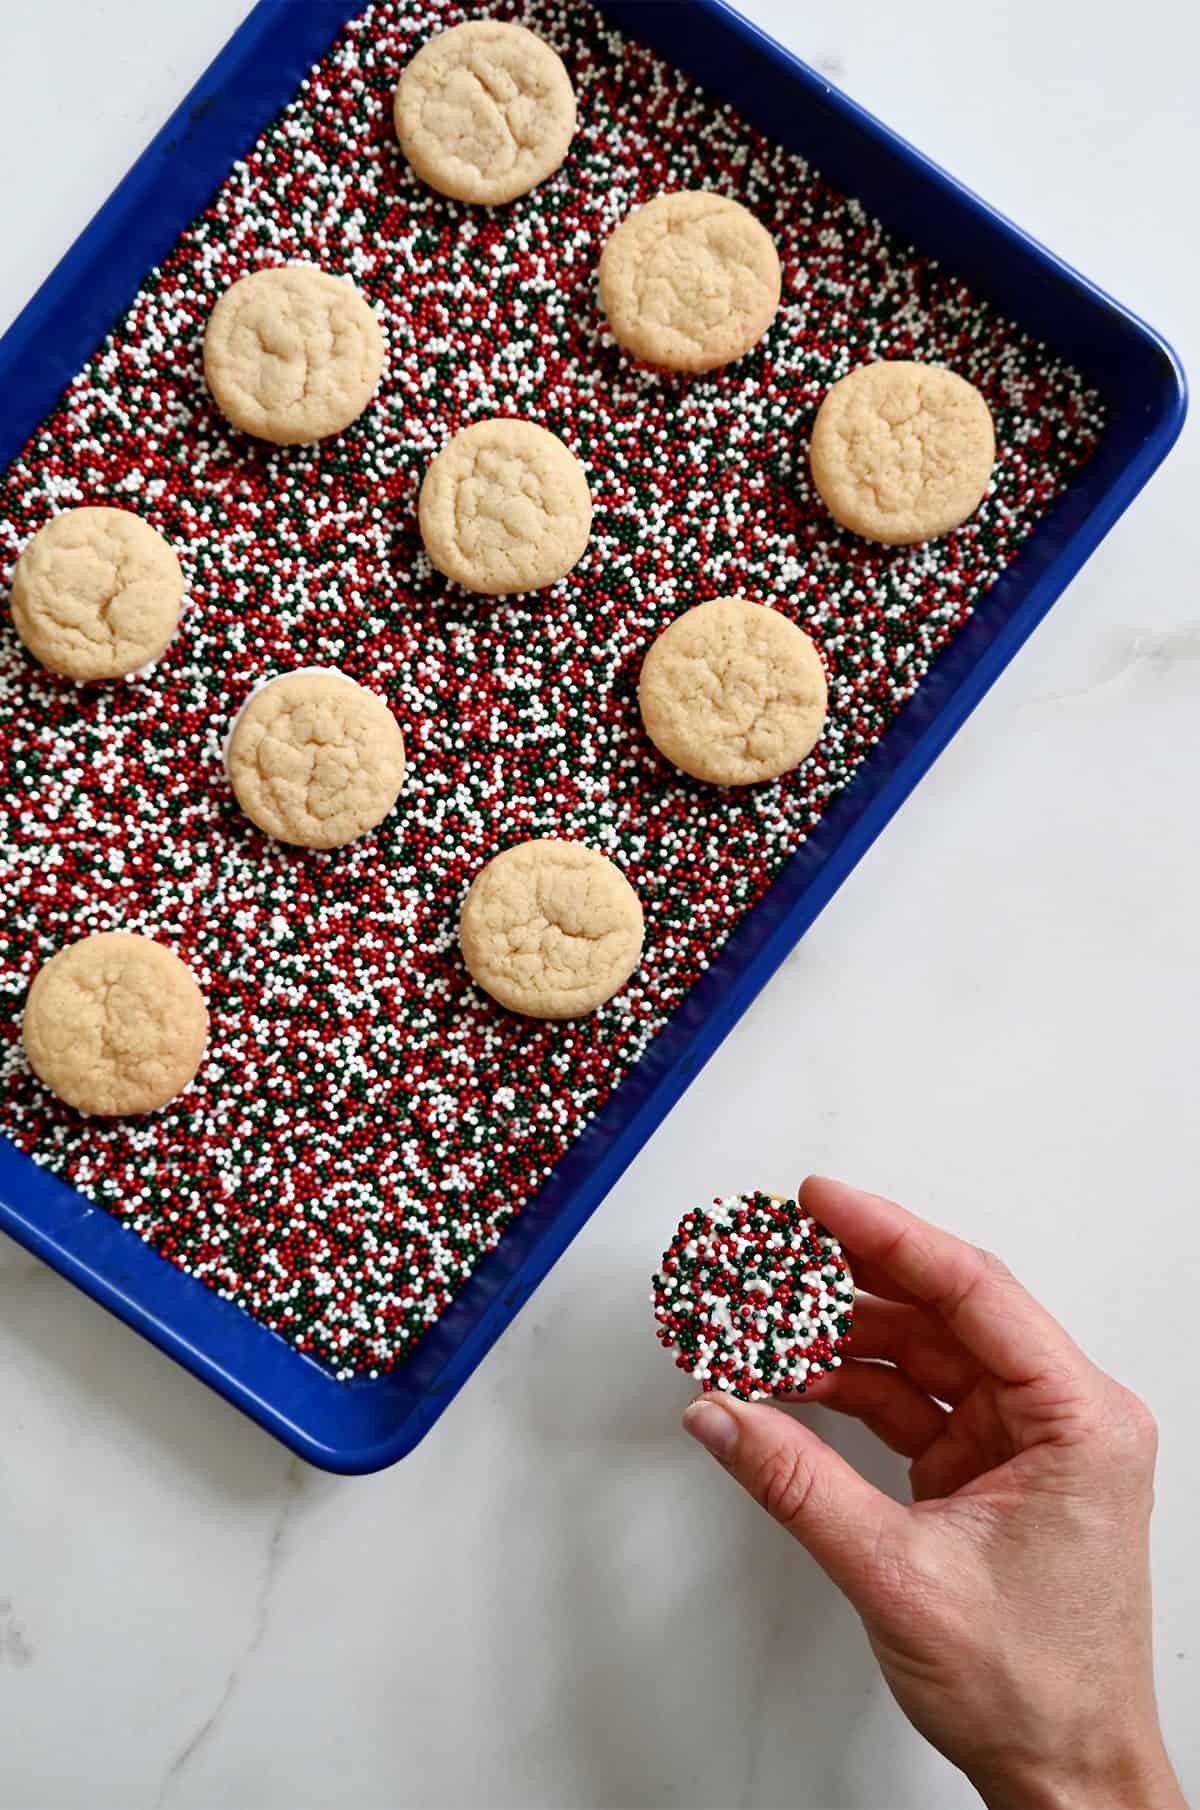
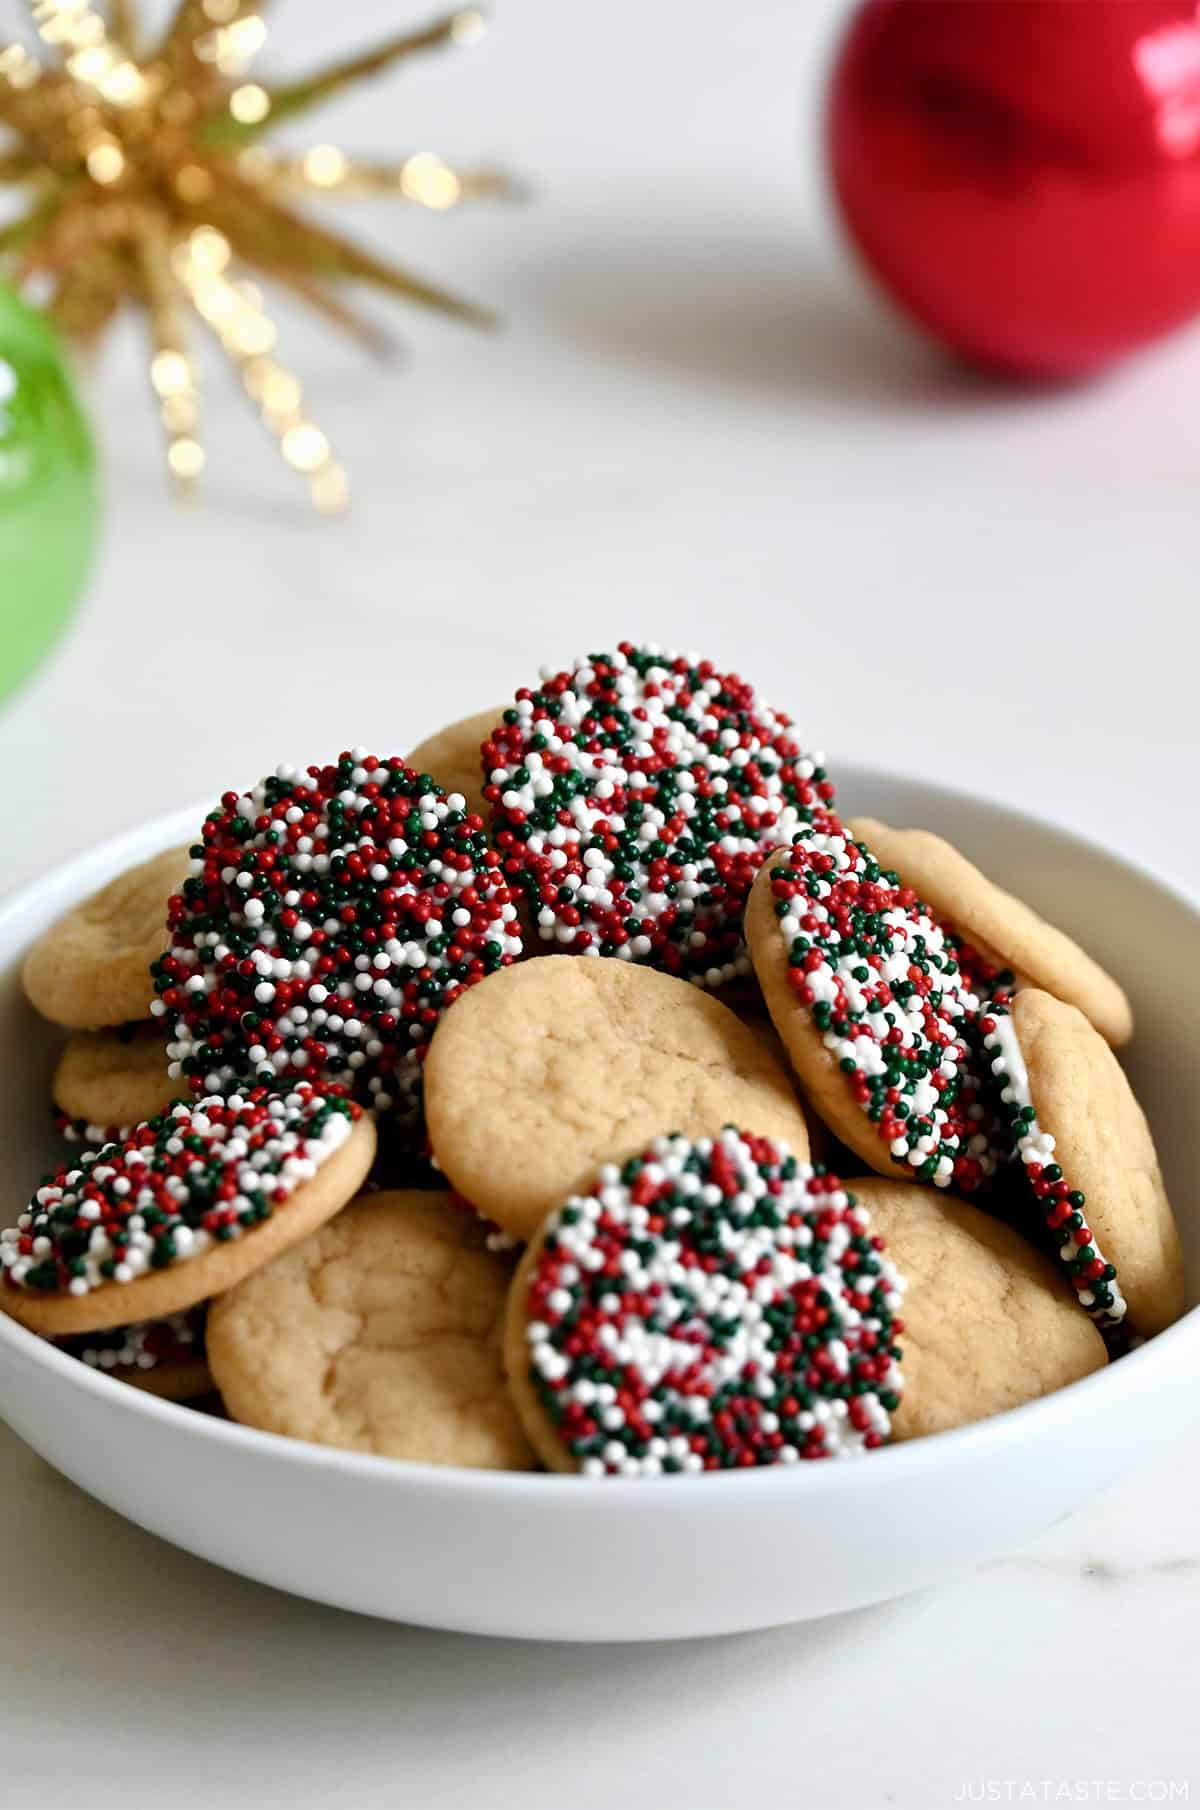
One of my favorite ways to dress up these chocolate chipless cookies is to flip them into a dipped, decorated treat that works for any holiday or occasion. I melt white chocolate (or milk, dark or even colored candy melts), pipe it into small rounds, sprinkle generously with festive sprinkles, then gently press a fully cooled cookie on top. Once the chocolate sets, flip them over and voilà—perfectly dipped cookies with a fun, customizable finish.
I’ve made these for everything from Christmas and Valentine’s Day to birthdays and 4th of July, and the best part is that you can make them any size: mini, regular or jumbo!

Storage and Freezing Instructions
To store: Once completely cooled, keep the cookies in an airtight container at room temperature. They’ll stay soft and chewy for up to 4–5 days—though let’s be honest, they rarely last that long around here!
To freeze baked cookies: Let them cool fully, then pop them into a freezer-safe bag or container with parchment between layers to prevent sticking. They freeze well for up to 3 months. Chocolate-dipped cookies also freeze well, but I like to add the dip fresh if I’m serving them for a party or gifting.
To freeze cookie dough: Scoop the dough into balls and freeze them on a baking sheet until firm. Then transfer to a freezer bag or container and freeze for up to 3 months. Bake straight from frozen—just add an extra minute or two to the bake time.
Ingredients
- 1 cup unsalted butter, softened
- 1 cup white sugar
- 1 cup light brown sugar
- 2 large eggs, cold
- 2 teaspoons vanilla extract
- 3 cups all-purpose flour
- 1 teaspoon baking soda
- 1/2 teaspoon baking powder
- 1/2 teaspoon kosher salt
- 1 1/2 cups chocolate chips or chocolate melting wafers (See Kelly’s Note)
- Sea salt, for topping (optional)
Instructions
- Preheat the oven to 350°F. Line two baking sheets with parchment paper.
- In the bowl of a stand mixer fitted with the paddle attachment, cream together the butter, white sugar and brown sugar until light and fluffy, about 2 minutes.
- Add the eggs one at a time, beating between each addition, then beat in the vanilla extract.
- Add the flour, baking soda, baking powder and salt and beat just until combined.
- Scoop 2-tablespoon mounds of dough onto the baking sheets, spacing each mound at least 2 inches apart.
- Bake the cookies for 12 to 15 minutes, rotating the pans halfway through, until they are slightly crispy around the edges and barely set in the centers. Remove the cookies from the oven and let them cool completely on the baking sheets. (See Kelly’s Notes.)
- Once the cookies have cooled completely, melt the chocolate chips in a double boiler or the microwave. (If desired, add 2 teaspoons of coconut oil to the chocolate to help thin it and also allow it to harden with a firm bite.)
Video
How to Make Cookies With a Hard Chocolate Shell Bottom
This is my new signature cookie recipe 🍪 Learn how I make my famous cookies with a hard chocolate bottom: soft, chewy chocolate CHIPLESS cookies dipped in melted chocolate for a crunchy snap! Full written recipe on Just a Taste: https://www.justataste.com/chocolate-chipless-cookies-recipe Kelly’s signature dough (cream butter/sugar light & fluffy, aerate flour, chill 15 min) piped with chocolate bottoms mess-free (pastry bag hack).
Kelly’s Notes
- These cookies can be made any size—mini, standard or jumbo. Just adjust the bake time accordingly: smaller cookies will bake faster, while larger cookies may need an extra minute or two.
- You can dip the cookies in either melted chocolate chips or melted chocolate wafers (similar to candy melts, but chocolate). I prefer using melting wafers because they harden more quickly and have a bit of a snap to them when bitten into. Top with sprinkles to match any holiday or occasion!
- Underbaking cookies is the secret to ensuring they remain soft and chewy once cooled. And allowing them to finish “baking” on the hot baking sheets outside the oven (until they cool completely) will prevent you from overbaking them.
- To make ahead: The dough can be made, scooped and refrigerated for up to 3 days or frozen for up to 3 months prior to baking (when stored in an air-tight container).
- To store: Once completely cooled, keep the cookies in an airtight container at room temperature. They’ll stay soft and chewy for up to 4–5 days—though let’s be honest, they rarely last that long around here!
- To freeze baked cookies: Let them cool fully, then pop them into a freezer-safe bag or container with parchment between layers to prevent sticking. They freeze well for up to 3 months. Chocolate-dipped cookies also freeze well, but I like to add the dip fresh if I’m serving them for a party or gifting.
- ★ Did you make this recipe? Don’t forget to give it a star rating below!
Nutrition
Did you try this recipe?
Leave a comment below with your star rating!
This post may contain affiliate links.


I MADE THESE COOKIES TODAY I ADDED 1 /2 CUP GRATED CHOCOLATE BUT TOO MUCH BAKING SODA I THINK NEXT TIME I WILL ADD 1 /2 TSP
THANKS FOR SHARING
You’re so welcome, CJ!
My new favorite cookies!! Going to experiment with some other extracts.
So glad you enjoyed them, Rhonda!
Deeeelish! What a fun twist. Going to try with white chocolate next.
So glad you enjoyed it, Rosie!
These were outstanding. So, so chewy and soft. Loved the dipped bottom!
So glad you enjoyed the recipe, Leah!