Two dessert favorites join forces in this easy recipe for Crème Brûlée Cheesecakes starring a tangy cream cheese custard with sweet and crunchy torched sugar topping.
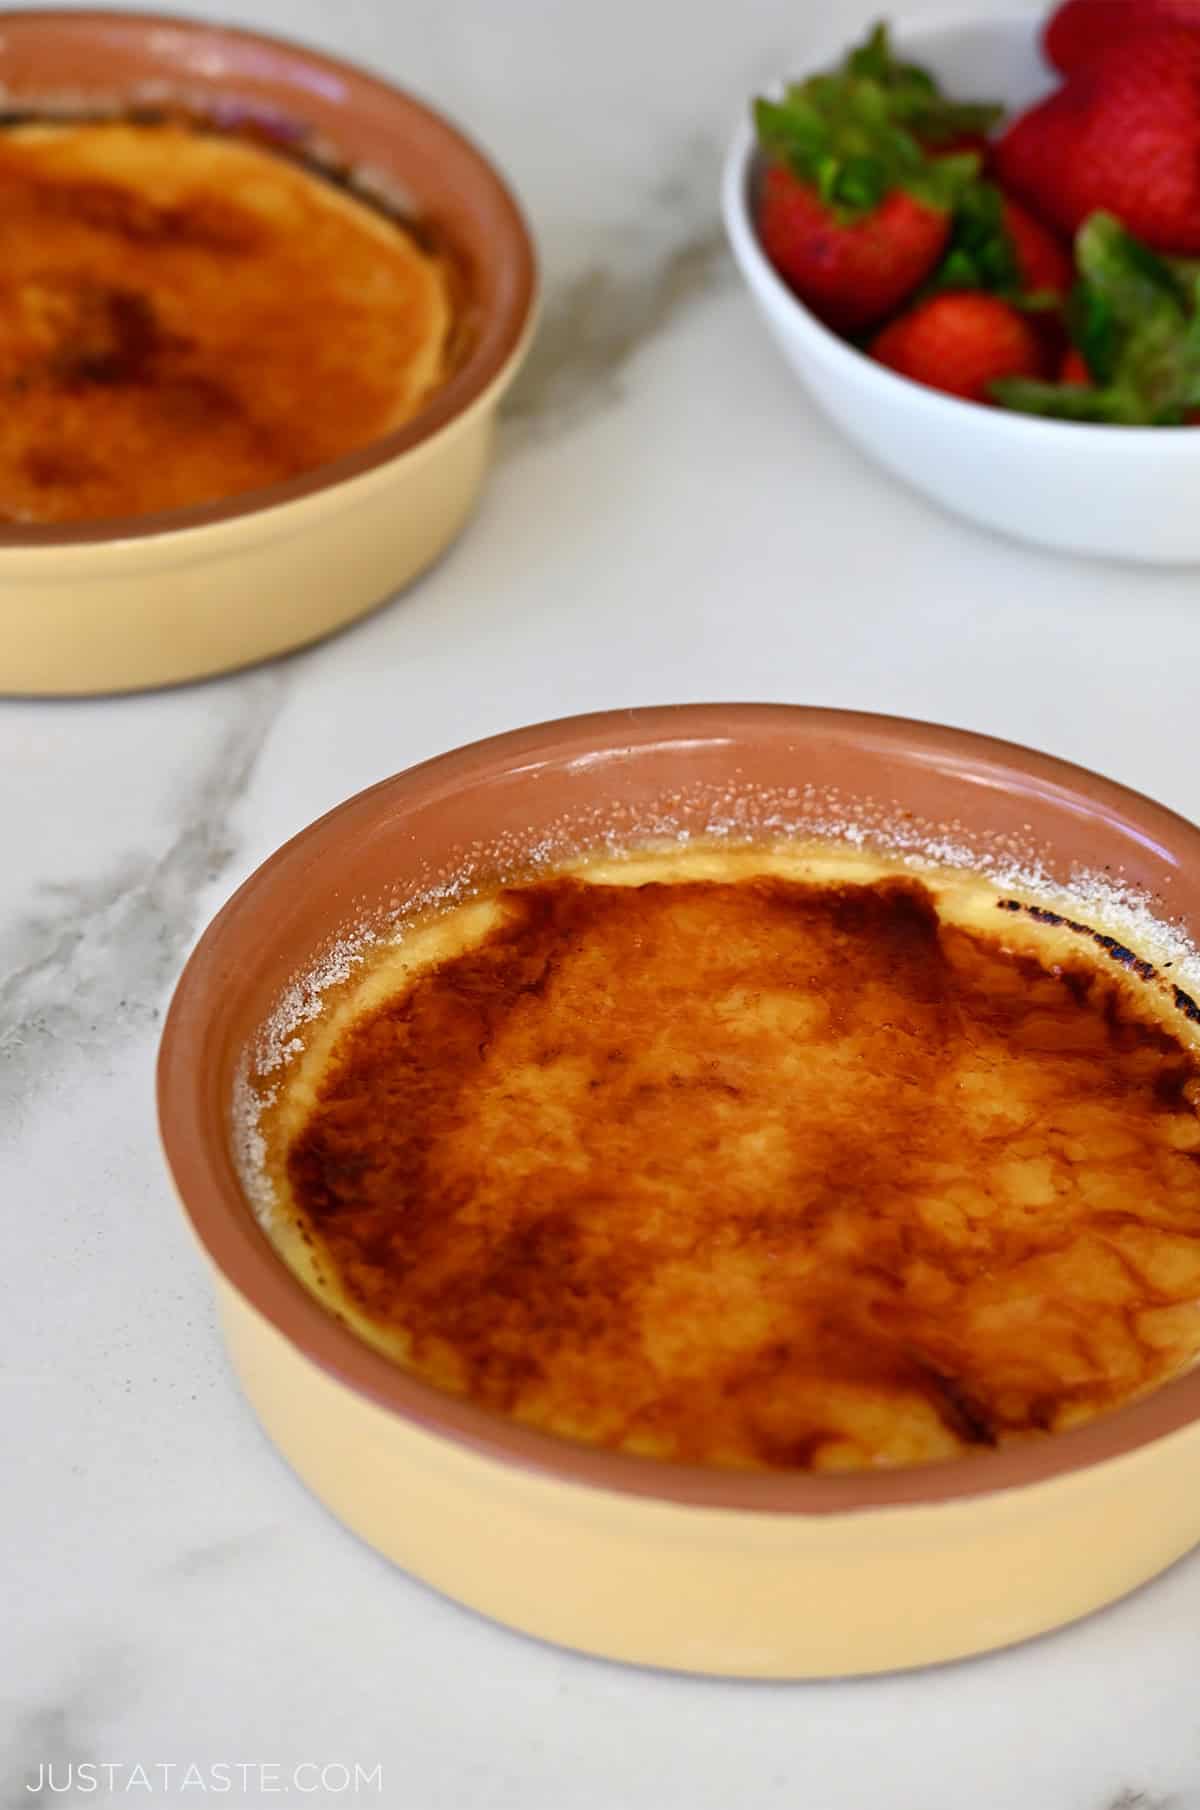
Table of Contents
Eons ago (after my N*SYNC days but before my HGTV days), I attended culinary school in New York City at The Institute of Culinary Education. It was one of the best experiences of my life and affirmed that my career would absolutely be a career in food. Along the way I met many inspiring chef instructors, and one of them was Melanie Underwood, an incredibly talented chef, teacher and author.
And we have Melanie to thank for this incredibly easy and creamy Crème Brûlée Cheesecakes recipe, courtesy of her new cookbook, Making Artisan Cheesecake (Quarry Books, 2015).
Her creative twist takes the classic crème brûlée we all know and love and makes it even more irresistible by blending in cream cheese for a subtle tang and an even richer, creamier custard. And of course, it wouldn’t be crème brûlée without that signature golden-brown sugar crust.
These individual desserts are proof that sometimes the simplest recipes are the most impressive. But why save it for Valentine’s Day or some once-a-year special occasion? Making crème brûlée at home is surprisingly easy, and you only need five simple ingredients. No complicated techniques, no weird grocery store scavenger hunts—just everyday ingredients and a handful of ramekins.
What is Crème Brûlée?
Crème brûlée, which translates to “burnt cream” in French, is a classic custard dessert made with egg yolks, heavy cream and sugar. Its iconic caramelized sugar topping is created by using a butane kitchen torch or a broiler to achieve a glassy, golden-brown layer that cracks when tapped with a spoon. (Anyone else just get a visual of Pierre Cadault from Emily in Paris cracking the top of his crème brûlées?)
This French dessert is famous for its simplicity and creamy texture. In this crème brûlée recipe, we combine its best qualities with the creamy tang of cheesecake. The result? A dessert worthy of Valentine’s Day, candlelit dinners and dinner party applause.

- Cream cheese: Full-fat cream cheese is key for the creamiest results. Let it come to room temperature before starting to avoid any lumps in the batter.
- Sugar: Granulated sugar sweetens the custard base and is also used to create that signature caramelized topping.
- Heavy cream: Adds richness and helps achieve that ultra-smooth texture.
- Egg yolks: These create the custard-like consistency that sets crème brûlée apart. Be sure to separate your eggs carefully so only yolks make it into the mix.
- Vanilla extract: Use a high-quality vanilla extract for the best results.
See the recipe card for full information on ingredients and quantities.
- Prep and preheat your oven. Preheat your oven to 325°F and gather your tools: six crème brûlée ramekins, a baking sheet (or a roasting pan), and either a butane torch or your broiler for caramelizing. Place the ramekins on the baking sheet and set a kettle of water to boil—we’ll need it for the water bath.
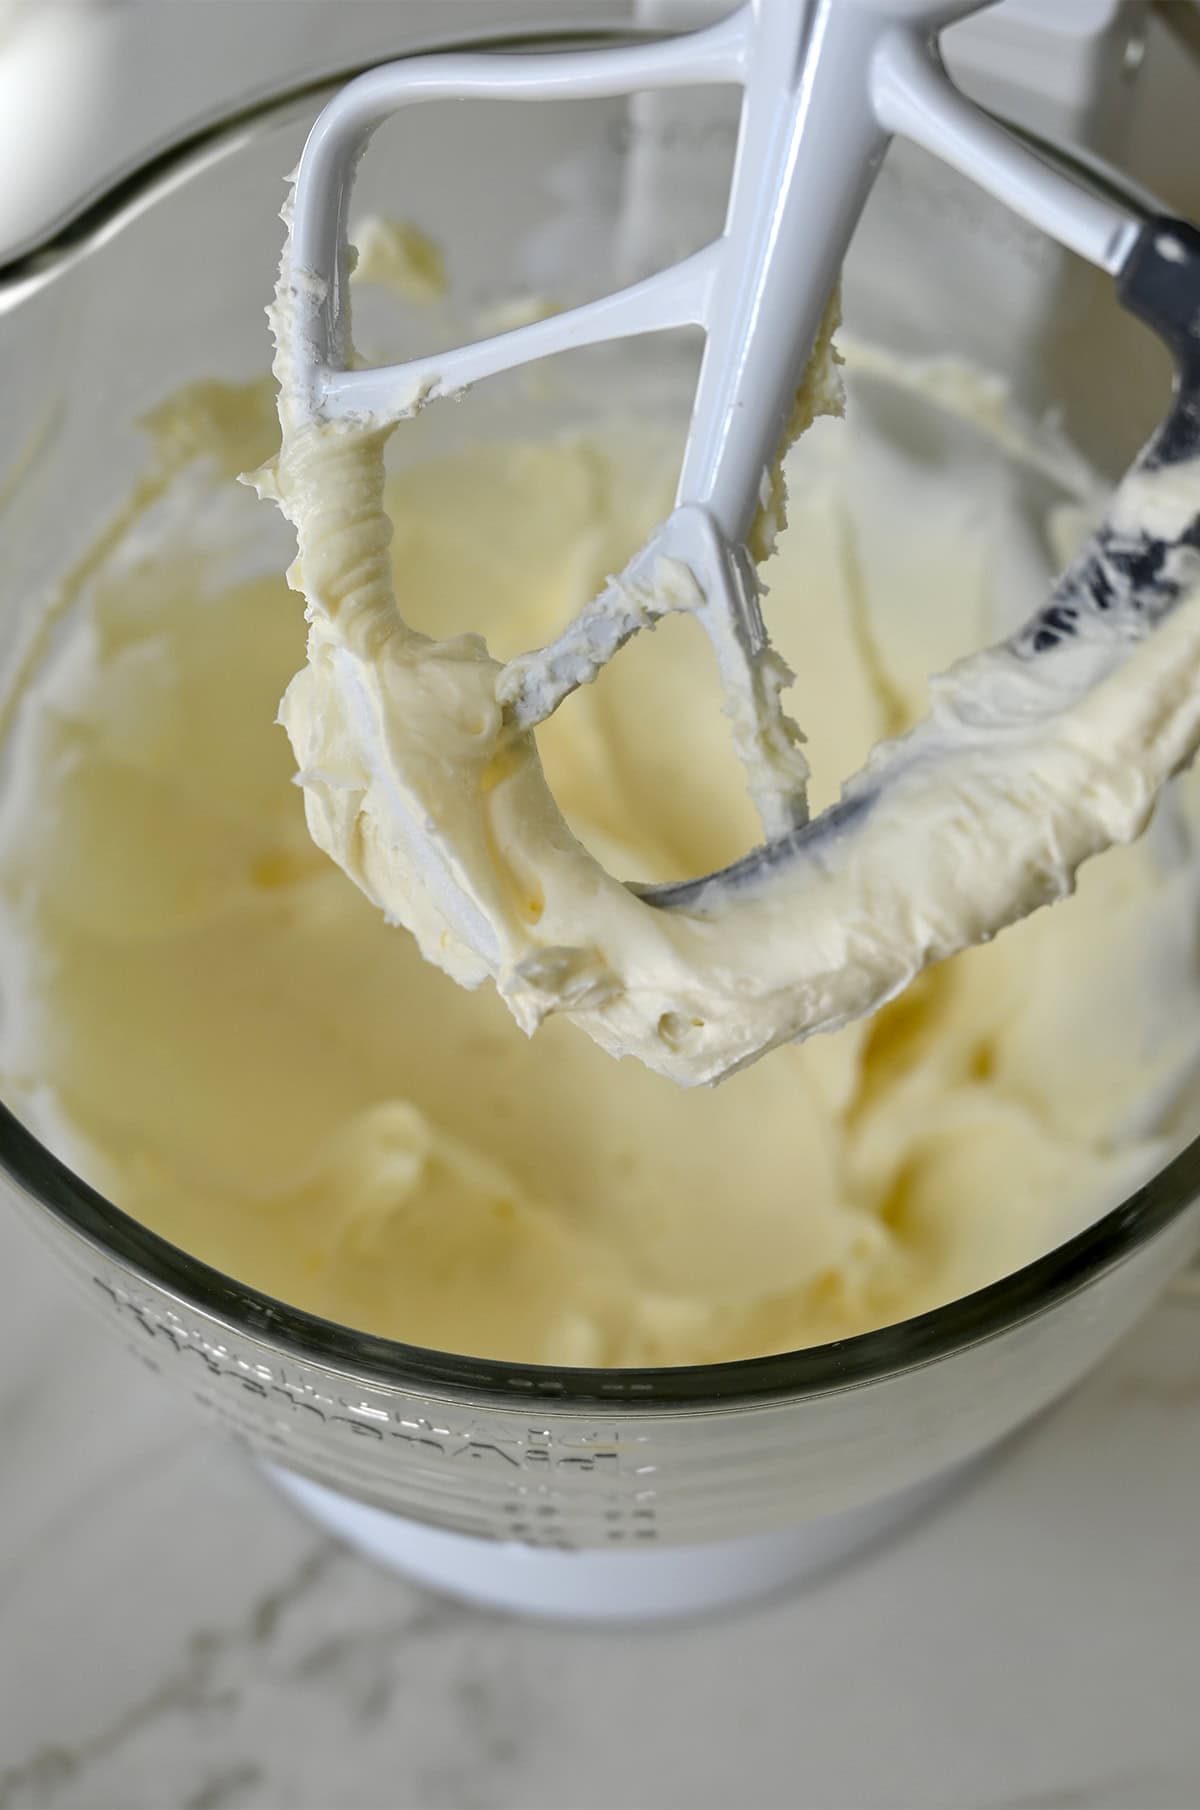
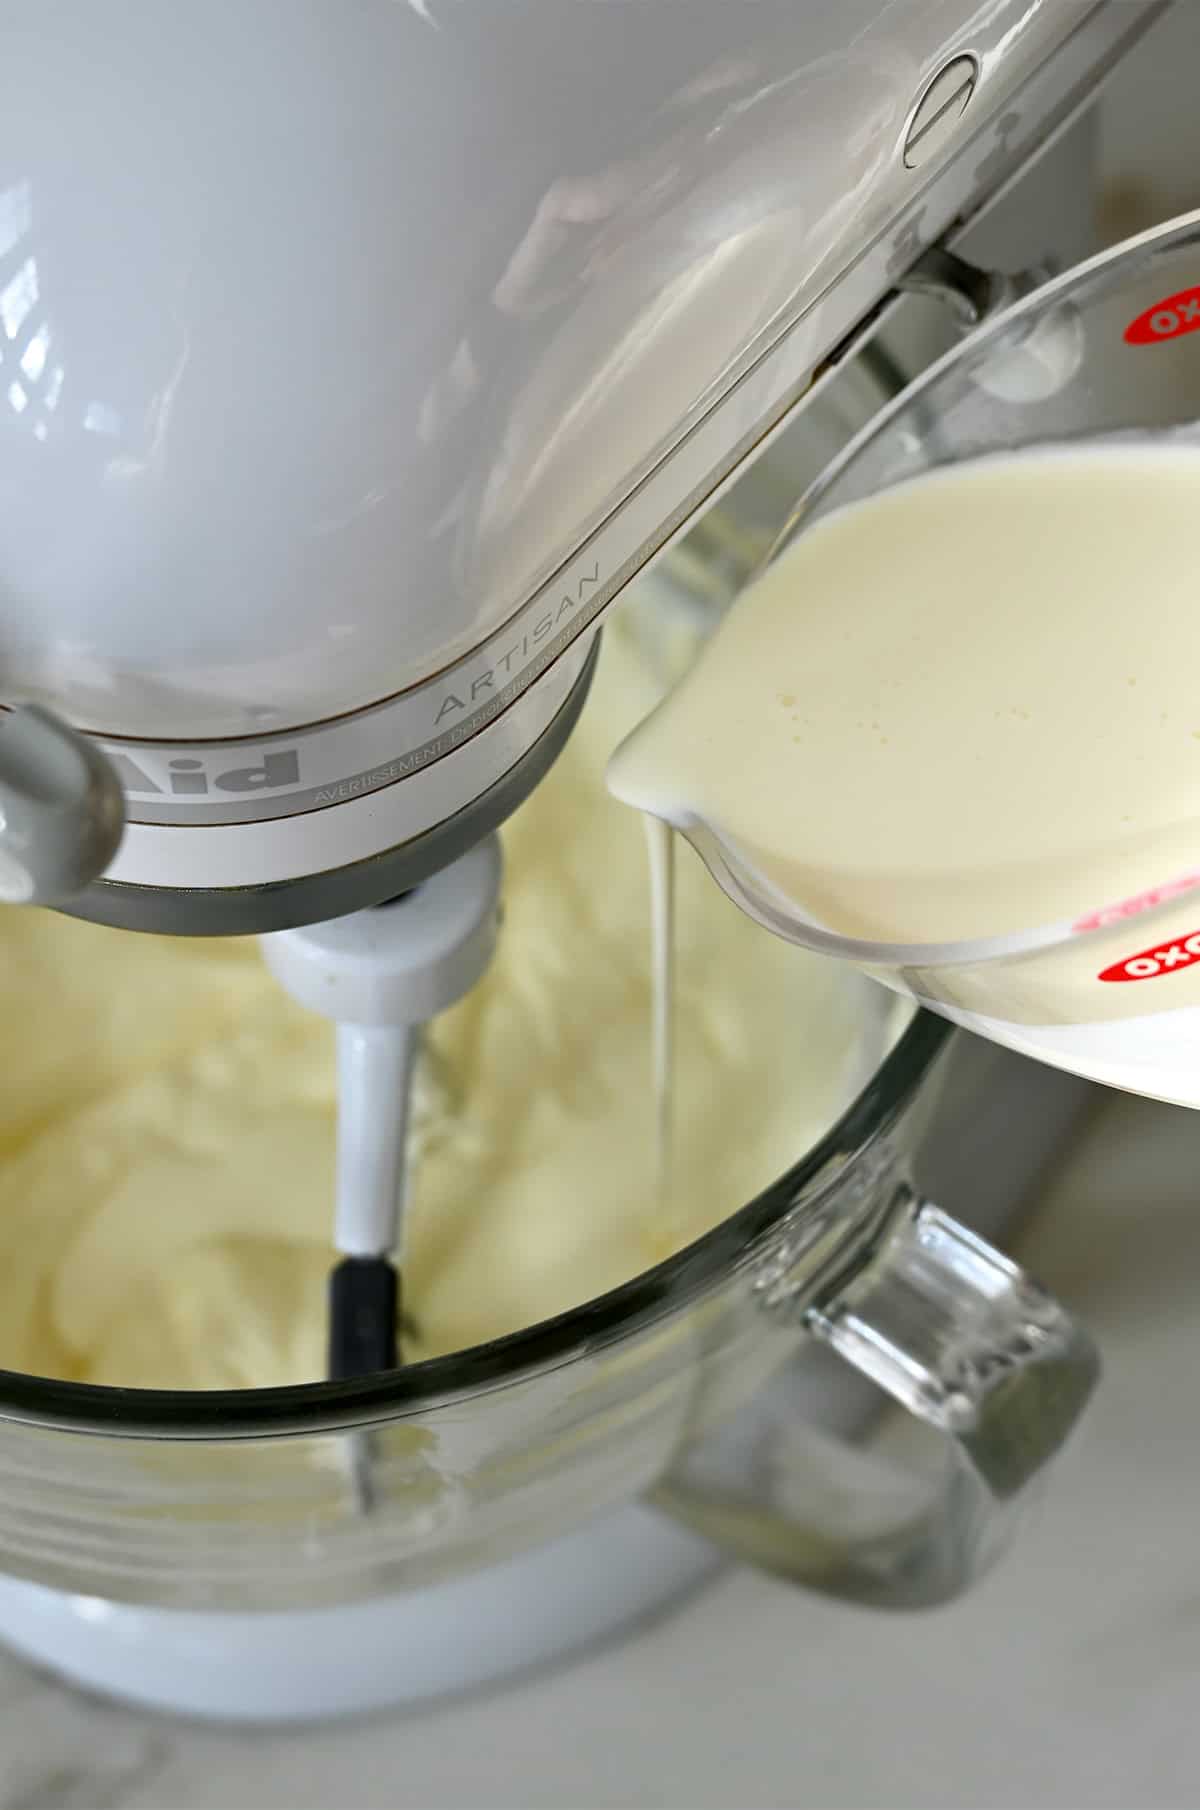
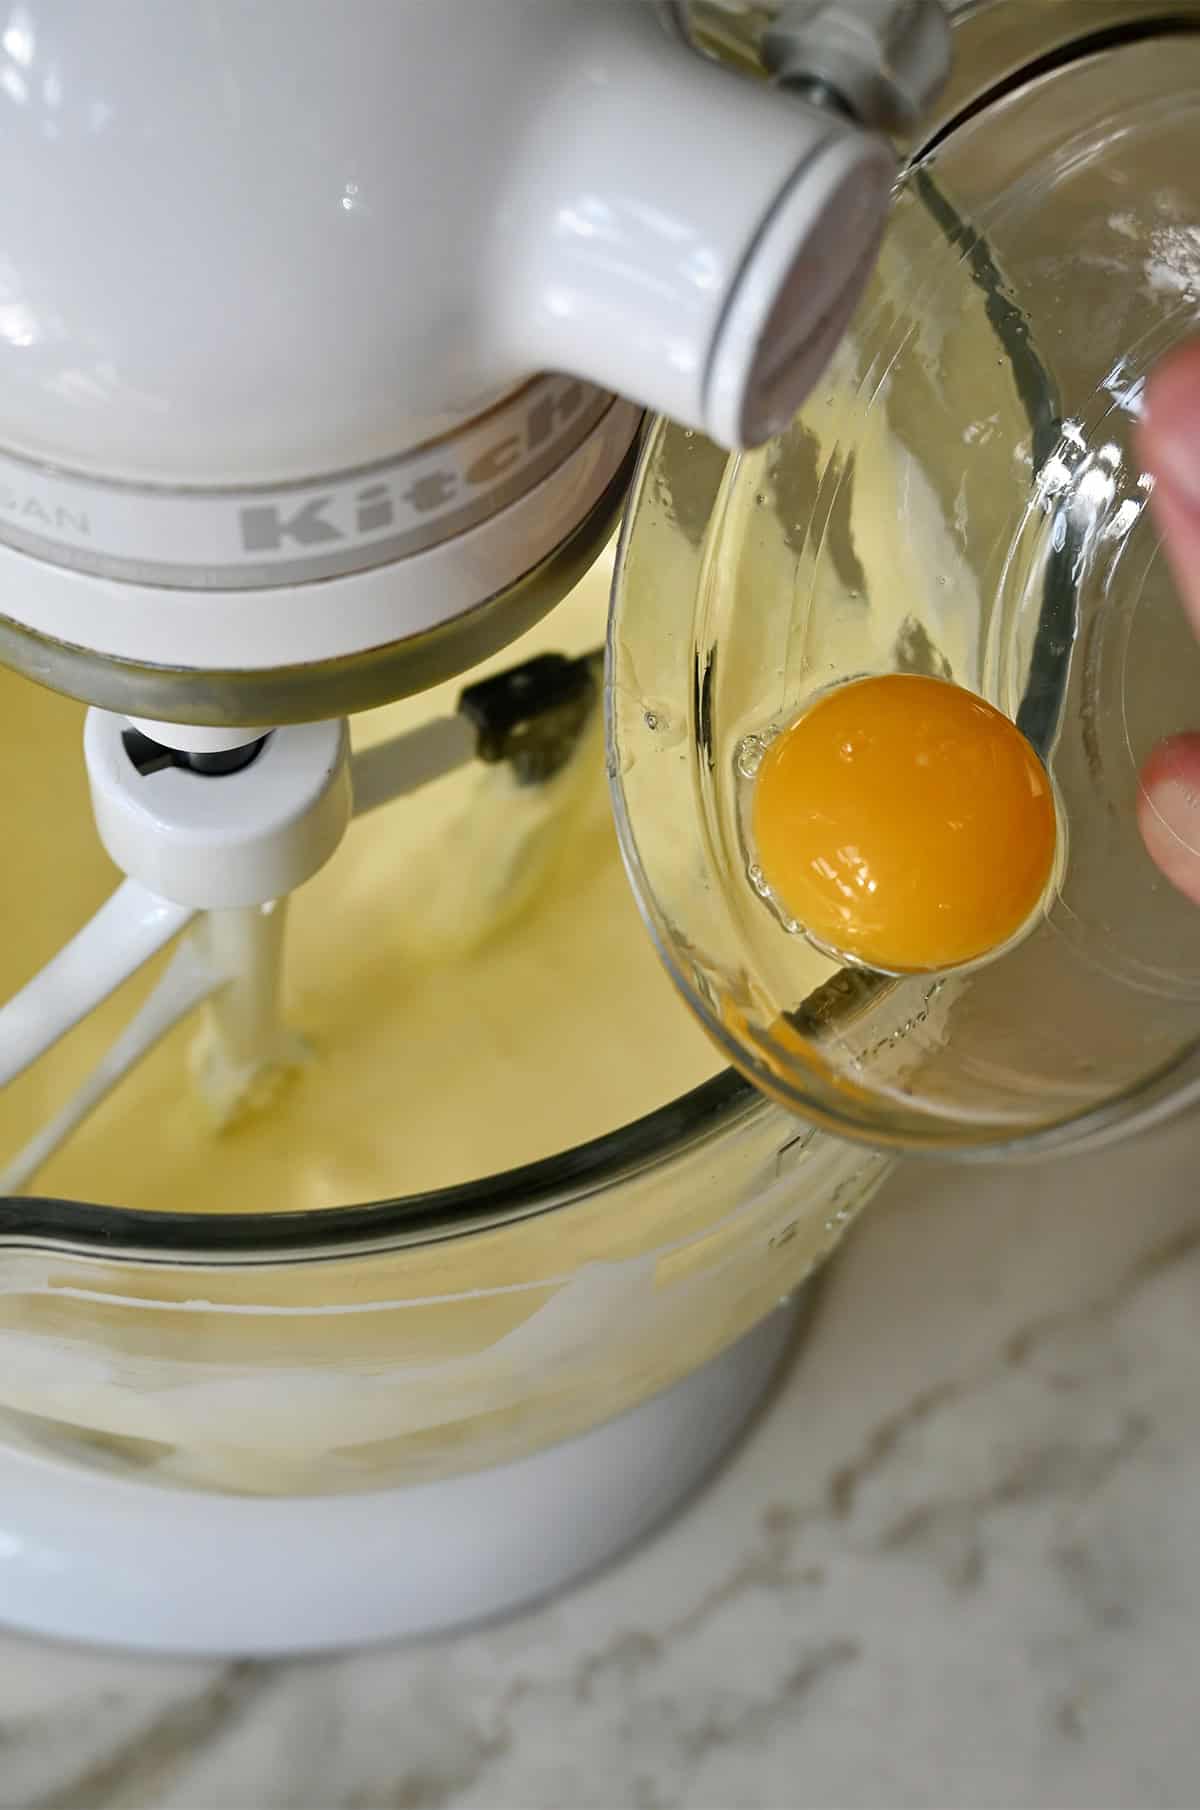
- Make the cream cheese custard base. Using a stand mixer with the paddle attachment or a handheld mixer, beat the cream cheese until it’s smooth and lump-free (scrape down the sides often). Add the sugar and continue beating until fully incorporated. Gradually stream in the heavy cream with the mixer on low speed, then mix in the egg yolks one at a time. Stir in the vanilla extract until just combined.
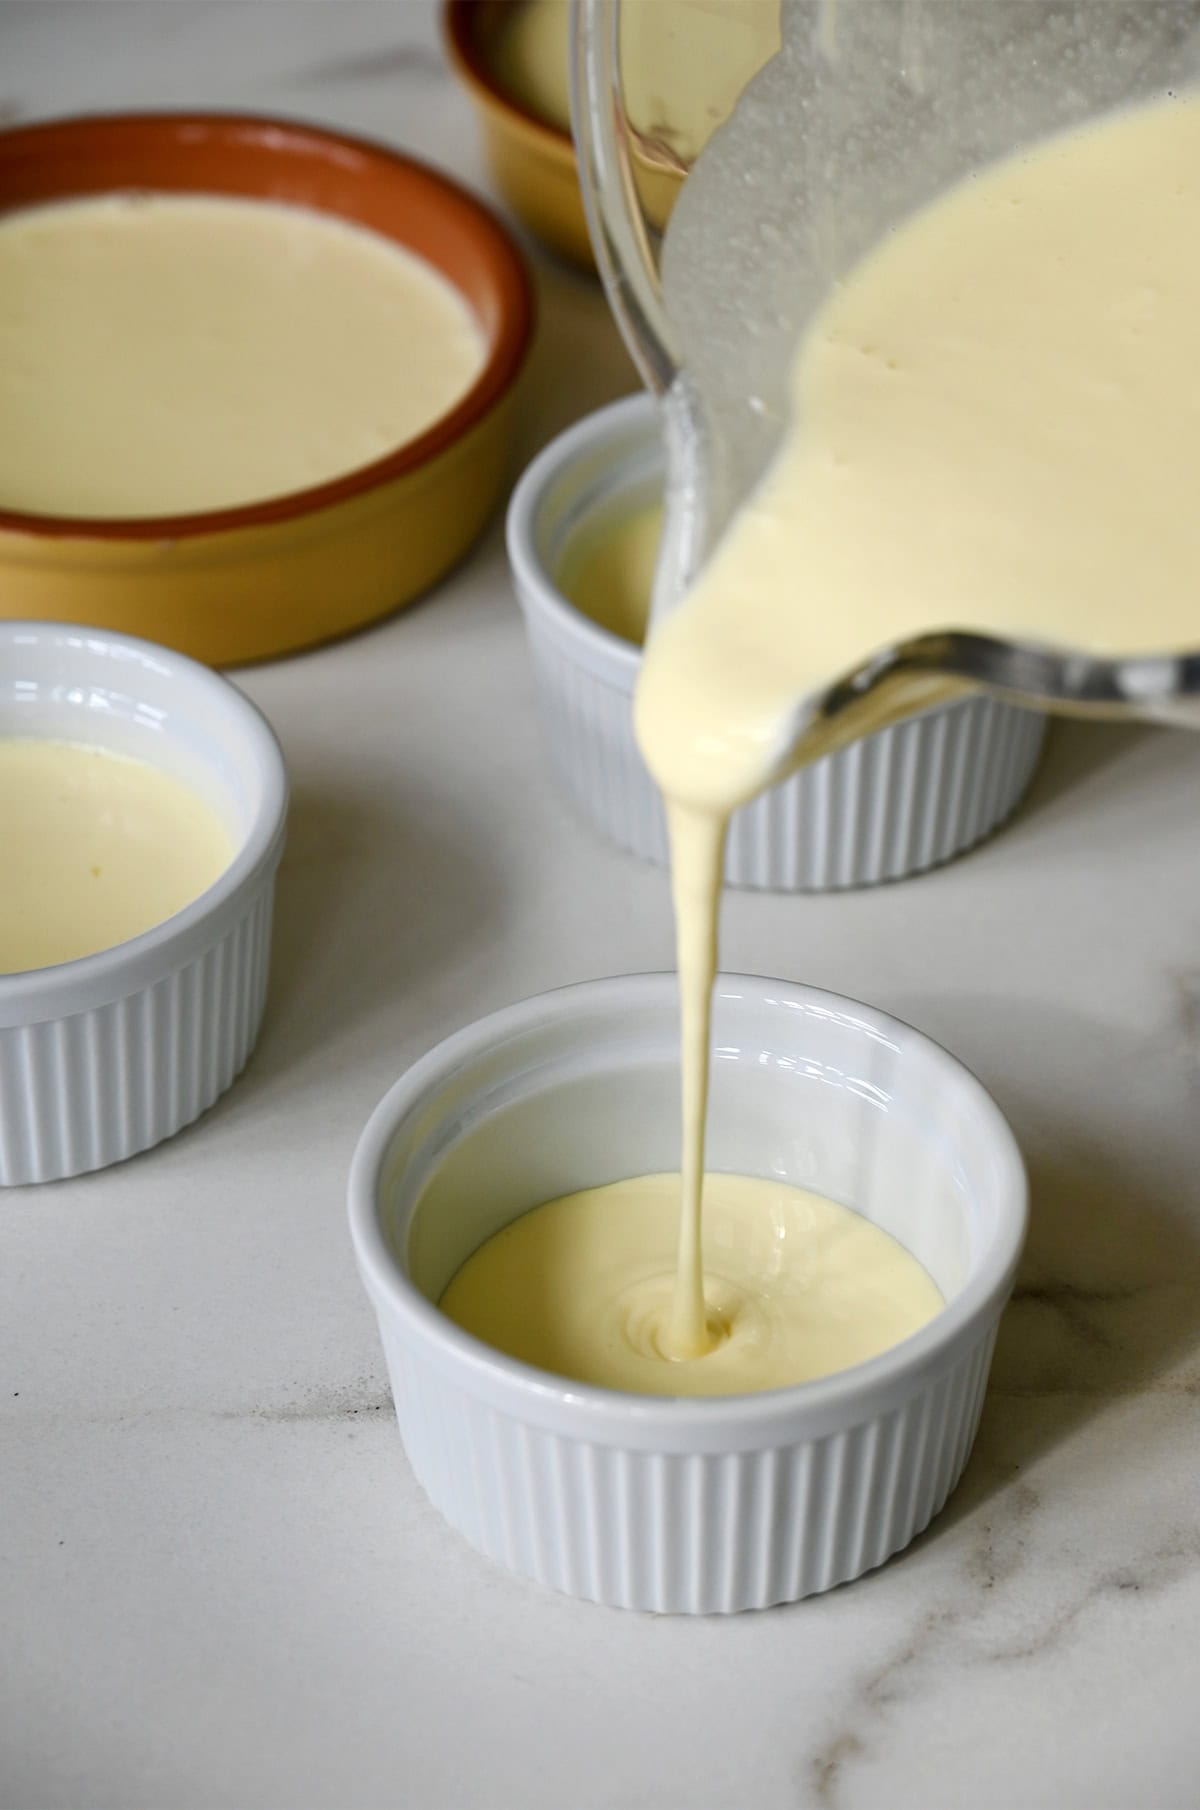
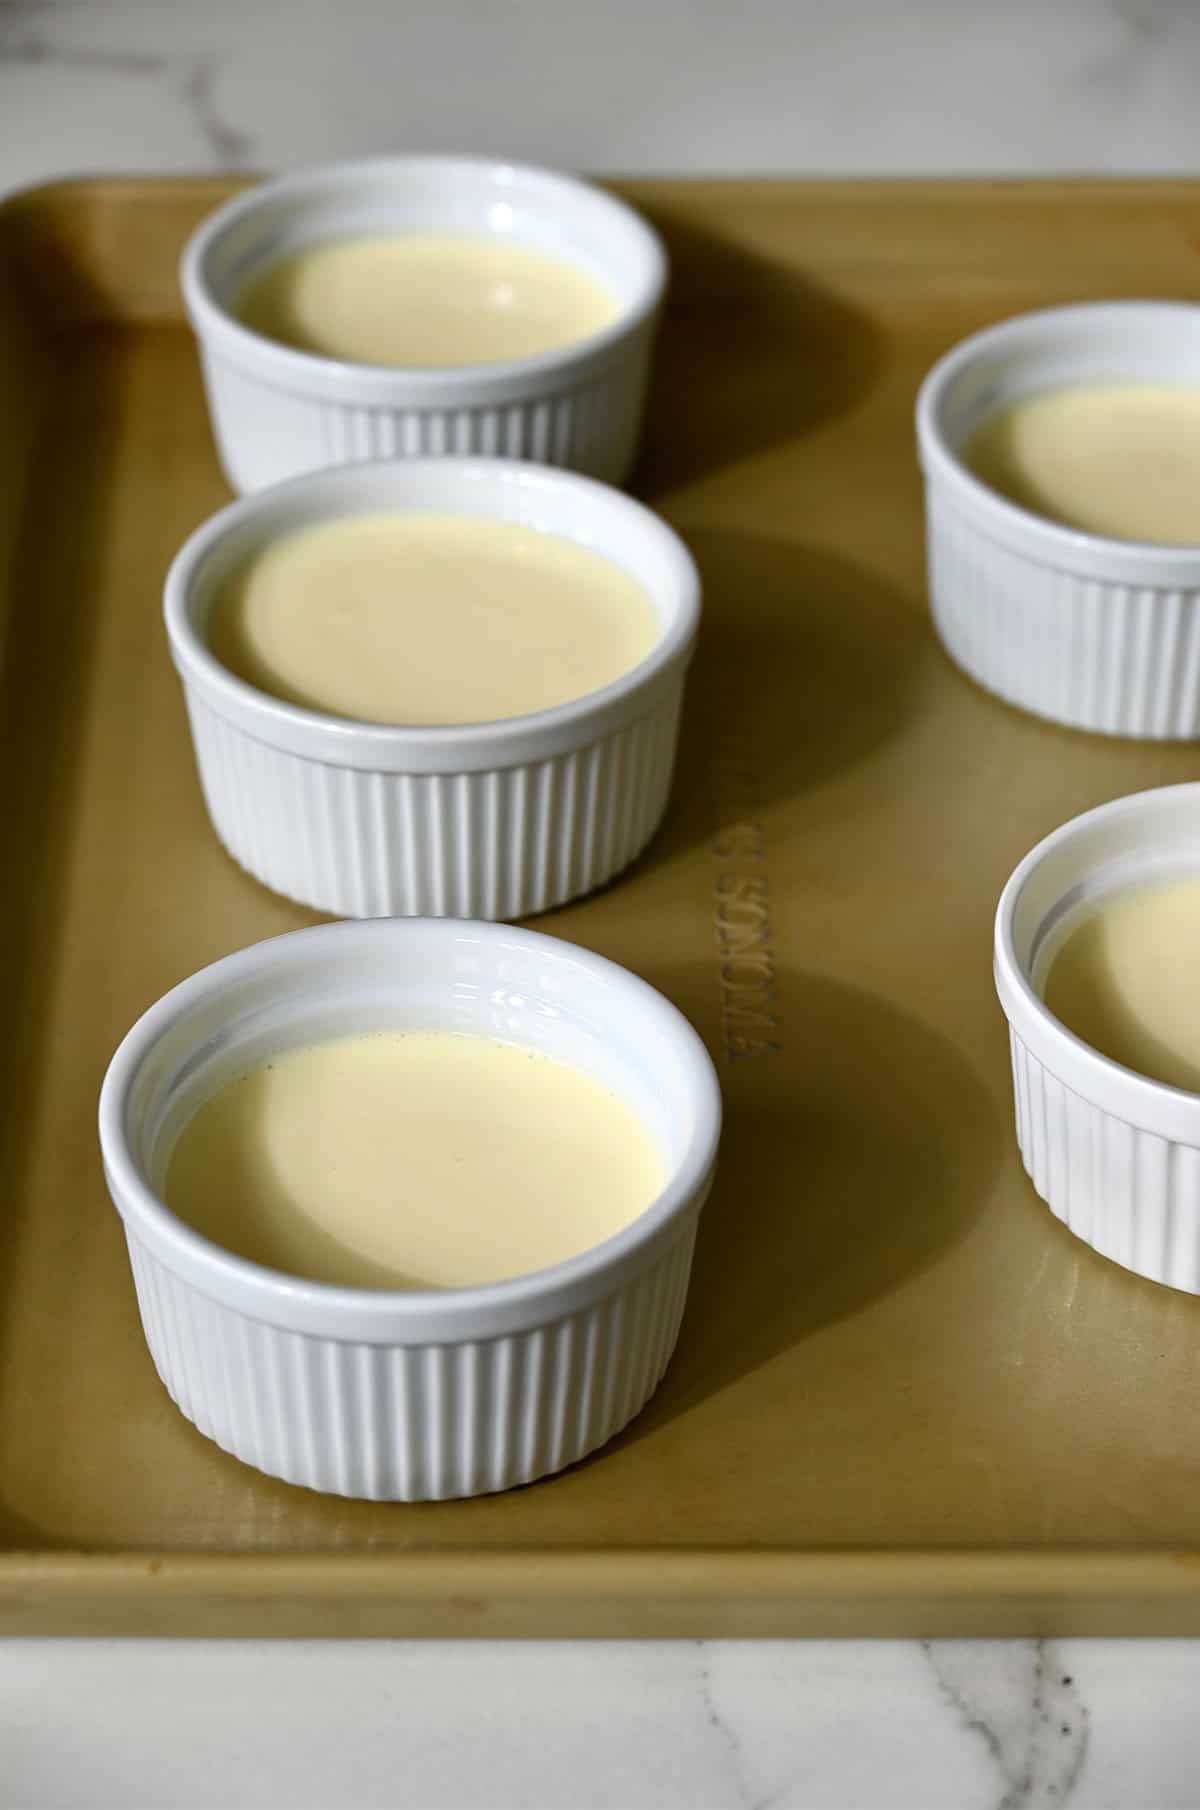
- Fill and bake. Evenly distribute the cheesecake mixture among the ramekins. Carefully pour the almost-boiling water into the roasting pan until it reaches halfway up the sides of the ramekins. Bake for 50 minutes, or until the cheesecakes are set but still slightly jiggly in the center.
- Cool and chill. Remove the ramekins from the water bath and let them cool to room temperature. Cover with plastic wrap and refrigerate for at least 2 hours (or overnight) to let the flavors meld and the texture set.
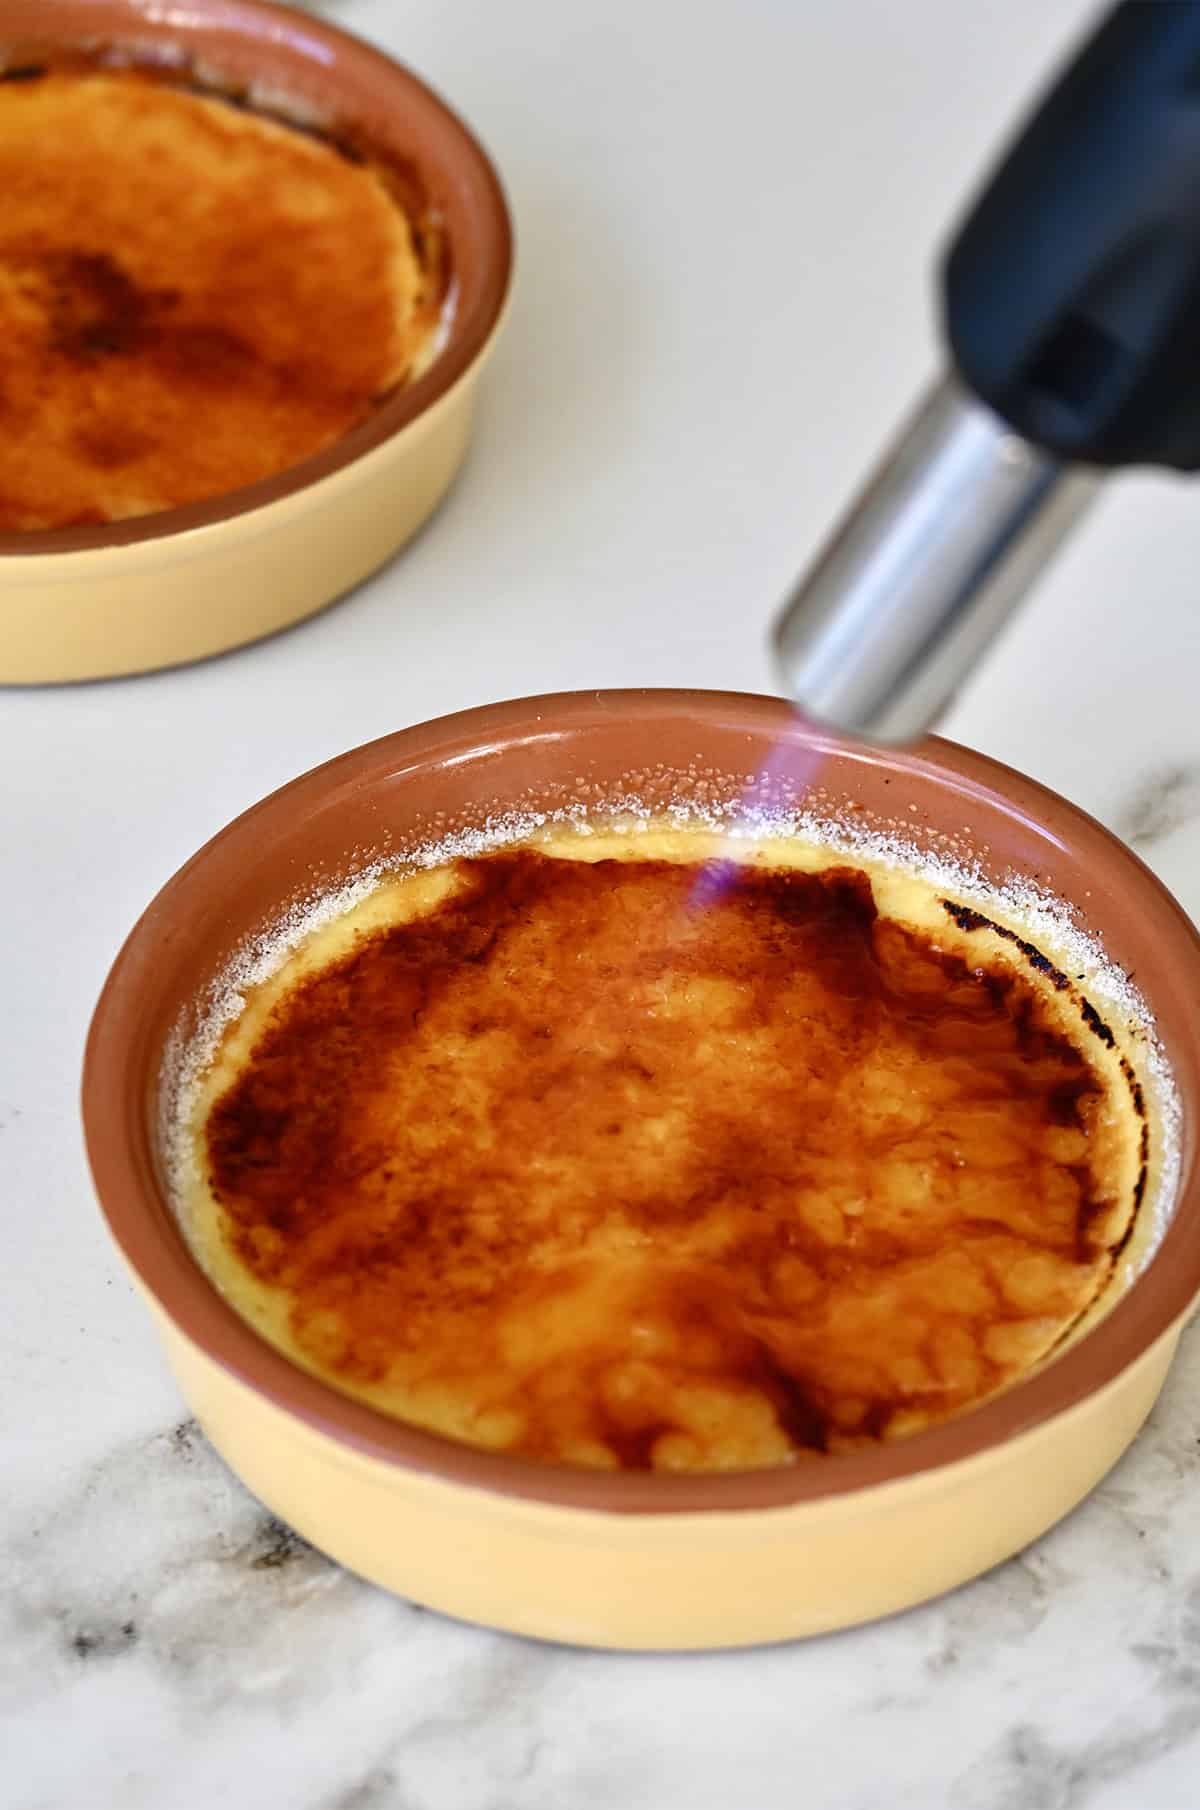
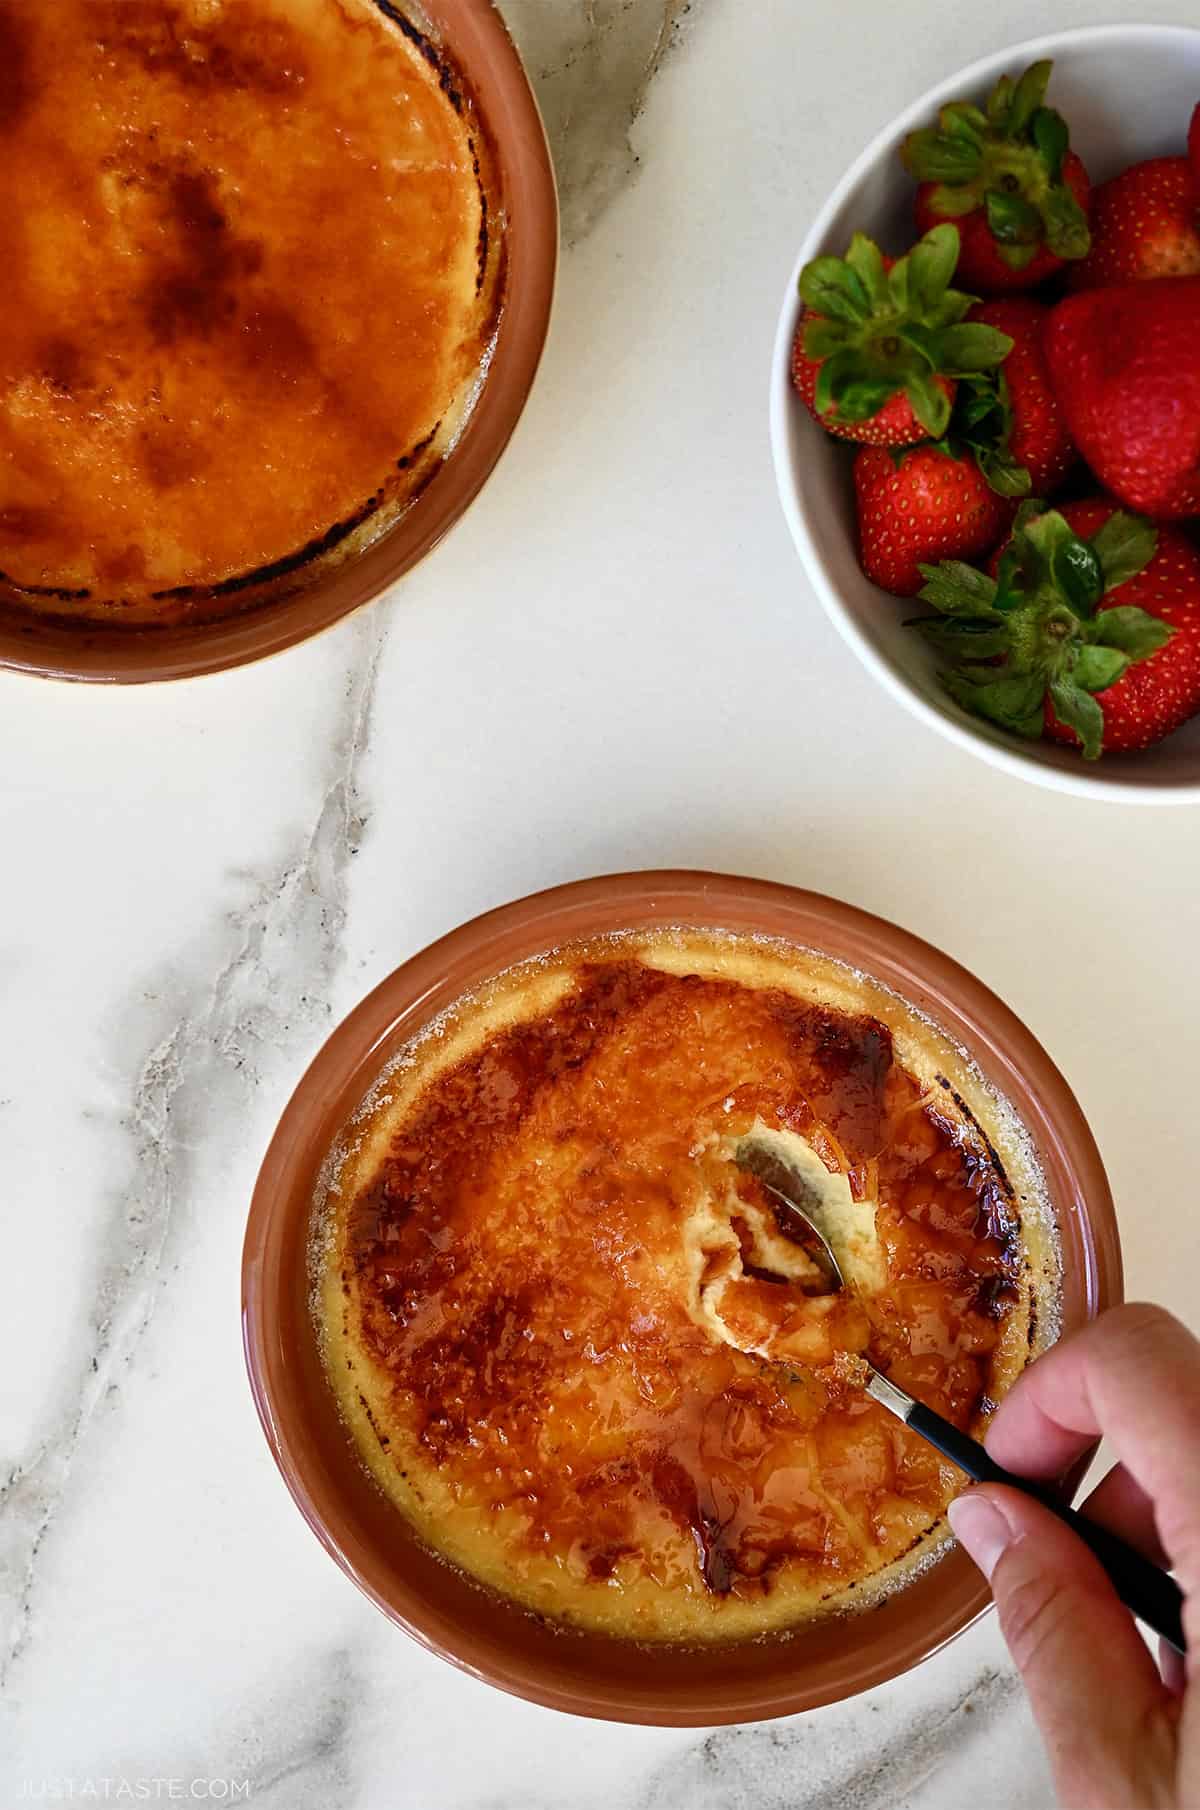
- Caramelize the tops. Just before serving, sprinkle each custard with 1 teaspoon of sugar. Use a kitchen torch to caramelize the sugar until it’s golden and bubbling. I find the best way to do this is to hold the torch about 2–3 inches away from the sugar and move it in small circles. Serve immediately and prepare for applause!
Kelly’s Note: Crème brûlée is at its absolute best when served chilled. The creamy custard contrasts beautifully with the crisp, caramelized sugar topping.
- There’s no tempering of eggs, no stovetop cooking and no need to strain the custard for this recipe. So, for an ultra-smooth dessert, it’s super important to bring your egg yolks and cream cheese to room temperature before you start.
- The easiest way to separate yolks: Crack the egg and gently transfer the yolk back and forth between the two shell halves, allowing the white to fall into a bowl below. Alternatively, you can use a water bottle—just squeeze, place the mouth of the bottle over the yolk and release to suction it up!
- Don’t skip the water bath! For the creamiest, silkiest crème brûlée, a water bath, also known as a bain-marie, is a must. Whether you’re baking custards or cheesecakes, a water bath helps desserts cook gently and evenly, preventing cracks. Heat a kettle of water while you preheat the oven and make the custard. Then, place the filled ramekins in a baking or roasting pan, then pour the hot water into the pan until it reaches halfway up the sides of the ramekins.
- Bake just until set. The custards are ready when the edges are set, but the center still jiggles slightly when shaken. Overbaking can lead to a rubbery texture, so keep an eye on them toward the end of baking.
- Chill the custards before you brûlée. This allows the custard to fully set and develop its creamy texture. Plus, a cold custard base allows the sugar to quickly caramelize into a crisp, crackling crust when torched.
- Broiler or blowtorch? While a culinary blowtorch is the classic tool for creating that signature burnt sugar crust, your oven’s broiler can work in a pinch. Place the ramekins on a baking sheet and set them under the broiler on high heat. Keep a close eye on them, and rotate the tray if needed for even caramelization. Both methods work, but a kitchen torch gives you better control for that golden, crackling finish.
Make-Ahead Tips
If you’re hosting, you can make the custards a day or two early, leaving you free to focus on other dishes. When it’s time to serve, simply sprinkle on the sugar, torch or broil, and voilà—dessert perfection in minutes!
- Make the custard ahead: The custard can be prepared, poured into ramekins and baked up to 2 days in advance. Once baked, let the custards cool to room temperature before covering them tightly with plastic wrap and storing them in the fridge.
- Wait to torch the sugar: For the best texture and flavor, wait to brûlée the sugar topping until you’re ready to serve. If torched too far in advance, the sugar crust may soften as it absorbs moisture from the custard, so avoid brûlée-ing too far in advance.
Crème brûlée cheesecake might feel fancy, but now you know the secret—it’s a breeze to make at home! Whether you’re serving these individual desserts to a crowd or treating yourself to a little luxury, this French dessert (with a twist!) will steal the show every time.

Ingredients
- 12 ounces cream cheese, at room temp
- 1/4 cup sugar
- 1 1/2 cups heavy cream
- 6 large egg yolks
- 2 teaspoons vanilla extract
- 2 Tablespoons sugar
Instructions
- Preheat the oven to 325°F.
- In the bowl of a stand mixer fitted with the paddle attachment, beat the cream cheese until it’s smooth and creamy, scraping down the sides frequently, about 2 minutes. Add ¼ cup sugar and continue beating the mixture and scraping down the sides until there are no visible lumps.
- With the mixer on a low speed, slowly stream in the heavy cream and mix just until combined. Add the egg yolks, one at a time, mixing between each addition. Stir in the vanilla extract.
- Place six crème brûlée molds on a baking sheet. Pour the mixture evenly among the molds. Place the baking sheet in the oven then pour enough almost boiling water into the baking sheet until it comes up halfway around the molds. Bake the cheesecakes for about 50 minutes, or just until they are set.
- Remove the cheesecakes from the oven and allow them to cool to room temperature. Once cooled, cover each with plastic wrap and refrigerate them for a minimum of 2 hours.
- When ready to serve, remove the cheesecakes from the fridge and discard the plastic wrap. Sprinkle each with 1 teaspoon of the remaining sugar. Using a butane torch, caramelize the sugar until it’s golden brown. (Alternatively, place the molds under a preheated broiler until the sugar is caramelized.) Serve immediately.
Kelly’s Notes
- Make the custard ahead: The custard can be prepared, poured into ramekins and baked up to 2 days in advance. Once baked, let the custards cool to room temperature before covering them tightly with plastic wrap and storing them in the fridge.
- Wait to torch the sugar: For the best texture and flavor, wait to brûlée the sugar topping until you’re ready to serve. Freshly caramelized sugar creates a crisp, crackly crust that contrasts beautifully with the cool, creamy custard. If torched too far in advance, the sugar crust may soften as it absorbs moisture from the custard, so avoid brûlée-ing too far in advance.
- ★ Did you make this recipe? Don’t forget to give it a star rating below!
Nutrition
Did you try this recipe?
Leave a comment below with your star rating!
This post may contain affiliate links.
Recipe re-printed from Making Artisan Cheesecake (Quarry Books, 2015) with permission from author Melanie Underwood.


Gotta add this to my dessert rotation. The 6 servings refers to what size ramekins?
Thanks! They’re 5-inch shallow ramekins :)
OMG these were AMAZING! And SO much easier to whip up than I thought they would be. Thanks for sharing this incredible recipe, Kelly!
Thrilled you enjoyed the recipe, Mary!
I so need to add a blow torch to my christmas list. These cheesecake brûlées look amazing and I absolutely love an eggy custard type pudding, especially if it has cheesecake flavours. Win win. Thank you for a great post. Sammie.
You are so welcome! Enjoy :)
I so need to pu