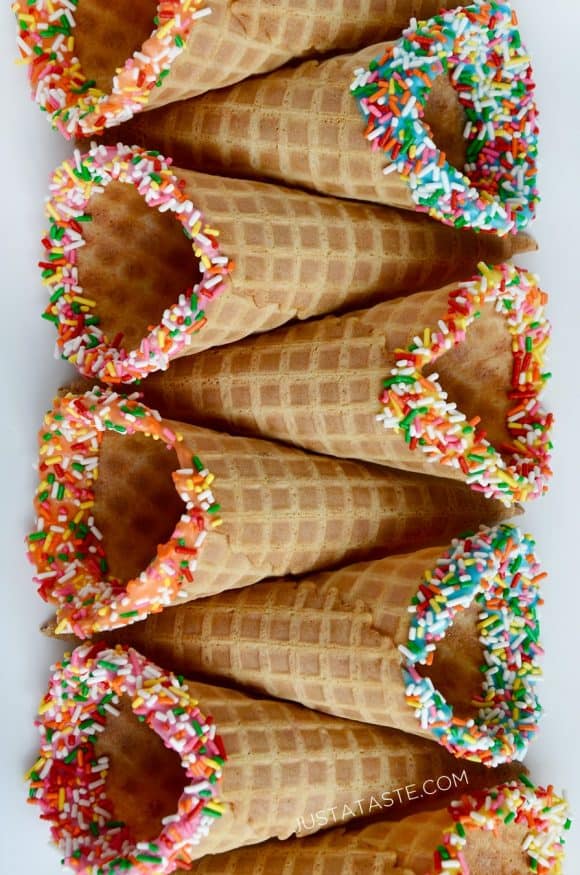
I have a real soft spot for dipped waffle cones. What began as an impassioned love of all things chocolate-covered and sprinkle-topped as a child, has since grown into an ice cream obsession. So I’ve sampled many a scoop and a cone in my day, from the hole-in-the-wall shops to the frosty treat chains (Dairy Queen dipped cone for one, please!) But there’s something about a DIY dipped waffle cone that takes an ordinary dessert to extraordinary levels.
And did you know you can actually make your own waffle cones on a panini press? True story! All you need is my simple waffle batter and a hot panini press, and you’re just minutes away from crispy, crunchy waffle cone glory.
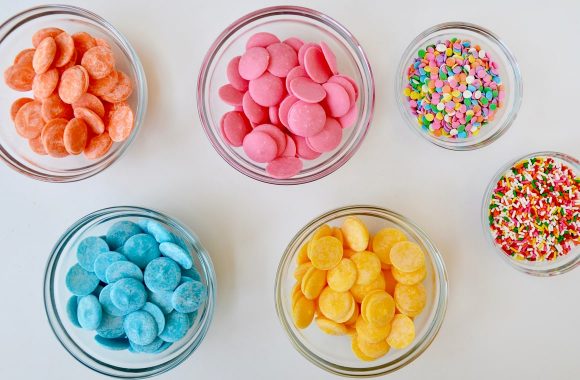
Of course you can skip the DIY efforts and take the ever-so-sweet shortcut with store-bought cones. Then all that’s left to do is get-to-melting with your candy melt colors of choice. Candy melts come in a rainbow of colors, so I’ve opted for pink, orange, yellow and blue. And here’s the real trick when it comes to melting them: Add a splash of vegetable oil to the melts before you pop them in the microwave. The added oil will ensure the melts are a thin enough consistency to make for easy dipping.
Once you’ve dipped and dunked your cones in the candy melts, immediately add a heavy shower of sprinkles, ensuring they stick on the inside and outside of the cone. And that’s all there is to it! You’ve taken a basic ice cream dessert to a show-stopping new level. Now grab your ice cream (or 5-minute frozen yogurt) of choice and let the scooping begin!
P.S. Did you see what you can make with leftover candy melts? (Hint: UNICORN!)
Craving more? Subscribe to Just a Taste to get new recipes, meal plans and a newsletter delivered straight to your inbox! And stay in touch on Facebook, Twitter, Pinterest and Instagram for all of the latest updates.

Ingredients
- Homemade or store-bought waffle cones
- Pink candy melts
- Orange candy melts
- Yellow candy melts
- Blue candy melts
- Rainbow sprinkles
Instructions
- Melt the candy melts according to the package directions. If the candy melts are too thick once melted, stir in 1 to 2 teaspoons of vegetable oil to thin the mixture.
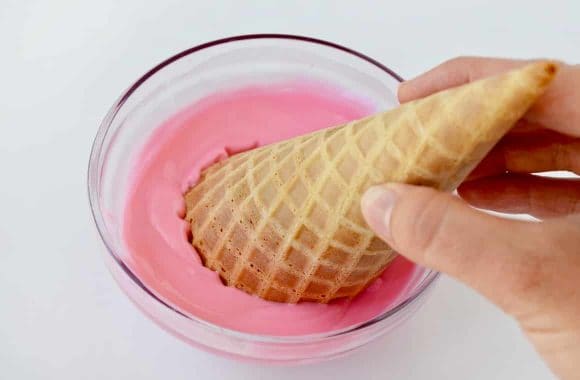
- Dip the tops of the waffle cones in the candy melts then immediately garnish them with the sprinkles and set them aside until the candy melts have fully hardened, about 10 minutes.
- ★ Did you make this recipe? Don't forget to give it a star rating below!
Nutrition
Shoutout
Did you try this recipe?
Share it with the world! Mention @justataste or tag #justatasterecipes!
This post may contain affiliate links.
Recipe by Kelly Senyei of Just a Taste. Please do not reprint this recipe without my permission. If you'd like to feature this recipe on your site, please rewrite the method of preparation and link to this post as the original source.






These are so cute!
I saw your picture of the dipped cones and had to read the recipe on how you did it. I can’t wait to go pick up some candy drops at the store. My daughter loves sprinkles and this treat will make her day!
Enjoy! :)
Such a cute idea!! Who wouldn’t love a sprinkle waffle cone with their ice cream <3 I HAVE to try it with my boys xoxo
Thanks so much, Nicola! I hope you and your boys enjoy them :)
I’m assuming these can be made ahead and stored in an airtight container? The chocolate doesn’t make the cone mushy does it? Thank you
Absolutely, Valerie!