If you’re looking for Easter cookies that are a little unexpected, these sugar cookie cups (a.k.a. deviled cookies) are it! They look just like deviled eggs at first glance, but they’re actually soft sugar cookies filled with vanilla frosting and topped with orange sanding sugar.

Table of Contents

If you’ve been around here for a while, you know I have a thing for cookie cups. From my chocolate chip cookie cups to gingerbread cookie cups to my peanut butter cookie cups stuffed with Reese’s, I’ve made plenty over the years—but I can’t remember being so excited to test a recipe as I was when this idea quite literally came to me in a dream.
At first glance, these look just like classic deviled eggs—right down to the yellow “egg yolk filling” and that tiny sprinkle on top that looks suspiciously like paprika. But one bite in and surprise! They’re actually soft, buttery sugar cookie cups filled with vanilla frosting and finished with orange sanding sugar for what might be the cutest (and tastiest) Easter cookies ever.
And while I really wanted to call these deviled cookies, I decided to keep things simple and let the photos do the talking. Whether you serve them for Easter brunch, tuck them onto a dessert table, or just enjoy watching people do a double take before reaching for one, these cookies are pure fun—no hard-boiled eggs required.
These Easter Cookies Are:
- Soft and buttery sugar cookie cups
- Designed to look like classic deviled eggs
- Made with simple pantry ingredients
- Filled with fluffy buttercream frosting
- Made with my most trusted sugar cookie dough
- A guaranteed conversation starter on any Easter dessert table

Start with My Favorite Sugar Cookie Dough
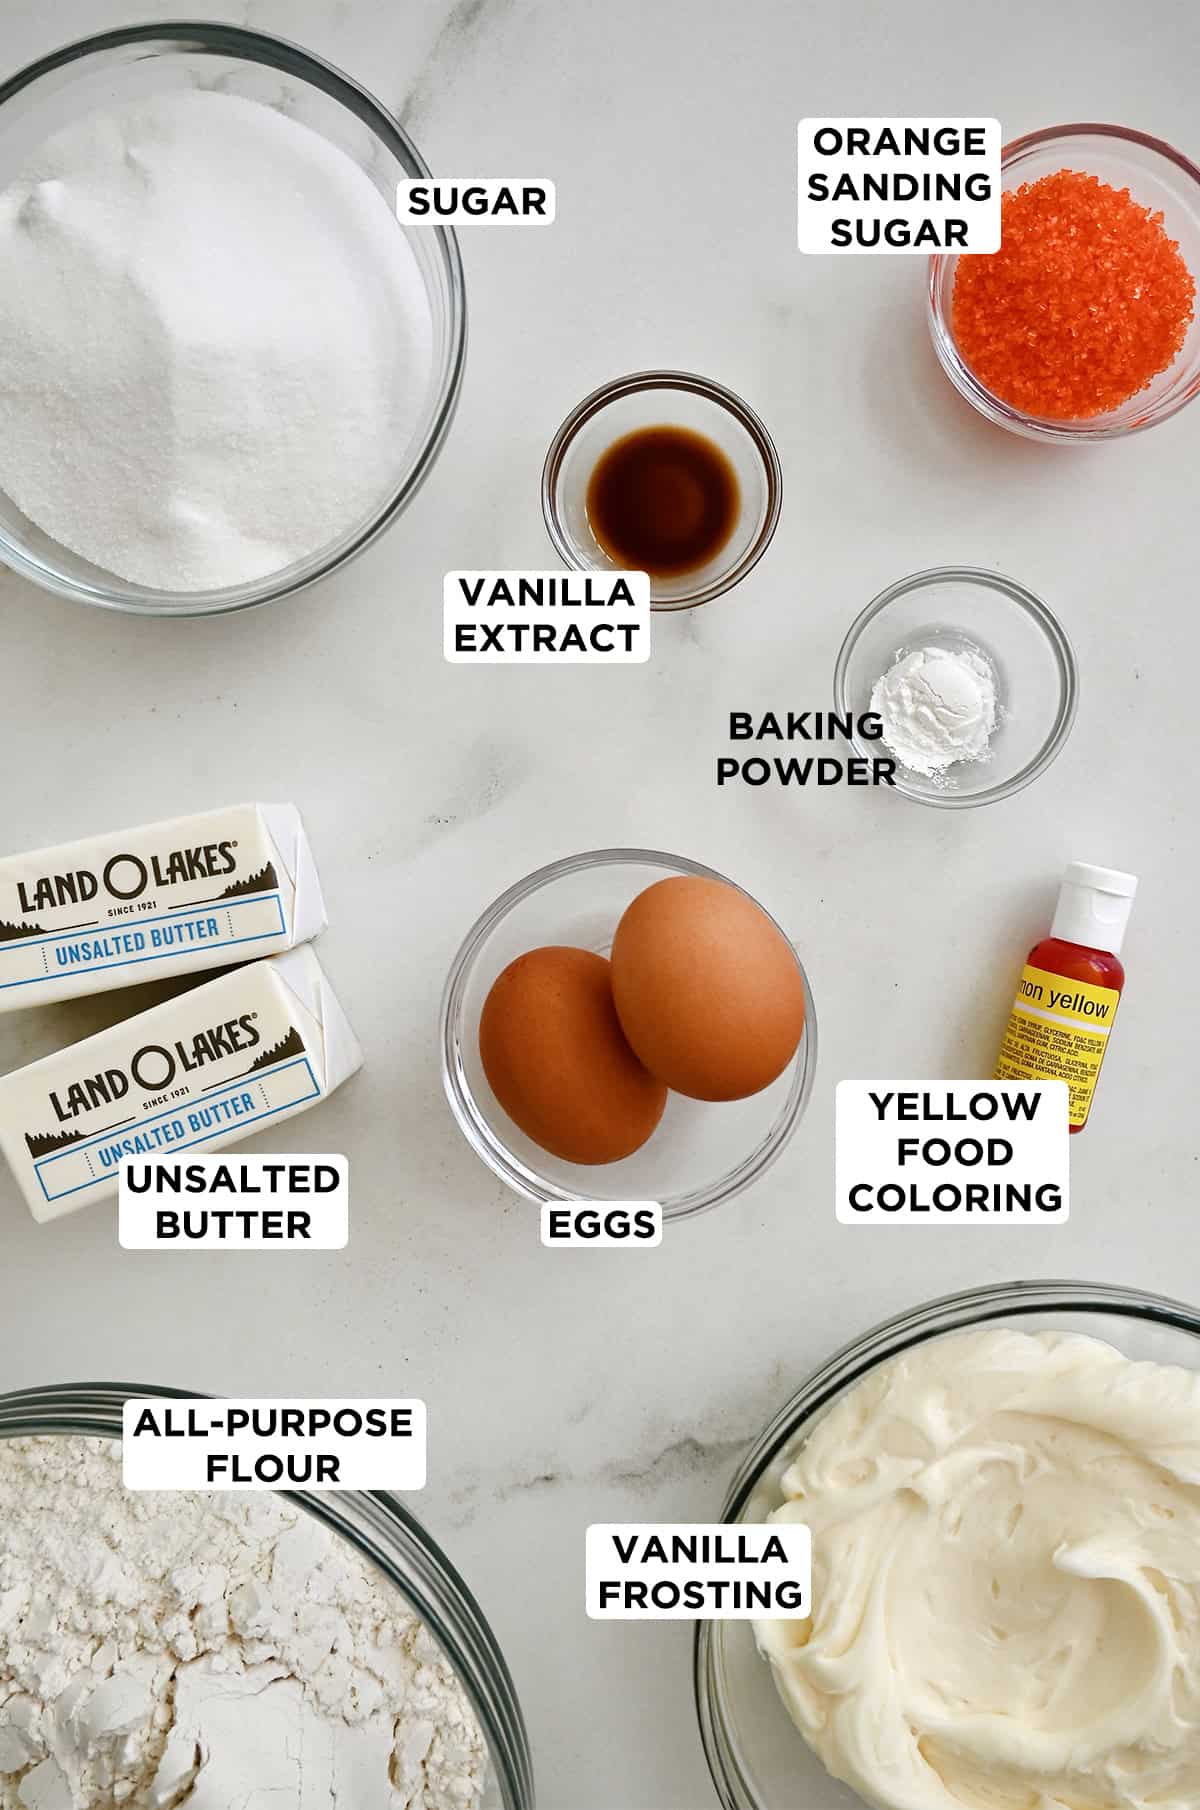
These Easter cookies are made with the same sugar cookie dough I use for my cutout sugar cookies and fruit pizza, and it’s one I come back to again and again. Over the years, I’ve tested it in a lot of different forms, and it continues to be one of the most reliable sugar cookie doughs on my site. Here’s everything you’ll need:
A few things make this dough work so well:
- More Butter, Just Enough Flour: This dough uses enough butter to stay soft and easy to work with, while still having enough flour to hold its shape. It’s a ratio I rely on whenever I need a sugar cookie that can be shaped, cut, or baked into cookie cups. Adding extra flour may seem tempting, but it will make the dough harder to work with and the baked cookies drier.
- Room Temp Butter Matters: When butter is at the proper temperature, it creams smoothly with the sugar, trapping tiny air pockets that help create a tender texture and cookies that hold their shape. For the best results, the butter should feel soft but still cool to the touch and should give slightly when pressed. If you’re short on time, I have a guide on how to soften butter quickly that walks through a few easy, reliable methods.
- No Chilling Required: I developed this dough so you can mix, scoop and bake right away. It’s one of the things I love most about it—it keeps the recipe simple without sacrificing structure or texture.
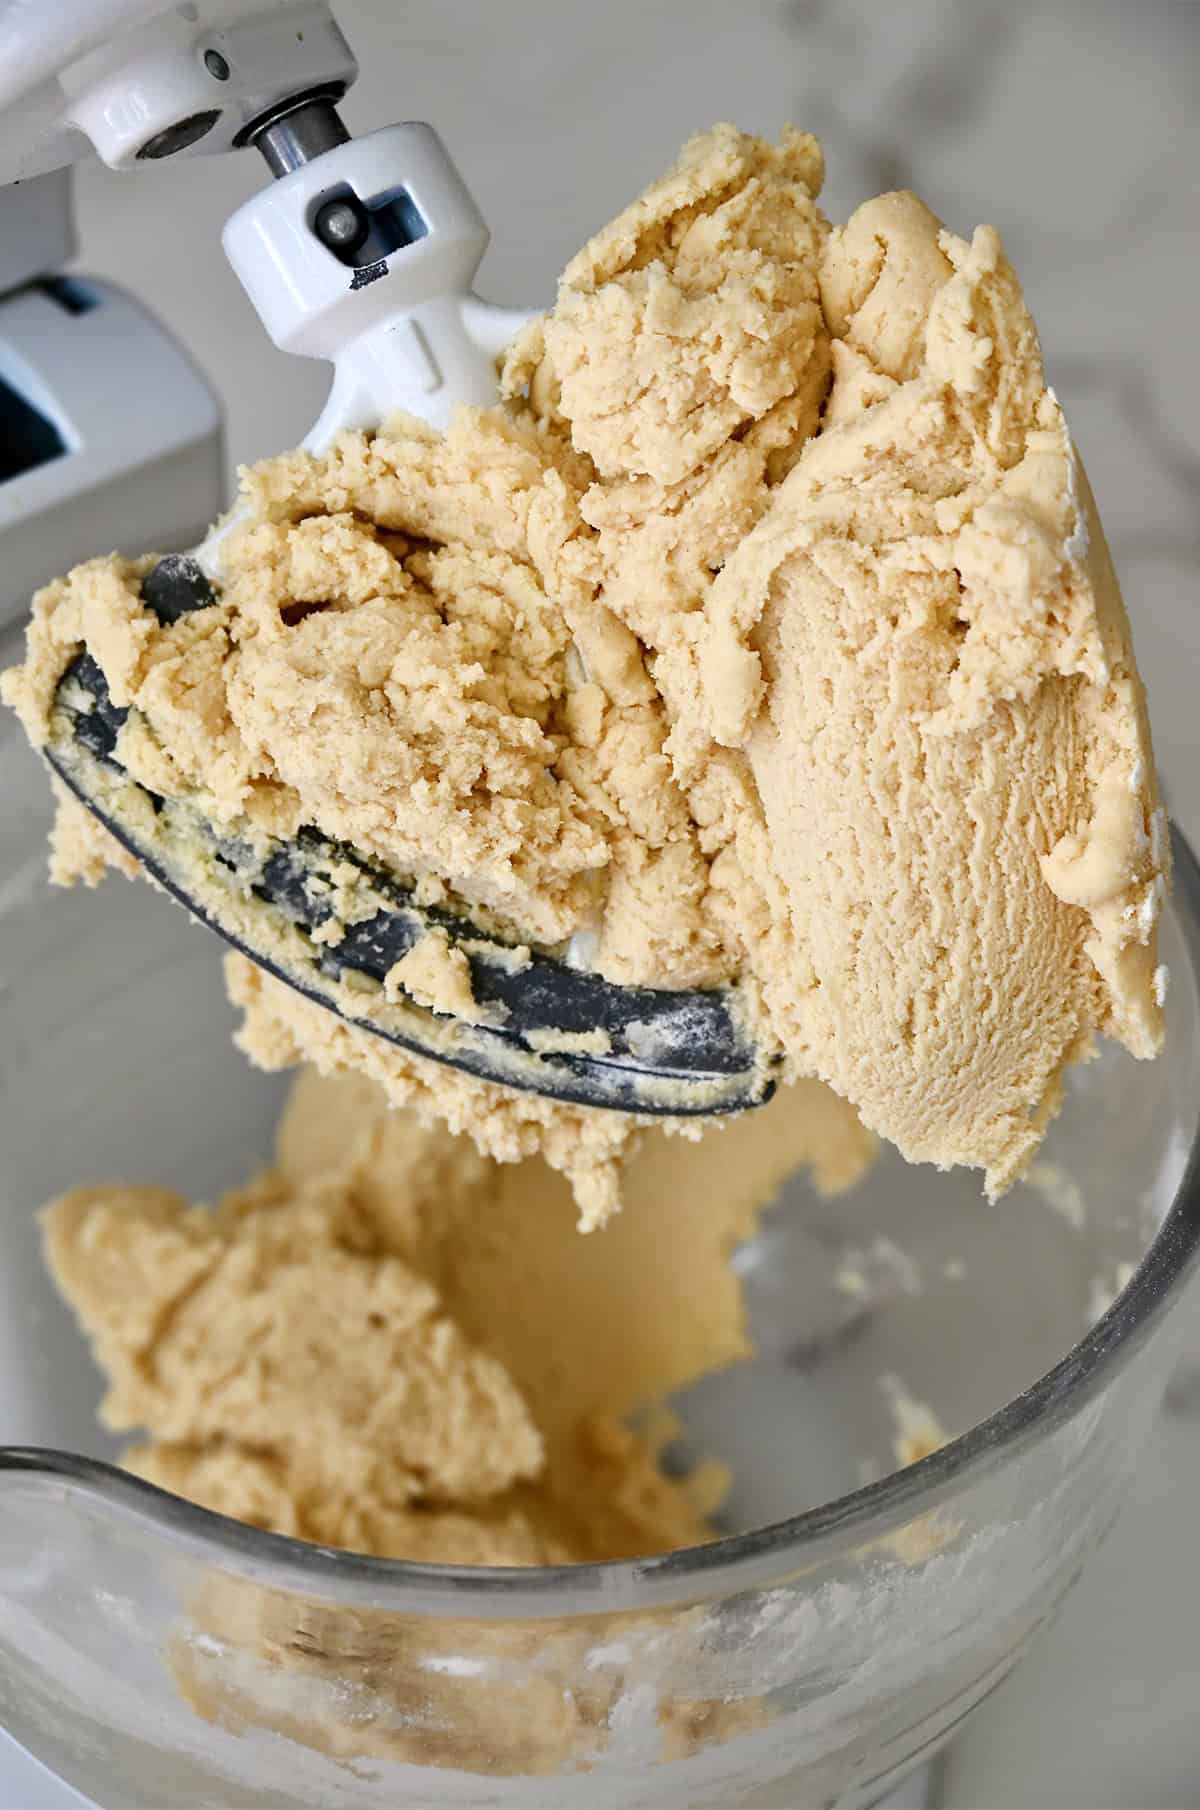
Once your sugar cookie dough is mixed, it should look like this:
How to Make These Easter Cookies
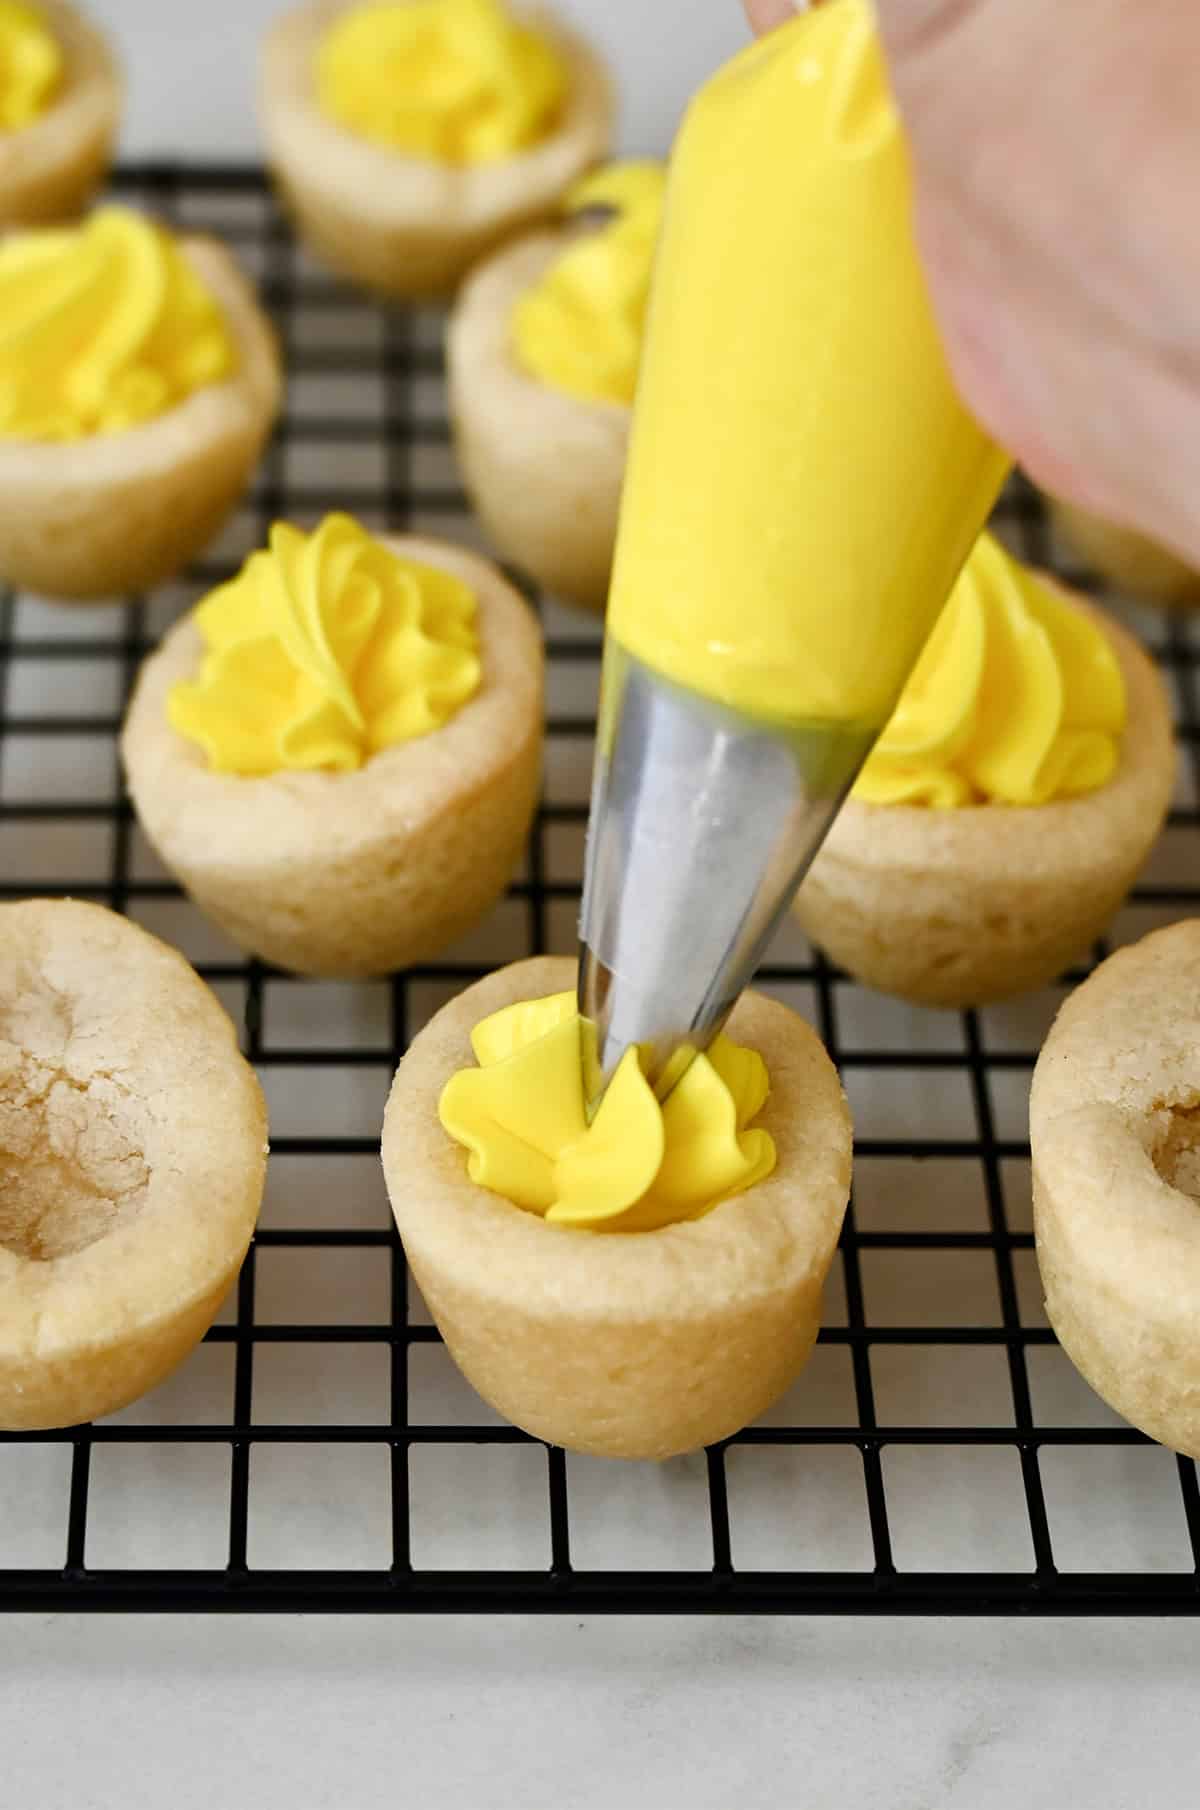
To make these Easter cookies look just like the deviled cookies you see here, you’ll need a silicone egg mold. It gives the cookies their shape and makes the whole illusion work. I also recommend using a piping bag fitted with a star-shaped tip for piping the frosting (a.k.a. the “yolk”) into the center of each cookie. It’s optional, but it makes the finished cookies look extra polished.
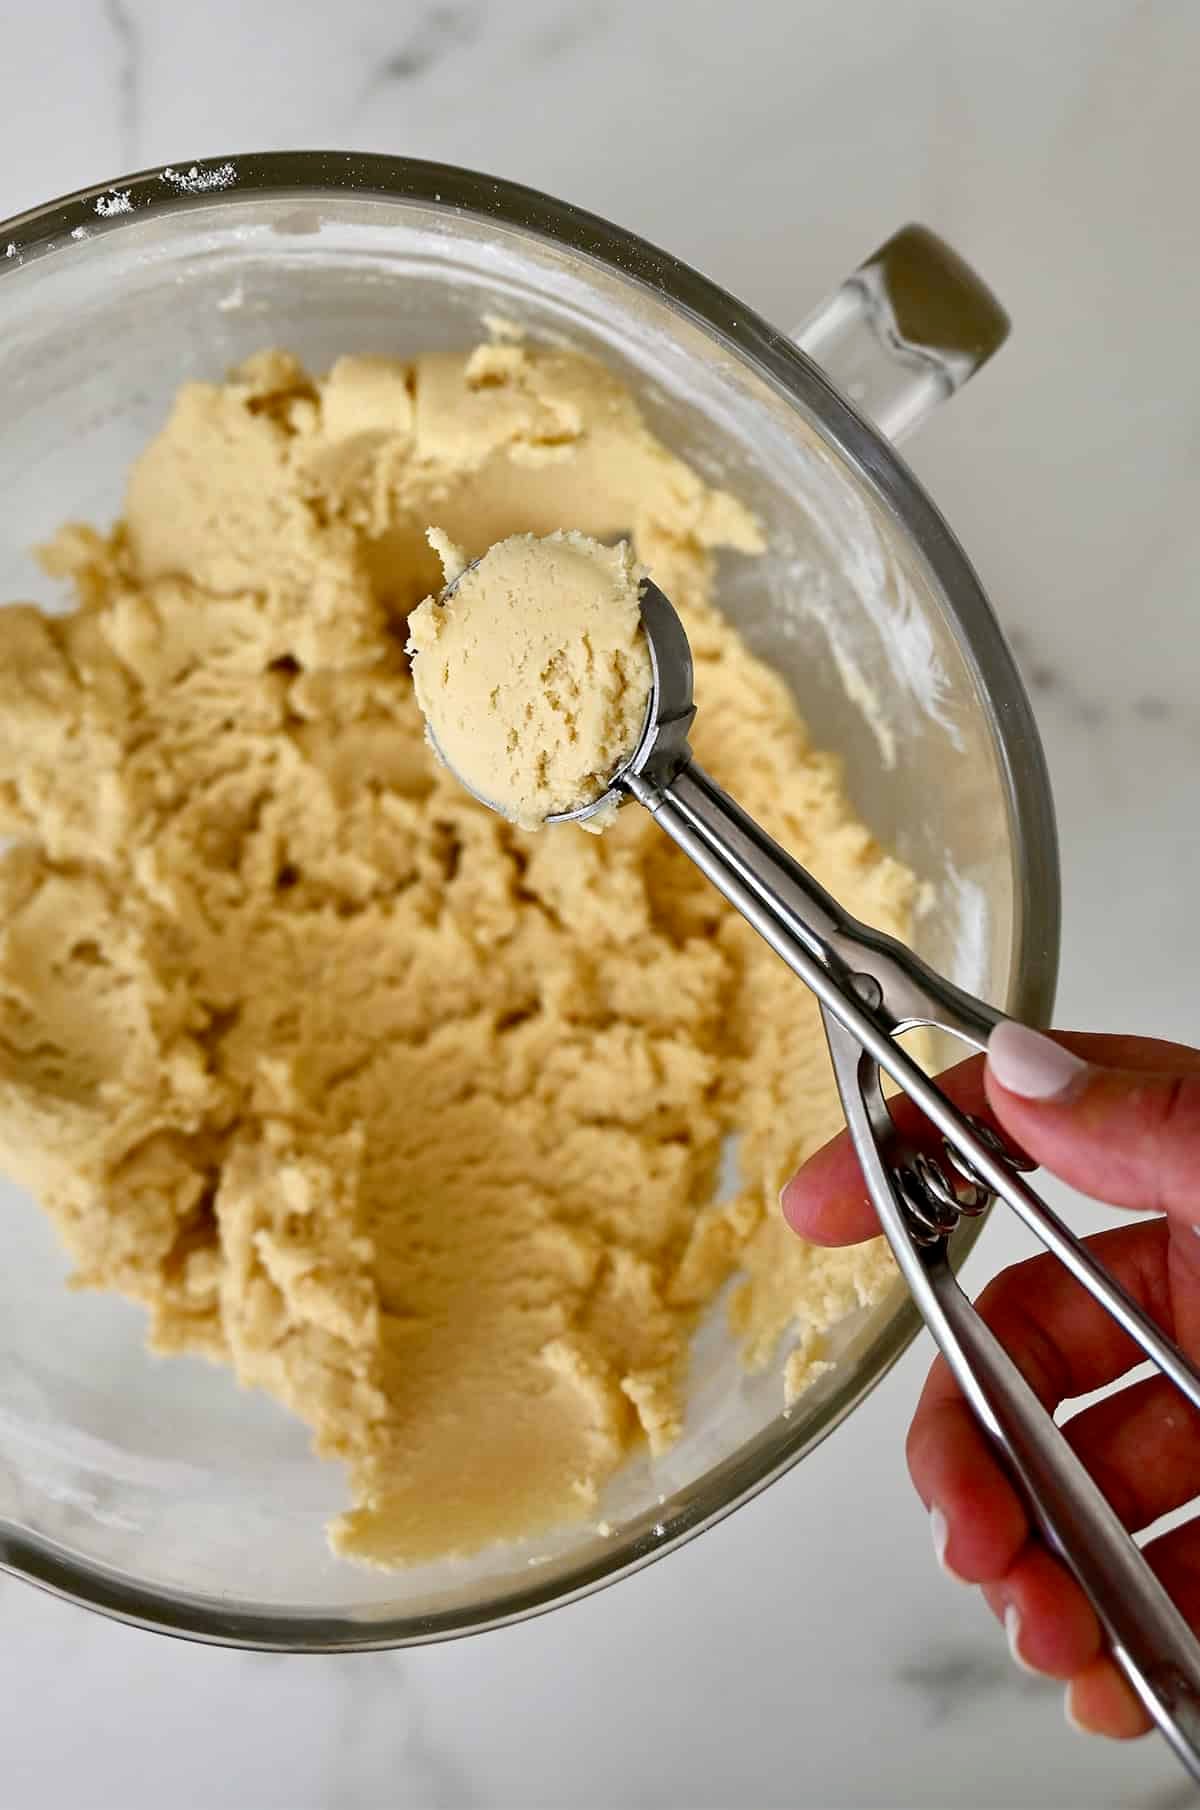
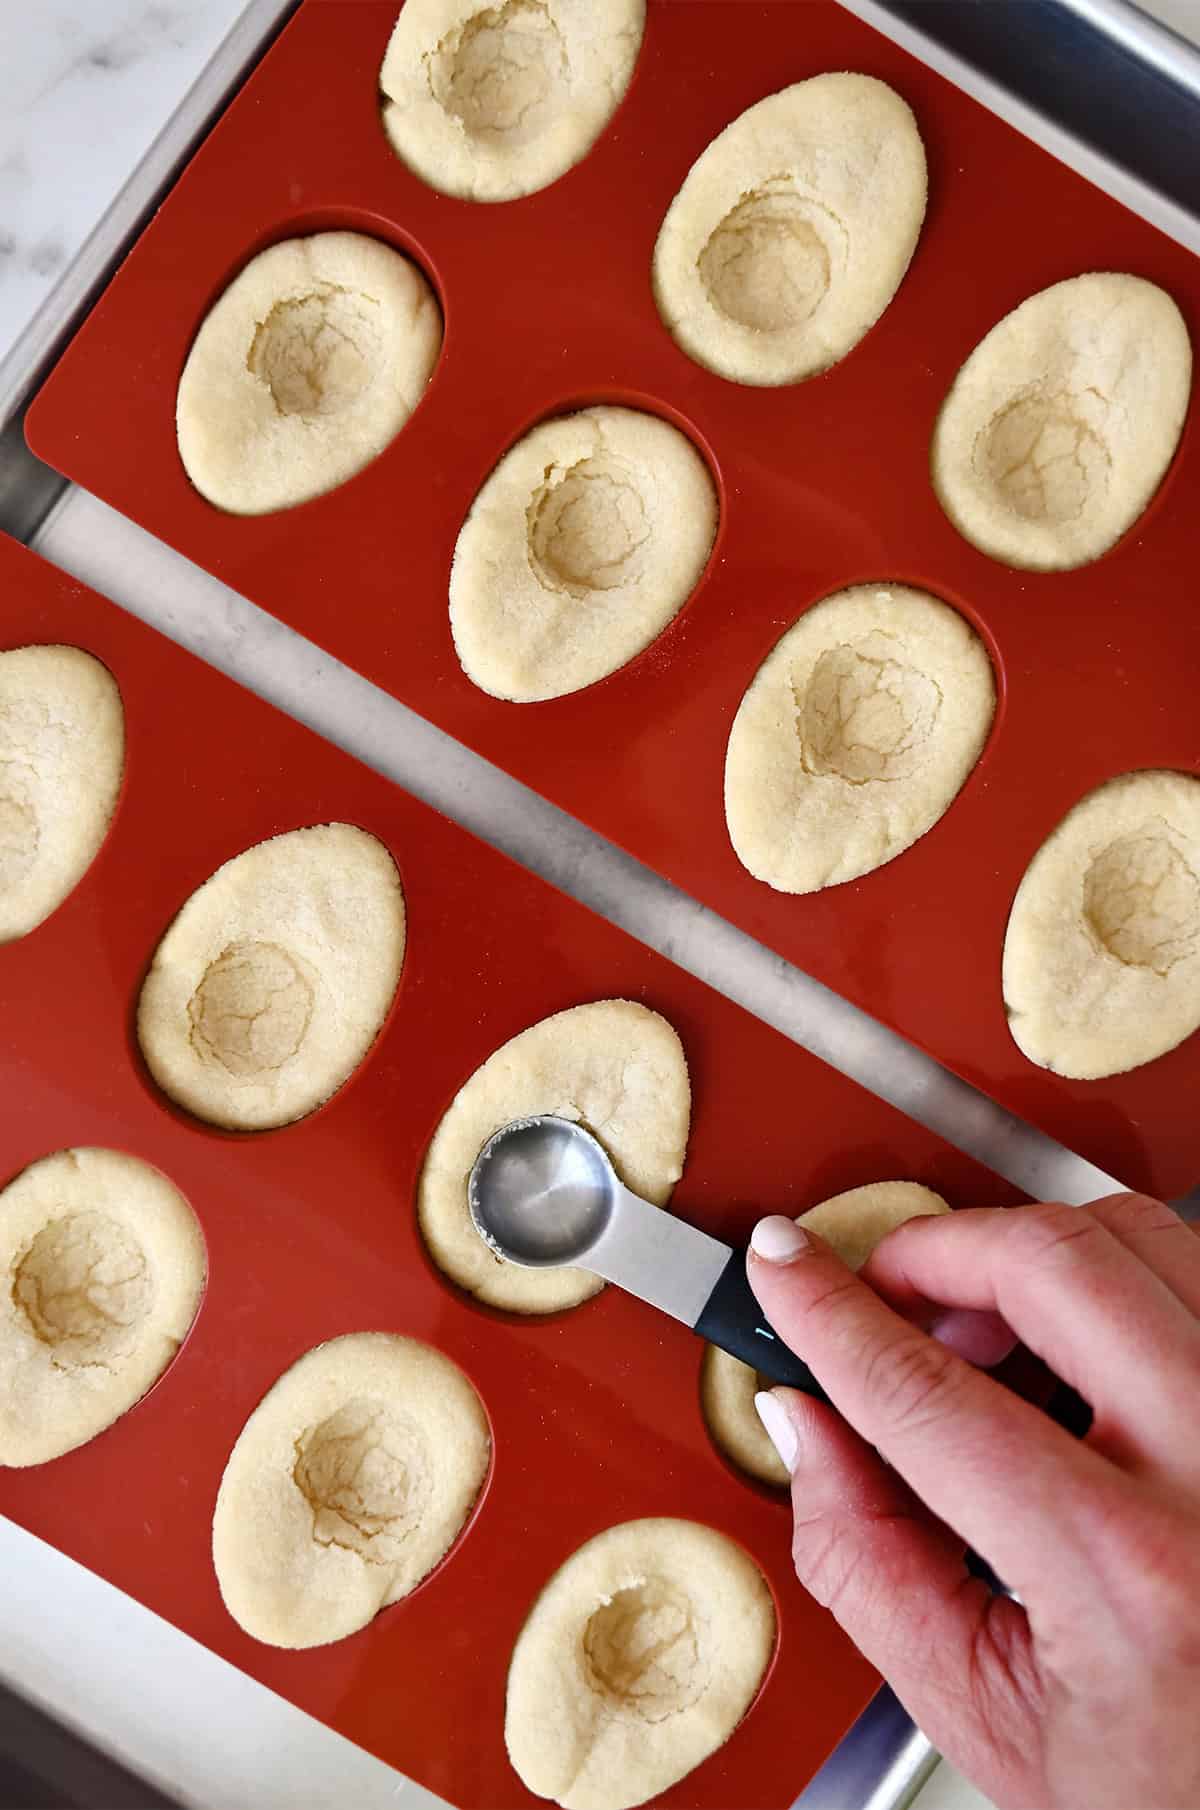
Scoop out 2-tablespoon portions of dough and roll into a ball before pressing it into the egg mold. Avoid overfilling the molds—the dough will spread slightly as it bakes, and leaving a little room helps the cookies keep their egg-like shape.


Bake until the cookies are pale golden and just set, which takes about 18–22 minutes in my oven.
As soon as they come out of the oven, use the bottom of a small spoon or a 1/2-teaspoon measuring spoon to gently press an indentation toward the wider end of each cookie. This creates the space for the “yolk” and is much easier to do while the cookies are still warm.
Let the cookies cool completely in the molds before removing them. This helps them set and keeps the edges clean.
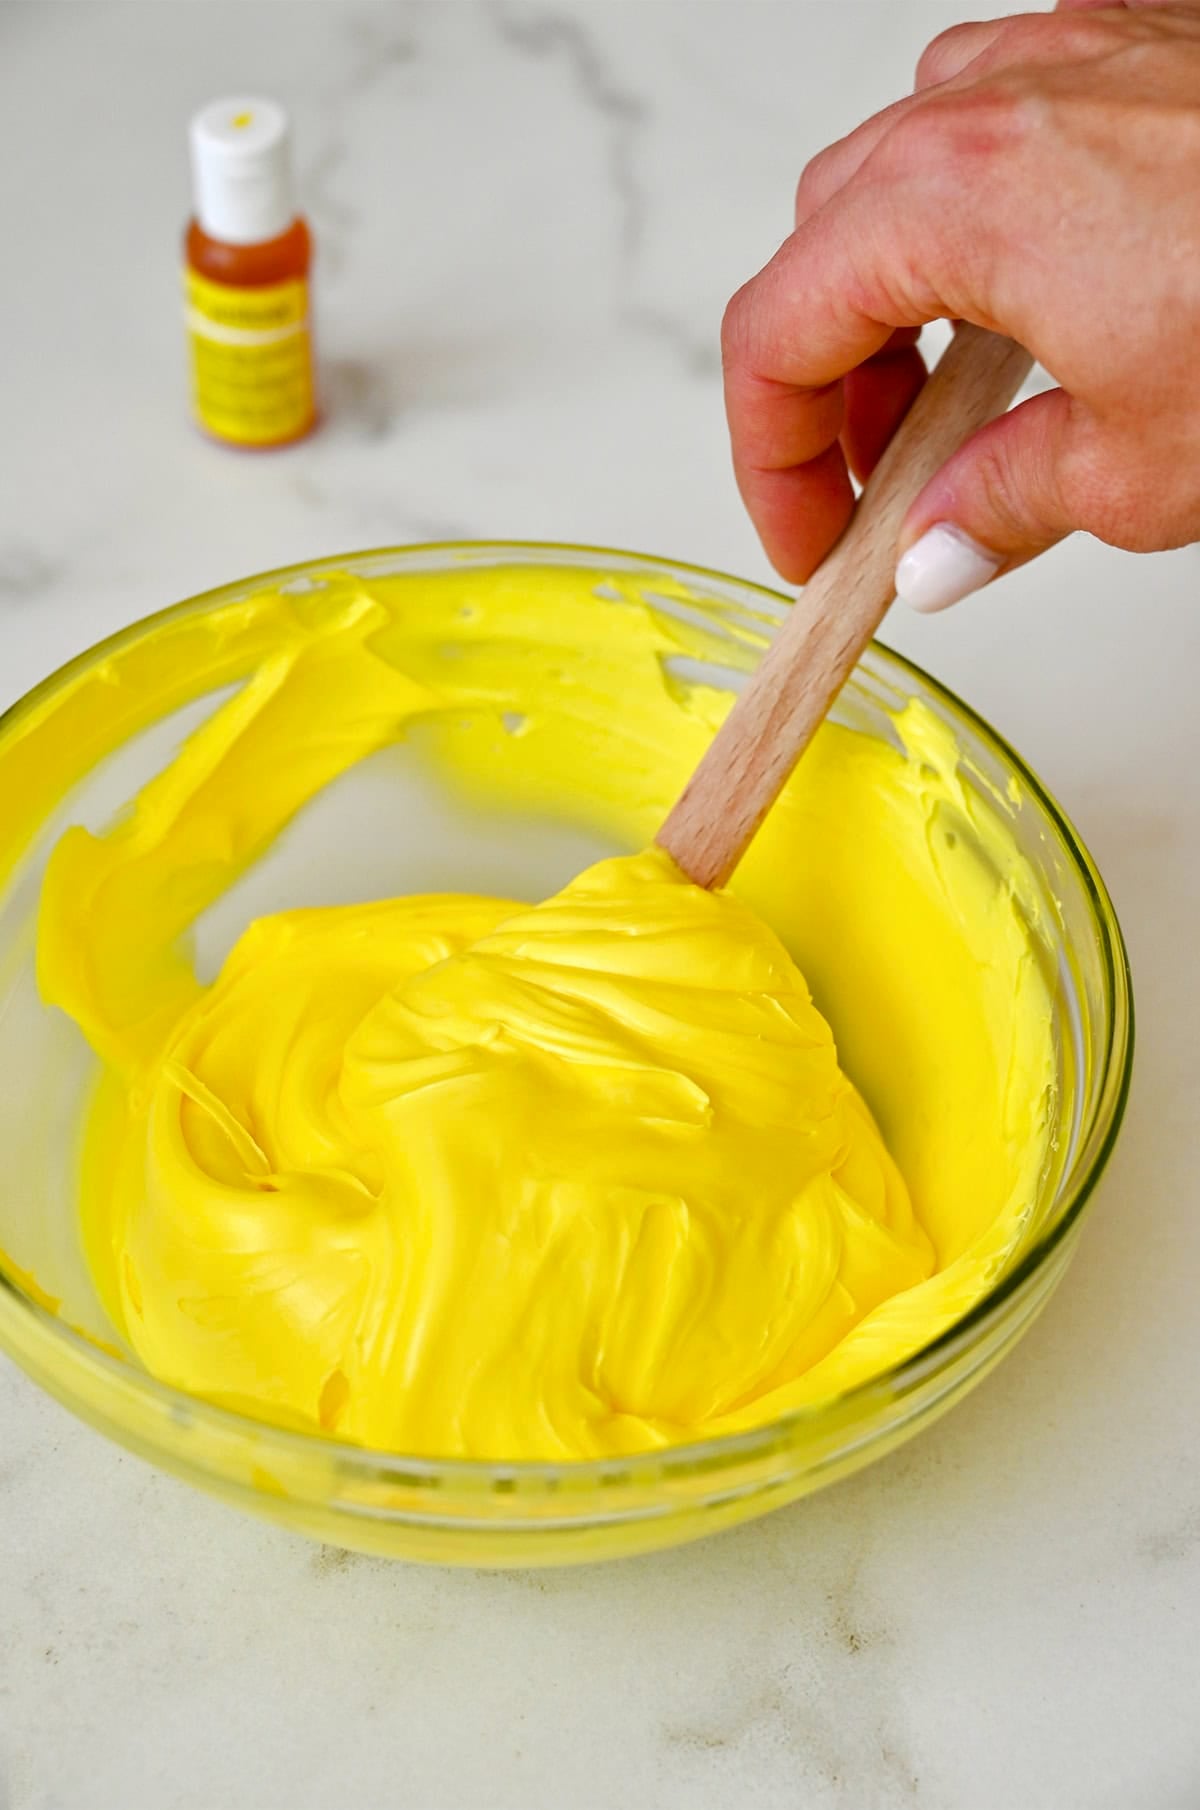
Once cooled, tint your vanilla frosting yellow (I used my homemade buttercream frosting recipe, but any ol’ store-bought frosting works just as well) and transfer it to a piping bag or a zip-top bag with the corner snipped. Pipe the frosting into the indentations, then finish with a light sprinkle of orange sanding sugar for that classic deviled-egg look.

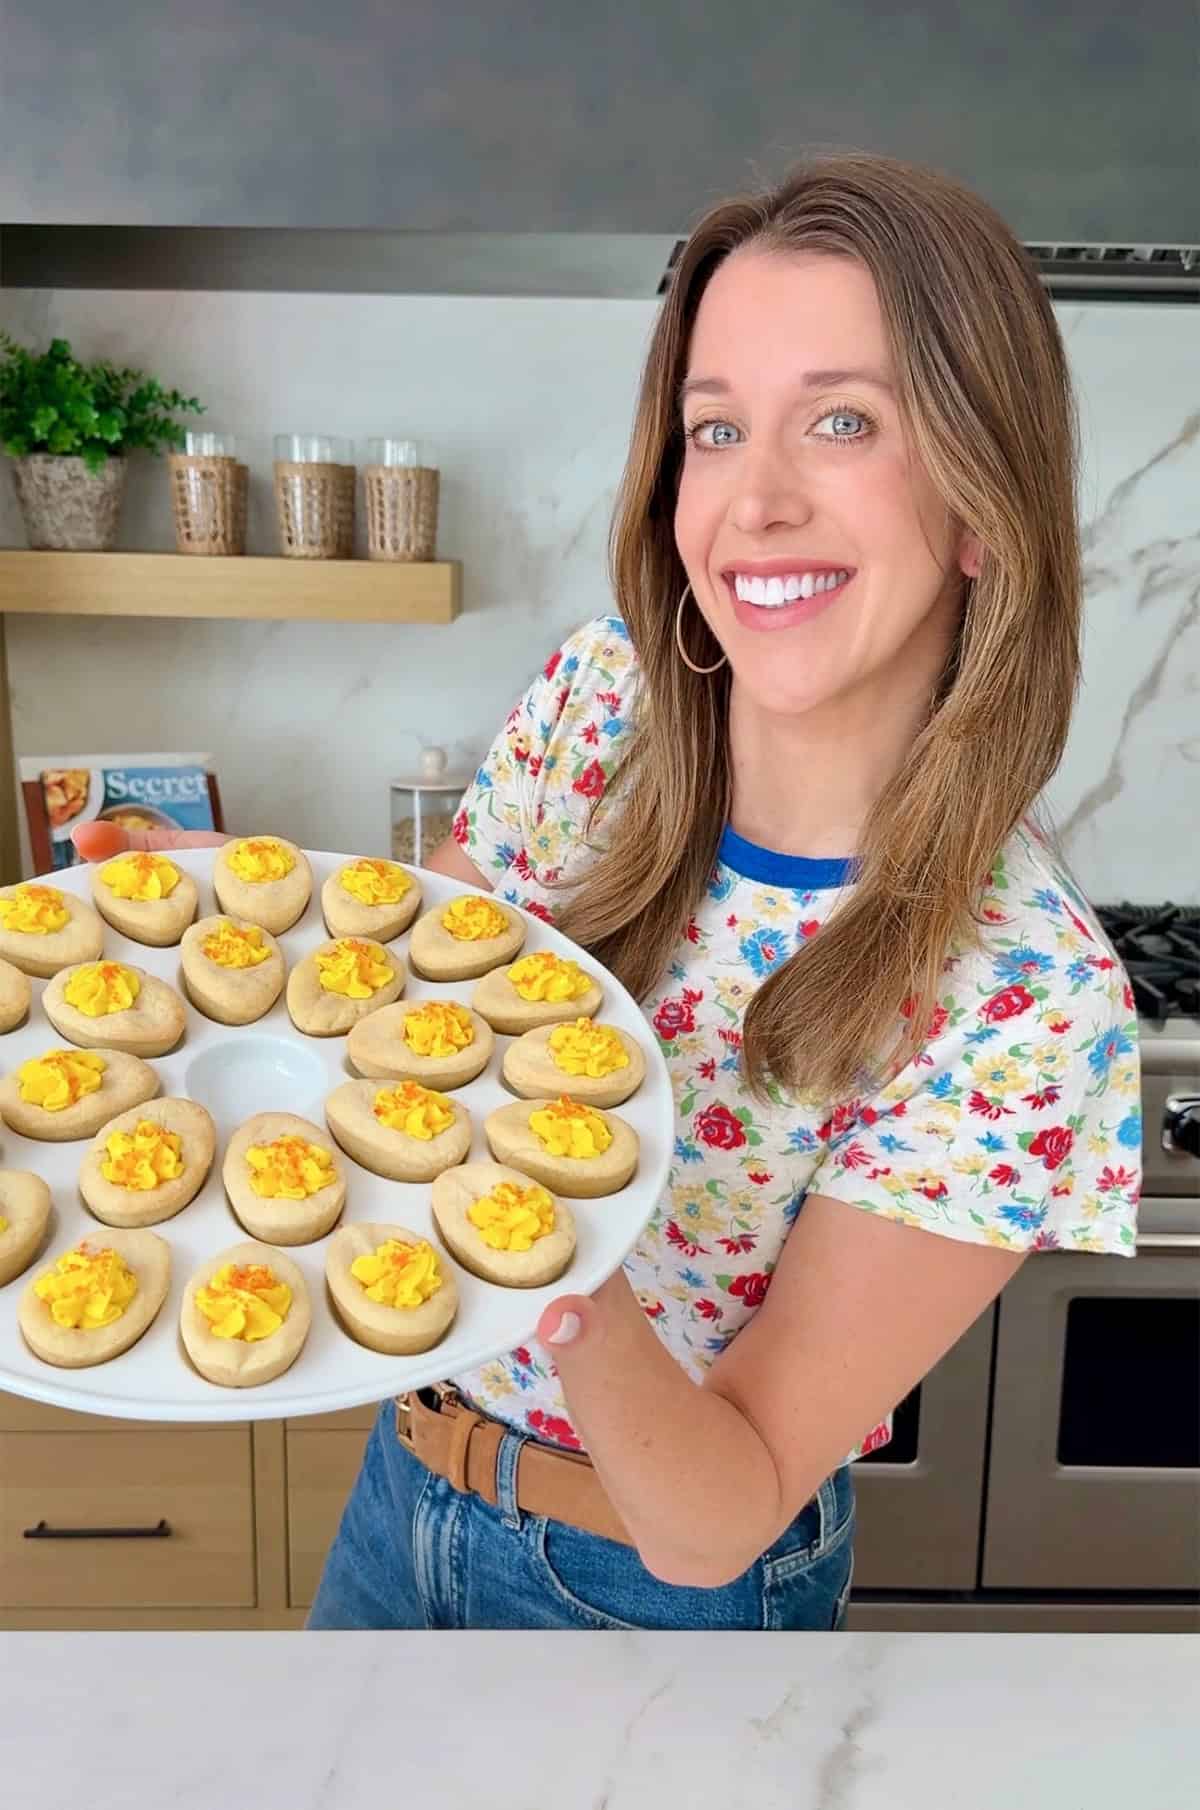
Serve right away or arrange them on a platter (like the deviled egg plate pictured below) and wait for the double takes!
What if I Don’t Have a Silicone Mold?
You can absolutely make these Easter cookies without the egg mold. If you’d rather skip the deviled-egg look, use a mini muffin tin to bake the sugar cookie cups instead.
You’ll end up with classic sugar cookie cups that are just as delicious and perfect for filling with frosting (chocolate buttercream would be delicious, too), a Hershey’s Kiss, or even a scoop of ice cream.
Storage Instructions
Once frosted, store the cookies in a single layer in an airtight container in the refrigerator for up to 3 days. Let chilled cookies sit at room temperature for about 10–15 minutes before serving so the frosting softens slightly.

More Easter Desserts You'll Love


Equipment
- 8-cup silicone egg mold (optional)
- 1 piping bag (optional)
- 1 star-shaped tip (optional)
Ingredients
- 1 cup unsalted butter, at room temp
- 1 1/3 cups sugar
- 2 large eggs
- 2 teaspoons vanilla extract
- 3 cups all-purpose flour
- 1/2 teaspoon baking powder
- 1 cup homemade vanilla frosting (or store-bought)
- 2 teaspoons yellow food coloring
- Orange sanding sugar, for decorating
Instructions
- Preheat the oven to 350°F. Place two of the silicone 8-cup egg molds on a baking sheet.
- In the bowl of a stand mixer fitted with the paddle attachment, cream together the butter and sugar until light and fluffy, about 2 minutes.
- Add the eggs, one at a time, beating between each addition, then beat in the vanilla extract.
- Add the flour, baking powder and ½ teaspoon kosher salt and beat just until combined.
- Scoop about 2-tablespoon portions of the dough and roll into a ball before pressing it into the mold.
- Bake the cookies until they are pale golden and set, 18 to 22 minutes. Remove the cookies from the oven and immediately use the bottom of a small spoon (or ½ teaspoon-sized measuring spoon) to make indentations toward the larger side of the egg.
- Let the cookies cool completely in the molds before removing them onto a serving plate.
- Add the frosting to a small bowl then stir in the yellow food coloring. Transfer the frosting into a piping bag or sealable plastic bag fitted with a star-shaped piping tip (optional).
- Pipe the frosting into the indentations then top with orange sanding sugar and serve.
Kelly’s Notes
- Without the mold: Use a mini muffin tin to bake classic sugar cookie cups instead. They’re perfect for filling with frosting, a Hershey’s Kiss, or even ice cream.
- To store: Once frosted, store the cookies in a single layer in an airtight container in the refrigerator for up to 3 days. Let chilled cookies sit at room temperature for about 10–15 minutes before serving so the frosting softens slightly.
- ★ Did you make this recipe? Don’t forget to give it a star rating below!
Nutrition
Did you try this recipe?
Leave a comment below with your star rating!
This post may contain affiliate links.


the recipe was super easy. do need to be careful of over filling. 2 tablespoons a little too much.
they were fun & delicious!
So glad you enjoyed the recipe, Charlotte!
I would think that if you had an egg plate that you could mold the dough in it and bake on a sheet . It may not look as nice as the molded “egg” but it would be more of the oval shape. These are really cute and would be great at Easter and for any summer parties too!
You could try that, Margaret! I’m not sure how much they’d hold their shape not being in a mold. Keep me posted!