Learn how to cut up a whole chicken with this easy, step-by-step guide. I’ll show you how to break it down into eight, 10, or even 12 pieces, ideal for roasted chicken, fried chicken or meal prep. Mastering this technique will become one of the most handy and economical skills in your kitchen!
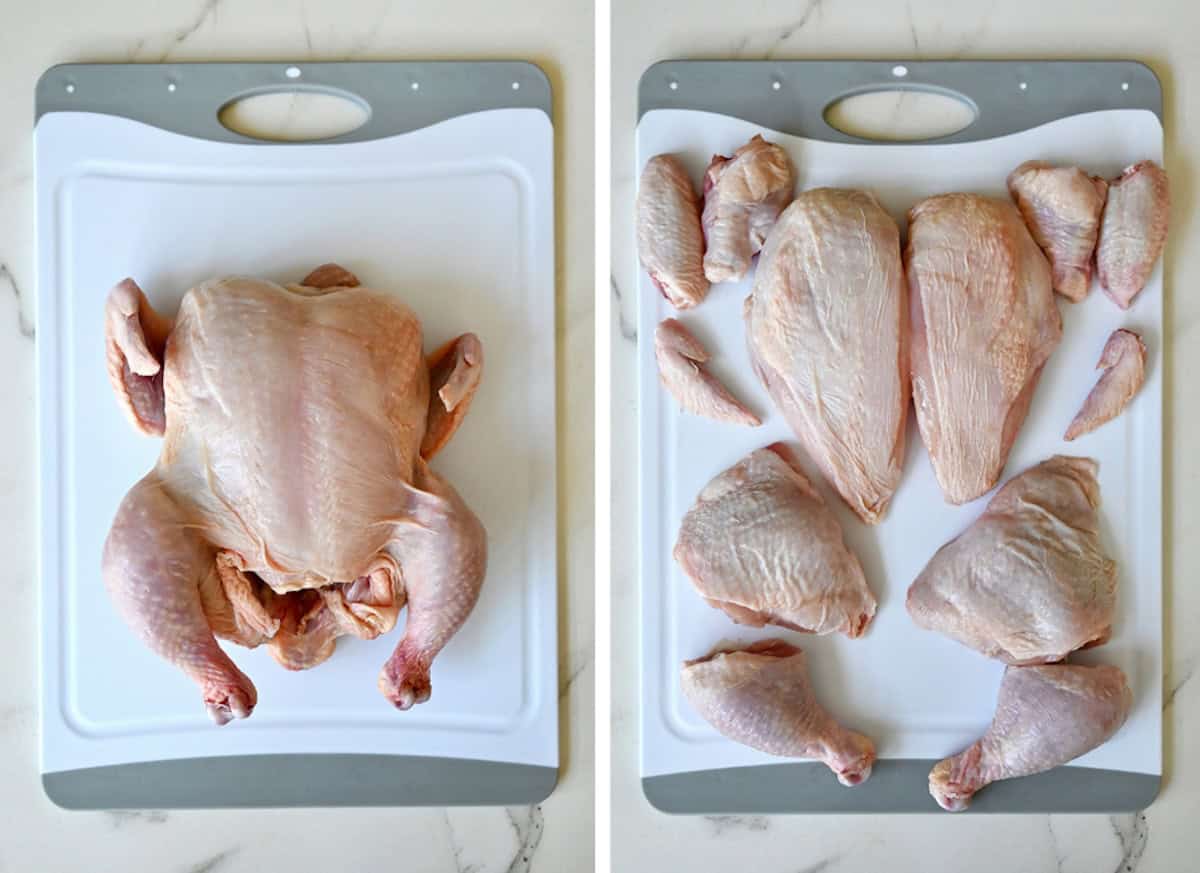
Table of Contents
Butchering a chicken might seem like a daunting task at first. Do you start with the wings? How do you remove the breastbone? What’s a chicken oyster, and why is it so delicious? And what exactly should you do with that spare chicken back? Find answers to all of these questions and more below, where I’m breaking down (food pun count: 1) the simple steps to go from whole bird to perfect portions.
With just a few simple tools, you’ll have full control over how you prep your poultry. Want 6, 8 or 12 pieces? No problem! My step-by-step visual guide shows you how to cut a whole chicken into the exact number of pieces you need, whether it’s for roasting, braising, stews or fried chicken.
Plus, buying a whole chicken is cheaper per pound than pre-cut parts, and you’ll also get bonus bits (hello, chicken back!) to make the best homemade stock ever. Knowing how to break down a whole chicken can feel intimidating at first, but I’m here to guide you through this essential kitchen skill.
Parts of a Chicken: What You’ll End Up With
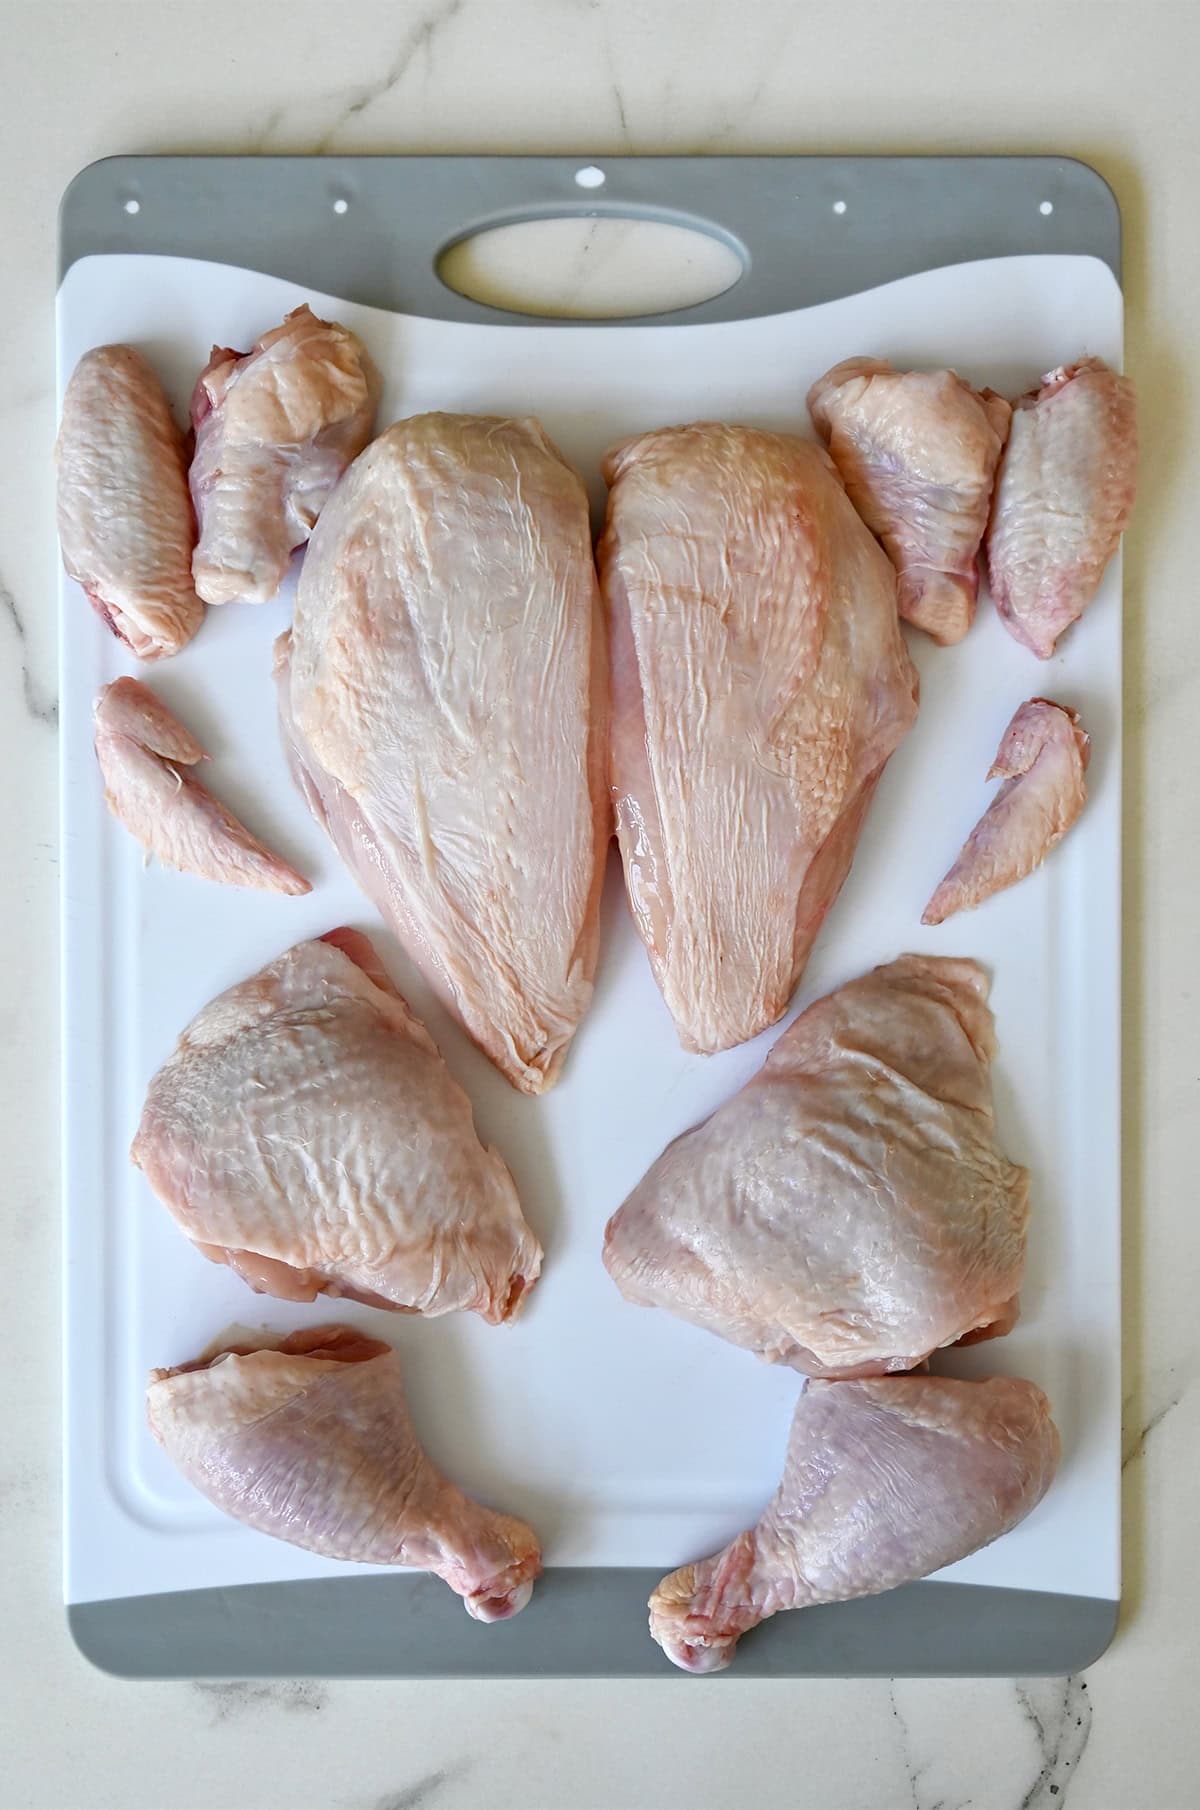
There are multiple ways to break down a chicken, with some methods leaving you with eight, 10 or even 12 pieces. Following my simple steps, here’s what you’ll end up with:
- 2 drumsticks
- 2 thighs
- 2 wings
- 2 breast pieces
But wait, there’s more! I’ll also show you how to cut the wings into drumettes and flats, bringing the grand total to 12 perfectly portioned pieces.
Tools You’ll Need
- Sharp chef’s knife
- Cutting board (one dedicated to raw meat is best)
- Kitchen shears (optional, but handy)
Step-by-Step: How to Break Down a Chicken
- Remove the wings. Stretch each wing away from the body and feel for the joint located just below the breast. Once you’ve located the joint, cut down through it to remove the wing. Repeat on the other side.
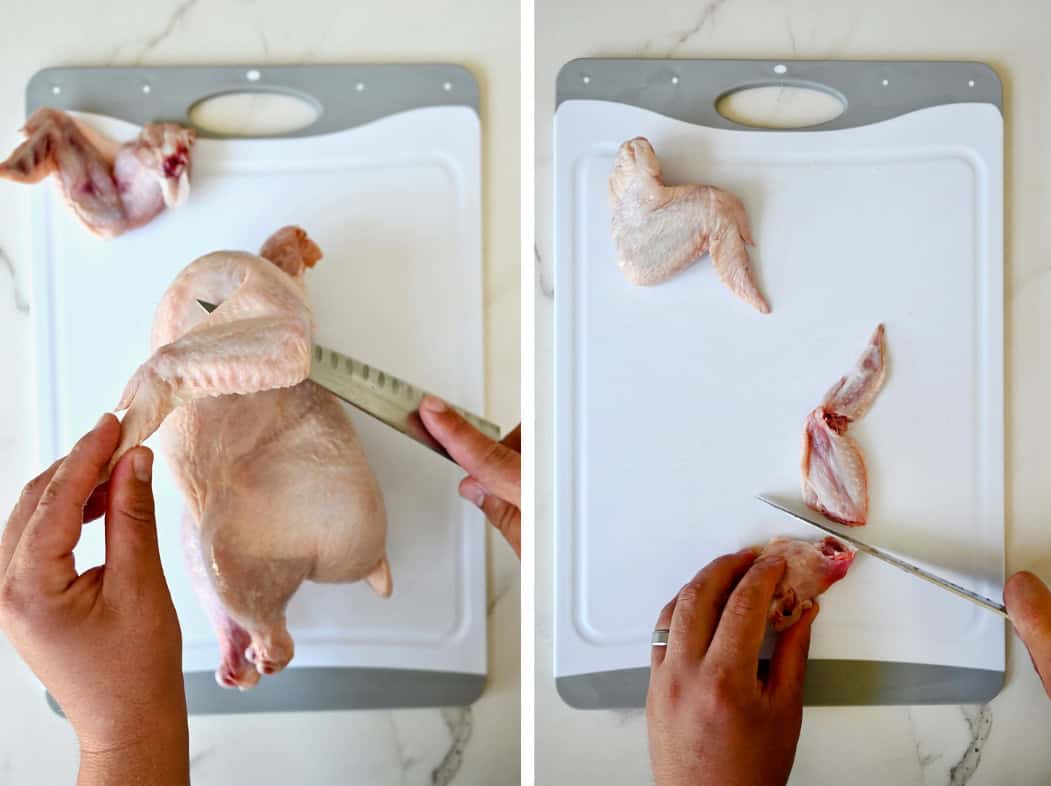
Pro Tip: For 12 pieces, separate the wings into flats and drumettes using your knife or kitchen shears. Voilà! You now have 4 pieces (second picture).
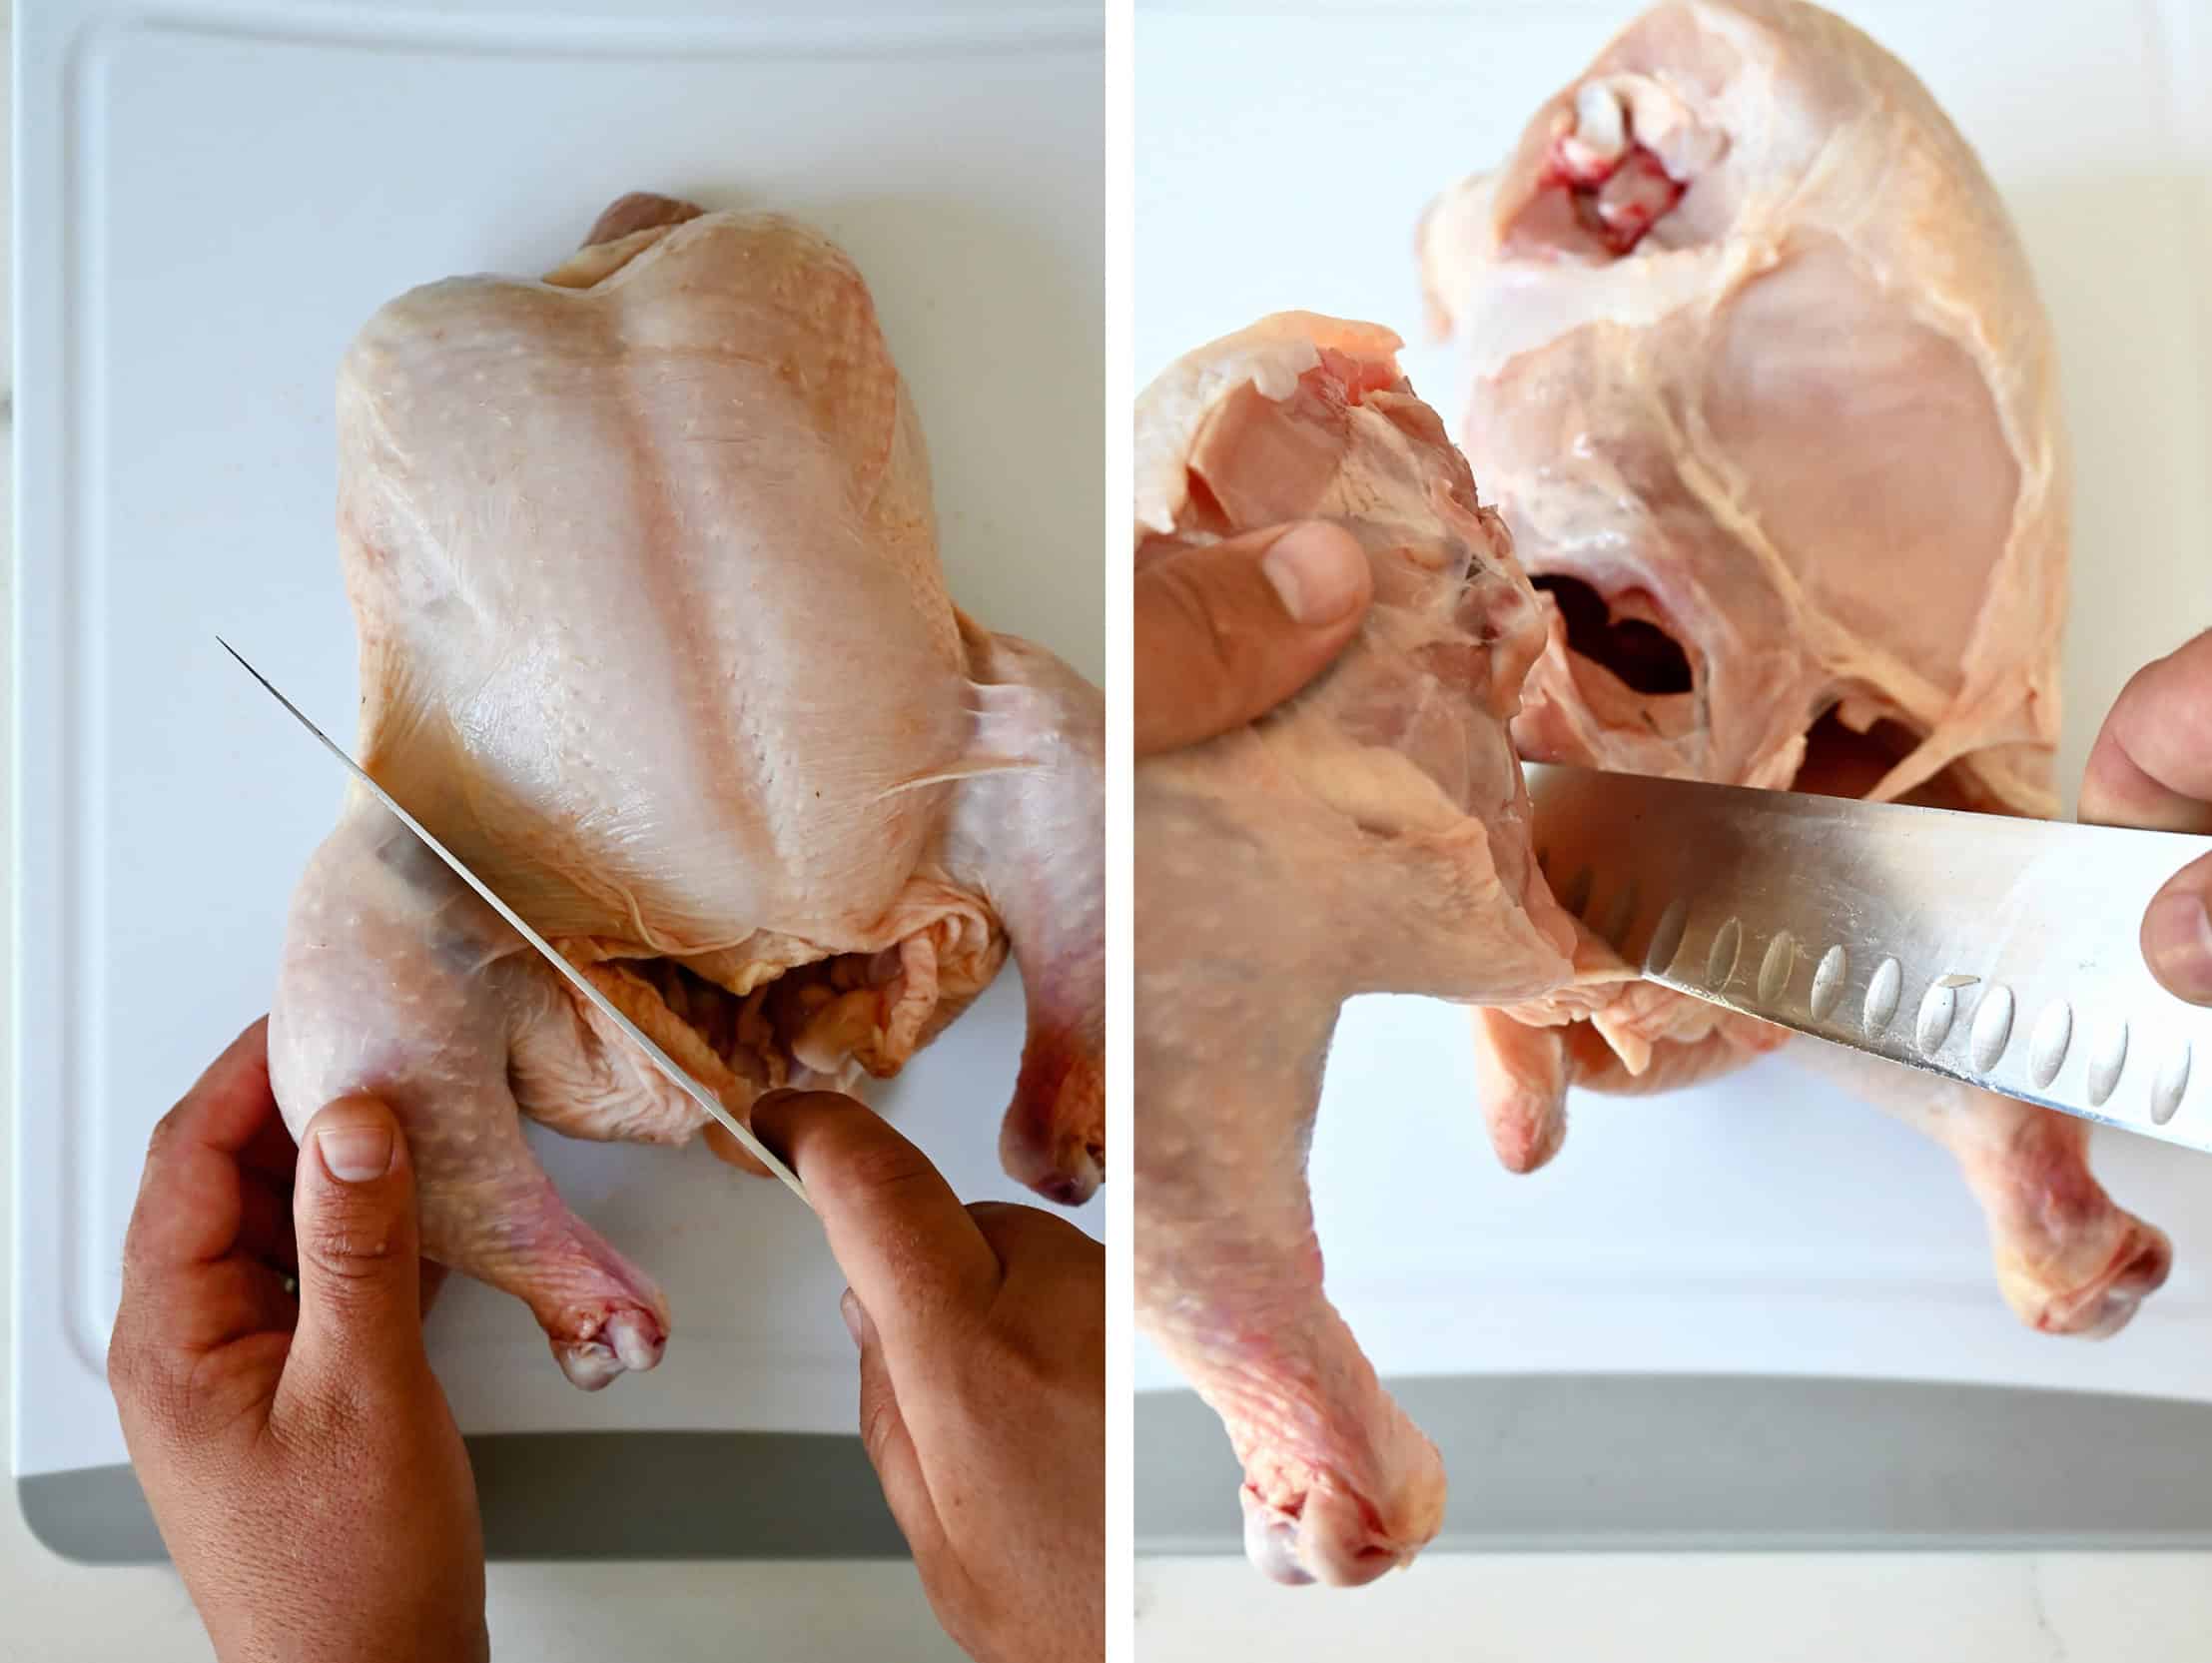
- Remove the legs. With the chicken breast side up, gently pull one leg away from the body and slice through the skin between the leg and body. Bend the leg back until the joint pops, then cut through the joint to remove the leg. Repeat with the other leg for 2 legs total.
- Separate the drumsticks from the thighs. Flip each leg over with the skin side down. You’ll notice a natural fat line between the drumstick and thigh. Follow that line and slice to separate the two.
Don’t forget about the chicken oyster! This tender nugget of meat is located right near the backbone and is a hidden gem for flavor. Cutting around the oyster as you separate the thighs makes sure you don’t miss it!

- Cut out the backbone. Turn the chicken breast side down. Using your kitchen shears (or a sharp knife), cut along both sides of the backbone to remove it. Don’t toss this! The backbone is perfect for making homemade chicken stock.
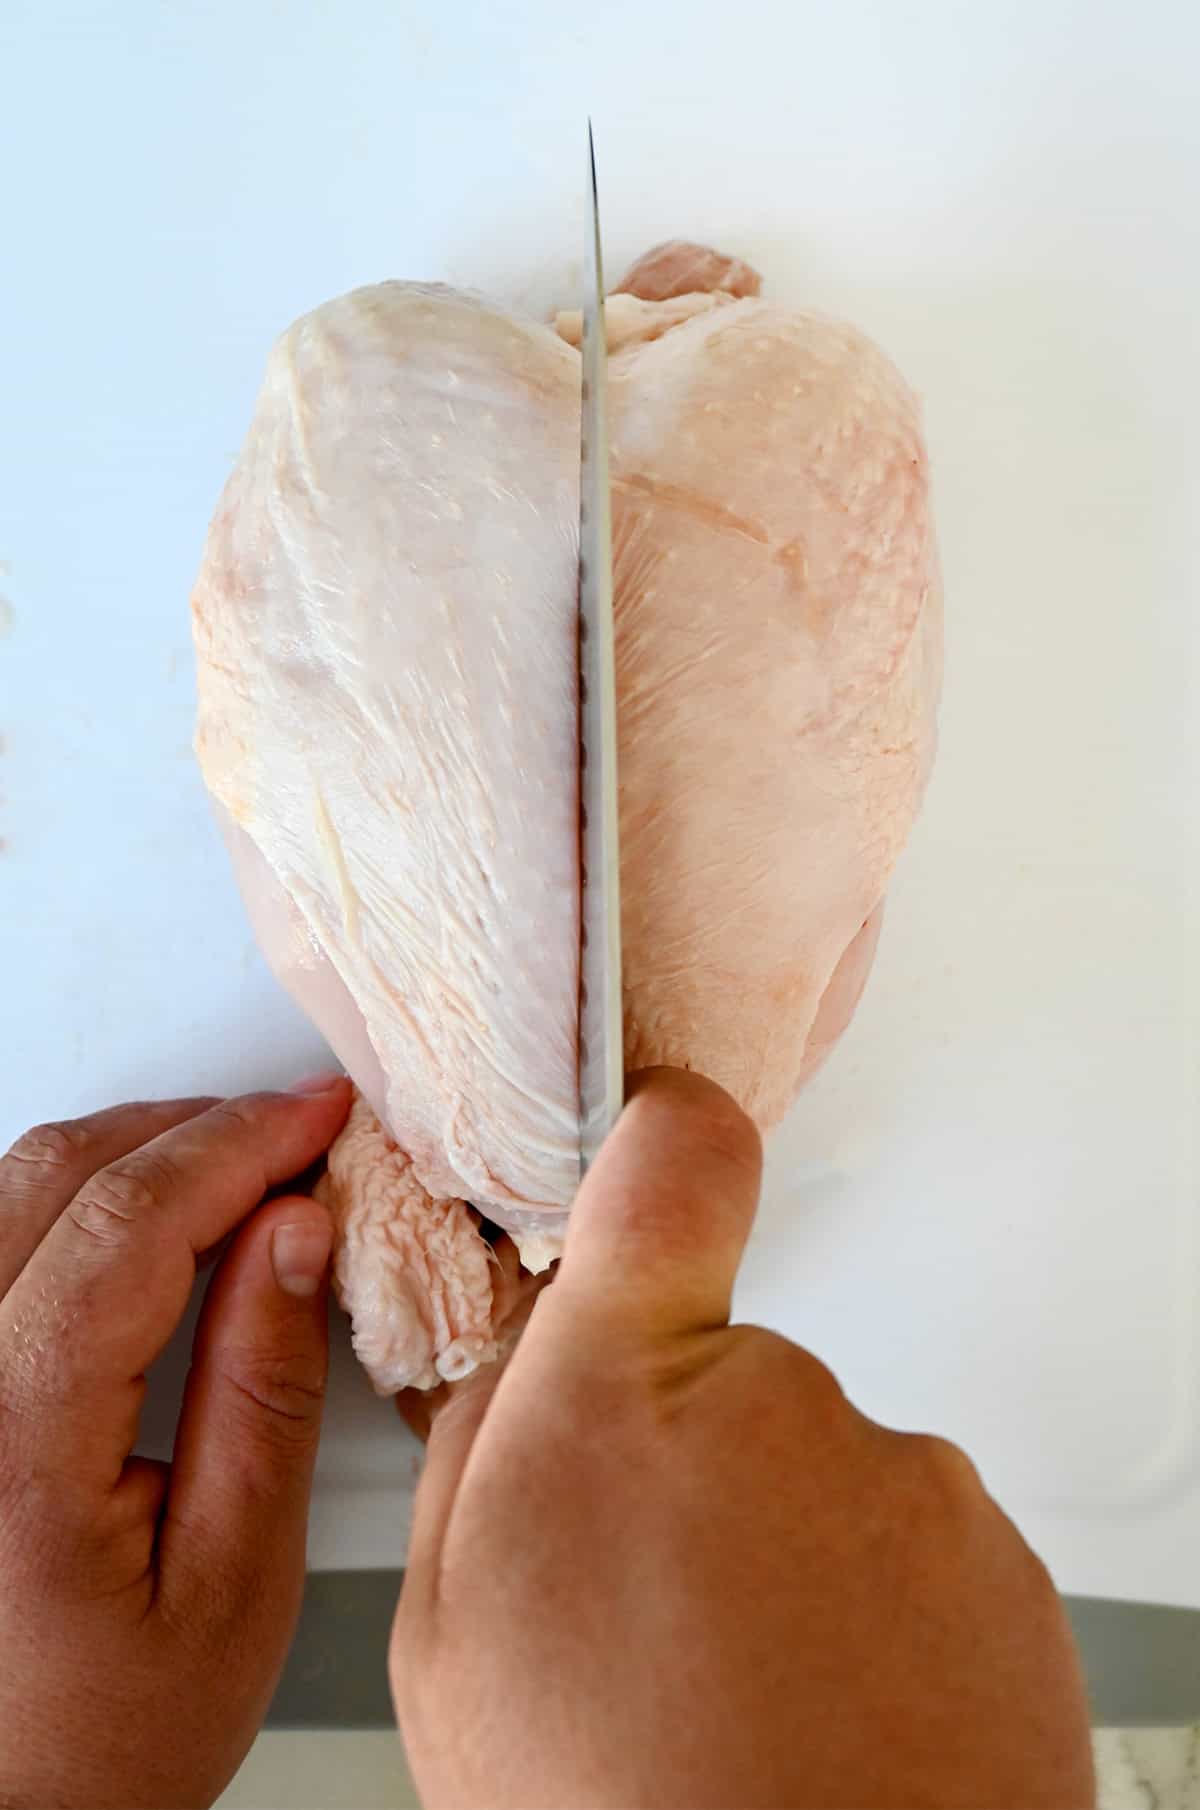
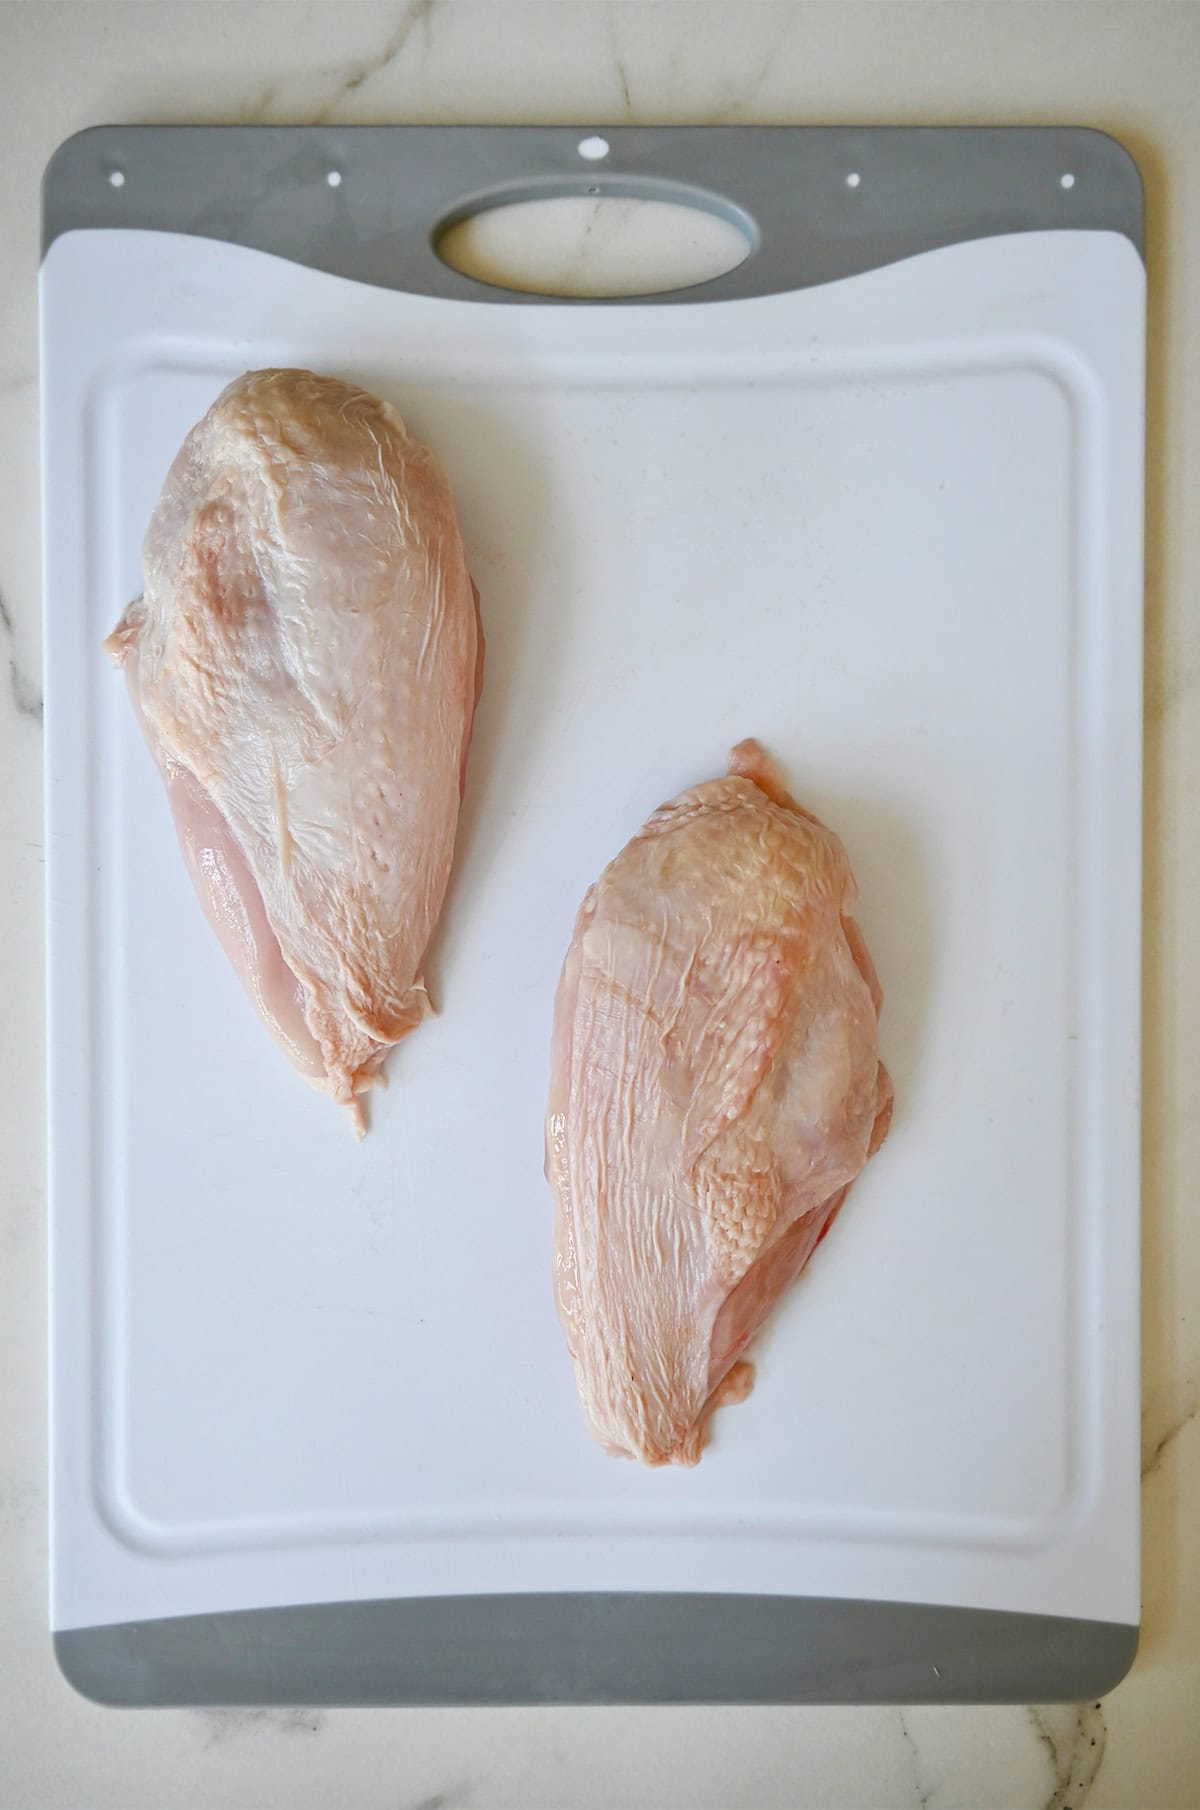
- Separate the breasts. Flip the chicken breast-side up. Carefully slice down the center of the breastbone. Press firmly to cut through the cartilage and separate the breast into two halves. To make 12 pieces, further divide each breast into thirds by cutting through the middle of each half. This gives you 6 breast pieces, perfect for even cooking!
Kelly’s Note: This same technique can also be applied to carving a roast chicken! The same steps for separating the wings, legs and breasts work just as well on a cooked bird as on a raw one. The only difference is that the meat may be more tender and delicate, so you’ll want to be a little more gentle when cutting to avoid tearing the meat.
Storing and Using Your Chicken Cuts
Once you’ve cut up your whole chicken, here’s how to store the pieces:
- Refrigerate: Store chicken pieces in an airtight container in the fridge for up to 3 days.
- Freeze: For longer storage, freeze each piece in a separate bag and label it. Chicken can be frozen for up to 3 months.
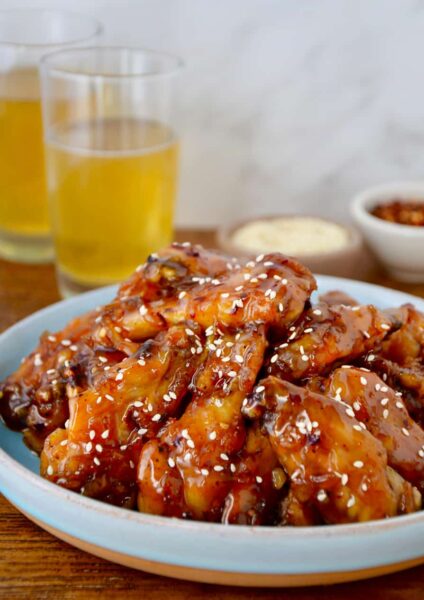
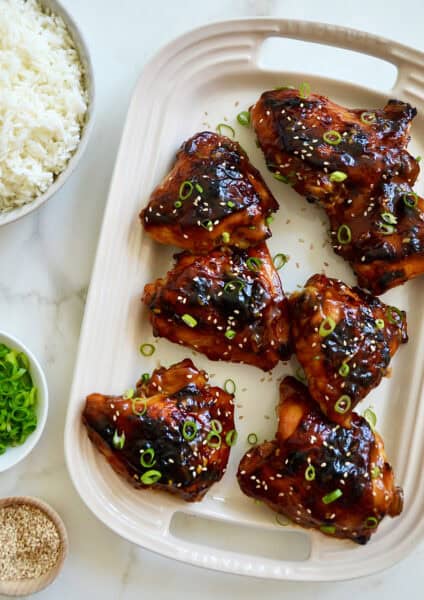
Chicken Recipes to Try
Now that you’ve mastered how to cut a whole chicken, here are some delicious recipes to try:


Equipment
- Sharp chef's knife
- Kitchen shears
- Cutting board
Ingredients
- Whole chicken
Instructions
- Place the chicken on a cutting board and pat dry with paper towels.
- Remove the wings. Stretch each wing away from the body and feel for the joint beneath the breast. Slice downward through the joint to remove the wing. To make 12 pieces, separate the wings into flats and drumettes using your knife or shears.
- Remove the legs. With the chicken breast-side up, pull one leg away from the body and slice through the skin between the leg and body. Bend the leg back until the joint pops, then cut through the joint to remove the leg. Repeat on the other side.
- Separate drumsticks from thighs. Flip the leg over, skin side down. Cut along the natural fat line between the drumstick and thigh to separate the two. Repeat with the other leg. (Pro Tip: Be sure to cut around the oyster—the tender nugget of meat near the backbone!)
- Cut out the backbone. With the chicken breast-side down, use kitchen shears or a sharp knife to cut along both sides of the backbone. Save this for making stock!
- Separate the breasts. Flip the chicken breast-side up. Slice down the center of the breastbone, pressing firmly to cut through the bone, and divide the breasts into two halves.
- Break down further (optional). If desired, cut the wing tips off or further divide the breast halves for smaller pieces.
Kelly’s Notes
- Following my simple steps, you’ll end up with 2 drumsticks, 2 thighs, 2 wings and 2 breast pieces.
- Save any extra parts like the wing tips or backbone to make homemade chicken stock. This ensures no part of the chicken goes to waste!
Nutrition
Did you try this recipe?
Leave a comment below with your star rating!
This post may contain affiliate links.


Great article
Thanks so much, Charles!
This is a great post. Butchering a chicken can be very intimidating. Awesome instructions and pictures.
Connie
Just read the tutorial and it was VERY helpful. It’s not common to see a whole chicken in Japanese supermarkets so I had never seen my mom prepare a whole chicken or even butcher it. Your instruction was very clear and thanks for the tip!
I’m definitely intimidated with cutting up poultry. I get the wings and drumsticks off…then what?! Great post!
Such a great post and I needed it too! :)
Thanks!