Thai Coconut Sticky Rice with Mango (khao niao mamuang) is a classic Thai dessert that balances the creamy sweetness of coconut-infused sticky rice with fresh, juicy mangoes. With just five simple ingredients and my tips for success, you’ll effortlessly recreate this delicious Thai favorite at home. It’s chewy, juicy, sweet and savory, all in one bite!
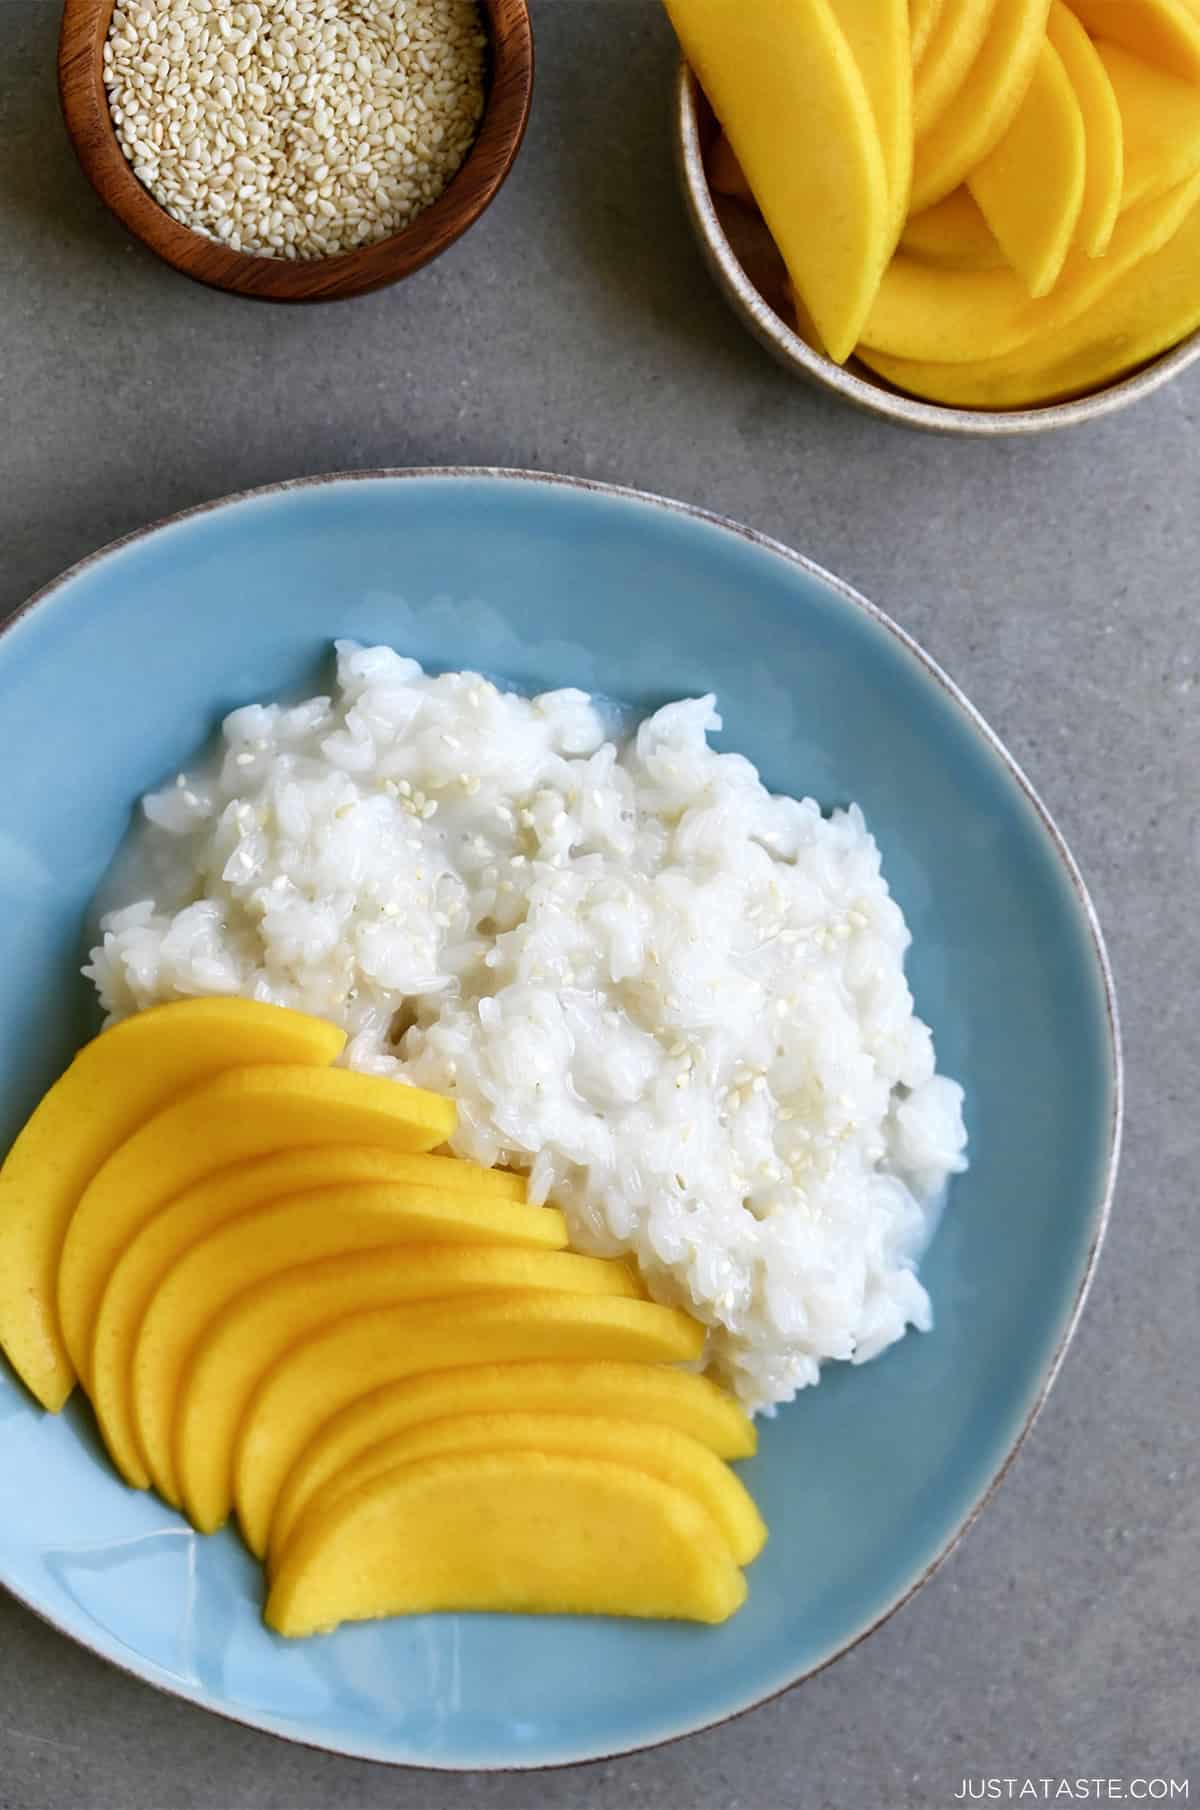
Table of Contents
My love affair with sticky rice began long ago at my all-time favorite Thai restaurant, Spice and Rice, in La Jolla, California. No meal at the beach town eatery was complete without an order of warm sticky rice paired with chilled mango. Eleven years after my first taste of the Thai dessert and I’m finally getting around to recreating this restaurant favorite at home.
All you need is five simple ingredients—rice, coconut milk, sugar, salt and mango—to prepare this dynamic dessert duo. Add your choice of toasted sesame seeds or shredded coconut garnish and your sweet finale is complete.
Ready to toss those takeout menus for good? Don’t miss Easy Homemade Pad Thai with Chicken. Dinner and dessert? Done and done!
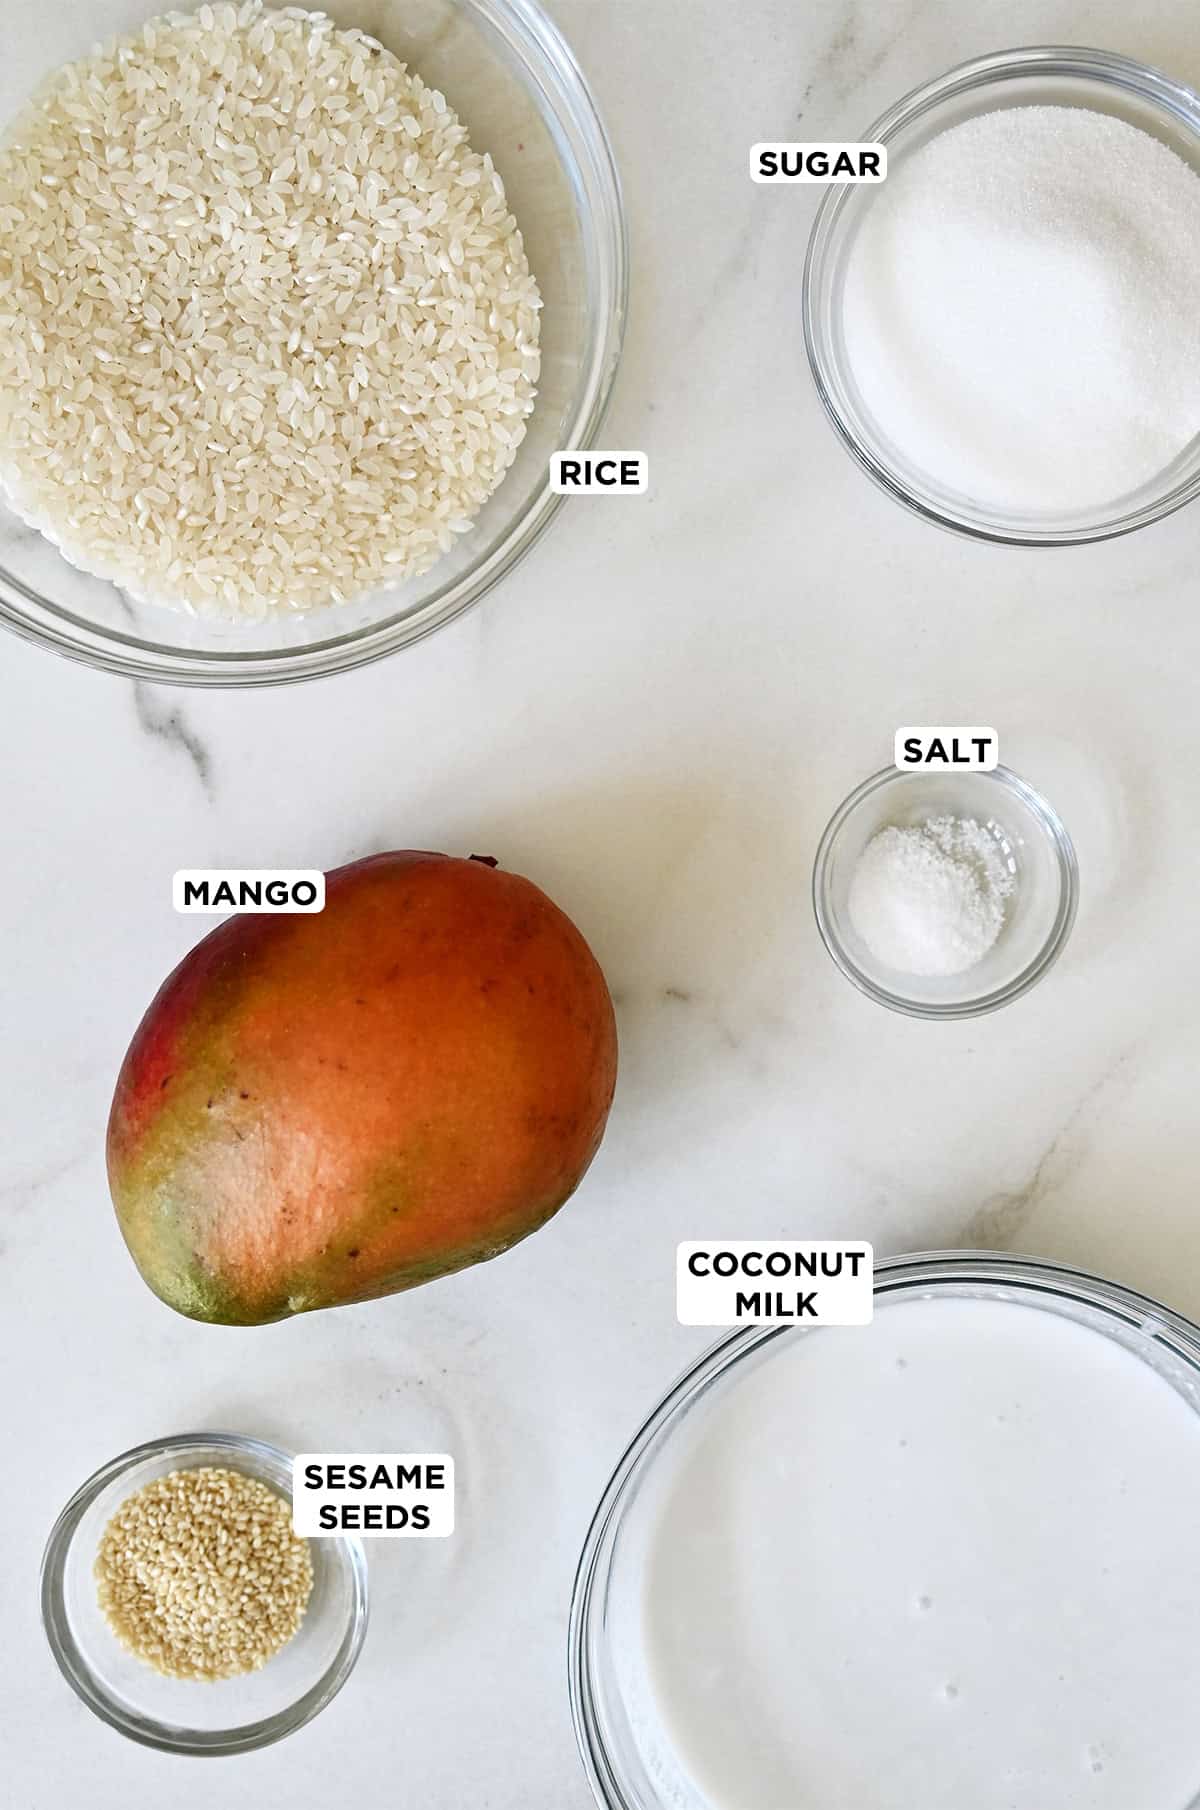
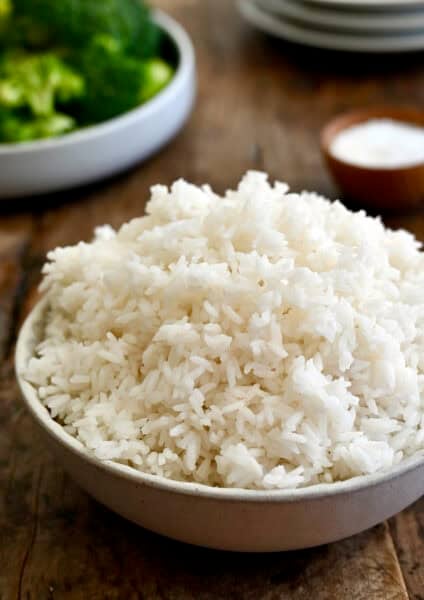
- Glutinous rice: Also called sweet or sticky rice, this is a must for Thai sticky rice because its high amylopectin content creates the essential sticky, chewy texture that regular white rice just can’t achieve.
- Unsweetened coconut milk: Use full-fat canned coconut milk for the best texture and taste. Shake the can well before opening to ensure it’s well-mixed.
- Sugar: Adds sweetness.
- Salt: Just a touch enhances the flavors and balances the sweetness.
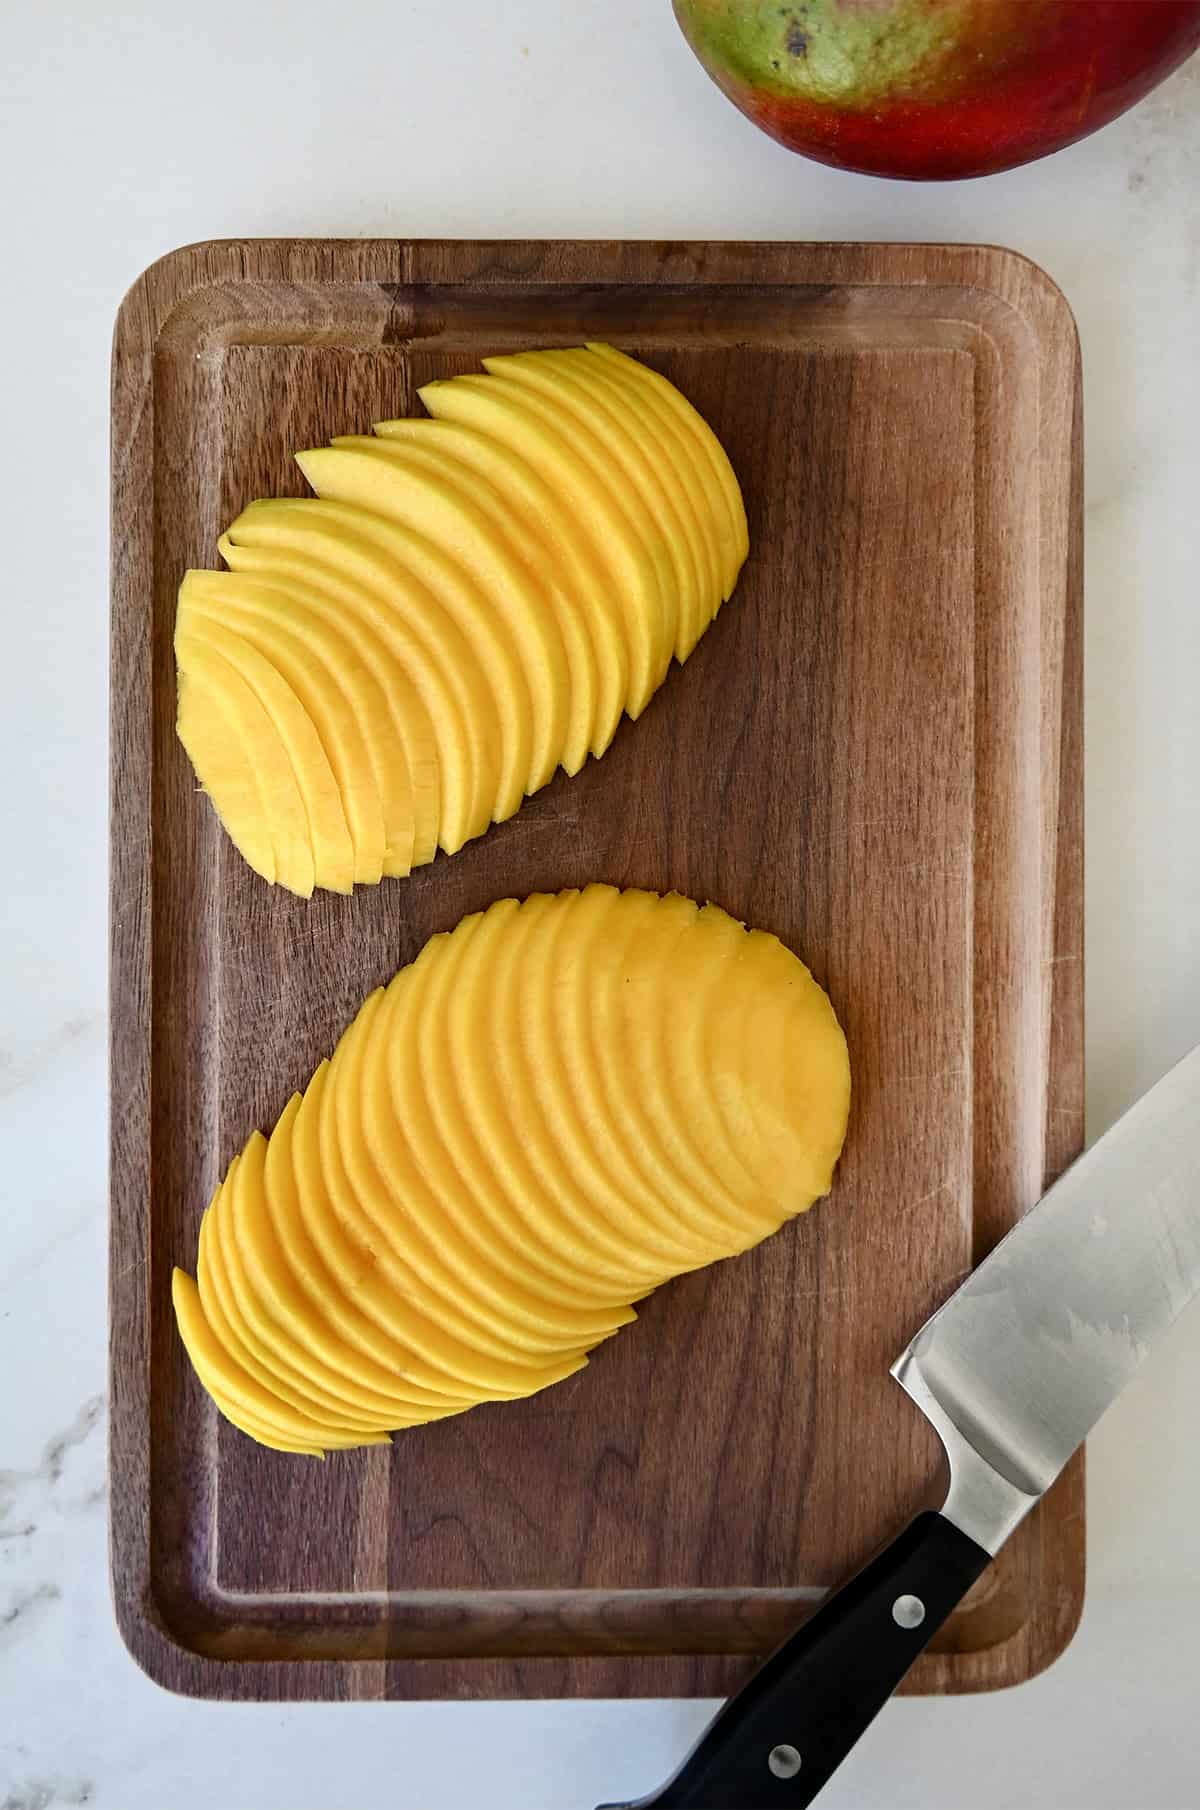
- Mango: Use ripe, sweet mangoes that are in season for the best flavor. Check out my video tutorial for the fastest way to cut a mango.
- Sesame seeds (optional): These add a lovely nutty flavor and a bit of crunch. Toast them in a dry skillet until golden for the best flavor.
- Sweetened flaked coconut (optional): Adds extra coconut flavor. See below for how to toast the flakes.
See the recipe card for full information on ingredients and quantities.
Making this naturally gluten-free dessert isn’t complicated, but following each step is important for coconut sticky rice success.
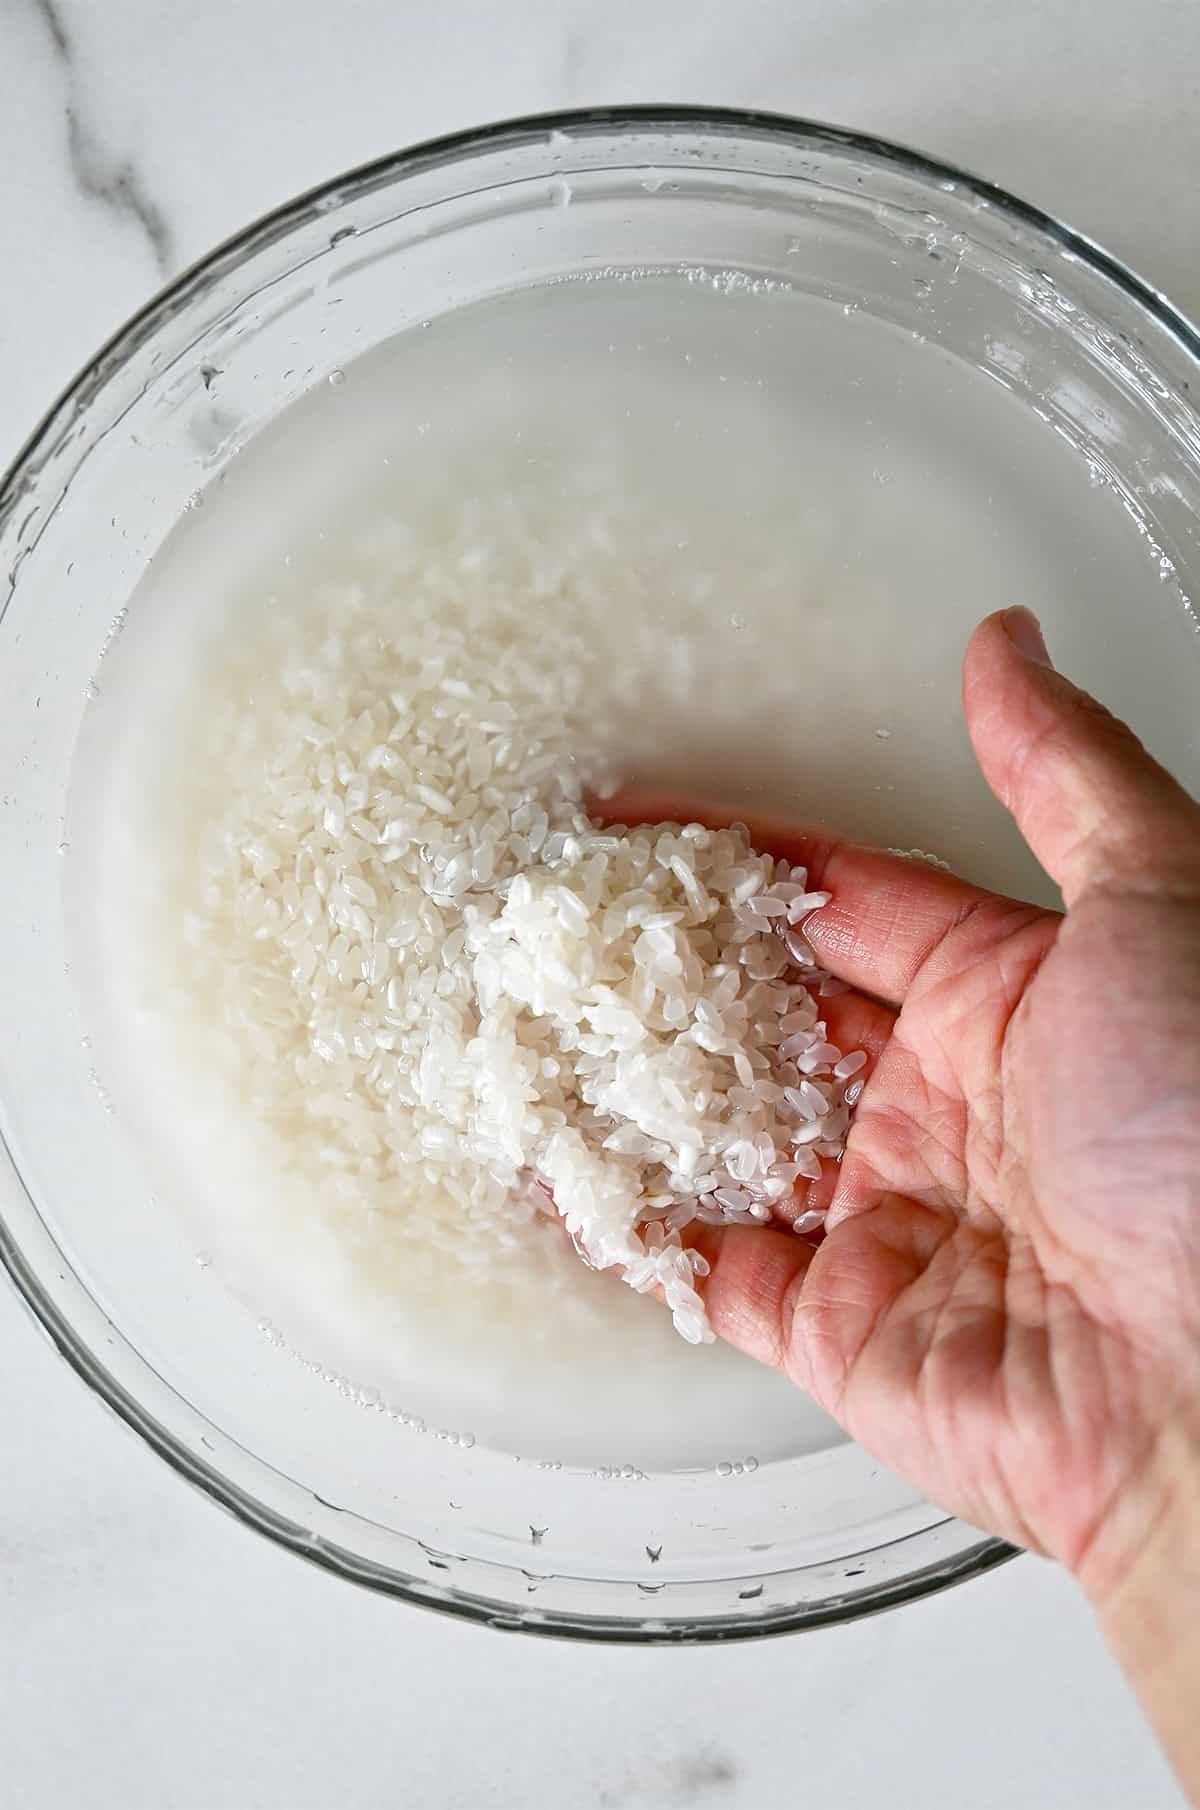
- Rinse and soak the rice. Rinse it several times with cold water until the water runs clear. Transfer the rice to a bowl and fill it with cold water. Cover it with a towel and allow the rice to soak overnight.
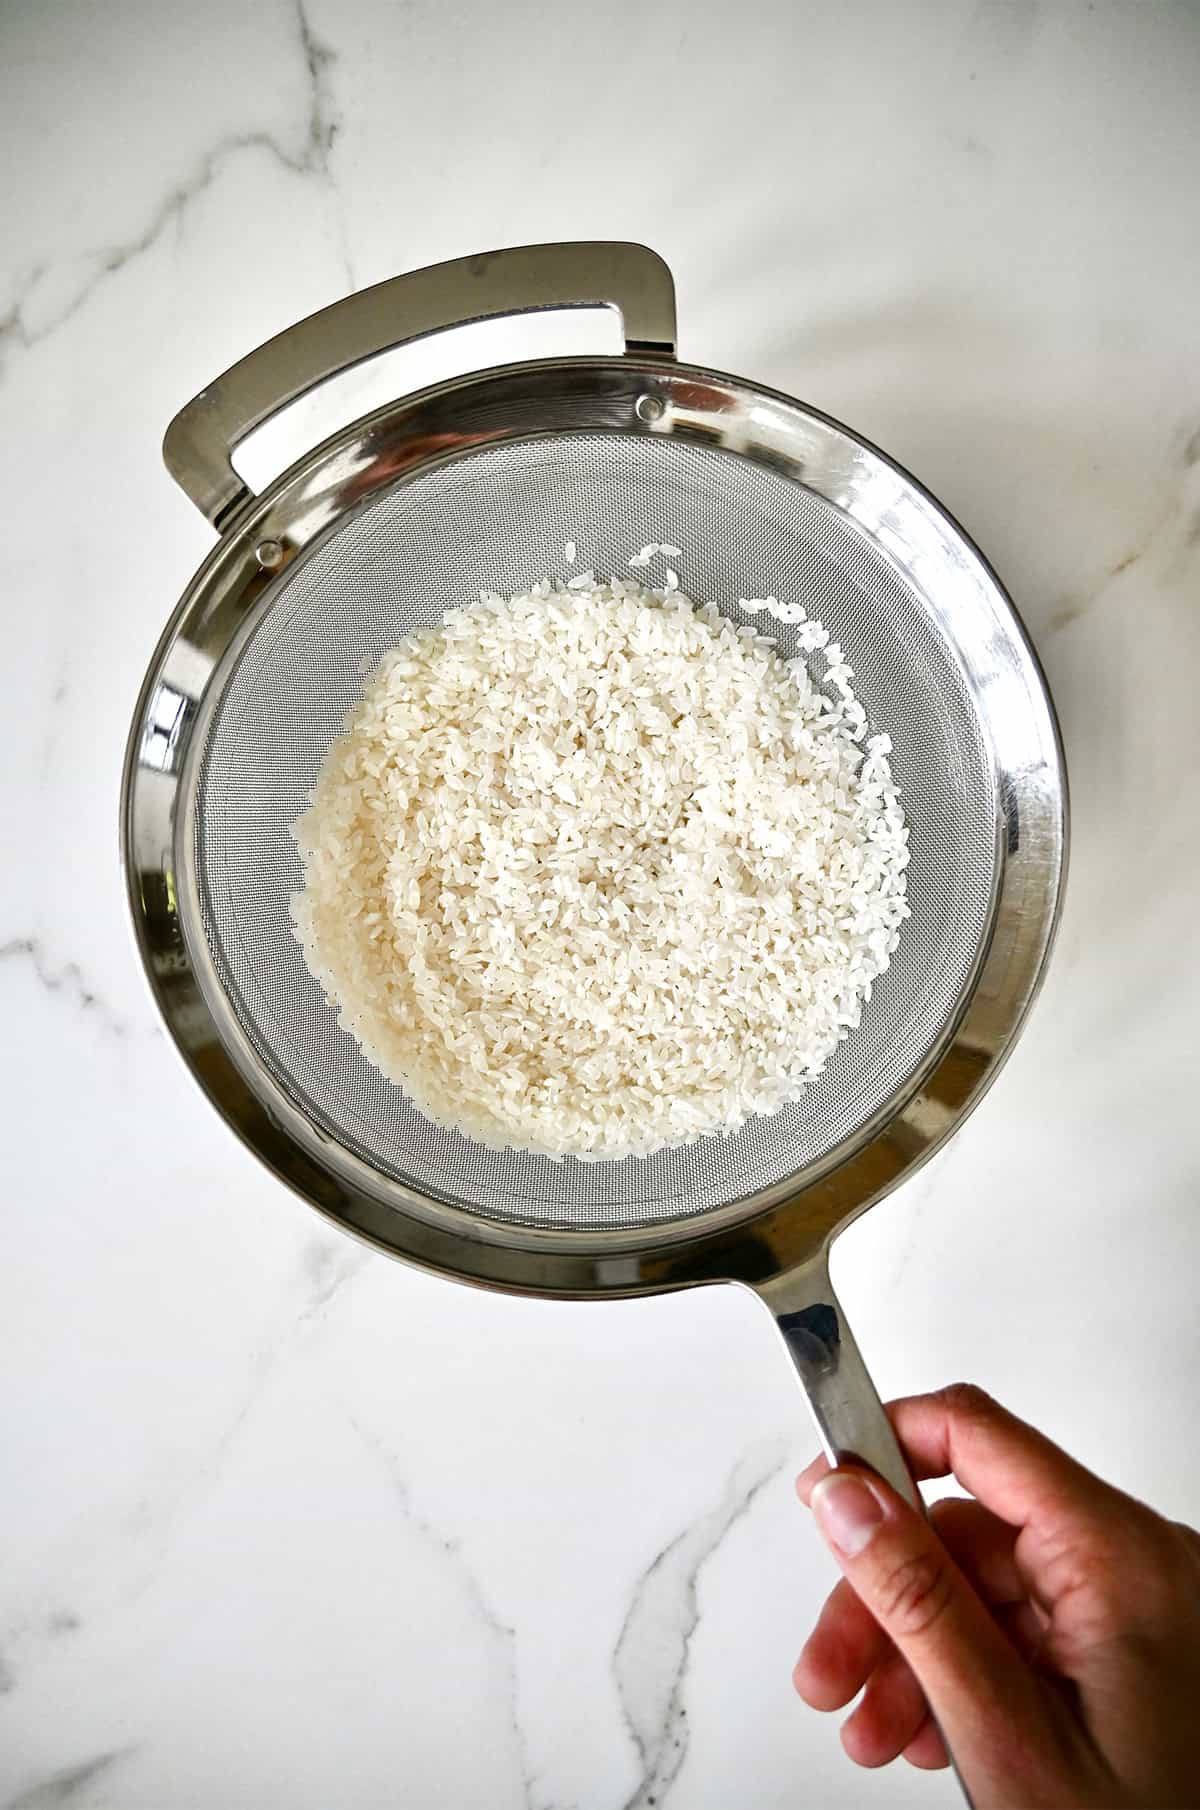
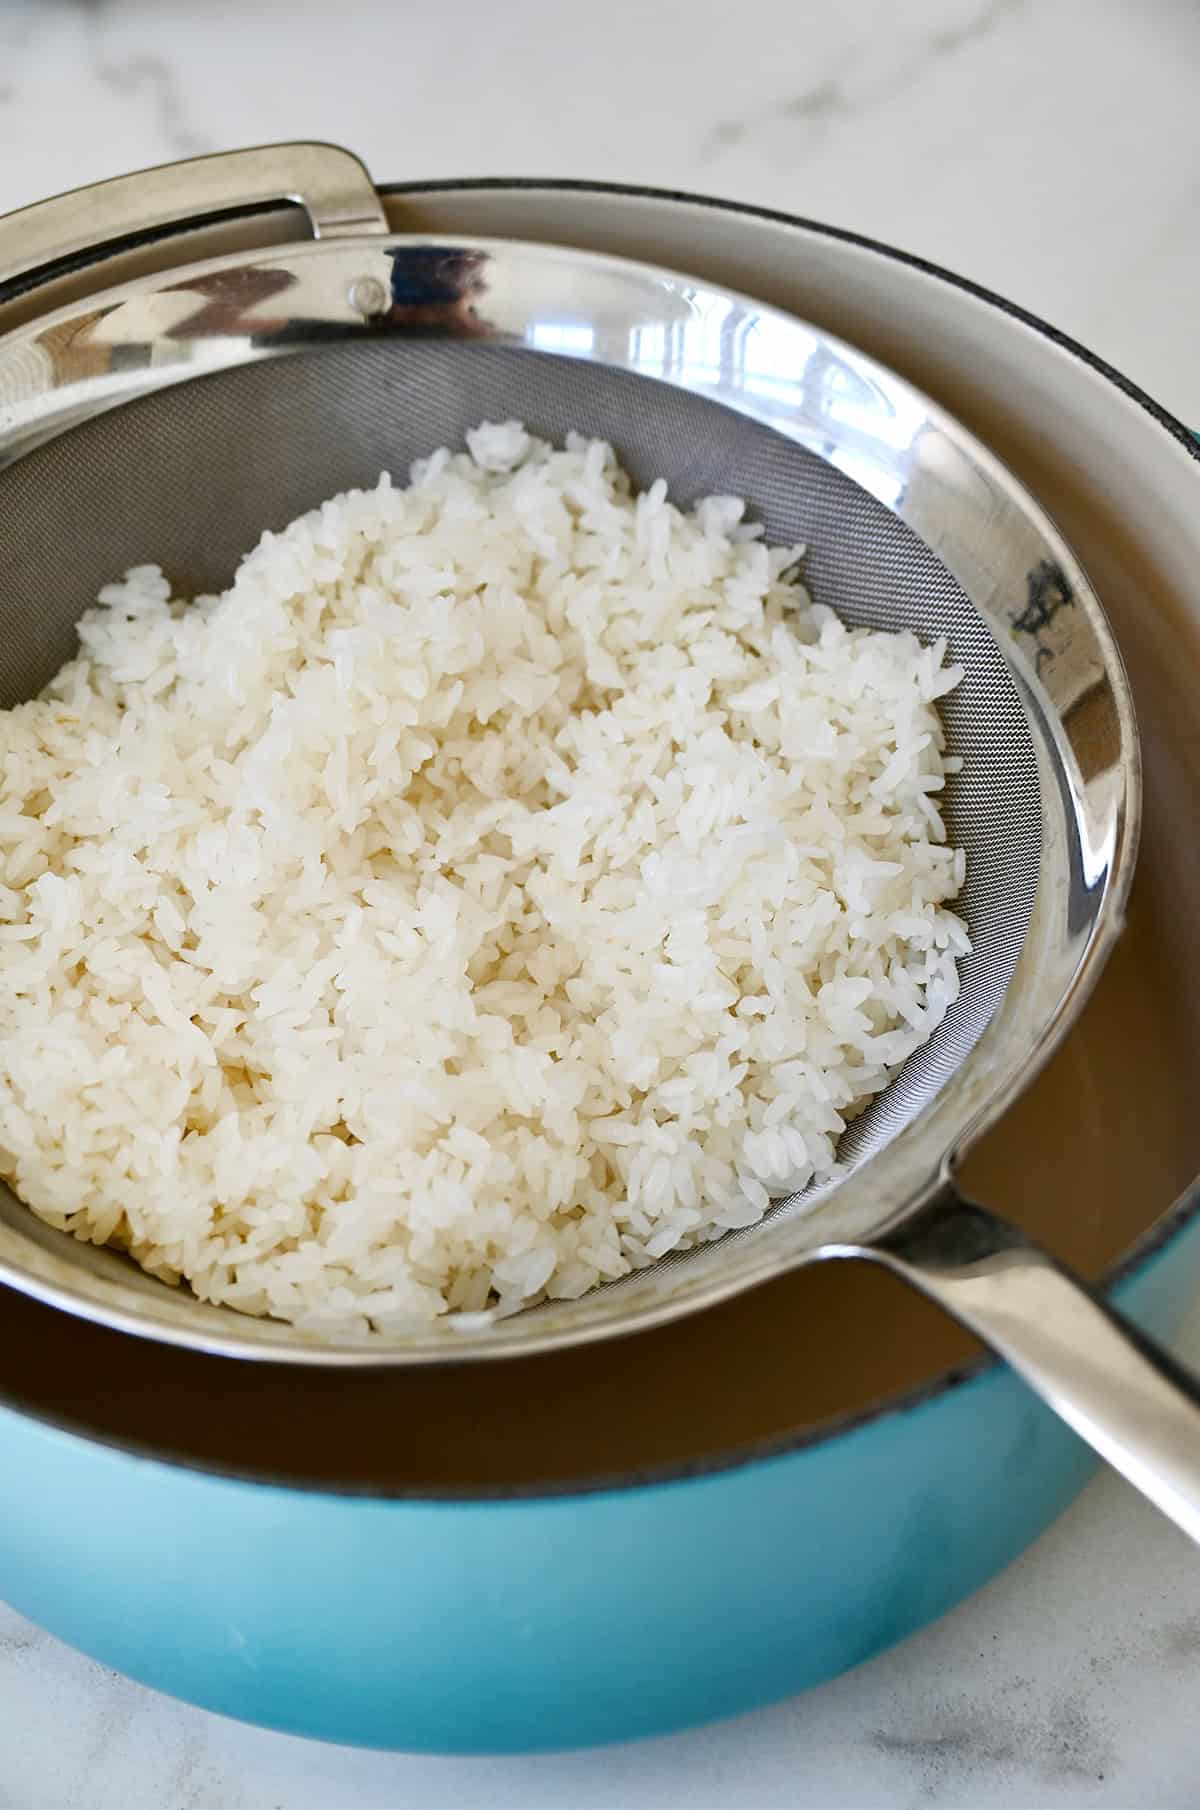
- Steam the rice. Drain the rice in a sieve then place the sieve atop a large pot of shallow, simmering water. Make sure the sieve isn’t touching the water to prevent the rice from getting soggy. Place a towel over the sieve and then cover the pot with a lid and steam the rice for 60 to 70 minutes until it’s cooked through. Add more water to the pot as needed.
- While the sticky rice is cooking, make the coconut milk mixture. Combine the salt with 1 cup of coconut milk and ⅓ cup of sugar in a small saucepan set over medium heat. Bring the mixture to a boil, stirring until the sugar is dissolved. Remove the pan from the heat and cover it with foil to keep it warm.
- Combine the cooked rice with the coconut milk mixture. Transfer the cooked rice to a large bowl and stir in the mixture. Cover the bowl and let the rice stand for 30 minutes until it has absorbed all of the liquid. The rice can be prepared up to this point 2 hours in advance and kept covered at room temperature.
If you’ve discovered you’ve undercooked the rice after adding the coconut milk mixture to it, don’t panic! Transfer the rice back into the sieve and place the sieve atop the pot of boiling water. Cover it with a towel and a lid and re-steam it the same way you did the first time.
Then remove it and stir in a second round of the coconut milk mixture and continue with the recipe as directed. The rice can absorb a significant amount of liquid, so don’t hesitate stirring in a second round of the coconut milk mixture.
- While the rice is standing, make the thickened coconut sauce. Combine the remaining ⅓ cup coconut milk with 3 tablespoons of sugar in a small saucepan. Bring the mixture to a boil and cook it, stirring, for 1 minute. Transfer to a small bowl and refrigerate it until it thickens slightly.

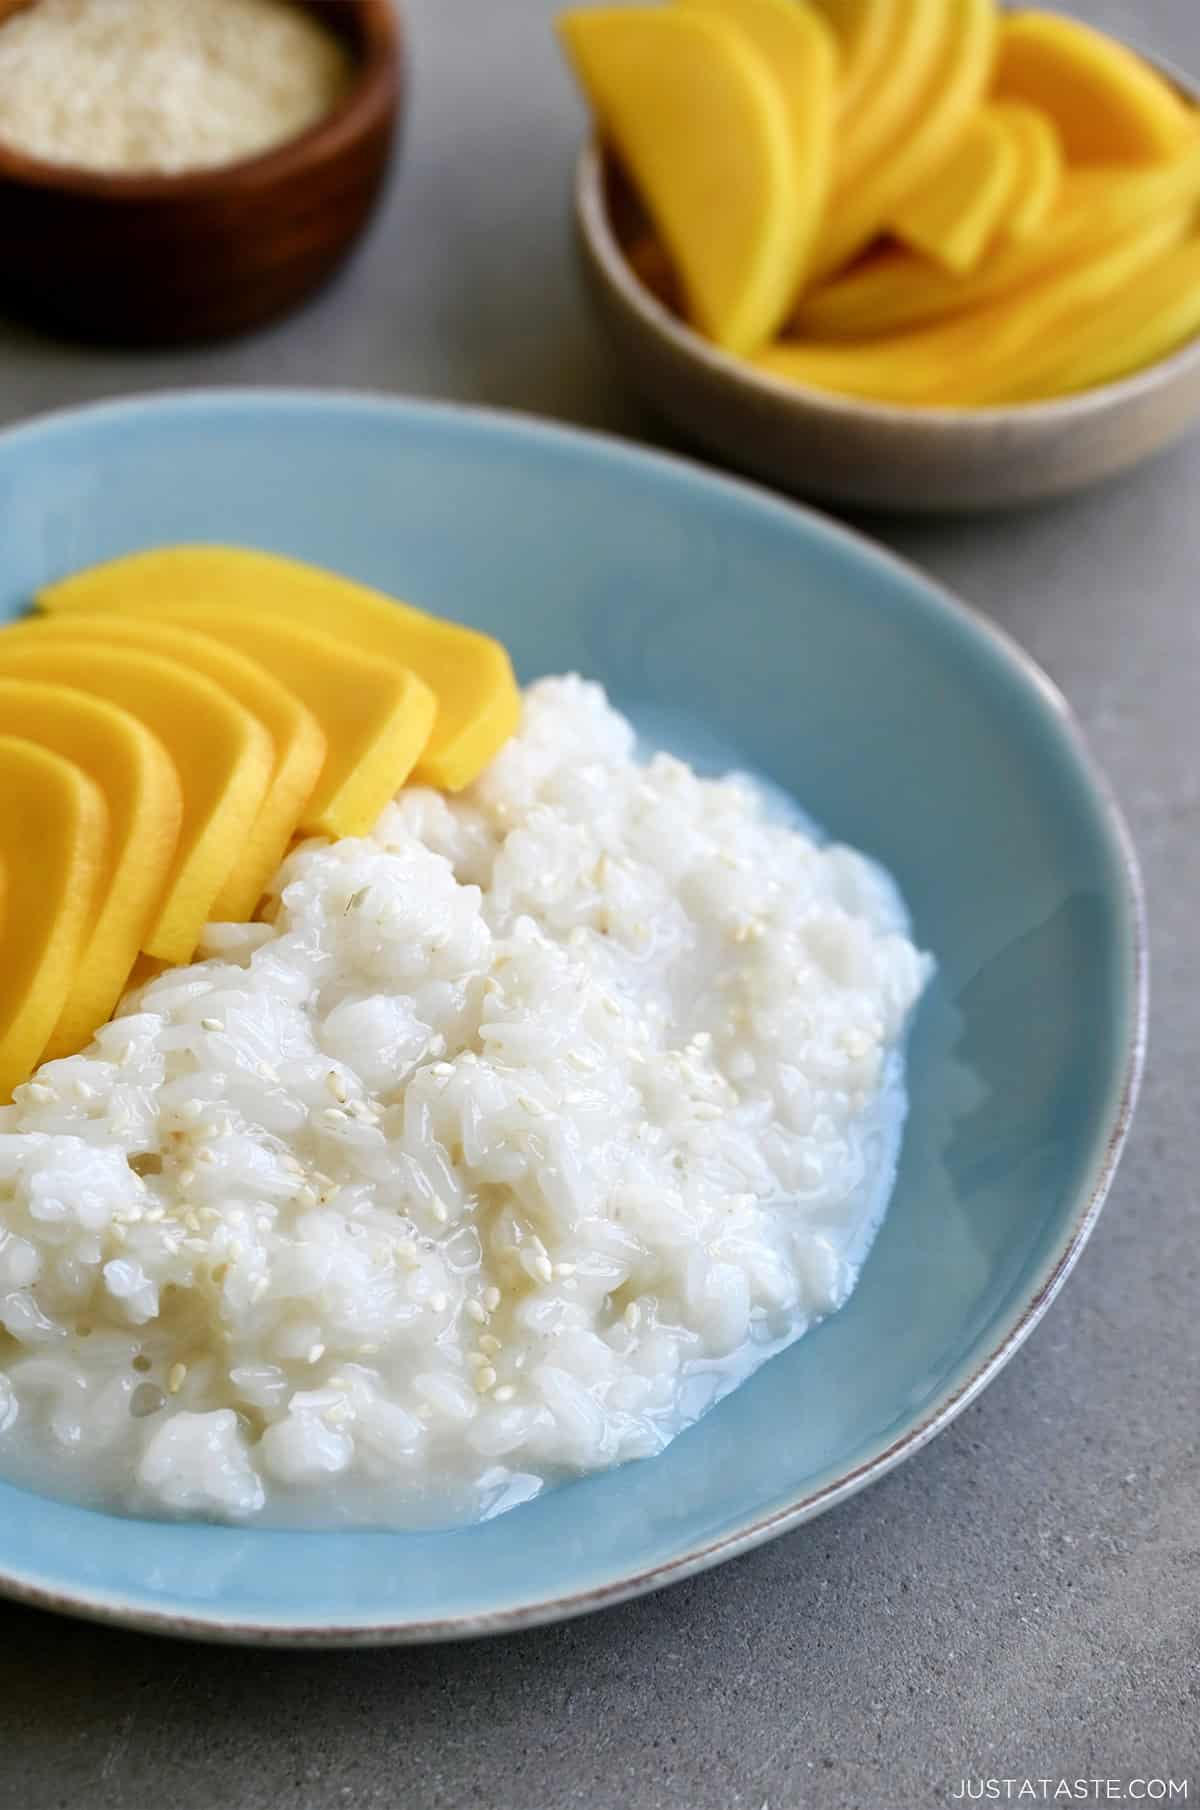
- Assemble and serve. Add several spoonfuls of the coconut-flavored sticky rice to a plate with the sliced mango. Drizzle the rice with the thickened coconut milk syrup, garnish with the sesame seeds and toasted coconut, and serve.
Mango sticky rice is best when enjoyed the same day you make it. While you can reheat it, the texture is never as good as when it’s fresh. However, there are lots you can do to prep ahead of time to make serving day much easier; see make-ahead prep tips below.
- Rinse the rice thoroughly. This step is important because it removes excess starch from the surface of the grains, preventing the rice from getting too sticky or clumpy.
- Soaking the rice is crucial for achieving the right texture. If you’re short on time, you can soak the rice for a minimum of 4 hours, but overnight is best for the perfect consistency.
- Sweet rice is essential for this dish. Regular rice won’t give you the sticky consistency characteristic of this dessert, and other varieties like sushi or risotto rice just won’t cut it. Stick to authentic Thai glutinous rice for the perfect texture.
- When steaming the rice, err on the side of overcooking it. This helps achieve that perfect texture.
Make-Ahead Prep Tips
Here are a few steps you can do ahead of time to make serving this Thai dessert easier:
- Soak the rice ahead of time. Rinse and soak the glutinous rice the night before you plan to make the dessert.
- Toast the sesame seeds and coconut flakes in advance and store them in an airtight container. This step can be done several days ahead, and they’ll be ready to sprinkle over the dessert when you’re ready to serve.
- Both the initial sweetened coconut milk mixture and the thickened coconut milk syrup can be made a day in advance. Store them in separate containers in the refrigerator and gently reheat the initial mixture before combining it with the cooked rice.
As I mentioned above, this dessert is best when enjoyed right away. However, if you happen to have leftovers, here is the best way to store and reheat them:
Storing: Transfer the fragrant sticky rice to an airtight container and store it in the refrigerator. Keep the mango slices and thickened coconut sauce in separate containers. All components can be stored for up to 2 days.
Reheating: While the texture is best when freshly made, you can gently reheat the coconut rice. Place it in a microwave-safe bowl, cover it with a damp paper towel to retain moisture, and microwave it in 30-second intervals, stirring in between, until warmed through. Alternatively, you can steam the rice again for a few minutes to reheat it.
Pro Tip: If the rice seems too dry after reheating, add a splash of coconut milk to restore some of its original creaminess.
How to Toast Coconut Flakes
To toast the coconut flakes, line a baking sheet with parchment paper and then sprinkle the coconut in an even layer. Bake the coconut for 7 to 10 minutes at 350ºF, stirring it halfway through, until golden brown.
This simple step adds nutty flavor and a little bit of crunch to your Thai coconut sticky rice.
Find inspiration to complete your Thai-Inspired dinner with these must-try recipes:
- Drunken Noodles with Chicken
- Thai Chicken Pasta Salad
- Thai Beef Salad with Lime Dressing
- Easy Chicken Pad Thai
- Pad See Ew (Thai Stir-Fried Noodles)
Ingredients
- 1 1/2 cups glutinous (sweet) rice
- 1 1/3 cups well-stirred canned unsweetened coconut milk
- 1/2 cup sugar
- 1/4 teaspoon salt
- 1 Tablespoon sesame seeds, toasted
- 1/2 cup sweetened flaked coconut, toasted (See Kelly’s Notes)
- 1 large mango, peeled, pitted, and cut into slices
Instructions
- Place the rice in a sieve and rinse it several times with cold water until the water runs clear. Transfer the rice to a bowl and fill it with cold water. Cover it with a towel and allow the rice to soak overnight.
- Drain the rice in a sieve then place the sieve atop a large pot of shallow, simmering water. (The sieve should not touch the water.) Place a towel over the sieve and then cover the pot with a lid and steam the rice for 60 to 70 minutes until it’s cooked through. (Error on the side of overcooking the rice.) Add more water to the pot as needed.
- While the rice is cooking, in a small saucepan set over medium heat combine 1 cup of coconut milk with ⅓ cup sugar and the salt. Bring the mixture to a boil, stirring until the sugar is dissolved. Remove the pan from the heat and cover it with foil to keep it warm.
- Transfer the cooked rice to a large bowl and stir in the coconut milk mixture. Cover the bowl and let the rice stand for 30 minutes until it has absorbed all of the liquid. (The rice can be prepared up to this point 2 hours in advance and kept covered at room temperature.)
- While the rice is standing, in a small saucepan combine the remaining ⅓ cup coconut milk with the remaining 3 tablespoons of sugar. Bring the mixture to a boil and cook it, stirring, for 1 minute. Transfer the mixture to a small bowl and refrigerate it until it thickens slightly.
- When ready to serve, divide the rice among serving plates then drizzle it with the reserved coconut milk mixture. Sprinkle the rice with the sesame seeds and toasted coconut and serve the sliced mango alongside the rice. (Check out my video tutorial for the fastest way to cut a mango.)
Kelly’s Notes
- To toast the coconut flakes, line a baking sheet with parchment paper and then sprinkle the coconut in an even layer. Bake the coconut for 7 to 10 minutes at 350ºF, stirring it halfway through, until golden brown.
- If you’ve discovered you’ve undercooked the rice after adding the coconut milk mixture to it, don’t panic! Transfer the rice back into the sieve and place the sieve atop the pot of boiling water. Cover it with a towel and a lid and re-steam it the same way you did the first time. Then remove it and stir in a second round of the coconut milk mixture and continue with the recipe as directed. The rice can absorb a significant amount of liquid, so don’t hesitate stirring in a second round of the coconut milk mixture.
- Sweet rice is essential for this dish. Regular rice won’t give you the sticky consistency characteristic of this dessert, and other varieties like sushi or risotto rice just won’t cut it. Stick to authentic Thai glutinous rice for the perfect texture.
- ★ Did you make this recipe? Don’t forget to give it a star rating below!
Nutrition
Did you try this recipe?
Leave a comment below with your star rating!
This post may contain affiliate links.
Recipe adapted from Epicurious.


Excellent, as always!
Thrilled you enjoyed the recipe, Estrella!
This was great! Best explanation of how to steam rice I’ve read.
It was a little too sweet for me (I cut the total sugar down to 1/3 of a cup), but it was super delish. And the leftovers tasted even better the next day, we just microwaved the rice briefly to warm it up again.
I’m so thrilled you enjoyed the recipe, Tara!
I would like to make this rice this weekend- which types of rice are sweet/glutinous?
thanks
Hi Shannon! You should be able to find sticky rice or sweet rice in the international aisle of most major grocery stores.
Unbelievable.. seriously I followed this recipe EXACTLY and it came out wonderful. I couldn’t believe how much it tasted like what I had at this one Thai place near me. This recipe just seems so accurate because every other recipe called for jasmine which just didn’t seem right and no-one else steamed the rice. Good for you.. Great recipe.
I’m so thrilled you enjoyed the recipe, Matt!
This was great even though I couldn’t find the correct rice. The crunch and slight sweet and tart flavor the mango gave it was fabulous. Will make this again thanks for sharing.
So glad you enjoyed it, Melanie!
Could you use a rice steamer to cook the rice instead?
Sure!
I had this delicious dessert for the first time at some friends house in Bangkok. I was wondering if it would be okay to cook the rice in a rice cooker instead of steaming? Do you think it would work?
Sure!
This sticky rice is so good any time of day, and I really loved the pairing of fresh mango.
Sounds and looks amazing! Can’t wait to try this recipe!
Looooove love love sticky rice. It’s so odd that something as simple as plain old white rice can become so addictive. Looks delicious!
Looooooove this. I’m so in love with coconut rice. Sticky rice, and basically sticky coconut. So yeah, I’m going in.
Great minds think alike! I just shot photos of forbidden coconut rice with mango and I am craving it all over again after seeing this post! One of my favorite combinations ever.
I’ve never tried making this using sushi rice. I wonder how different it will be from the usual glutinous rice that I’m used to.
Hi Lola! I just updated the recipe to include “glutinous (sweet) rice.” I used sushi rice and it turned out quite well, but glutinous rice works, too!
I make onigiri fairly often, and only soak the rice for one hour or so, and the texture comes out perfectly for onigiri. Could this work for this recipe? I’ve never had coconut rice, so I don’t know how the texture compares with sushi prepared rice.
Coconut Sticky Rice with Mango looks so yum! Super Delicious recipe. :-)
I’ve heard so much about coconut sticky rice but haven’t made it yet! Thanks for sharing this easy recipe; can’t wait to try it!
Love mango and sticky rice! It has to be the best ever.
LOVE sticky rice! So beautiful!
I’ve always wanted to make my own sticky rice! This looks lovely!