
This Classic Cheese Ball recipe is the ultimate make-ahead appetizer for any holiday party or gathering. It’s made with cream cheese, cheddar cheese, sour cream and seasonings, then rolled in crushed pecans or dried cranberries for a cheese ball that’s loaded with flavor.

Table of Contents
Is it even a holiday party if a good ol’ cheese ball doesn’t make an appearance? OK, I have a confession to make: I’ve never been a huge cheeseball fan. They can be a little… underwhelming, right? But this isn’t your average cheese ball recipe!
I’ve taken the classic holiday appetizer and given it a flavor-packed makeover. Tangy sour cream makes the ball o’ cheese extra creamy, while a whole tablespoon of Worcestershire sauce (pronounced: wu-stuh-shir) amps up those savory, umami flavors. Throw in some pimiento peppers and freshly shredded Sharp Cheddar, coat it in chopped pecans, and you’ve got a cheese ball that’s guaranteed to be the star of your next gathering.
And while you can’t go wrong with the classic pecan coating, this cheese ball is easy to customize for any occasion, from dried cranberries for the holidays to a pumpkin-shaped version for fall!
This ingredient lineup could not be more flavor-packed!

- Cream cheese: The base of every great cheese ball! Make sure it’s softened to room temperature for easy mixing. To soften cream cheese, leave it out on the counter for about 30 minutes or pop it in the microwave for 15-second intervals until softened.
- Sour cream: Adds tanginess and makes the cheese ball extra creamy.
- Cheddar cheese: For the creamiest texture, grab a block of cheese and grate it yourself. Pre-shredded cheese works in a pinch, but the anti-caking agents can prevent it from blending as smoothly into the cream cheese mixture. I love using sharp cheddar for the best flavor.
- Pimiento peppers: These sweet and tangy peppers add pops of flavor throughout. You’ll usually find small jars of diced pimientos near the pickles and olives.
- Worcestershire sauce: Adds rich, savory umami flavor, cutting through the richness of the cheese with its slightly tangy and complex taste.
- Garlic powder: For flavor.
- Scallions (a.k.a green onions): Finely slice or chop them to ensure their mild onion flavor is evenly distributed without overpowering each bite.
- Pecans: Finely crushed or chopped pecans add the perfect crunchy coating.
See the recipe card for full information on ingredients and quantities.


- Make the cheese mixture. In a large bowl, stir together the cream cheese, sour cream, Sharp Cheddar cheese, pimiento peppers, Worcestershire, garlic powder and sliced scallions until combined.
- Form into a ball. Arrange a piece of plastic wrap on your work surface then transfer the cheese mixture into the center. Gather up the sides of the plastic wrap and shape the cheese into a ball. Refrigerate it for 20 minutes.
- Coat and serve. Add crushed pecans to a shallow bowl. Remove the cheese ball from the fridge and discard the plastic wrap. Coat the cheese ball in the pecans, pressing them to adhere to the entire exterior of the cheese ball. Serve immediately or re-cover it with plastic wrap and refrigerate it until ready to serve with crackers, pretzels or crudité.
Safe Serving Tip: You can safely leave a cheese ball out at room temperature for up to 2 hours—any longer, and bacteria can start to grow, so it’s best to return it to the fridge.
If you’re hosting and know it’ll be out for longer, you can keep it on a platter nestled over ice or serve it up mini cheese ball style (see below), keeping the rest in the fridge and replenshing as needed.

My Favorite Cheese Ball Pairings
For me, a classic cheese ball belongs on a party platter surrounded by plenty of crackers, pretzels and fresh veggies. Ritz crackers are always a hit, but I also love serving it with warm crostini, mini bagels, crisp apple slices (here’s my trick for keeping apples from browning) or sturdy barbecue potato chips (trust me on that last one!).
Pro Tip: Don’t serve the cheese ball straight from the fridge. Let it sit out for about 10-15 minutes for optimal spreadability. Oh, and don’t forget a cheese spreading knife—after all, this is a spread, not a dip, and your guests will thank you.
Cheese Ball Variations
One of the best things about this homemade cheese ball recipe is how customizable it is. Whether you’re aiming for a classic flavor profile or something more adventurous, there’s endless room to play around.
For game days, I roll up a football-shaped cheeseball that’s loaded with crispy bacon and jalapeños. It’s a total touchdown at every gameday party! Or, sometimes for holiday gatherings, I swap out the pecans for dried cranberries for a festive twist.
When you’re experimenting with flavors, here are a few tips to keep in mind:
- Texture is everything. Don’t skip the crunchy coating! It adds the perfect contrast to the creamy cheese filling and gives every bite that satisfying crunch. Chopped nuts, dried fruit or even pretzel crumbs all work great. Chopped pistachios are one of my fave alternatives!
- Go easy on the salt.
- Get creative with mix-ins. Love some heat? Stir in a few dashes of hot sauce or Sriracha. Not a fan of cheddar? Swap in Monterey Jack, Colby Jack or a smoky gouda. Just remember to shred your own cheese for the best texture and flavor.
Make It a Pumpkin Cheese Ball!
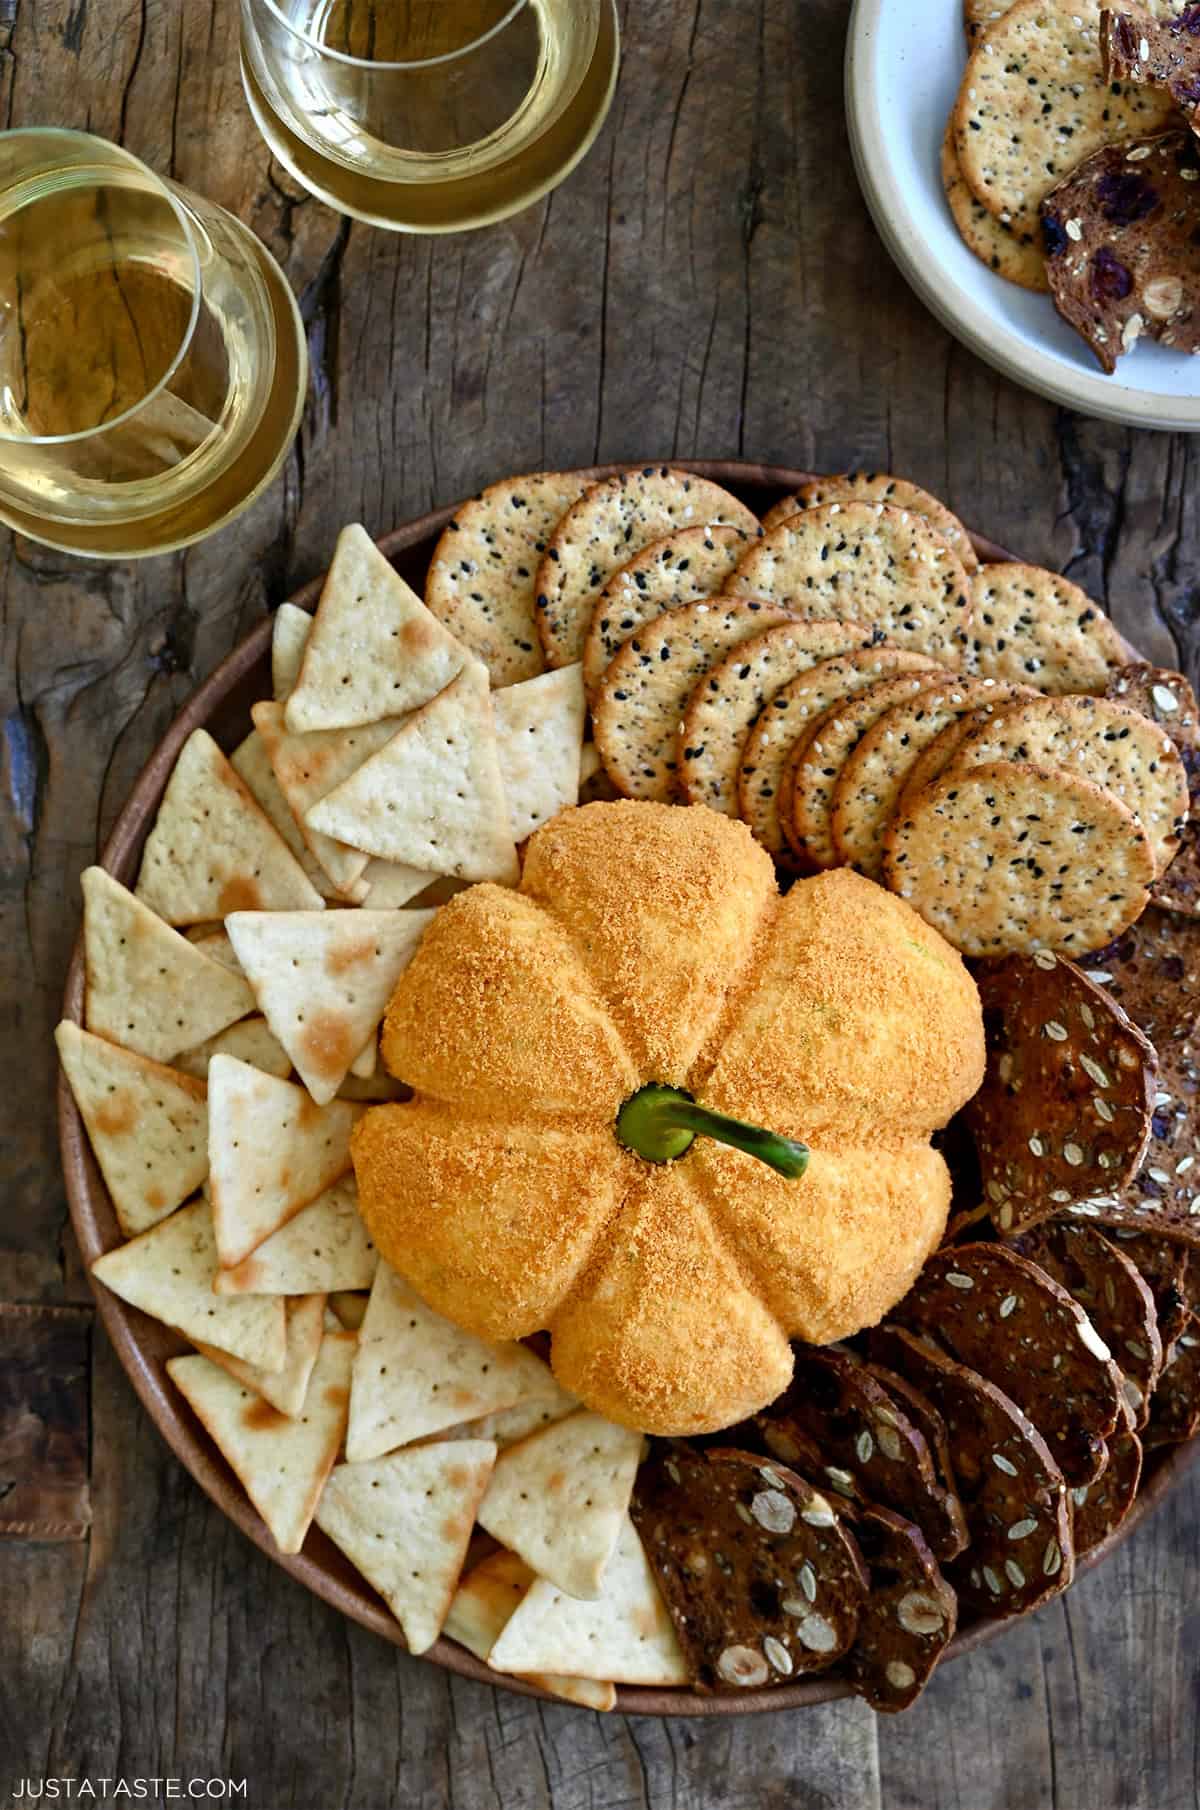
A cheese ball that looks like a pumpkin? Yes, please! This festive fall appetizer starts with my classic cheese ball recipe, but instead of rolling it in pecans, I coat it in finely crushed Cheez-Its for that bright orange color (and if you know me, you know I love Cheez-Its!). Add a bell pepper stem on top, and you’ve got an edible pumpkin that’s perfect for the center of a fall charcuterie board, Halloween parties or Thanksgiving gatherings.
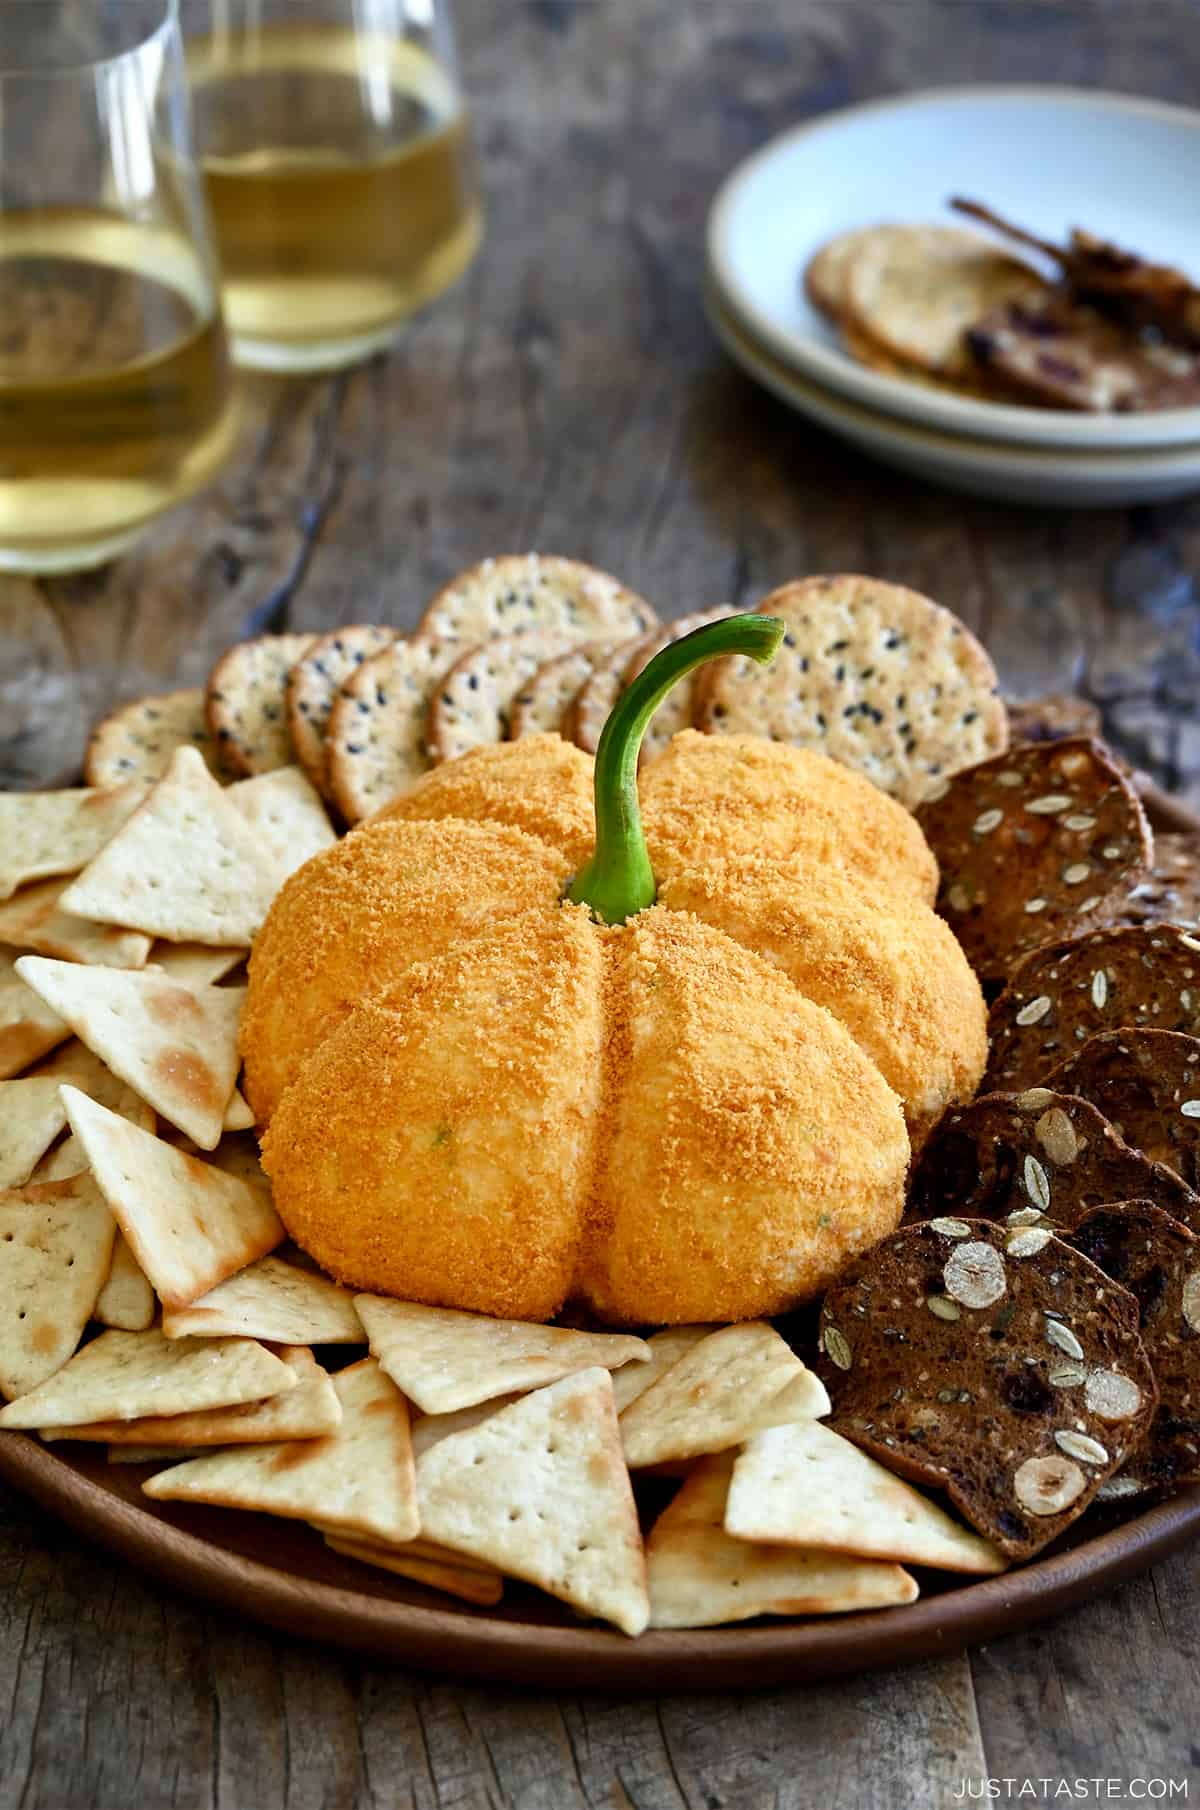
The trick to getting those pumpkin ridges is surprisingly simple: rubber bands!
- Shape the pumpkin. Prepare the cheese mixture as directed, then wrap it tightly in two layers of plastic wrap, shaping it into a ball. Stretch 3 or 4 rubber bands around the wrapped ball to create the pumpkin’s indentations.
- Chill until firm. Refrigerate for at least 4 hours so the cheese ball holds its shape when you remove the rubber bands and plastic wrap.
- Add the orange coating. Remove the rubber bands and plastic wrap, then gently press finely crushed Cheez-Its all over the cheese ball. If the mixture has softened too much to coat easily, pop it in the freezer for 10 minutes to firm up.
- Finish with the stem. Transfer the pumpkin cheese ball to a serving platter and insert a clean bell pepper stem into the top. Surround it with your favorite crackers and serve!
Kelly’s Tip: You can shape the cheese ball a day ahead and refrigerate it with the rubber bands and plastic wrap still in place. Wait until shortly before serving to add the crushed Cheez-It coating so it stays nice and crunchy.
Go Mini for Easy Entertaining
This recipe can also be turned into mini cheese ball bites! After chilling the mixture, scoop and roll it into mini balls. Coat them in a variety of toppings like crushed nuts, dried cranberries or Everything seasoning. Add pretzel sticks for a fun, finger-friendly appetizer that’s perfect for parties.

Make-Ahead and Storage Tips
- Make-ahead: Make the cheese ball, but hold off on the nut coating until just before serving. Wrap it tightly in plastic wrap and store it in the fridge for up to 3 days. When you’re ready to serve, roll it in the nuts about an hour beforehand for the freshest crunch. Pop it back in the fridge until your guests arrive.
- Leftovers: Store leftovers in an airtight container in the fridge for up to four days.

Ingredients
- 2 (8-oz.) packages cream cheese, softened
- 1/2 cup sour cream
- 2 cups shredded Sharp Cheddar cheese (See Kelly’s Notes)
- 1 (4-oz.) jar diced pimiento peppers, drained
- 1 Tablespoon Worcestershire sauce
- 2 teaspoons garlic powder
- 1/2 cup sliced scallions
- 1 1/2 cups finely crushed pecans or other nut (See Kelly’s Notes)
- Crackers, pretzels or crudité, for serving
Instructions
- In a large bowl, stir together the cream cheese, sour cream, Sharp Cheddar cheese, pimiento peppers, Worcestershire, garlic powder and sliced scallions until combined.
- Arrange a piece of plastic wrap on your work surface then transfer the cheese mixture into the center. Gather up the sides of the plastic wrap and shape the cheese into a ball. Refrigerate it for 20 minutes.
- Add the crushed pecans to a shallow bowl.
- Remove the cheese ball from the fridge and discard the plastic wrap. Coat the cheese ball in the pecans, pressing them to adhere to the entire exterior of the cheese ball.
- Serve the cheese ball immediately or re-cover it with plastic wrap and refrigerate it until ready to serve with crackers, pretzels or crudité.
Kelly’s Notes
- Cheese: For the best texture, I recommend shredding your own cheese. Pre-shredded cheese works, too, but it won’t blend quite as smoothly.
- Coating: You can coat your cheese ball in any crushed nuts or chopped, dried fruit you prefer. A few great options other than pecans are pistachios and dried cranberries.
- Make-ahead: Make the cheese ball, but hold off on the nut coating until just before serving. Wrap it tightly in plastic wrap and store it in the fridge for up to 3 days. When you’re ready to serve, roll it in the nuts about an hour beforehand for the freshest crunch. Pop it back in the fridge until your guests arrive.
- Store: Store leftovers in an airtight container in the fridge for up to four days.
- Pumpkin Cheese Ball Variation: For a festive fall twist, wrap the prepared cheese mixture in two layers of plastic wrap and shape it into a ball. Stretch 3 or 4 rubber bands around it to create pumpkin-like ridges, then refrigerate for at least 4 hours. Remove the rubber bands and plastic wrap, coat the cheese ball in finely crushed Cheez-Its instead of pecans, and finish with a bell pepper stem. If the cheese ball is too soft to coat, freeze it for 10 minutes to firm up.
- ★ Did you make this recipe? Don’t forget to give it a star rating below!
Nutrition
Did you try this recipe?
Leave a comment below with your star rating!
This post may contain affiliate links.

Made the mini version for Christmas Eve dinner and they were the crowd favorite!! Did a mix of crushed nuts and also the dried cranberries. Will make again for NYE. Thanks!
So glad you enjoyed the recipe, Katrina! Happy (almost) New Year!
Hey kelly tried your cheese ball, came out great!! The only thing i did differently was combined some pretzel crumbs in the mix before i put in plastic wrap. Then 30min later rolled in the pretzel crumbs i had, the kids loved it. Great recipe thx
Mike
So glad you all enjoyed the recipe, Mike!