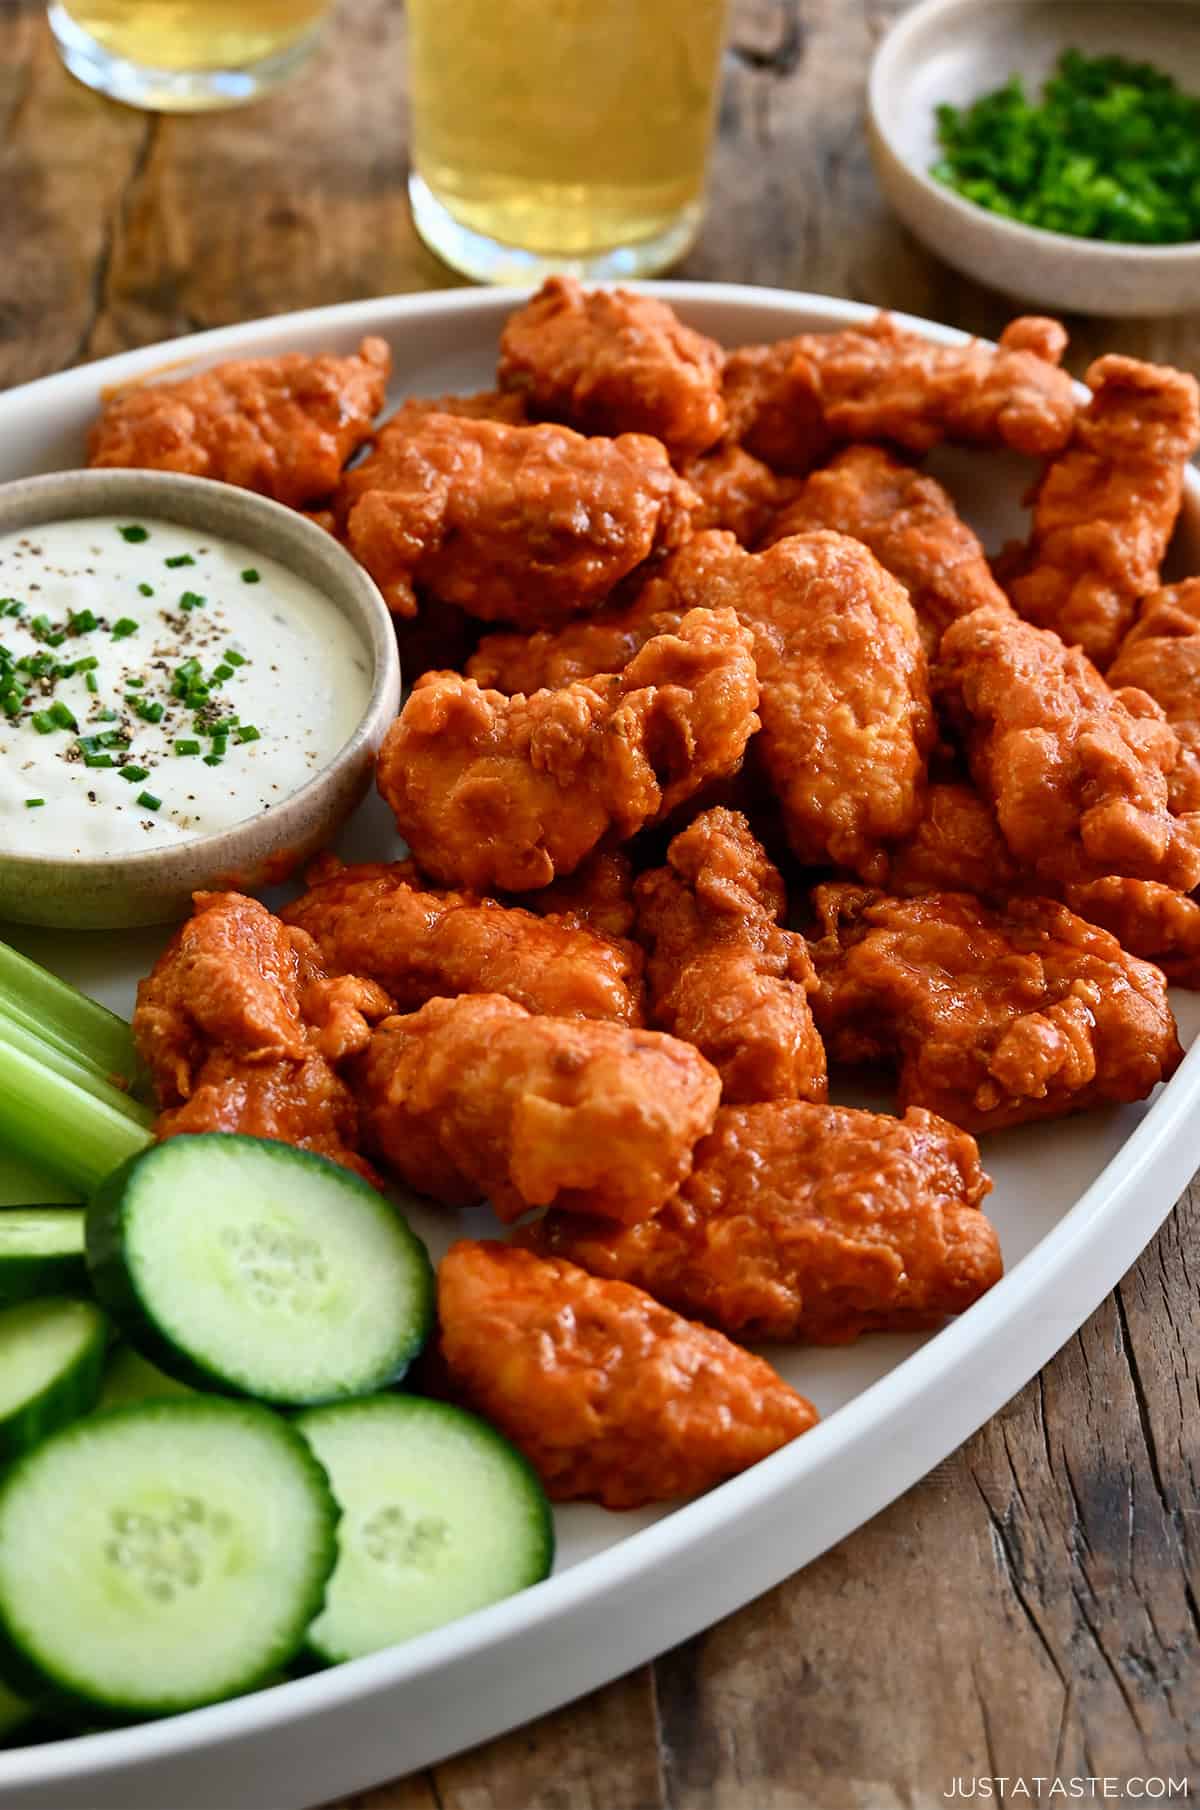
These crispy boneless chicken wings are lightly battered, fried until golden brown, and tossed in a simple 2-ingredient Buffalo sauce (or any sauce you love most!). Ready in just 30 minutes, they’re the ultimate gameday snack or easy weeknight dinner guaranteed to disappear fast.
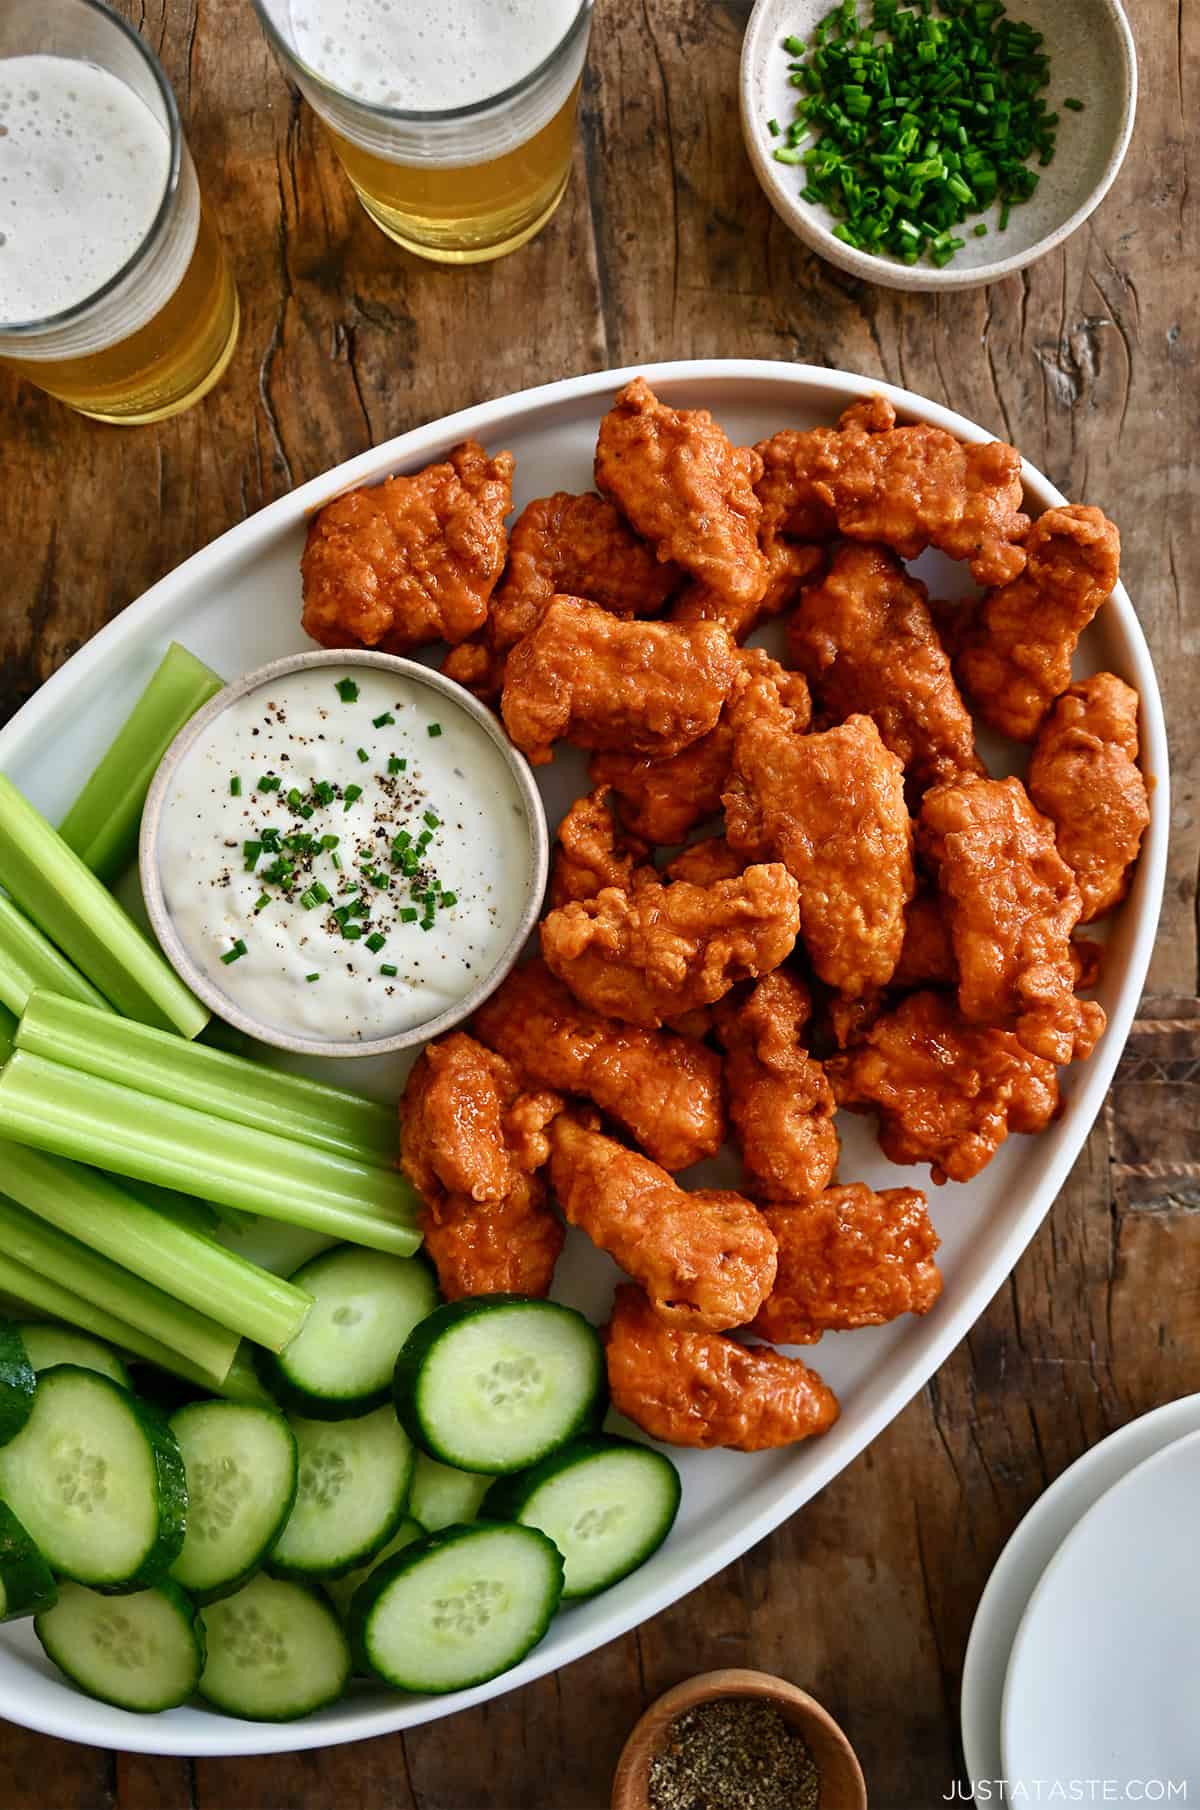
Table of Contents

When it comes to football-watching foods, everyone has their favorite. For me? It’s chicken wings. Every single time.
And while I love a classic platter of bone-in wings, these boneless chicken wings are what I make when I want something a little easier to eat, more kid-friendly and guaranteed to disappear the second they hit the table.
The setup couldn’t be easier: Cut chicken breasts into bite-sized pieces, coat them in a seasoned flour mixture, fry until golden and crispy, then toss everything in homemade Buffalo sauce (the same simple 2-ingredient sauce I use for my grilled Buffalo shrimp and Buffalo chicken meatballs). That’s it!
P.S. If we’re being honest, boneless chicken wings are really just good ol’ chicken nuggets. And I am fully on board with that.
- Chicken: Boneless, skinless chicken breasts cut into bite-sized pieces are the classic choice, but I actually love using chicken thighs here because they’re even more moist.
- All-purpose flour: This is the foundation of the coating. The flour absorbs surface moisture on the chicken, which helps the egg mixture stick—and once the egg sticks, the coating sticks.
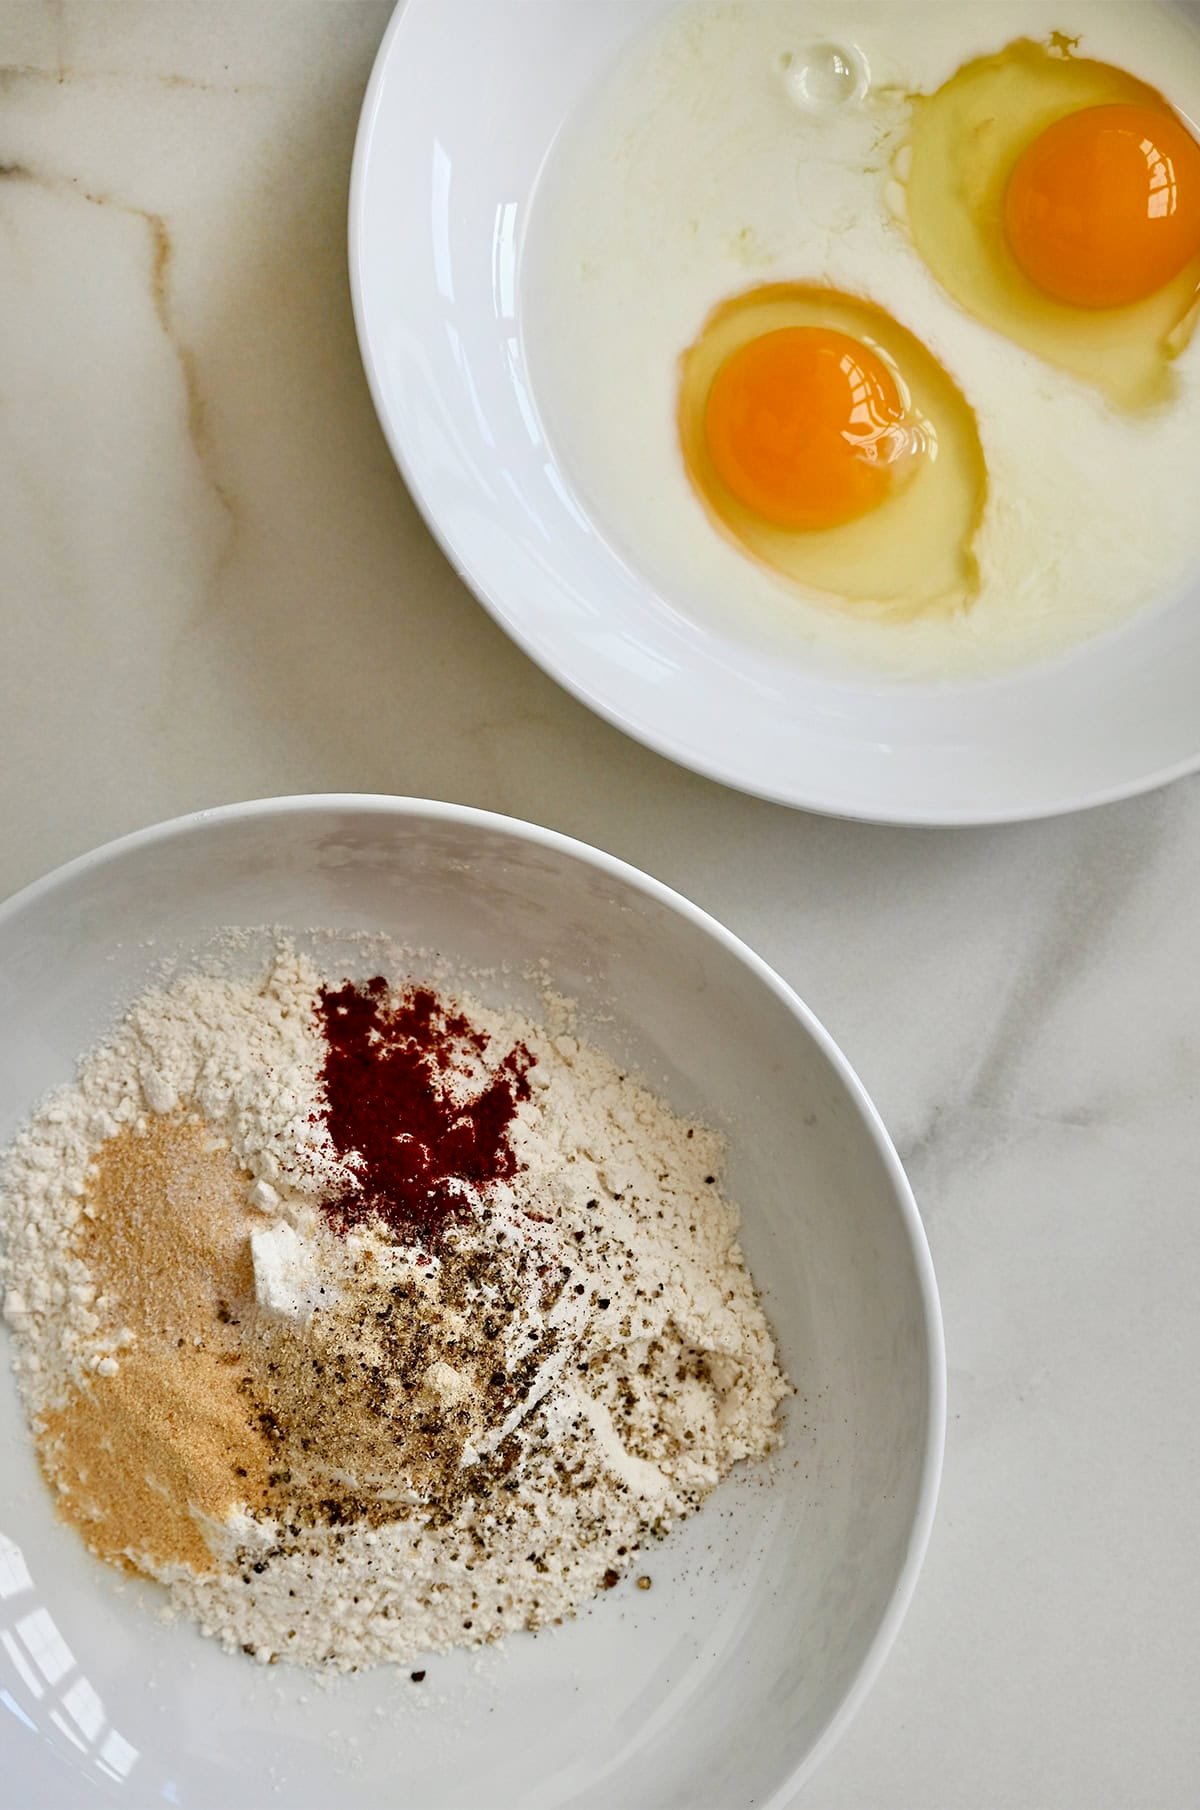
- Garlic powder, onion powder, smoked paprika, salt, pepper: These seasonings go straight into the flour so the chicken is flavorful before it ever gets tossed in sauce.
- Eggs and milk: The egg wash helps the seasoned flour coating stick.
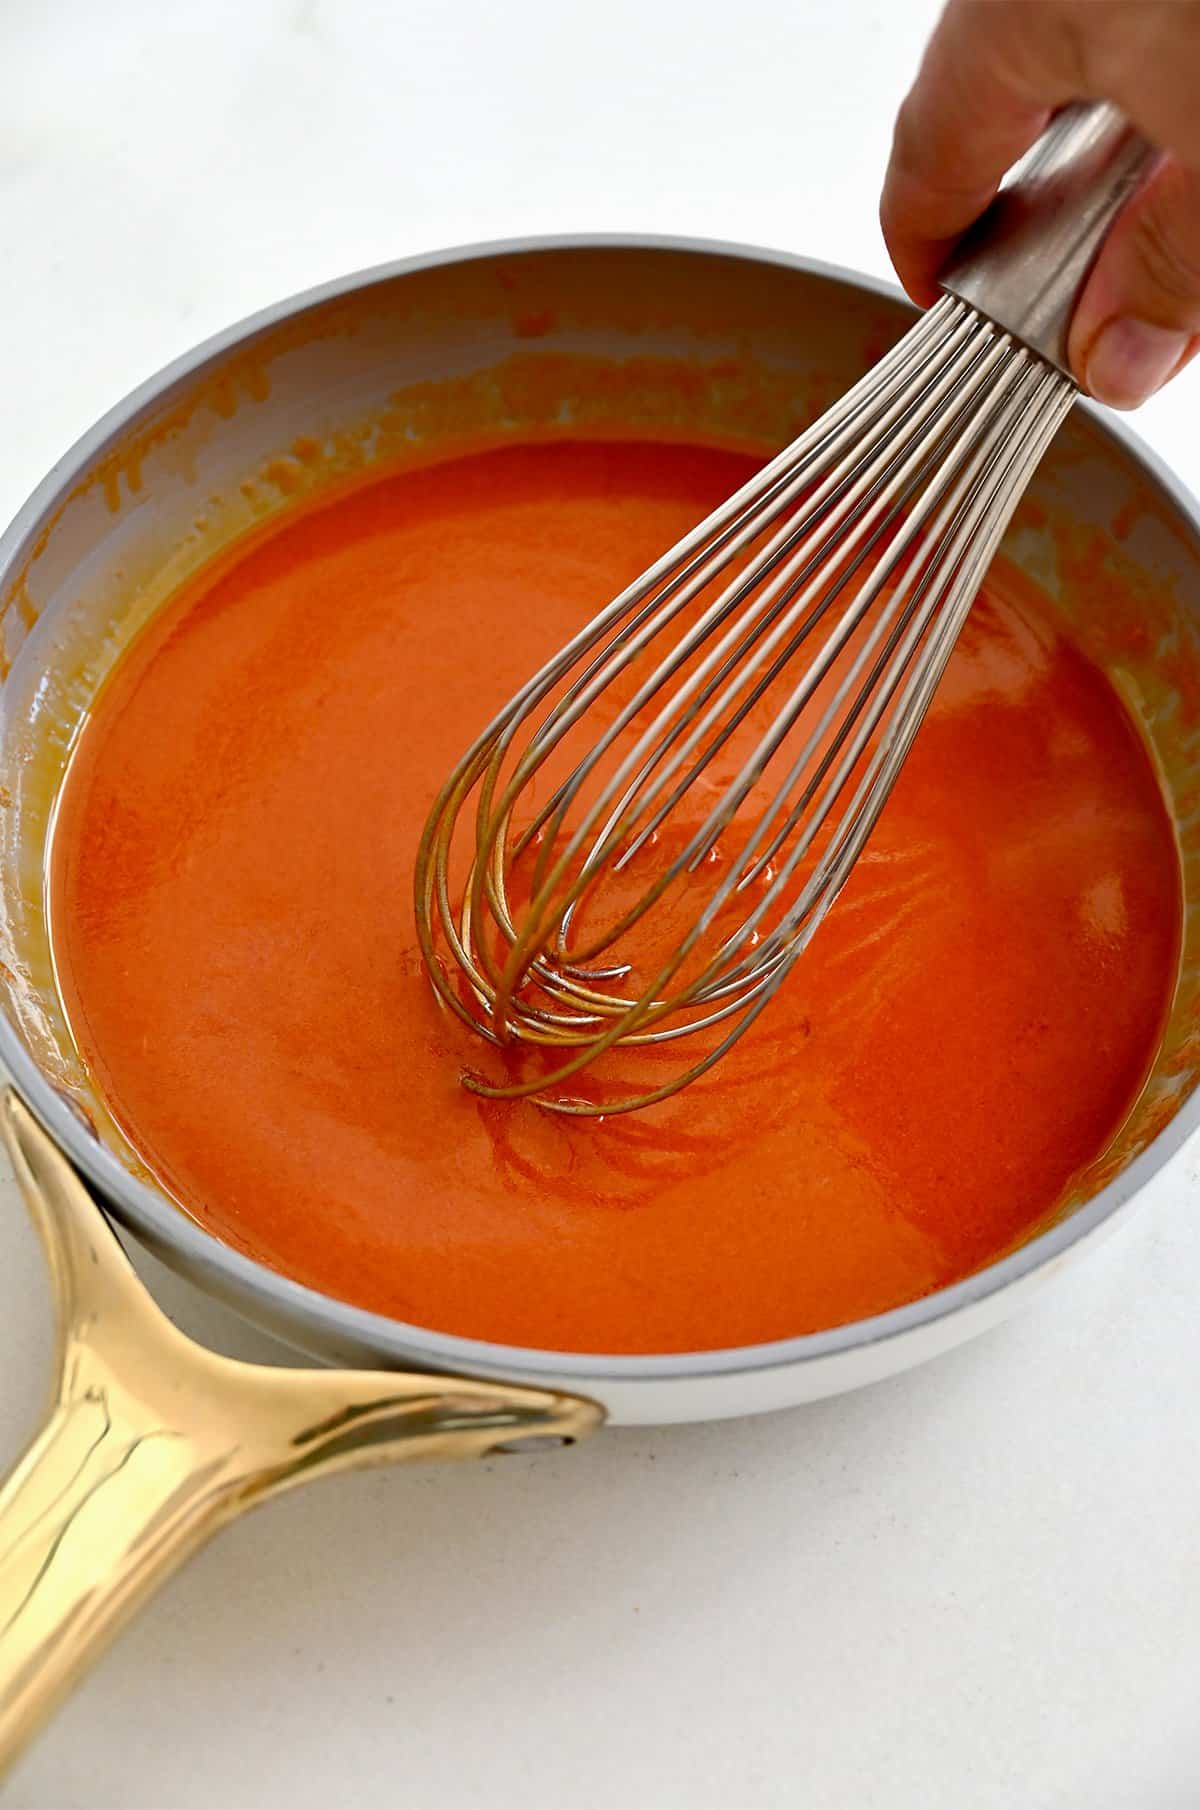
- Hot sauce and butter: This is all you need to make a classic Buffalo sauce. Frank’s RedHot is my go-to (if you’ve tried my Buffalo chicken dip, you know I’m loyal), but any hot sauce you love will work here.
- Oil for frying: Use a neutral oil with a high smoke point like vegetable oil, canola oil or peanut oil. Skip the olive oil here—it burns too quickly at frying temperatures, which can lead to bitter flavor and less-than-crispy results.
When it comes to serving this classic appetizer, celery sticks are a must. I also like to add sliced cucumbers for variety. And then comes the big question: are you Team Blue Cheese or Team Ranch when it comes to dipping and dunking Buffalo wings? My homemade buttermilk ranch dressing is always a crowd favorite.
See the recipe card for full information on ingredients and quantities.
Prep and Double-Coat the Chicken
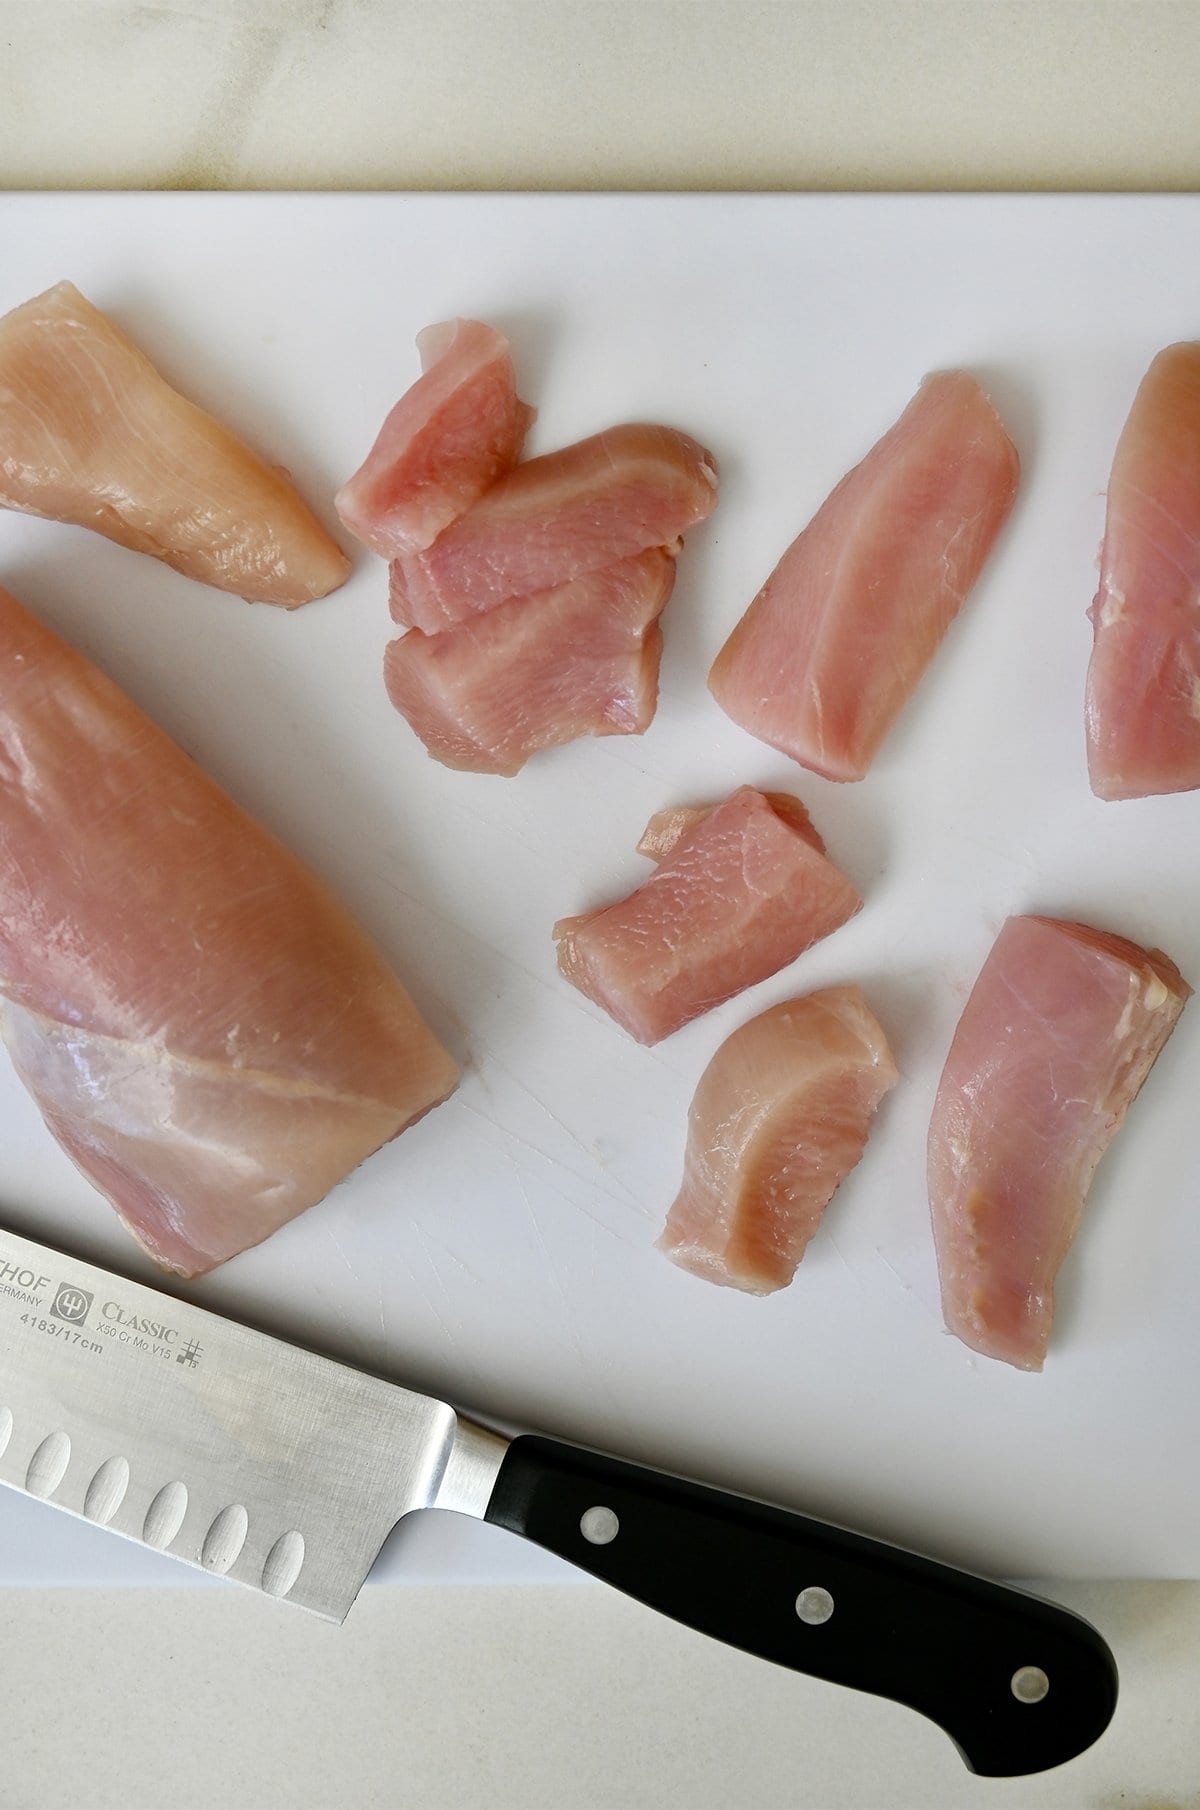
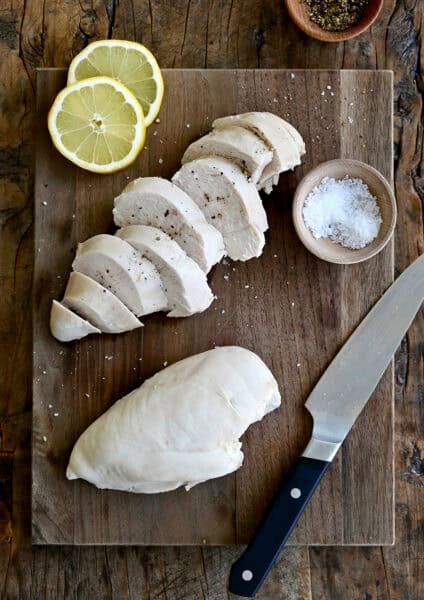
Start by cutting the chicken into evenly sized, nugget-like pieces. Keeping the pieces similar in size helps them cook evenly once they hit the oil.
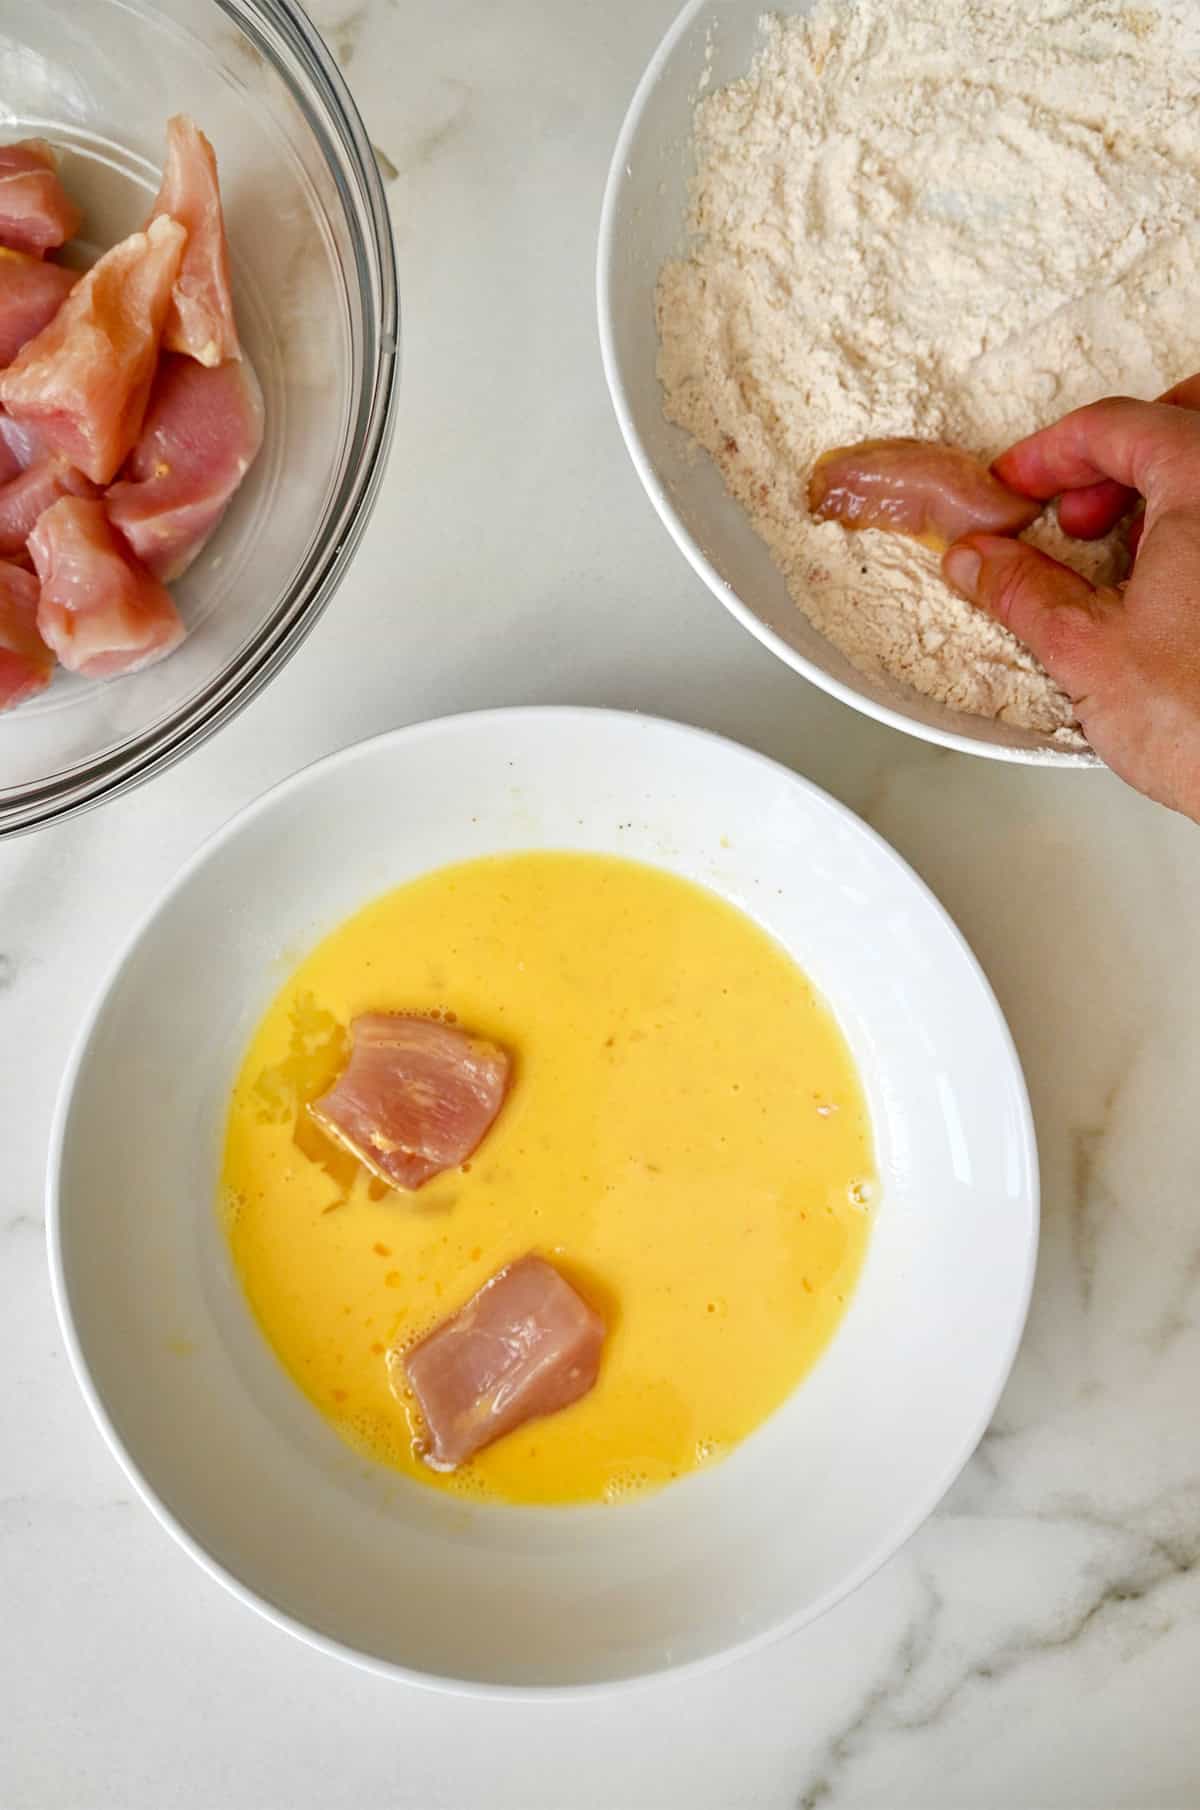
Next, set up your dredging station. You’ll need two bowls: one with the eggs whisked together with a splash of milk, and another with the flour mixed with the seasonings.
Dip each piece of chicken into the egg mixture, let any excess drip off, then coat it in the seasoned flour. Repeat the process once more so each piece is double-coated. That second dip is the not-so-secret trick to the crispiest boneless wings.
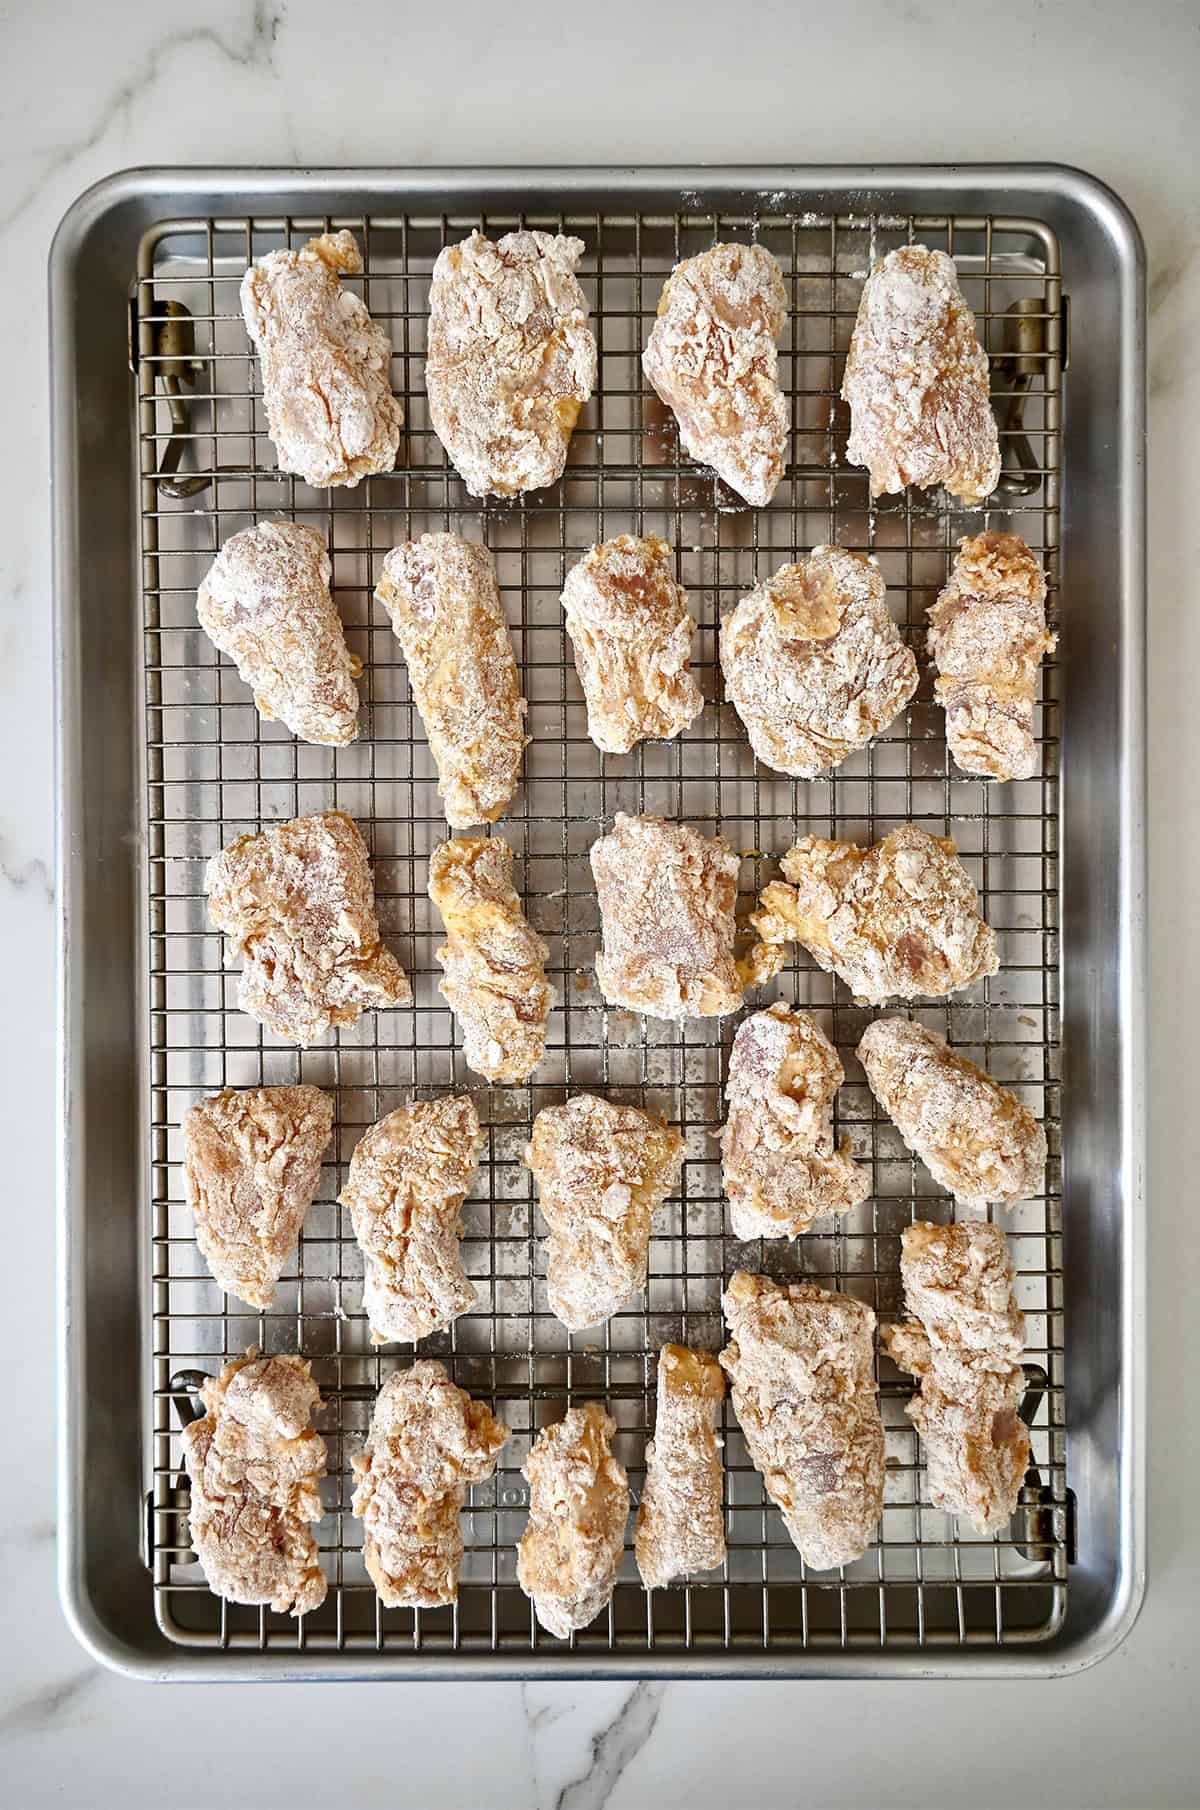
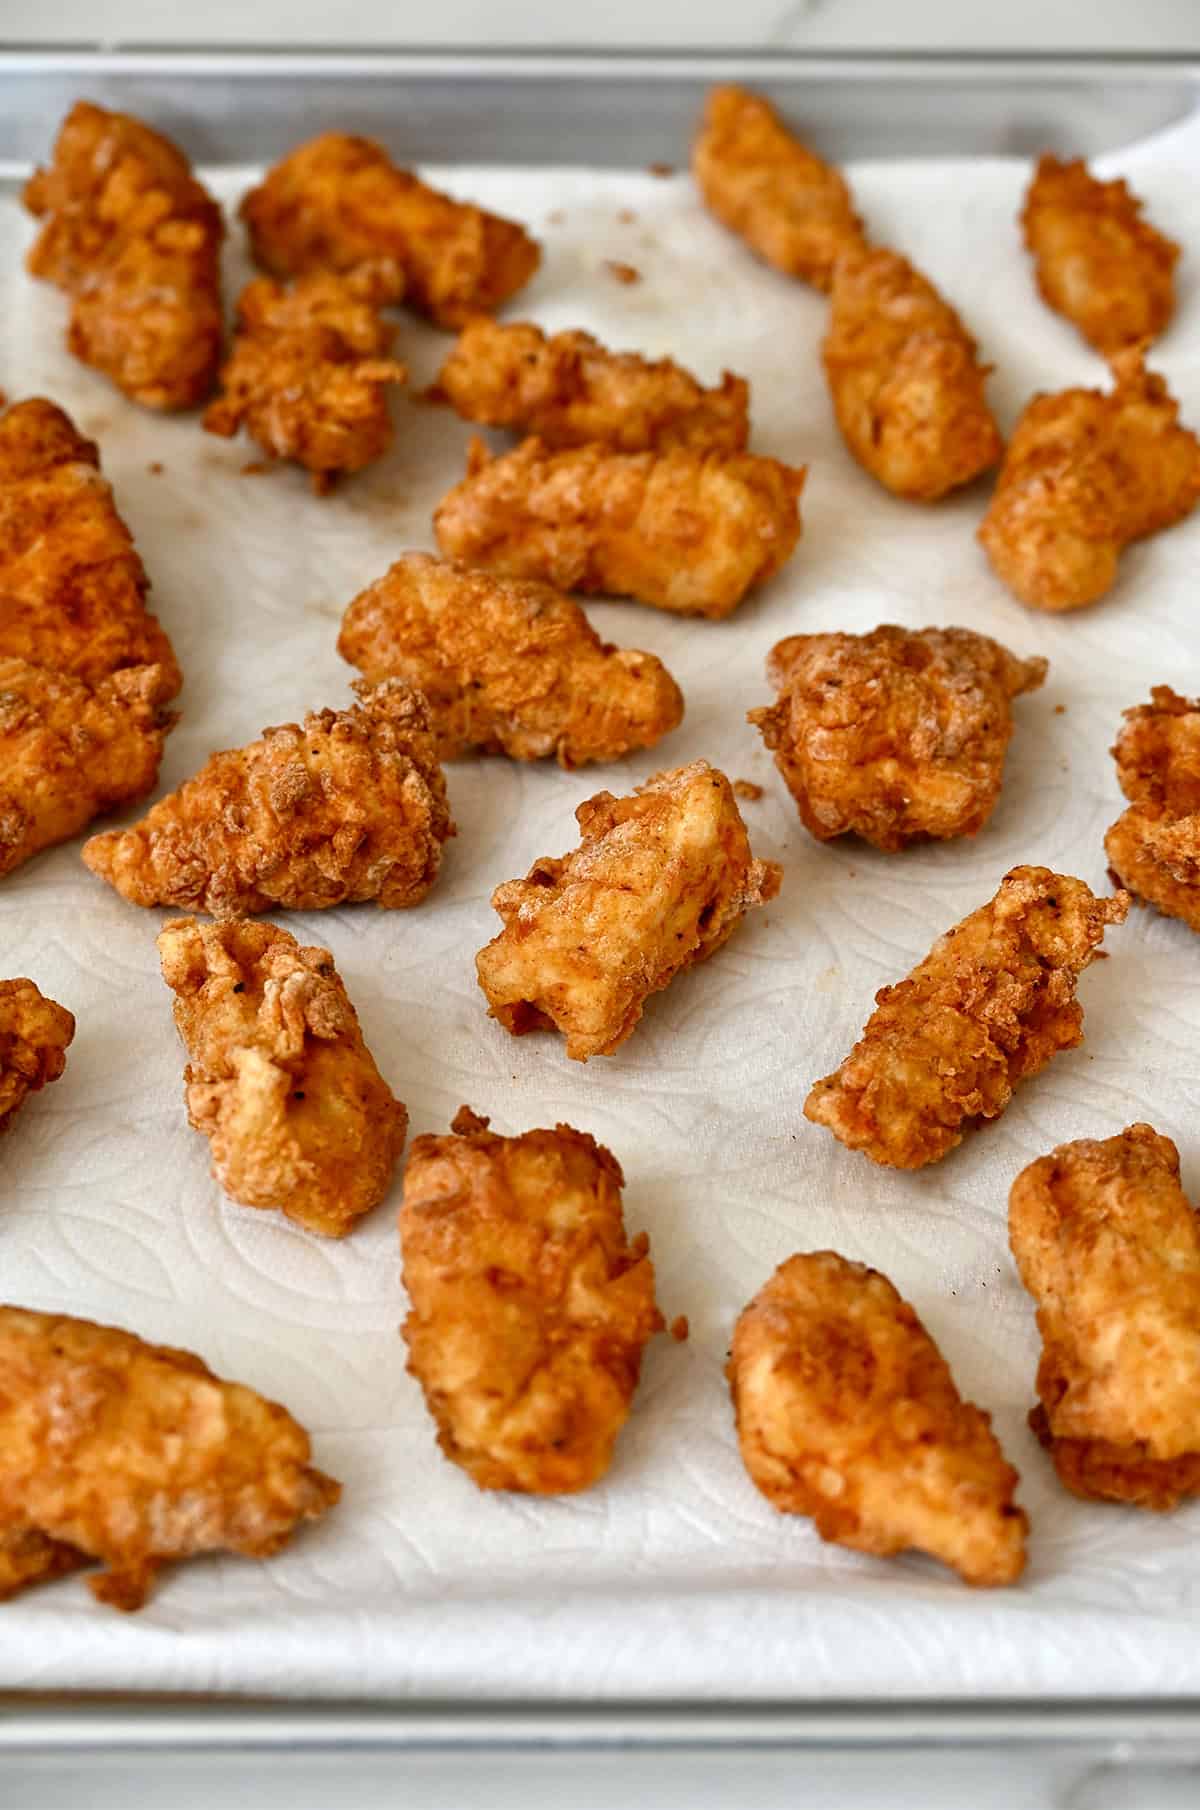
As you finish coating the chicken, place the pieces on a wire rack set over a baking sheet. This keeps the coating from getting soggy on the bottom and lets any excess drip away while you heat the oil.
Deep-Fry Until Crispy
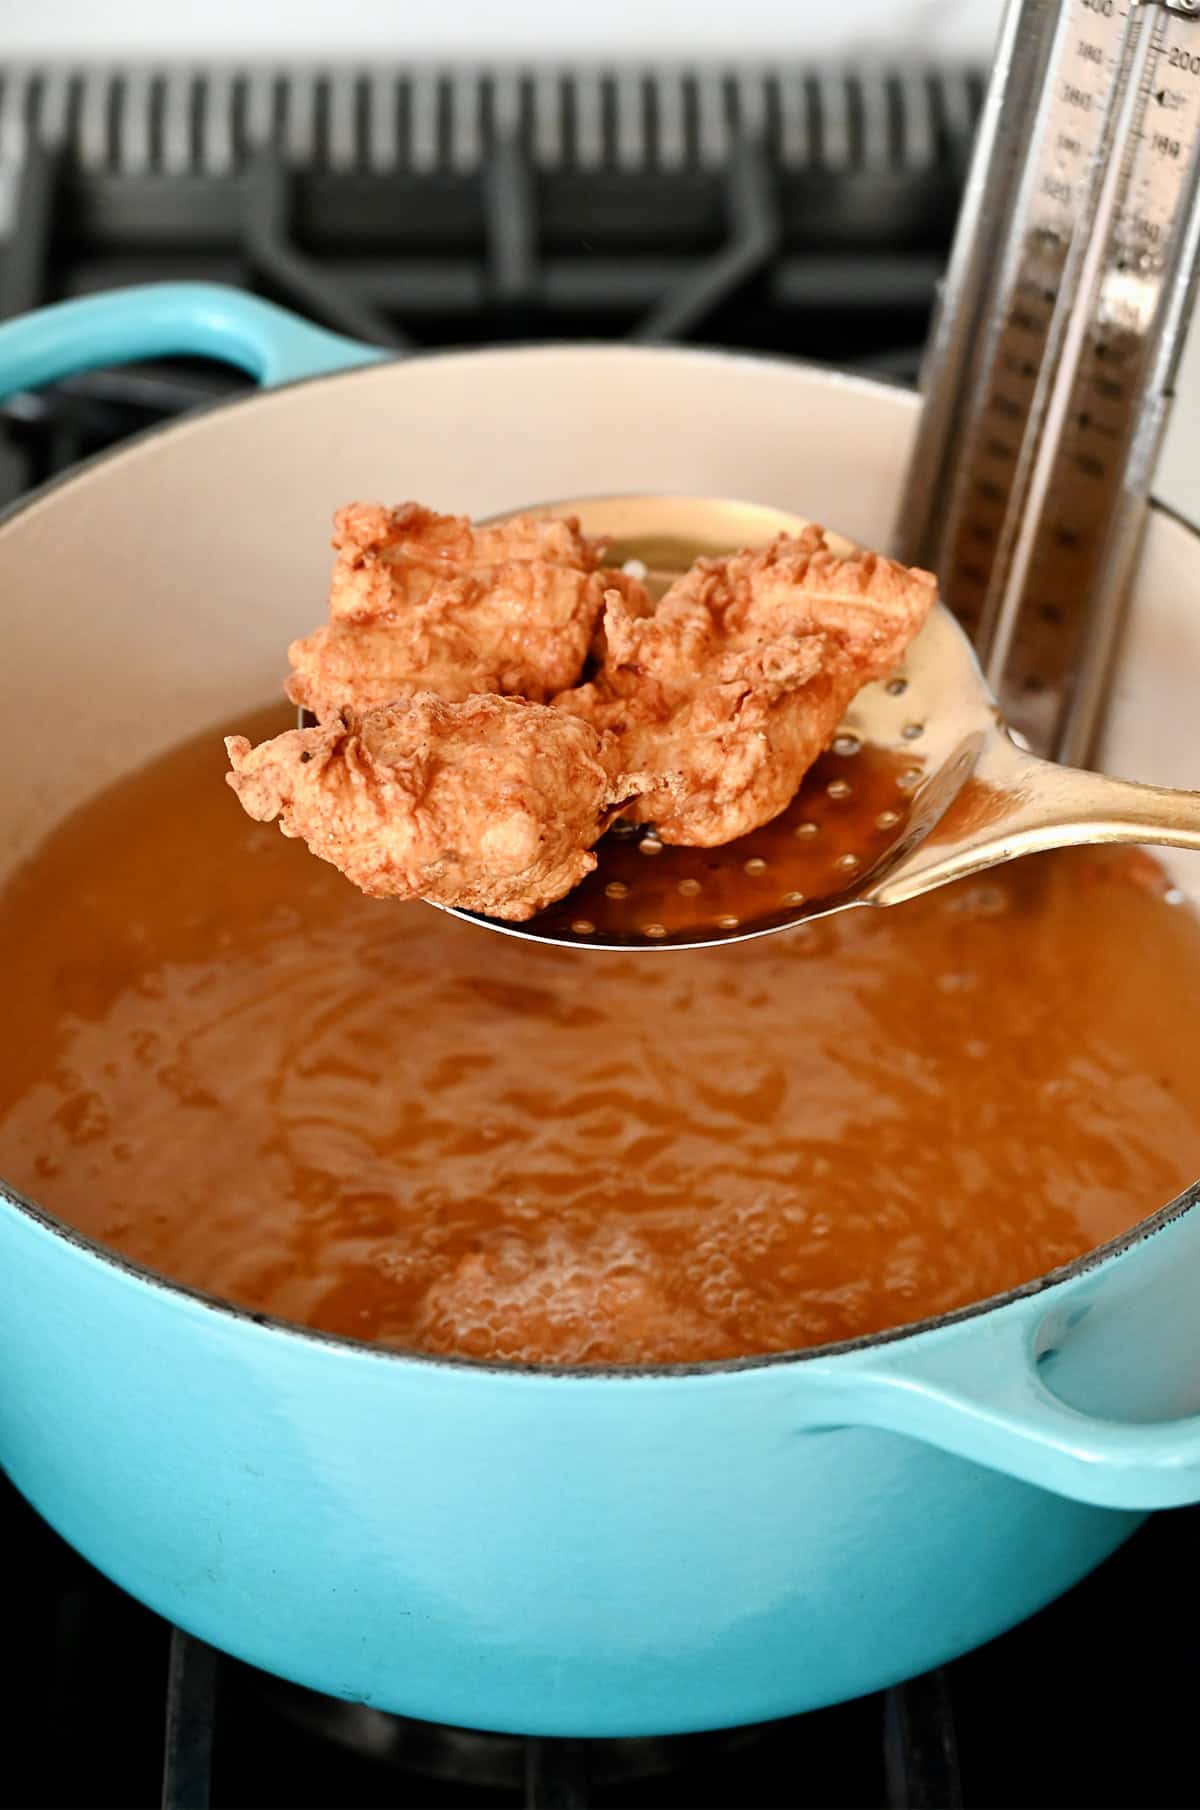
Pour at least 3 inches of oil into a heavy-bottomed pot and heat it to 360°F. I highly recommend using a deep-fry thermometer here—it takes all the guesswork out and helps you maintain the right temperature throughout frying.
Working in batches, carefully add the battered chicken pieces to the hot oil. Avoid overcrowding the pot, as adding too much chicken at once will drop the oil temperature and lead to greasy (not crispy) wings.
Fry the chicken wings for about 2 minutes per batch, flipping occasionally, until golden brown and cooked to an internal temperature of 165°F. Using a slotted spoon, transfer the cooked pieces to a paper towel-lined plate and let the oil return to temperature before frying the next batch.
Toss In Sauce
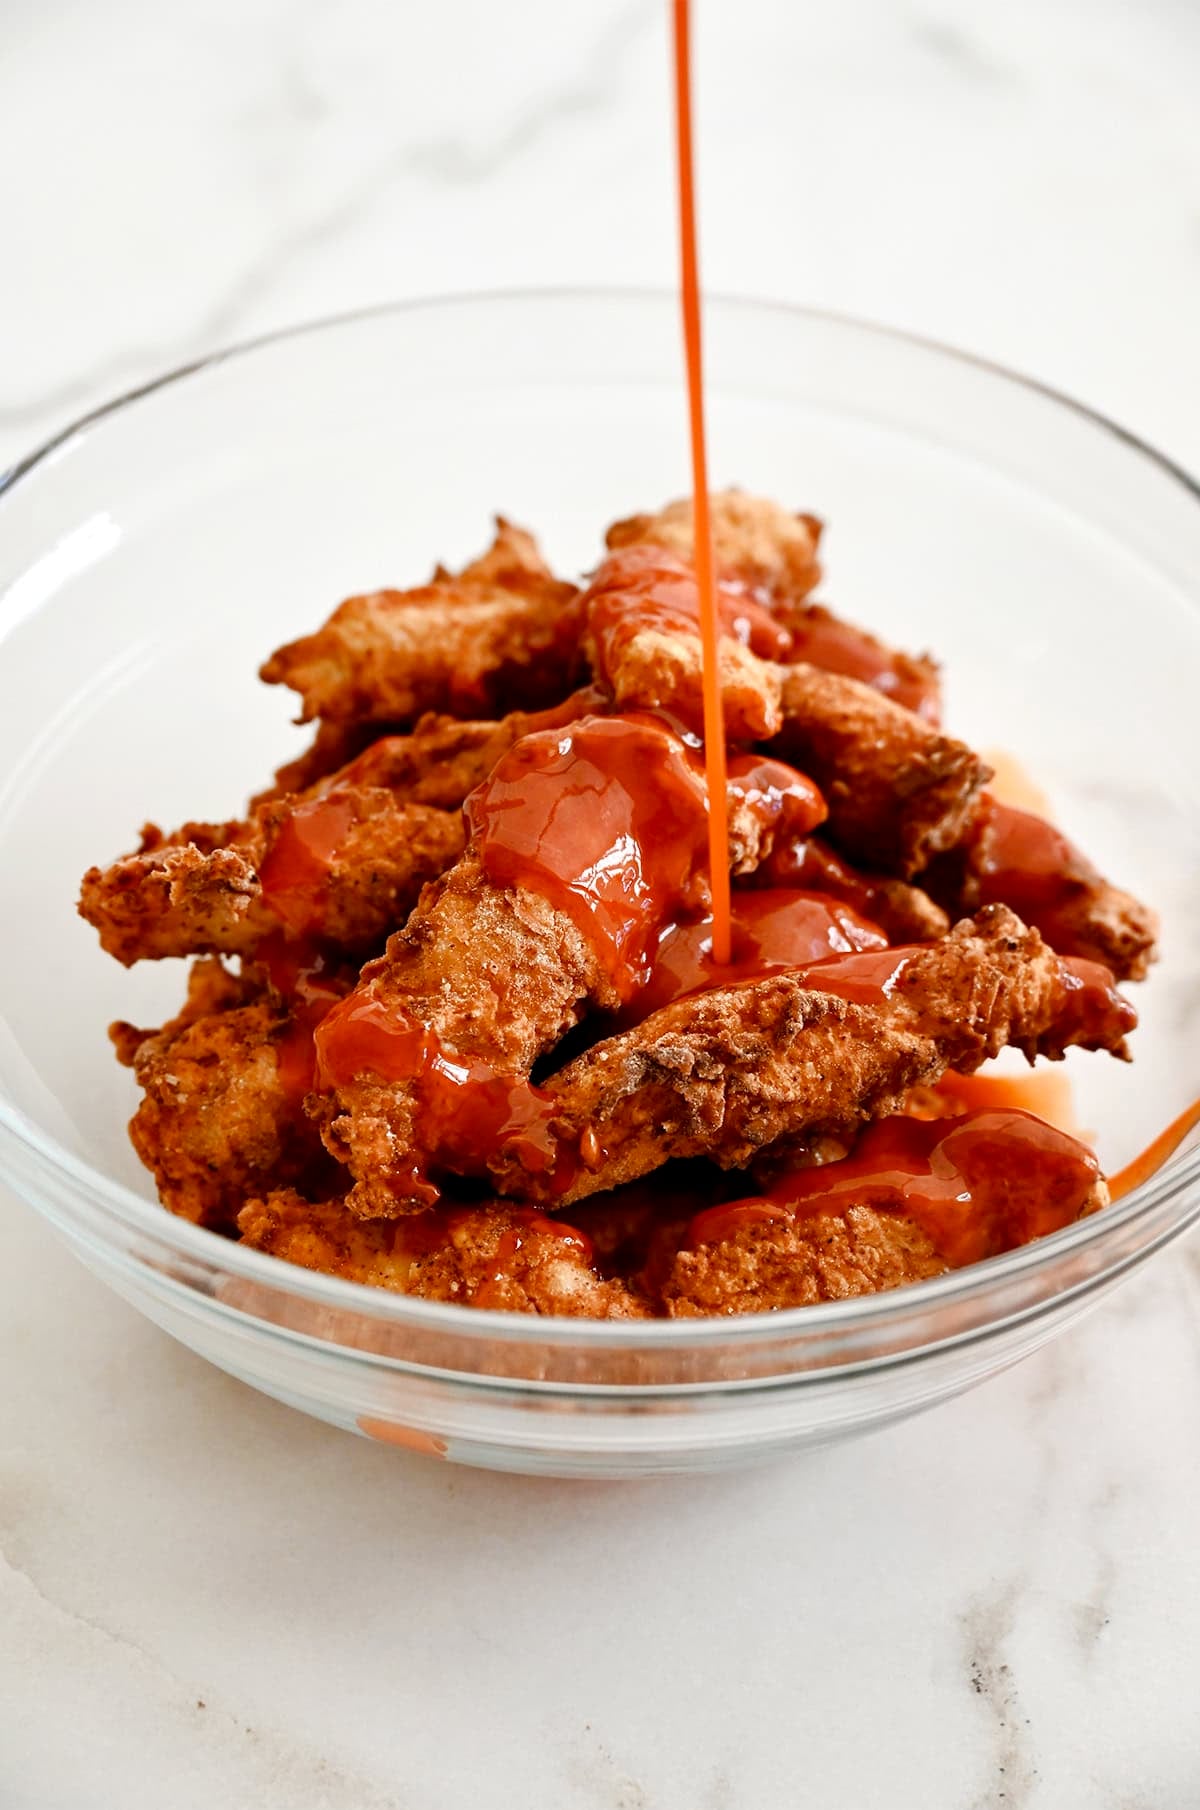
After all the pieces are fried, toss the chicken in the prepared Buffalo sauce. I use the largest stainless bowl I have and give it a few gentle tosses until every wing is evenly coated.
I like to toss the wings right before serving to keep the coating crisp, but you can also serve the sauce on the side for dipping if you’re feeding a crowd with different spice tolerances.
Serve immediately with celery sticks and plenty of ranch or blue cheese dressing—and don’t be surprised when they disappear fast!
FAQs
You can, but the texture will be different. Frying gives you the crispiest, lightest coating, which is why it’s my go-to for classic boneless wings. If you’d rather bake them, arrange the coated chicken on a wire rack set over a baking sheet, spray lightly with oil, and bake at 450°F, flipping once, until cooked through and golden, about 20 minutes.
If you’re curious how baking compares to frying (and air frying), I break it all down in my fried vs. baked vs. air-fried wings test over on YouTube. And if baked wings are more your speed, my baked teriyaki chicken wings and air fryer chicken wings are both great options for tossing in any sauce you love.
You can, with one small tweak. If you’re prepping ahead, fry the chicken, let it cool completely, and store it in the fridge without sauce. When you’re ready to serve, reheat the chicken in a hot oven or air fryer until crisp, then toss it in sauce right before serving. I don’t recommend saucing them ahead of time as the coating will get soggy.
Timing matters. For the crispiest results, toss the wings in sauce just before serving. If you’re serving a crowd, another great option is to keep the wings plain and serve the sauce on the side for dipping. Either way, avoid covering them with foil—steam is the enemy of crispiness.
Sauce Ideas to Switch Things Up
One of the reasons I make these boneless chicken wings so often is how easy they are to switch up. Once they’re fried and crispy, they’re basically a blank canvas for whatever sauce you’re craving that day.
My crew loves them tossed in homemade barbecue sauce or the honey garlic glaze from my popcorn chicken recipe. And if you’re feeling something a little brighter, the orange sauce I use for my baked orange chicken wings would be delicious here, too.

Equipment
Ingredients
- 1/3 cup Frank’s Red Hot Original Hot Sauce
- 1/4 cup unsalted butter
- 1 pound chicken breasts
- 1 cup all-purpose flour
- 1 teaspoon garlic powder
- 1 teaspoon onion powder
- 1/4 teaspoon smoked paprika
- 2 large eggs
- 1/4 cup milk
- Vegetable oil, for frying
Instructions
- In a small saucepan set over medium-low heat, combine the hot sauce and butter. Cook, whisking occasionally, until the sauce is smooth then set it aside.
- Slice the chicken breasts into 2-inch strips.
- In a medium shallow bowl, whisk together the eggs and milk.
- In a separate medium bowl, whisk together the flour, garlic powder, onion powder and paprika with ½ teaspoon kosher salt and ¼ teaspoon black pepper.
- One at a time, dip each chicken piece in the egg mixture then shake off any excess and dress it in the flour mixture. Repeat the dipping process once more time so each piece of chicken is double-coated.
- Line a baking sheet with paper towels.
- Add at least 3 inches of oil to a large heavy-bottomed stock pot set over medium-high heat. Attach the deep-fry thermometer.
- Once the oil reaches 360°F, add a portion of the coated chicken pieces to the pot and cook, flipping occasionally, until golden brown and cooked through, about 2 minutes. (The chicken must reach 165°F.)
- Using a slotted spoon, transfer the chicken pieces to the paper towel-lined baking sheet. Repeat the frying process with the remaining pieces of chicken, returning the oil to 360°F between each batch.
- Transfer all of the chicken pieces to a large bowl. Add the prepared Buffalo sauce and toss to combine. Serve immediately.
Kelly’s Notes
- Boneless, skinless chicken breasts cut into bite-sized pieces are the classic choice, but I actually love using chicken thighs here because they’re even more moist.
- Do not overcrowd the pan when cooking or the oil temp will drop too quickly and the chicken will take forever to cook while absorbing excess oil!
- Serve with celery sticks and ranch or blue cheese dressing. My homemade buttermilk ranch is always a hit.
- Make-Ahead: These boneless wings are best enjoyed fresh while they’re hot and crispy. You can bread the chicken up to a few hours in advance and keep it covered in the fridge, but I don’t recommend frying or saucing them ahead of time—they’ll lose their crunch.
- Store: Leftovers can be stored in an airtight container in the fridge for up to 2 days and reheated in the oven or air fryer to help re-crisp.
- ★ Did you make this recipe? Don’t forget to give it a star rating below!
Nutrition
Did you try this recipe?
Leave a comment below with your star rating!
This post may contain affiliate links.


Did a test run of these for Super Bowl tomorrow and WINNER WINNER CHICKEN DINNER! Were gobbled up in minutes. Trying with more sauces tomorrow too. Thnx!
So glad you enjoyed the recipe, Carly!