These healthy homemade fruit roll-ups are made with just one ingredient: fruit! Use strawberries, mangoes, peaches, or whatever fruit your family loves—fresh or frozen. There’s no added sugar, no dehydrator required, and the result is a chewy, naturally sweet snack that’s perfect for lunchboxes (and grown-up snack cravings, too!).
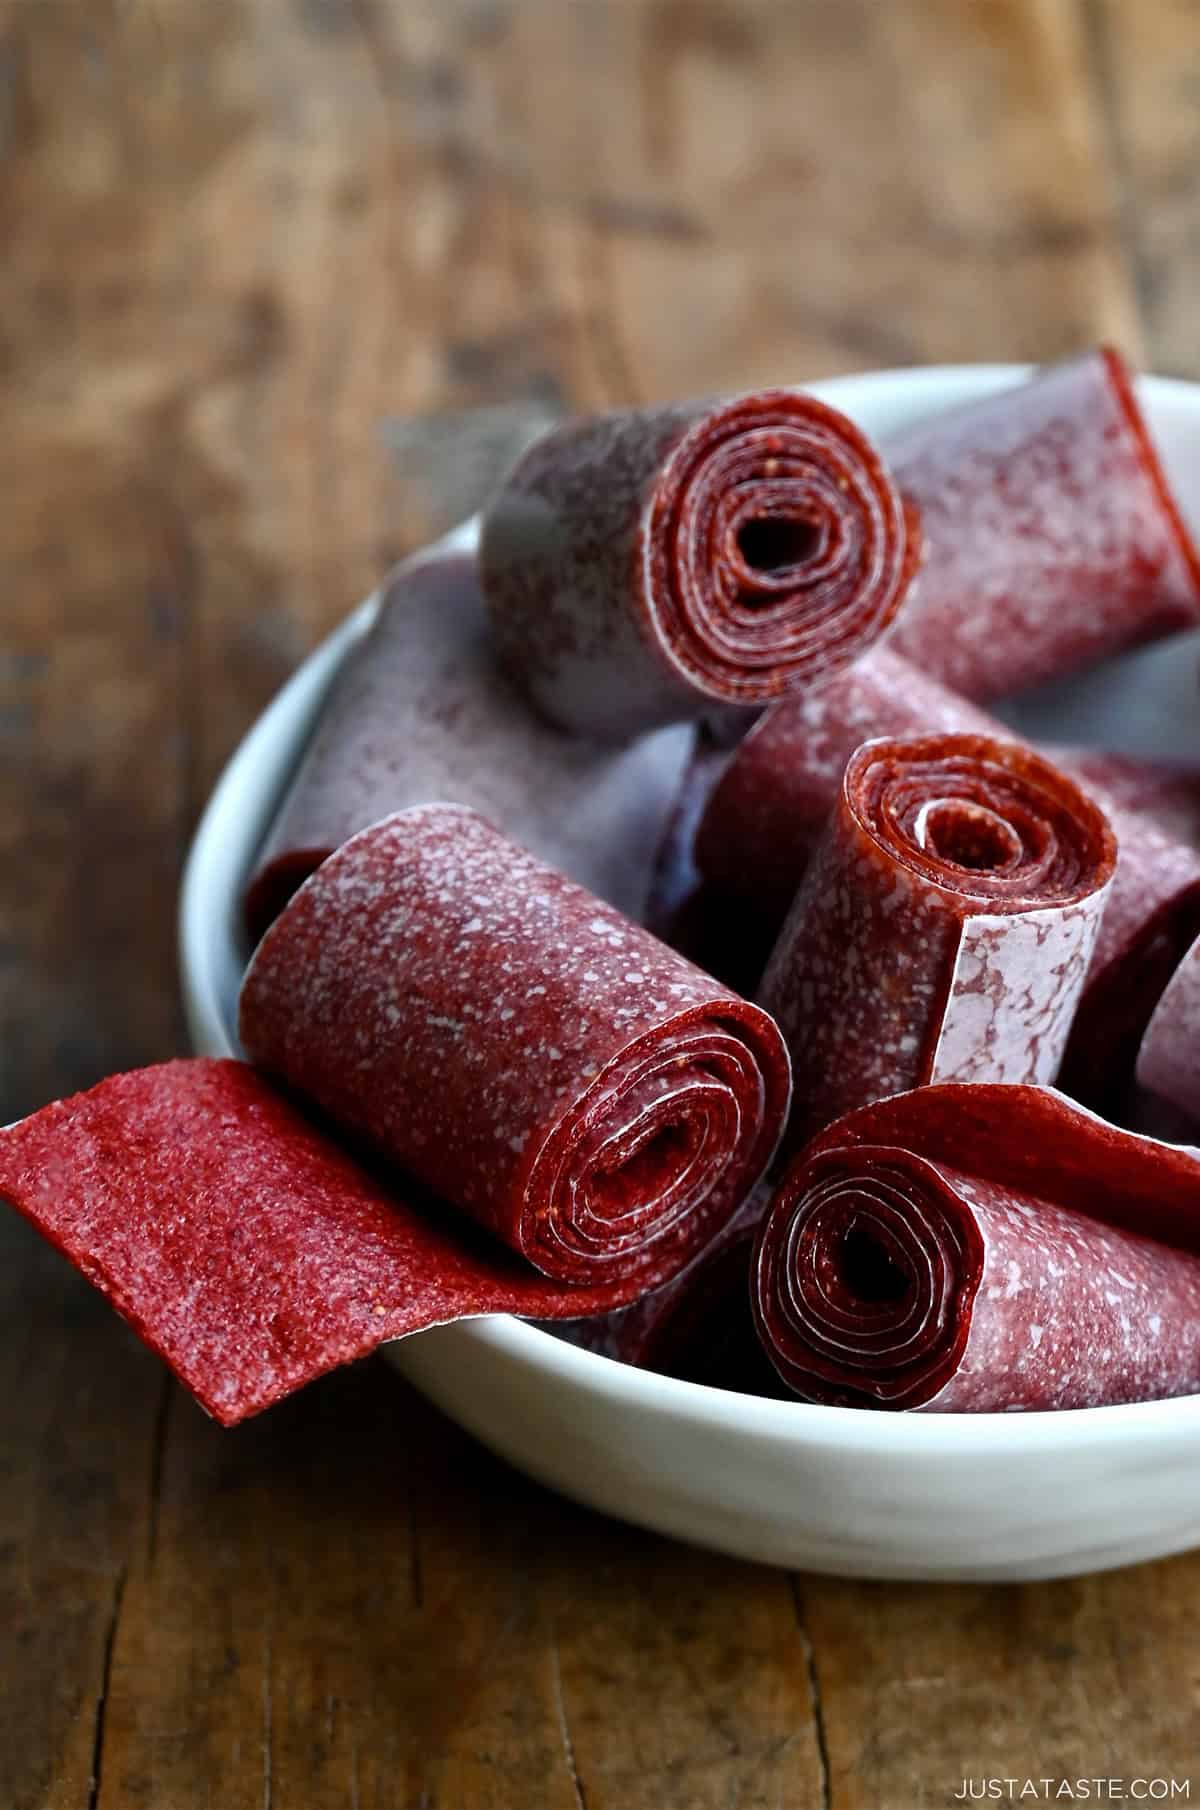
Table of Contents
If it really is true that “you are what you eat,” then from the ages of 6 to 13, I was a walking, talking fruit snack. I was a Gushers crusher. A String Thing enthusiast. A Fruit by the Foot fanatic. (Shout-out to my fellow children of the 90s.)
I first shared this recipe way back in 2013. Now I’m not only older (read: wiser), but I also have four kids of my own—and these homemade fruit roll-ups are still going strong in our house.
These healthy DIY fruit snacks are chewy, sweet and made with 100% fruit. That means no added sugar and no mile-long ingredient lists that accompany such snacks. There’s also no dehydrator required. So if you’ve got fruit and an oven, you’ve got healthy homemade fruit roll-ups—the ultimate back-to-school snack for fruit leather lovers of all ages. (And trust me: they’re just as fun to eat now as they were in 1994!)
Why This Recipe Works
Baking low and slow gently removes moisture from the fruit, concentrating its natural sweetness and creating that classic chewy fruit snack texture. It’s essentially dehydrating, but using your oven, no special tools required.
The result? A chewy, flexible fruit snack that tastes like the real thing (because it is!). This recipe has been kid-tested and lunchbox-approved more times than I can count. No artificial flavors, no weird ingredients—just real fruit and happy snackers.
Just 1 Ingredient: Fruit!
That’s it! Strawberries, mangoes, peaches, blueberries, raspberries, apples or even a mix—just make sure it’s soft and ripe for the smoothest purée and best-tasting fruit leather.
Frozen fruit works great, too. Just thaw and drain before blending.
Depending on the fruit, you may need to adjust the baking time slightly. Fruits that contain more water (like peaches or grapes) may take longer to fully dry.

- Preheat the oven to 175ºF (or your oven’s lowest setting). Line two rimmed baking sheets with silicone baking mats or parchment paper. (Skip the wax paper—it’ll stick.)
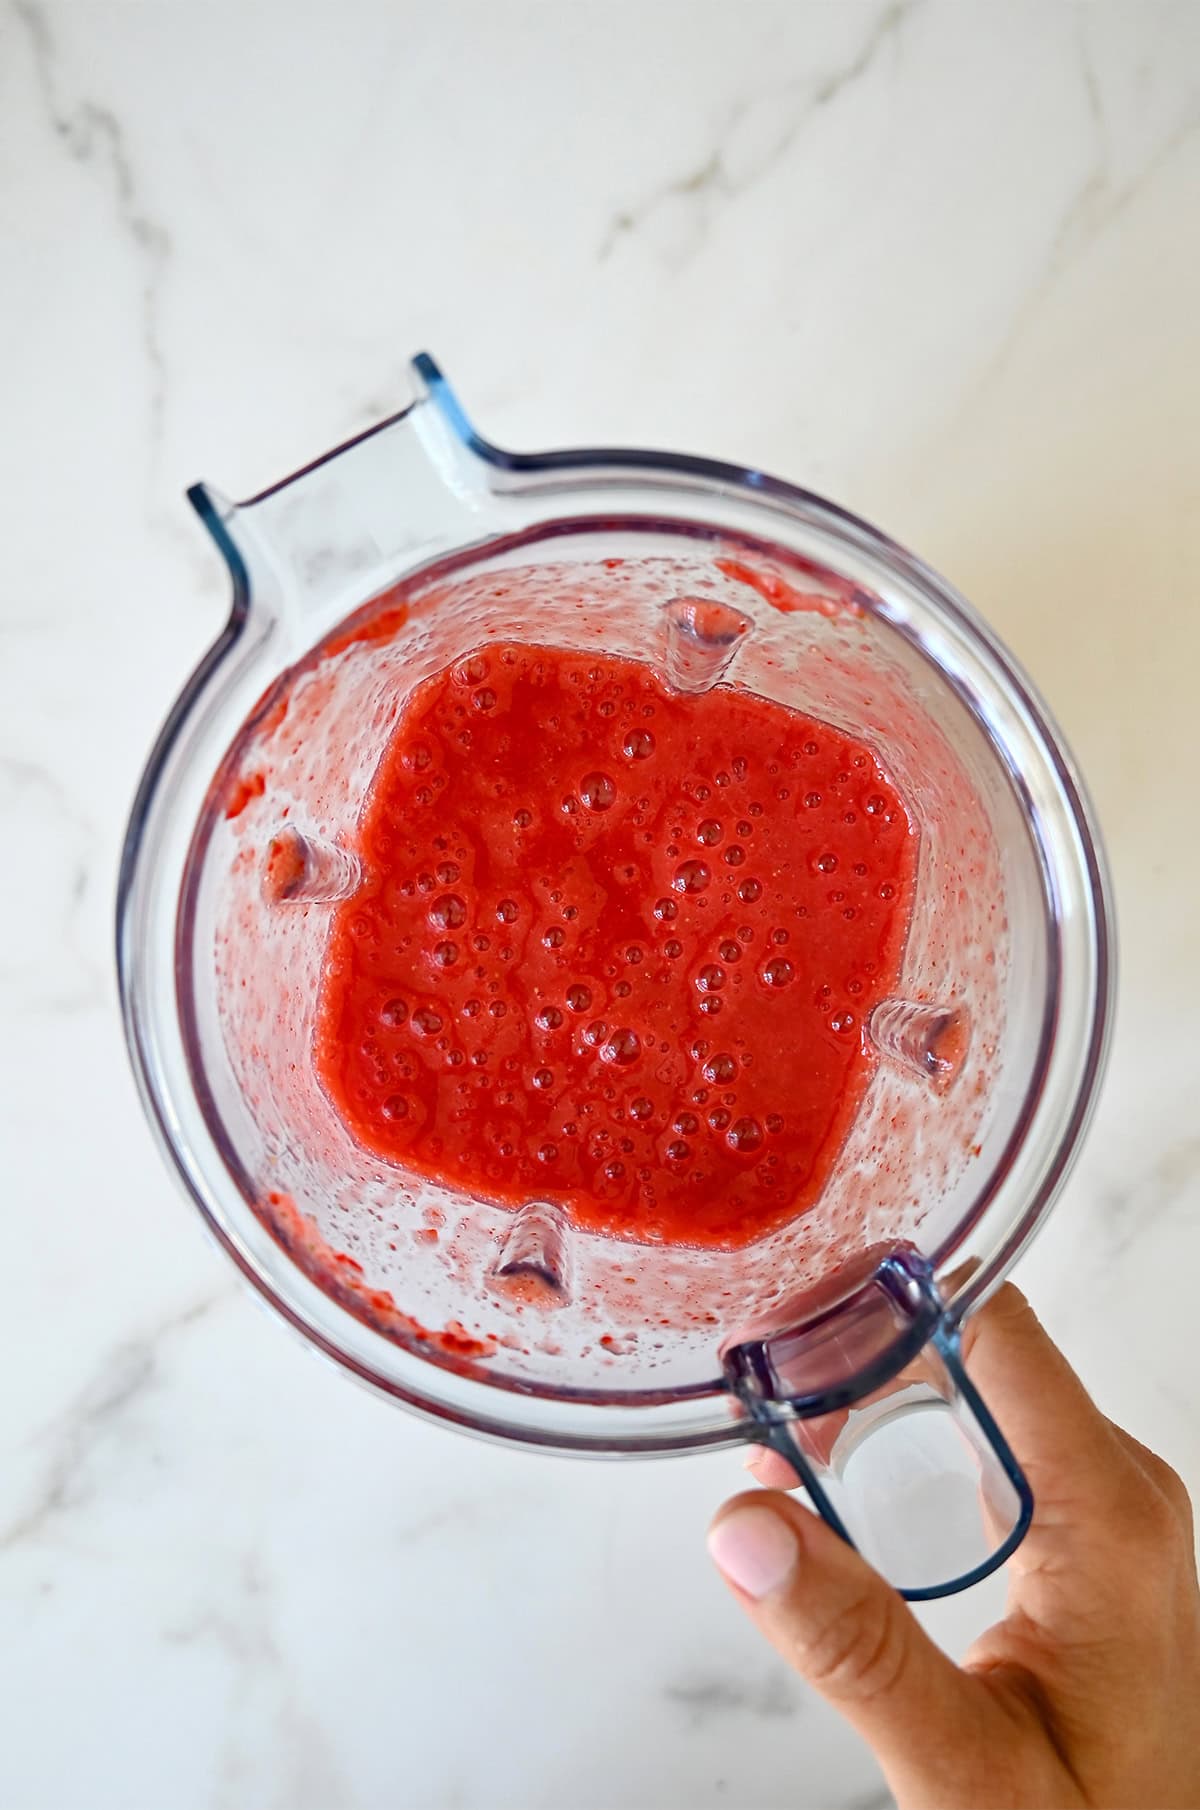
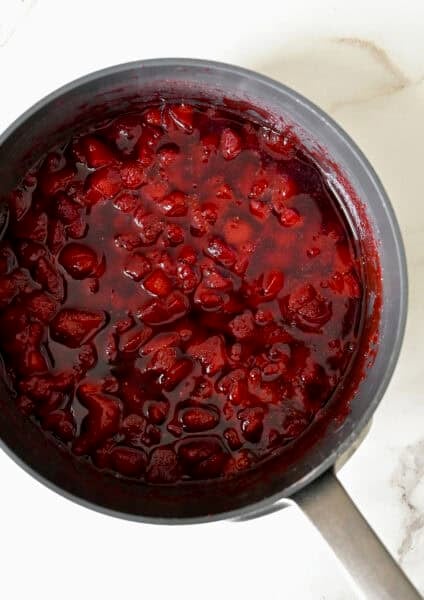
- Blend the fruit in a food processor or blender until completely smooth. You want a consistency similar to applesauce—no chunks or pulp.
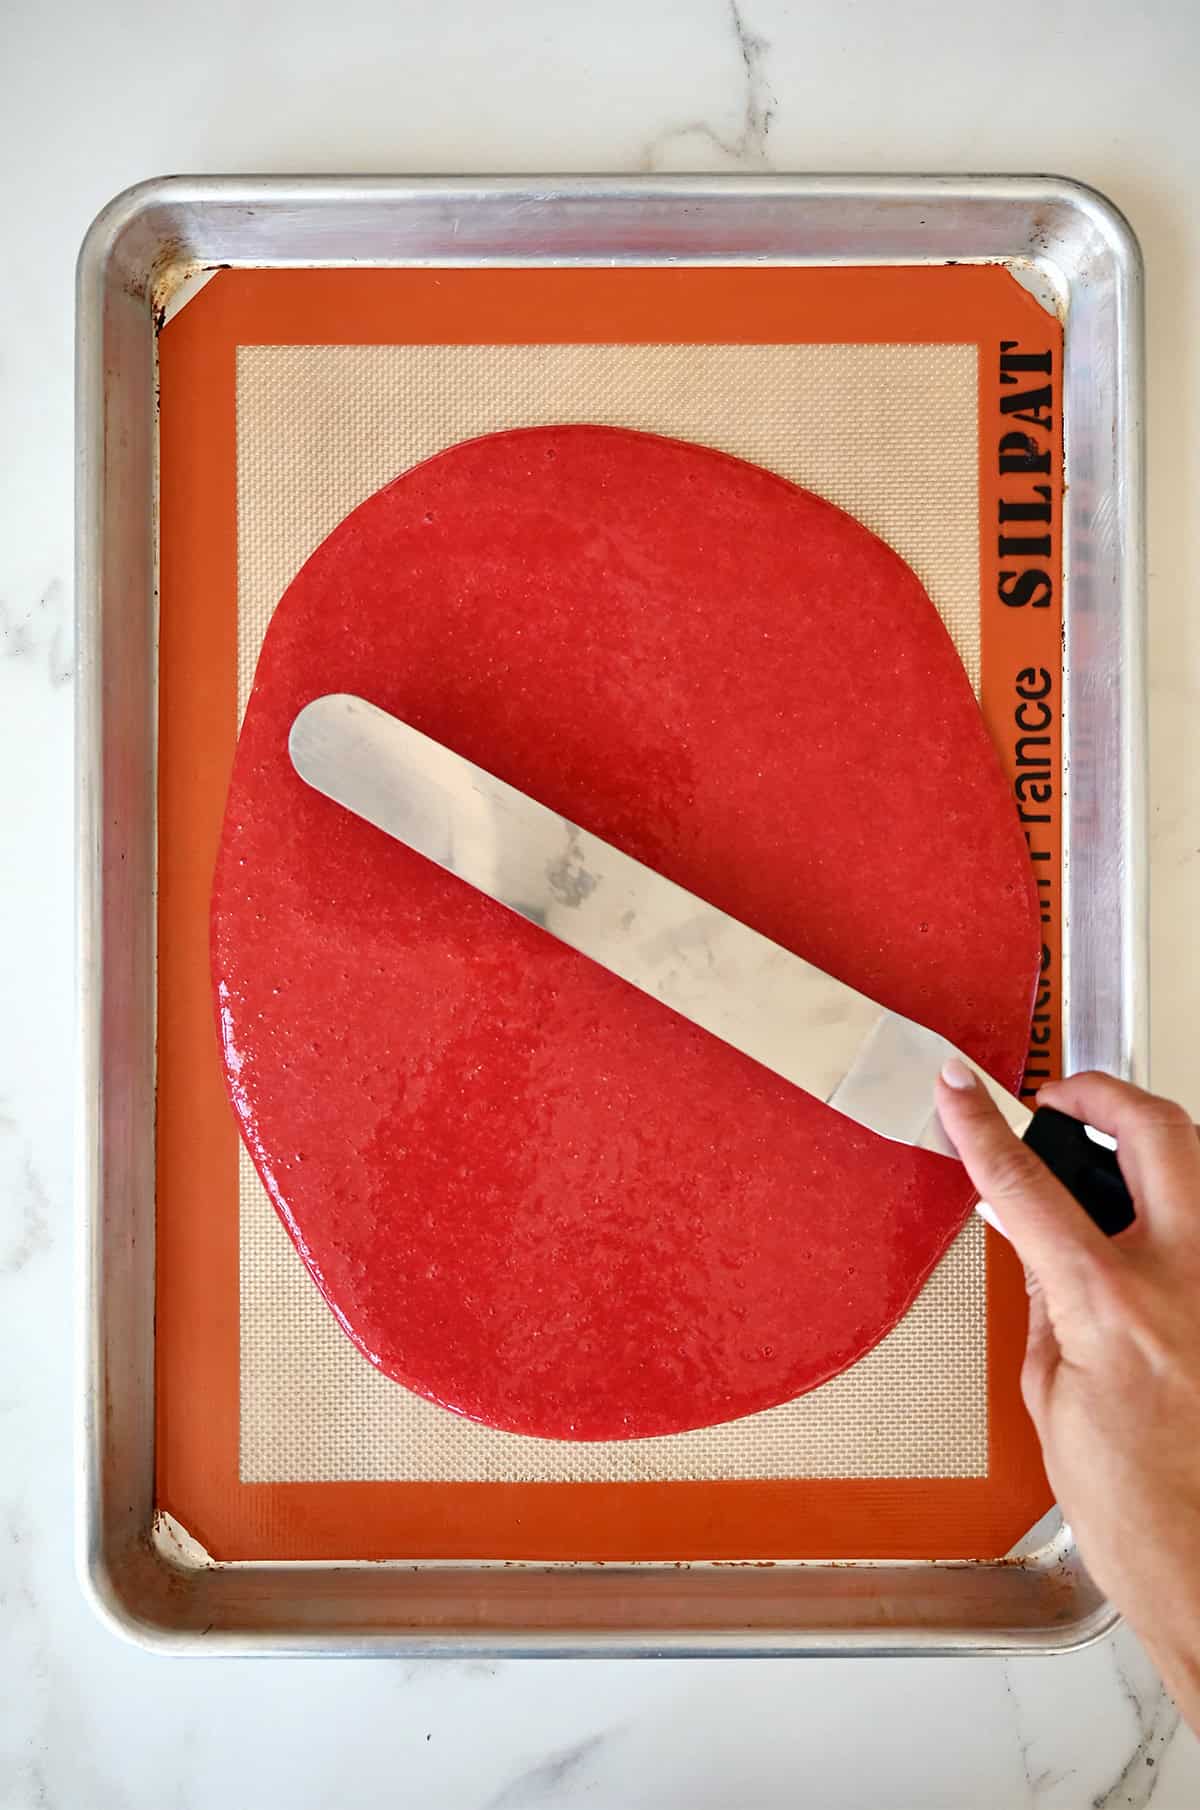
- Spread it thin. Divide the purée evenly between the two prepared pans. Use an offset spatula to spread it into a thin, even layer about 1/8-inch thick. Too thin and it might tear or get crispy at the edges; too thick and it’ll stay gummy.
- Dehydrate the fruit in the oven for 3 to 4 hours, or until the center feels dry to the touch but still flexible and just barely tacky, like a sticky note. You’re removing moisture, not baking to golden brown, so low and slow is key here.
Kelly’s Note: If the center is still tacky, it may have been spread too thick. You can gently flip the whole sheet over and continue dehydrating until both sides are fully dry.
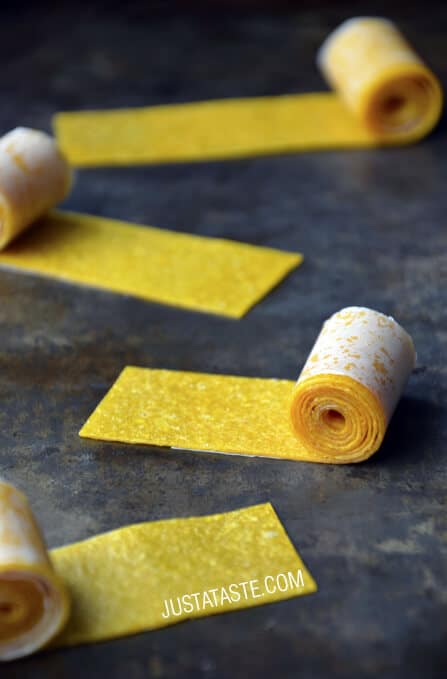
- Cool and cut. Once done, let the fruit roll ups cool slightly, then place a piece of wax paper on top and peel them off the pan together. Use kitchen scissors or a pizza cutter to slice into long strips. Roll ’em up with the wax paper to keep them from sticking and snack away!
Storage
Store the roll-ups in an airtight container at room temperature for up to 1 week. Keep them rolled in wax paper or parchment to prevent sticking.

Got a fun fruit combo your crew loves? I’d love to hear it—drop it in the comments below!
Looking for more lunchbox wins and after-school favorites? Here are a few of my go-to recipes that are easy to prep, packed with goodness and loved by even my pickiest eaters:
Ingredients
- 4 cups diced fruit
Instructions
- Preheat the oven to 175ºF and line two rimmed baking sheets with Silpats or parchment paper.
- Puree the fruit in a food processor or blender until smooth.
- Divide the purée evenly between the two prepared pans, and using an off-set spatula, spread the purée as flat and as evenly as possible until it’s about 1/8-inch thick.
- Bake the purée for 3 to 4 hours. (See Kelly’s Notes.) The fruit roll-ups are done when the purée is dry to the touch and pliable. If the bottom side of the roll-ups is still wet after some time, flip the roll-ups over and continue baking them until they are fully dried.
- Remove the roll-ups from the oven. Place a piece of wax paper on top of the roll-ups and then peel off the wax paper and the roll-ups together. Cut the sheet into long strips and then roll up the strips.
Video
Easy Homemade Fruit Roll-Ups | Healthy Snacks
Skip the store-bought fruit leather and whip up your own healthy, no sugar added version made with a single ingredient: fruit!
Kelly’s Notes
- The total baking time will vary depending on the exact thickness of your fruit roll-ups and the differing temperatures of ovens.
- The fruit roll-ups will last for up to 1 week when stored in an air-tight container.
- ★ Did you make this recipe? Don’t forget to give it a star rating below!
Nutrition
Did you try this recipe?
Leave a comment below with your star rating!
This post may contain affiliate links.
Recipe by Kelly Senyei of Just a Taste.


I love this healthy snack… I made it several times when my kids were young and they love it!!. One time I mixed mango and kiwis and again it was a hit. The house smelled amazing.
I’m thrilled you’ve been enjoying the recipe, Monica!
Hi Kelly,
This is a great recipe. Can I use canned mango pulp instead of fresh mangoes? It’s just puréed mangoes nothing else is added in the canned one.
That should work!
Hi, I wonder about using frozen mango? When it defrosts, I imagine the moisture content will be significantly more than fresh. I just bake it longer, yes? My other question is if you’ve had success freezing the finished product. Thank you.
Hi Brooklyn! You’d want to avoid any excess moisture. So I’d thaw it first, pat it dry, then continue with the recipe. And I wouldn’t recommend freezing them. :)
Hi, does this recipe really just have mango and no other ingredients if so can you tell me because I was shocked when I saw that it was just mango.
Just mango!
It looks simple and tasty but 3 to 4 hours is too long
Hi there! The baking time will vary depending on the thickness of your roll-ups and exactly how the heat circulates in your oven.
Wow these look so good!! My kids love fruit roll-ups but I never buy them (even tho, like you, I ate them a ton growing up!) I think this recipe is a perfect way to get the “roll-up” taste and the fun of food that rolls.
YESSSS! So thrilled you enjoyed the recipe, April!
Could I add a bit of a sweeter? If so, what kind would work best? Also, how sticky are these? I am not a huge mango fan, and if these do not turn out, I plan on using them as a treat for horses who like dried mango, but I don’t want them to be super sticky. Thanks a bunch!
Hi Natalie – I’ve never tried adding a sweeter to this recipe so unfortunately, I can’t weigh in on this. And please note they’re very chewy. If you’re interested in trying a strawberry version, here’s the link to my recipe for Homemade Strawberry Fruit Roll-Ups: https://www.justataste.com/strawberry-fruit-roll-ups/ :)
The lowest my oven will go is 350f. Would it still. Be doable?
Unfortunately no as they’ll burn too quickly. The lower temp helps them dry out without getting too crispy.
I know I’m about 2 1/2 years late on this one but if you hit bake to get 350 then you should be able to use the down arrows to go lower.
I was going to make these but was wondering if you HAVE to use parchment paper or silpats for the bottom? I’m so excited to try these! I love fruit rollups but I’d rather not have my daughter eat so much sugar!
Hi Keeley – The parchment paper or Silpat makes it so that you can easily pull and roll the fruit roll-up off of the baking sheet, so I wouldn’t recommend making this recipe without it!
We keep our fruit roll-ups for months in the fridge (obviously check them for mold before eating after extended periods) but if properly dried they last a LONG time. Might get a little tougher over time but still delicious and edible.
We wrap first in wax paper, then plastic wrap to keep them rolled tight, then put in a zip-lock bag and squish as much air as possible.
Thanks for sharing! I have a big costco jar of mangos I need to use, do you think I could use that instead if fresh?
Hi Alyssa! I’ve never used jarred fruit so I can’t say for certain if that will work. If you try it, keep in mind that they will likely have more moisture than fresh fruit so you’ll have to adjust the baking time. Let me know if you give it shot!