Want to know how to cook chicken breasts in a pan so they turn out juicy, golden and never dry? This foolproof stovetop method has been my go-to for years—and it’s easier than you might think.
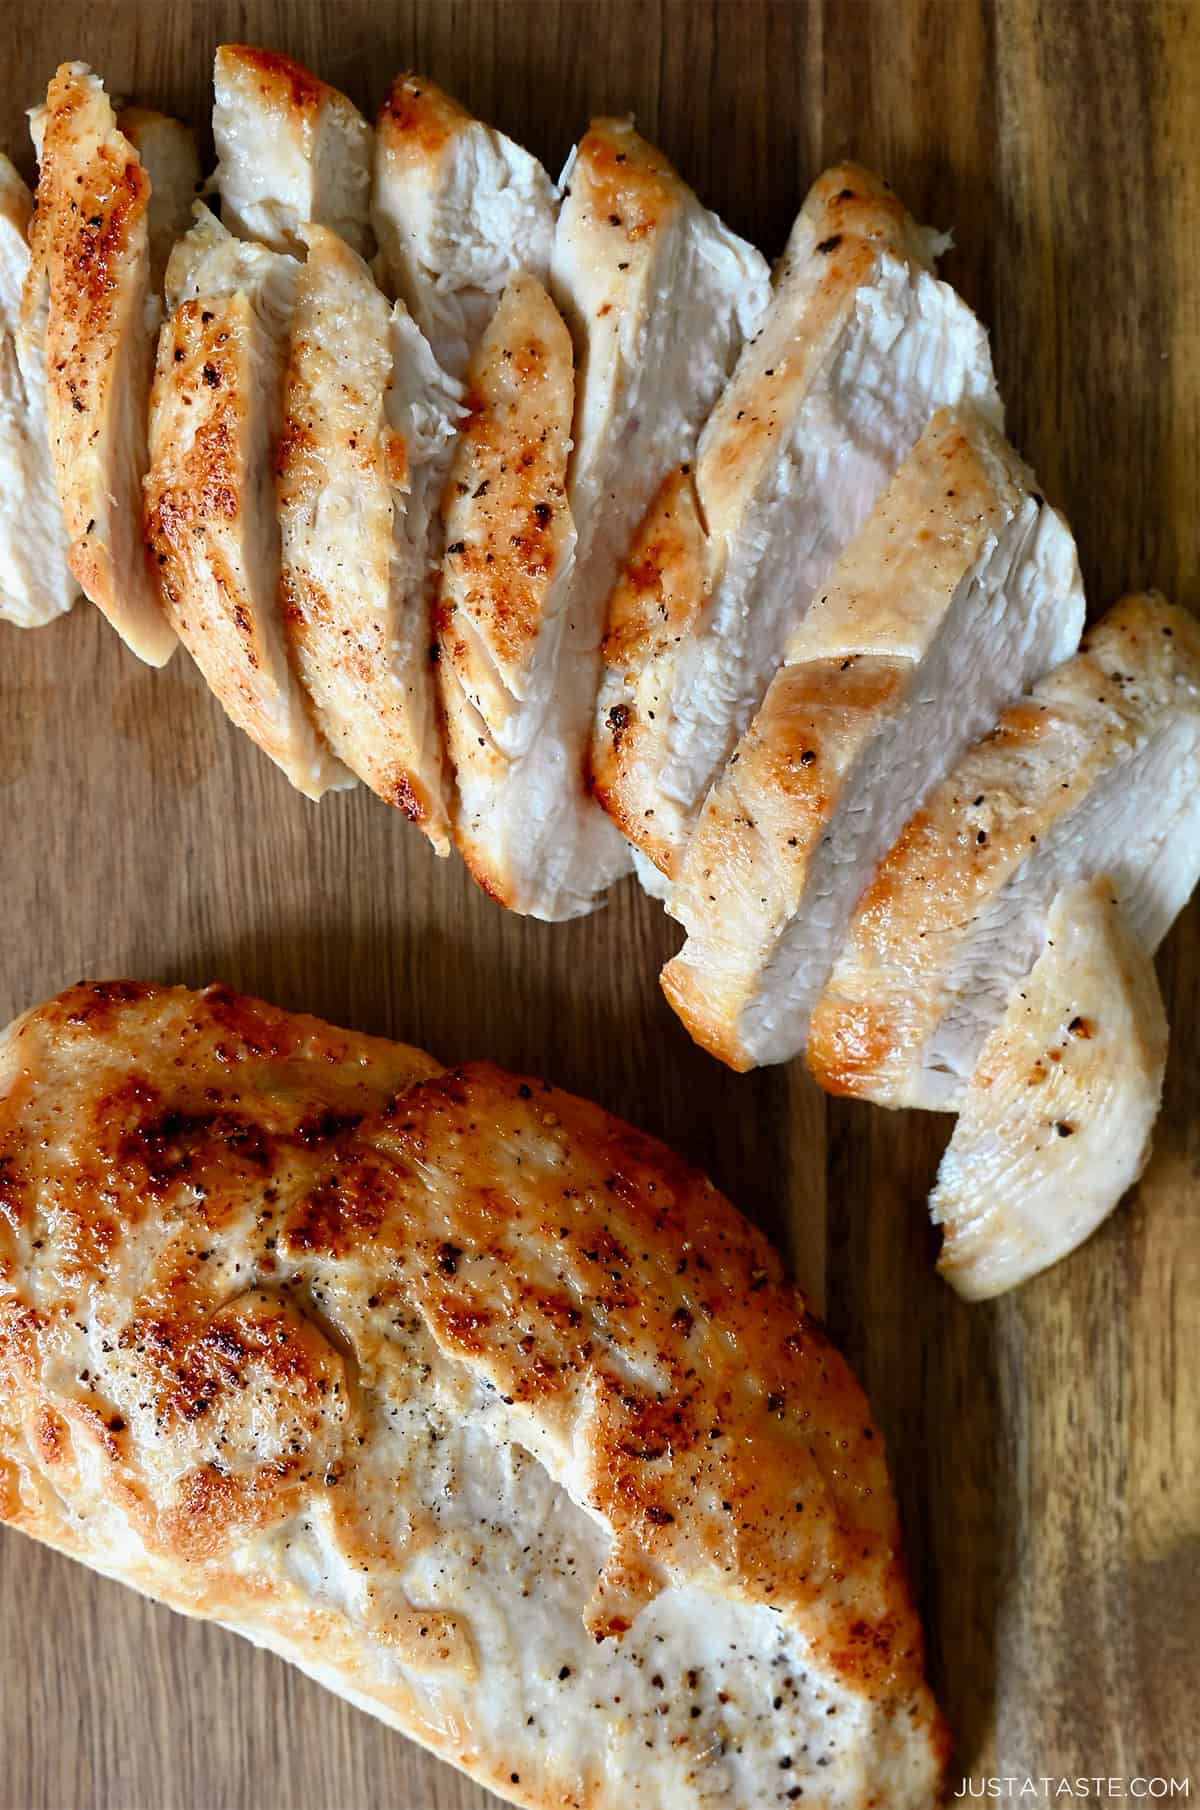
Table of Contents
Chicken breast gets a bad rap for being dry and boring, but when it’s done right, it’s juicy, golden and anything but bland. This is the reliable and easy chicken breast recipe every home cook needs in their back pocket—a true go-to for quick weeknight dinners or meal prep.
Way back in 2009, during my first few weeks of culinary school, we learned how to sauté a chicken breast. It was one of the first “ah-ha” moments where I realized that mastering a simple technique could make something as humble as chicken taste restaurant-worthy. We seared, we basted, we built pan sauces—and I walked out of class with a burn on my hand, a boost in confidence and a newfound respect for the stovetop chicken breast.
All these years (and hundreds of chicken dinners) later, I still use the same basic technique: dry the chicken well, season it simply and cook it in a hot pan without moving it. That’s the secret to beautifully pan-seared chicken breasts with a golden crust and juicy center—every single time.
Whether you’re brand new to cooking or just tired of dry chicken, I’ll walk you through exactly how to cook chicken breast in a pan—with all the tips, tools and temp checks you need to get it right.
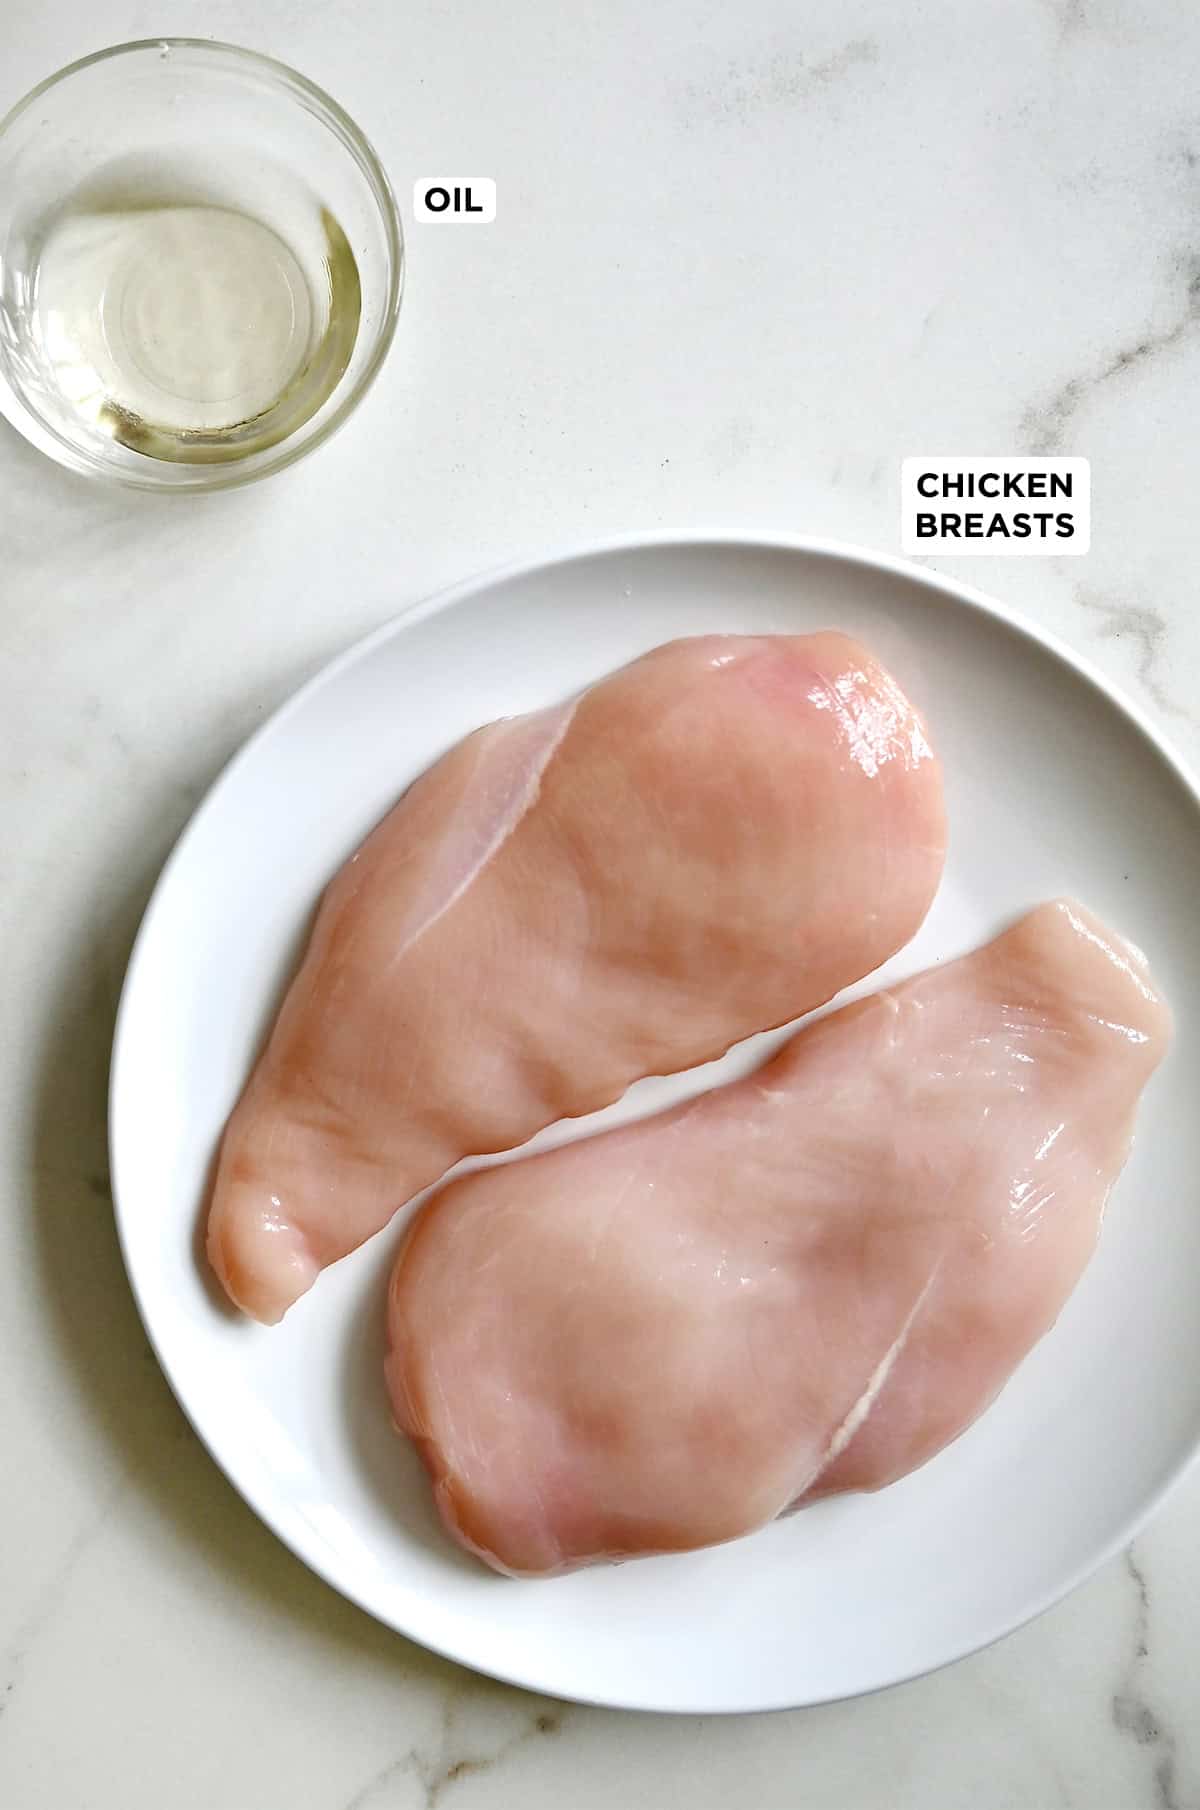
- Boneless, skinless chicken breasts: This stovetop chicken recipe is specifically for boneless breasts. Bone-in chicken takes much longer to cook through, which can lead to burnt outsides and undercooked centers.
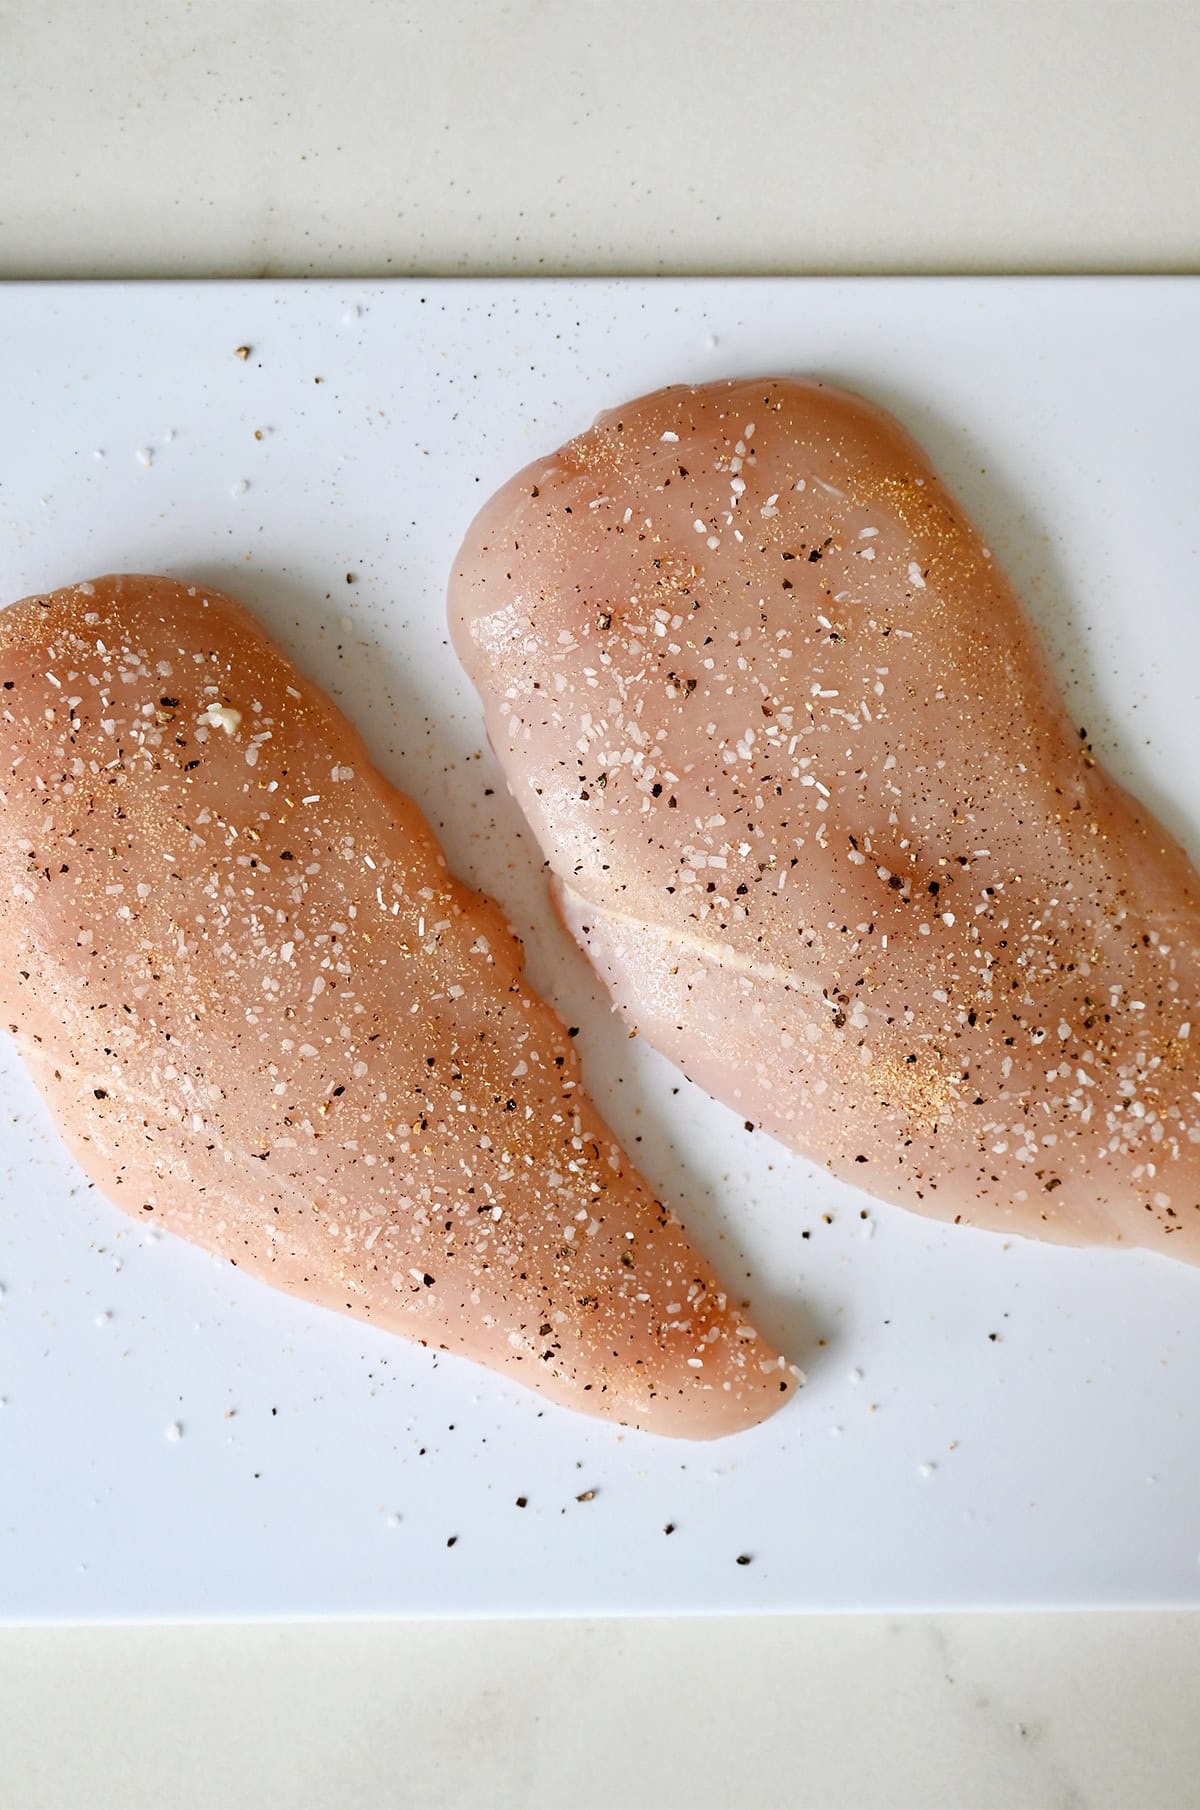
- Salt and freshly ground black pepper: Don’t be shy here. A generous sprinkle of salt and pepper is the foundation of flavorful chicken.
- Oil: Choose an oil with a high smoke point like avocado oil or olive oil to get that gorgeous golden sear without smoking up your kitchen.
See the recipe card for full information on ingredients and quantities.
Here’s exactly how I cook chicken breasts in a pan so they’re crisp on the outside and tender in the center. Follow these steps and you’ll have perfect results every time:
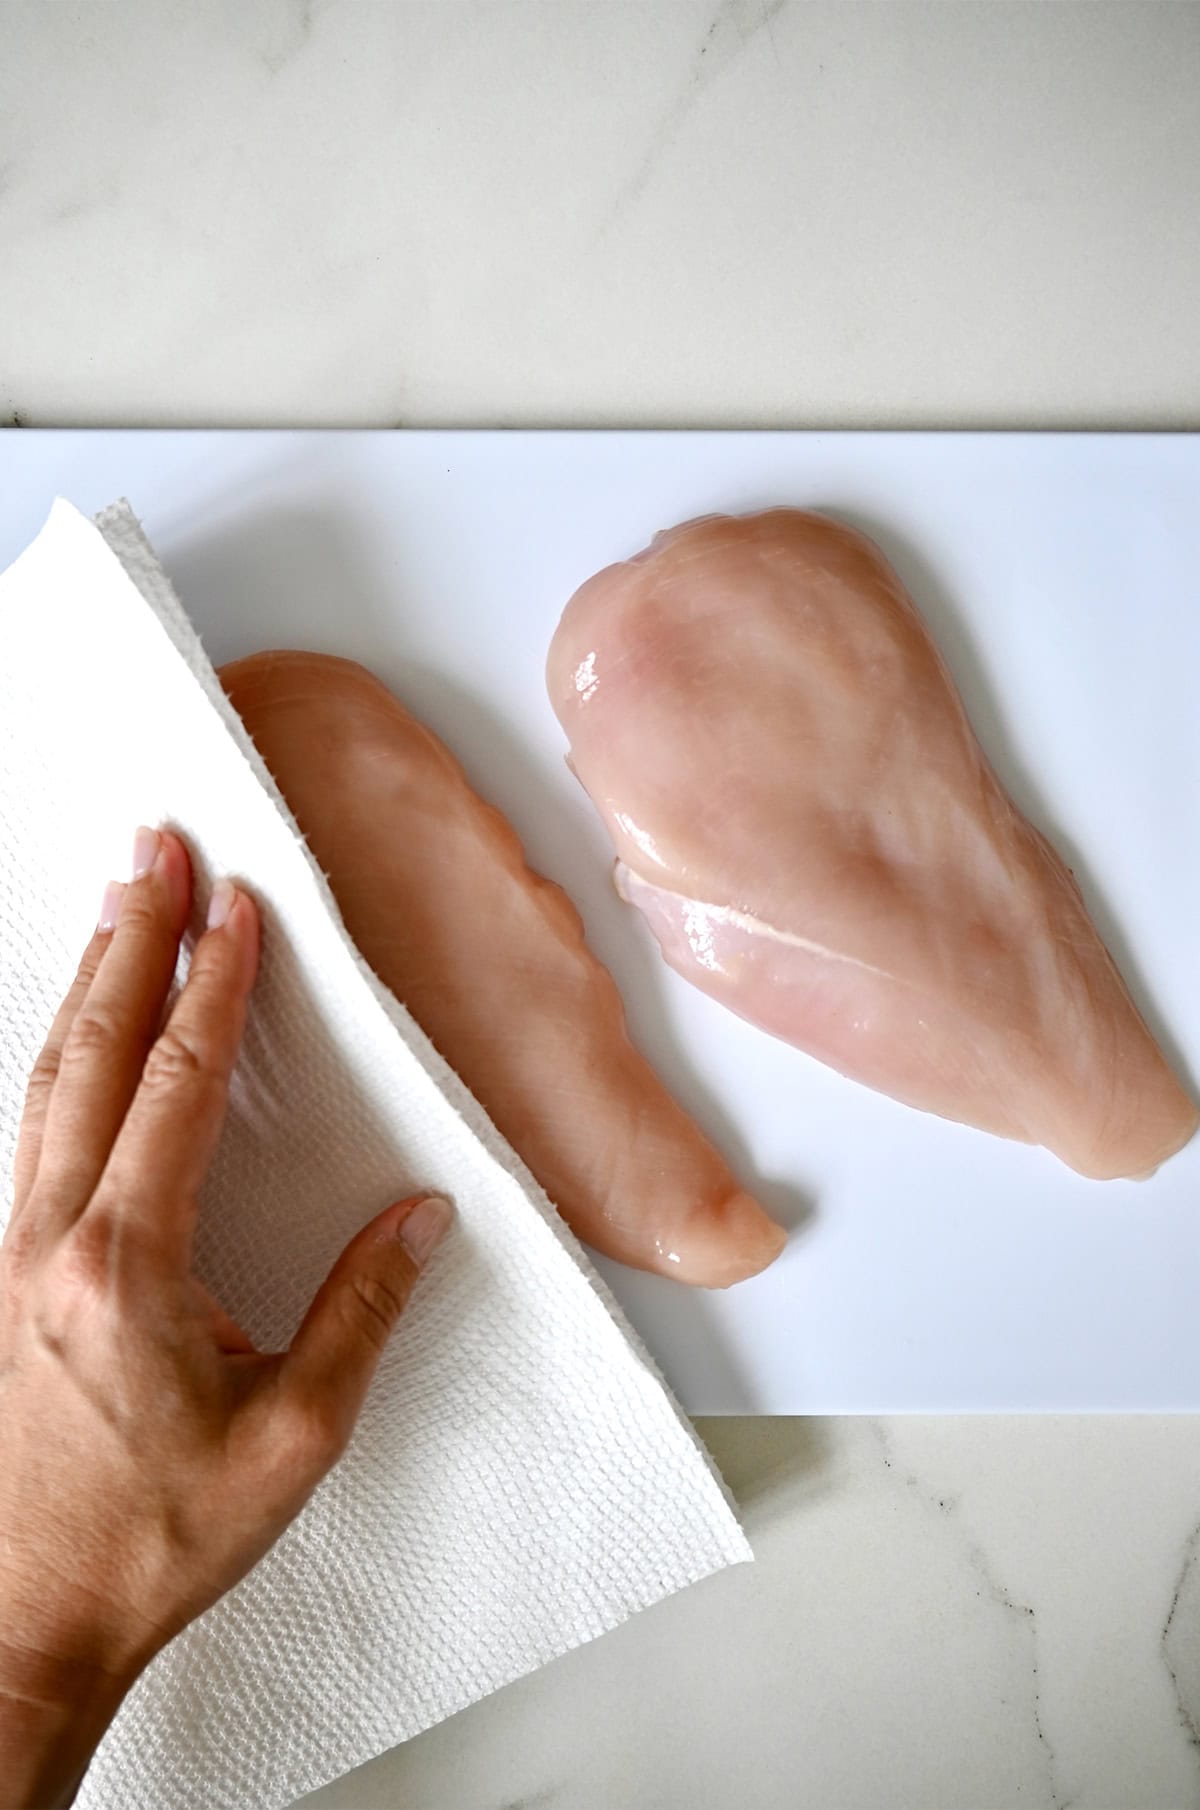
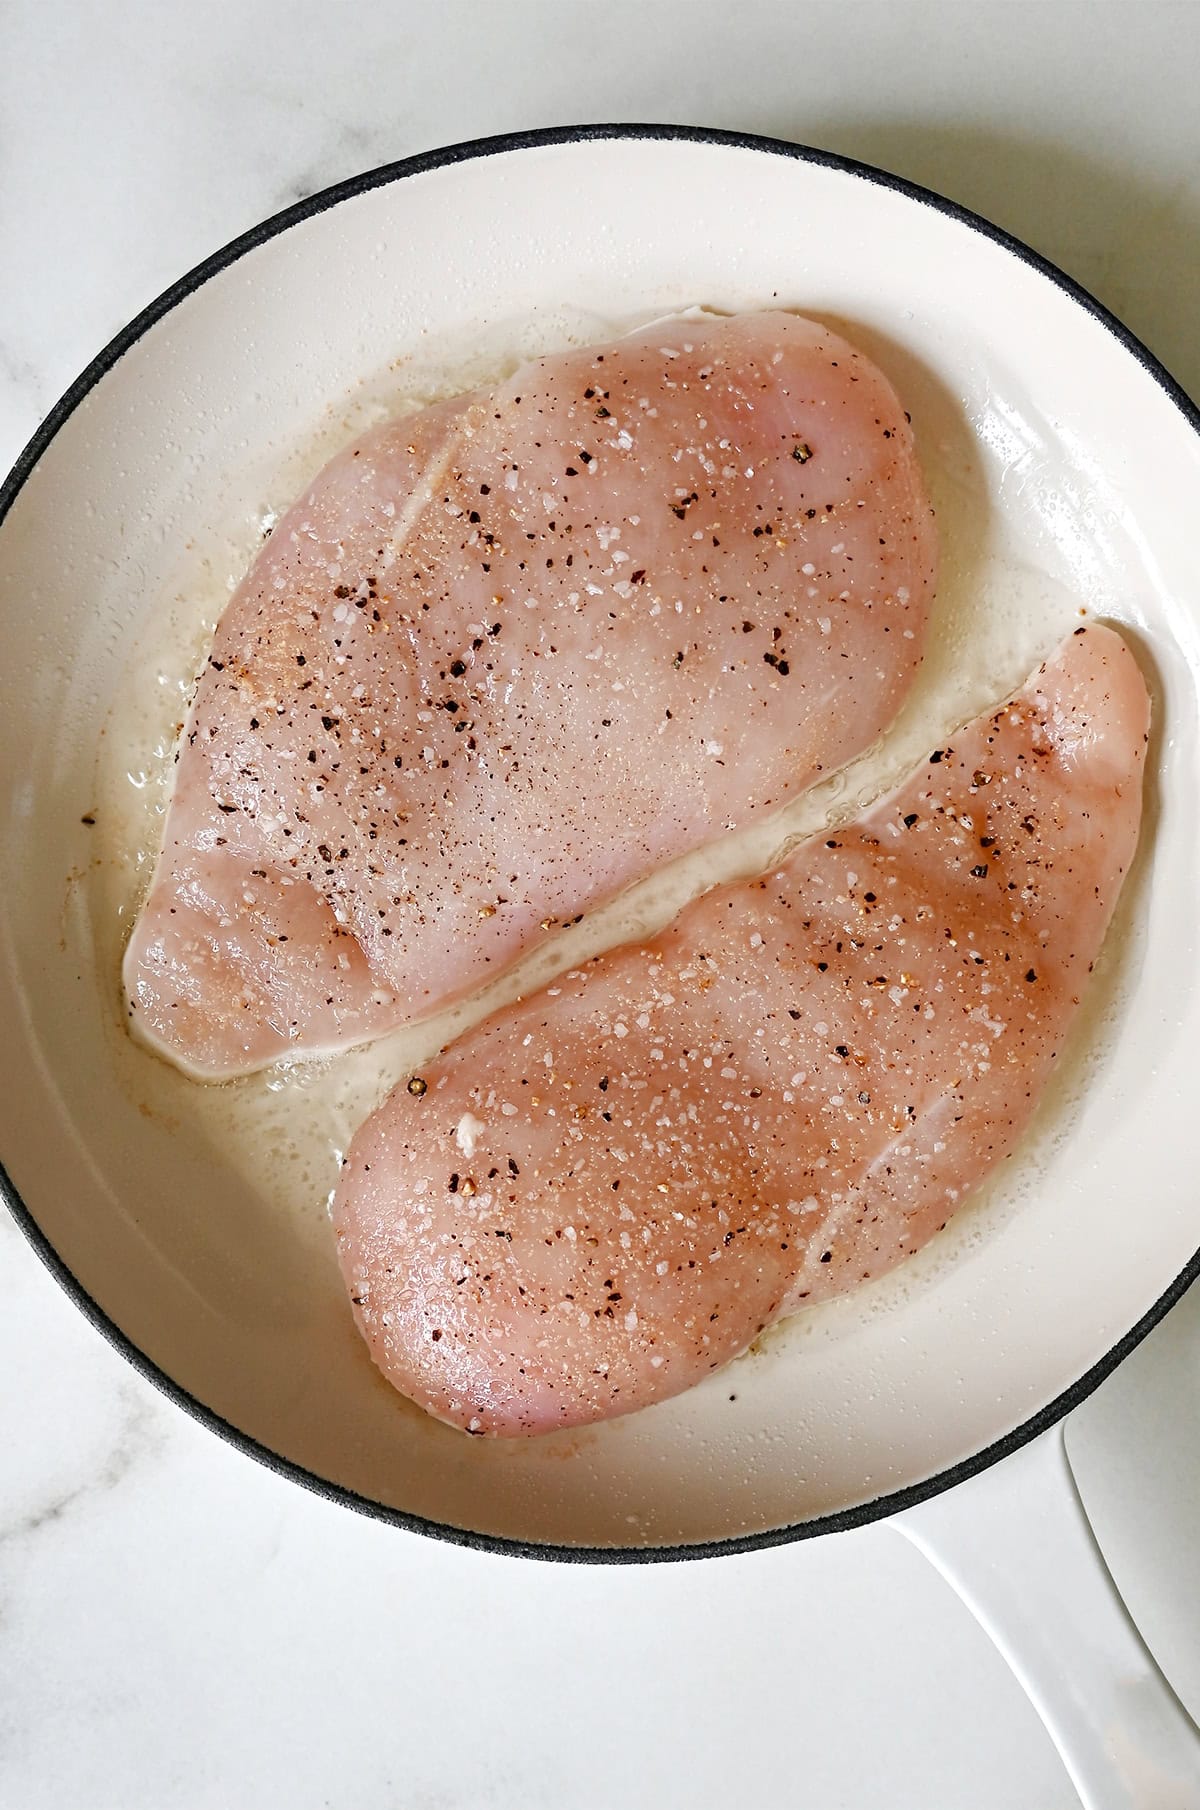
- Pat dry and season generously. Use paper towels to pat the chicken breasts dry—this helps you get a good sear. Excess moisture will make the chicken steam instead of brown. Sprinkle both sides with salt and pepper (and any extra seasonings you like).
- Heat your pan. Place a large skillet (I love enameled cast iron!) over medium-high heat. Add about 1 tablespoon of oil, enough to lightly coat the bottom of the pan. Let it heat for 1 to 2 minutes, until the oil shimmers and easily moves when you tilt the pan—that means it’s hot enough to sear.
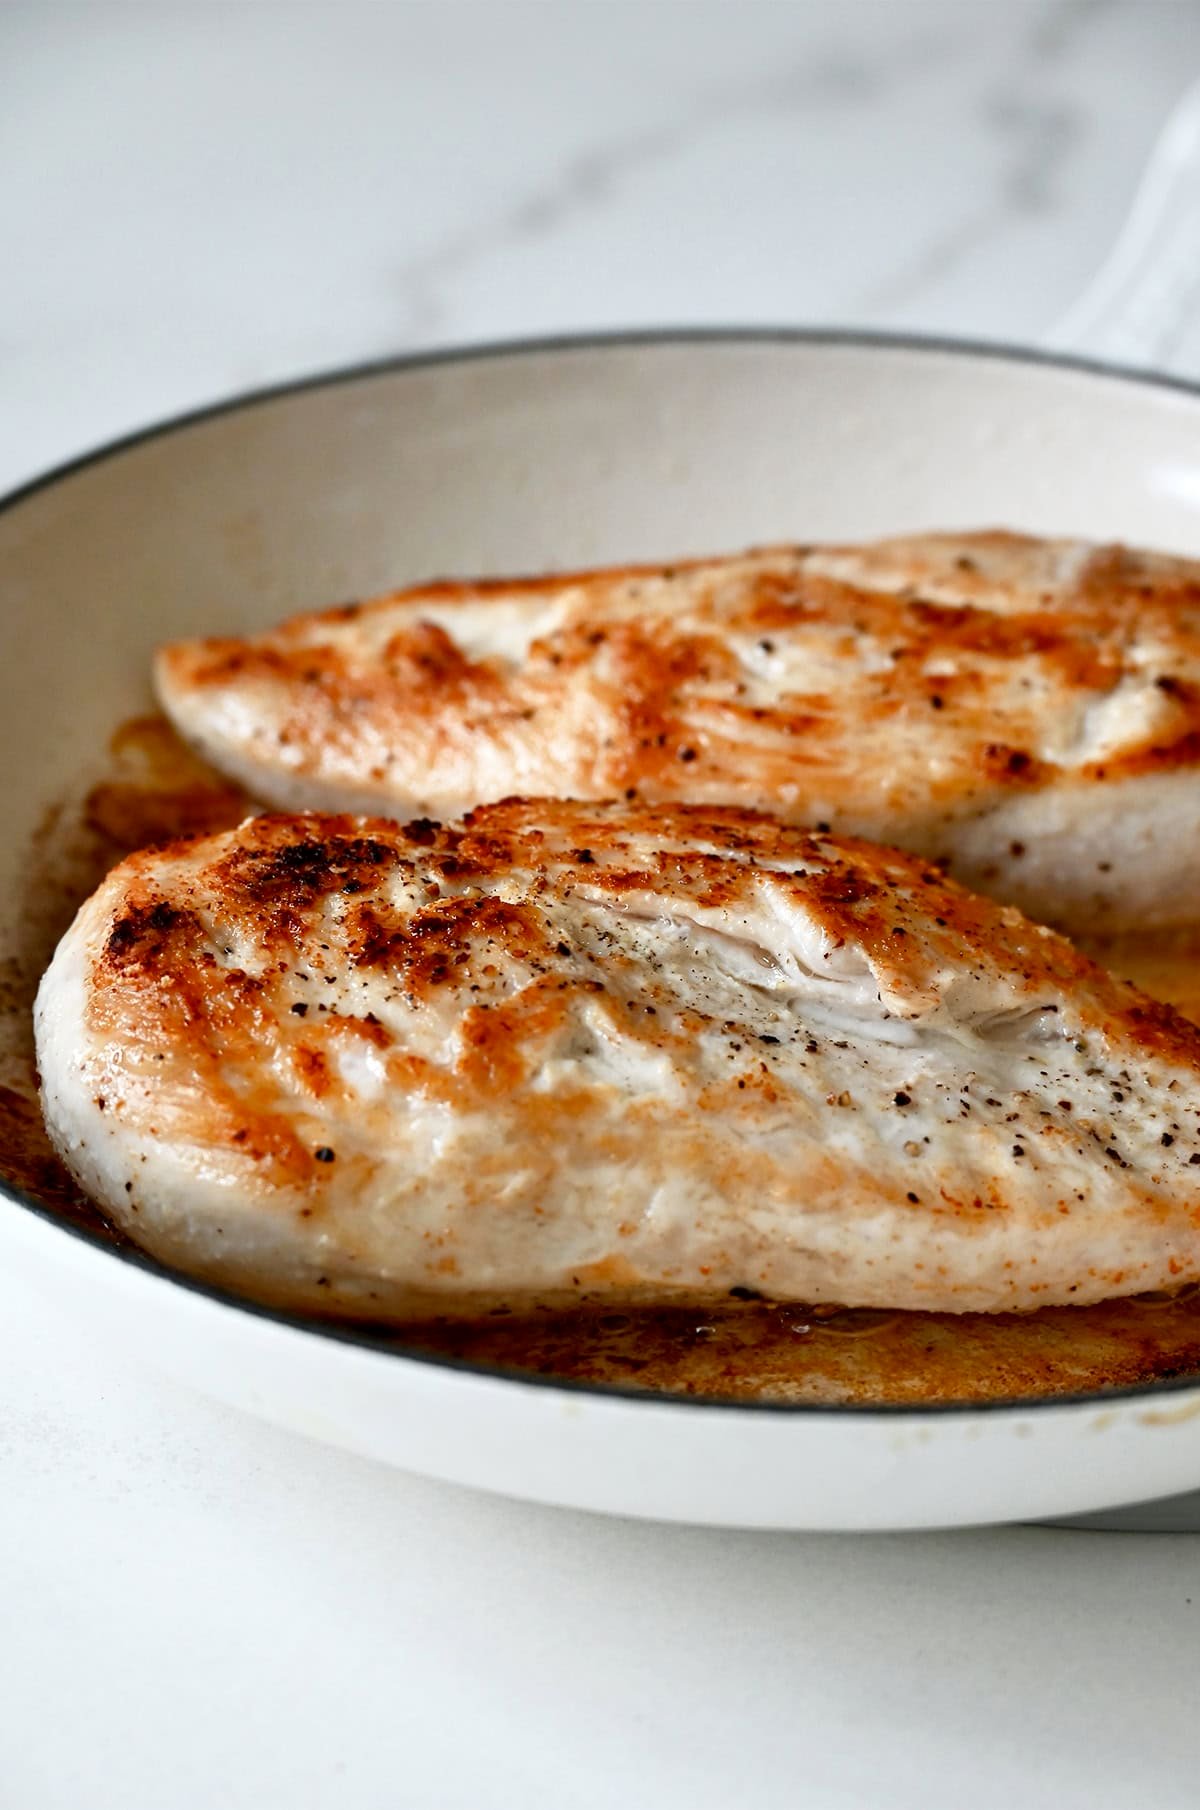
- Sear the first side. Carefully lay the chicken breasts flat in the hot pan (they should sizzle!) and don’t move them for 5 to 7 minutes. That undisturbed contact is how you get a golden-brown crust. If the chicken sticks when you try to lift it, give it another minute—it’ll release when it’s ready.
- Flip and cover. Flip the chicken over using tongs or a spatula. Cook the second side for another 5 to 7 minutes, then place a lid on the pan for the last 1 to 2 minutes to gently steam the inside and finish cooking.
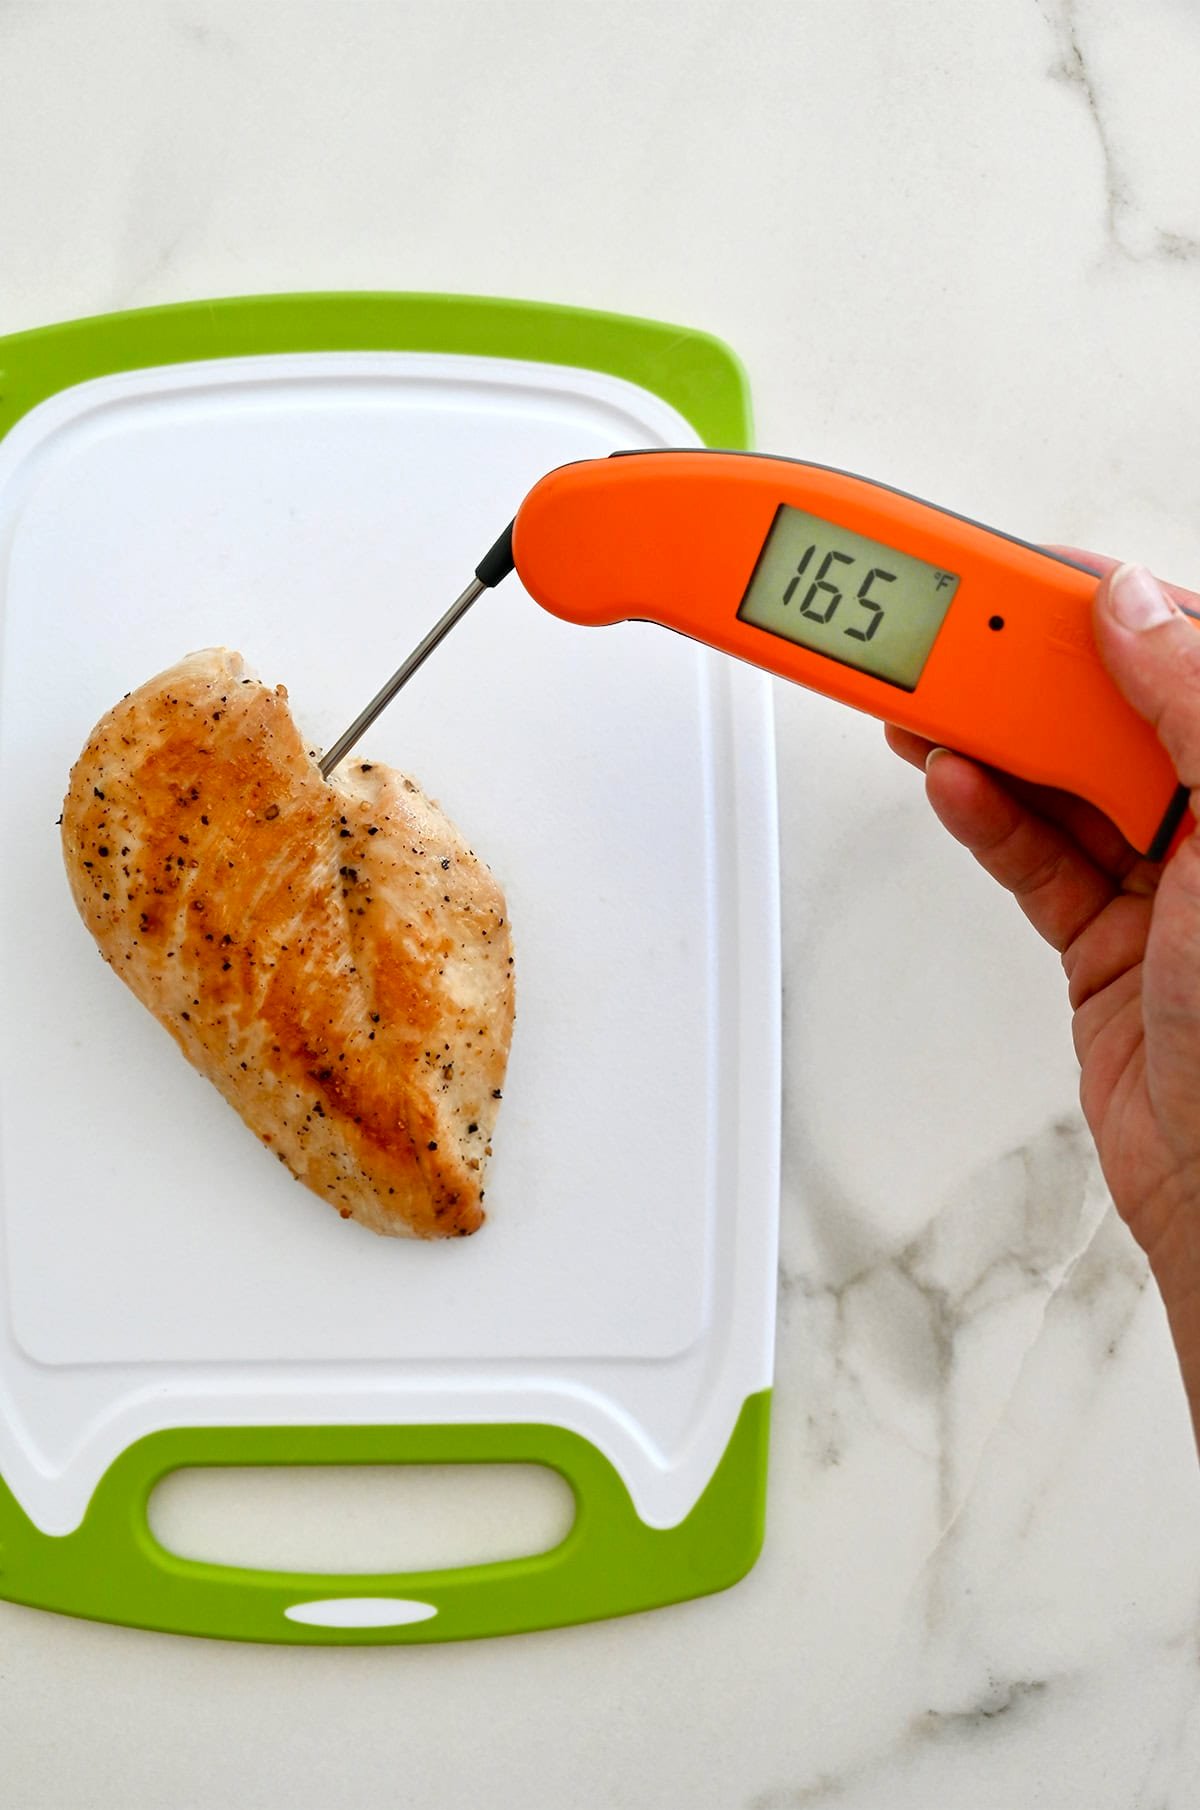
- Check the temperature. The best way to tell if your chicken is done? Use an instant-read thermometer. Insert it into the thickest part of the breast—chicken is done when it reaches an internal temperature of 165°F. (I usually pull mine at 160°F; it’ll finish cooking as it rests.)
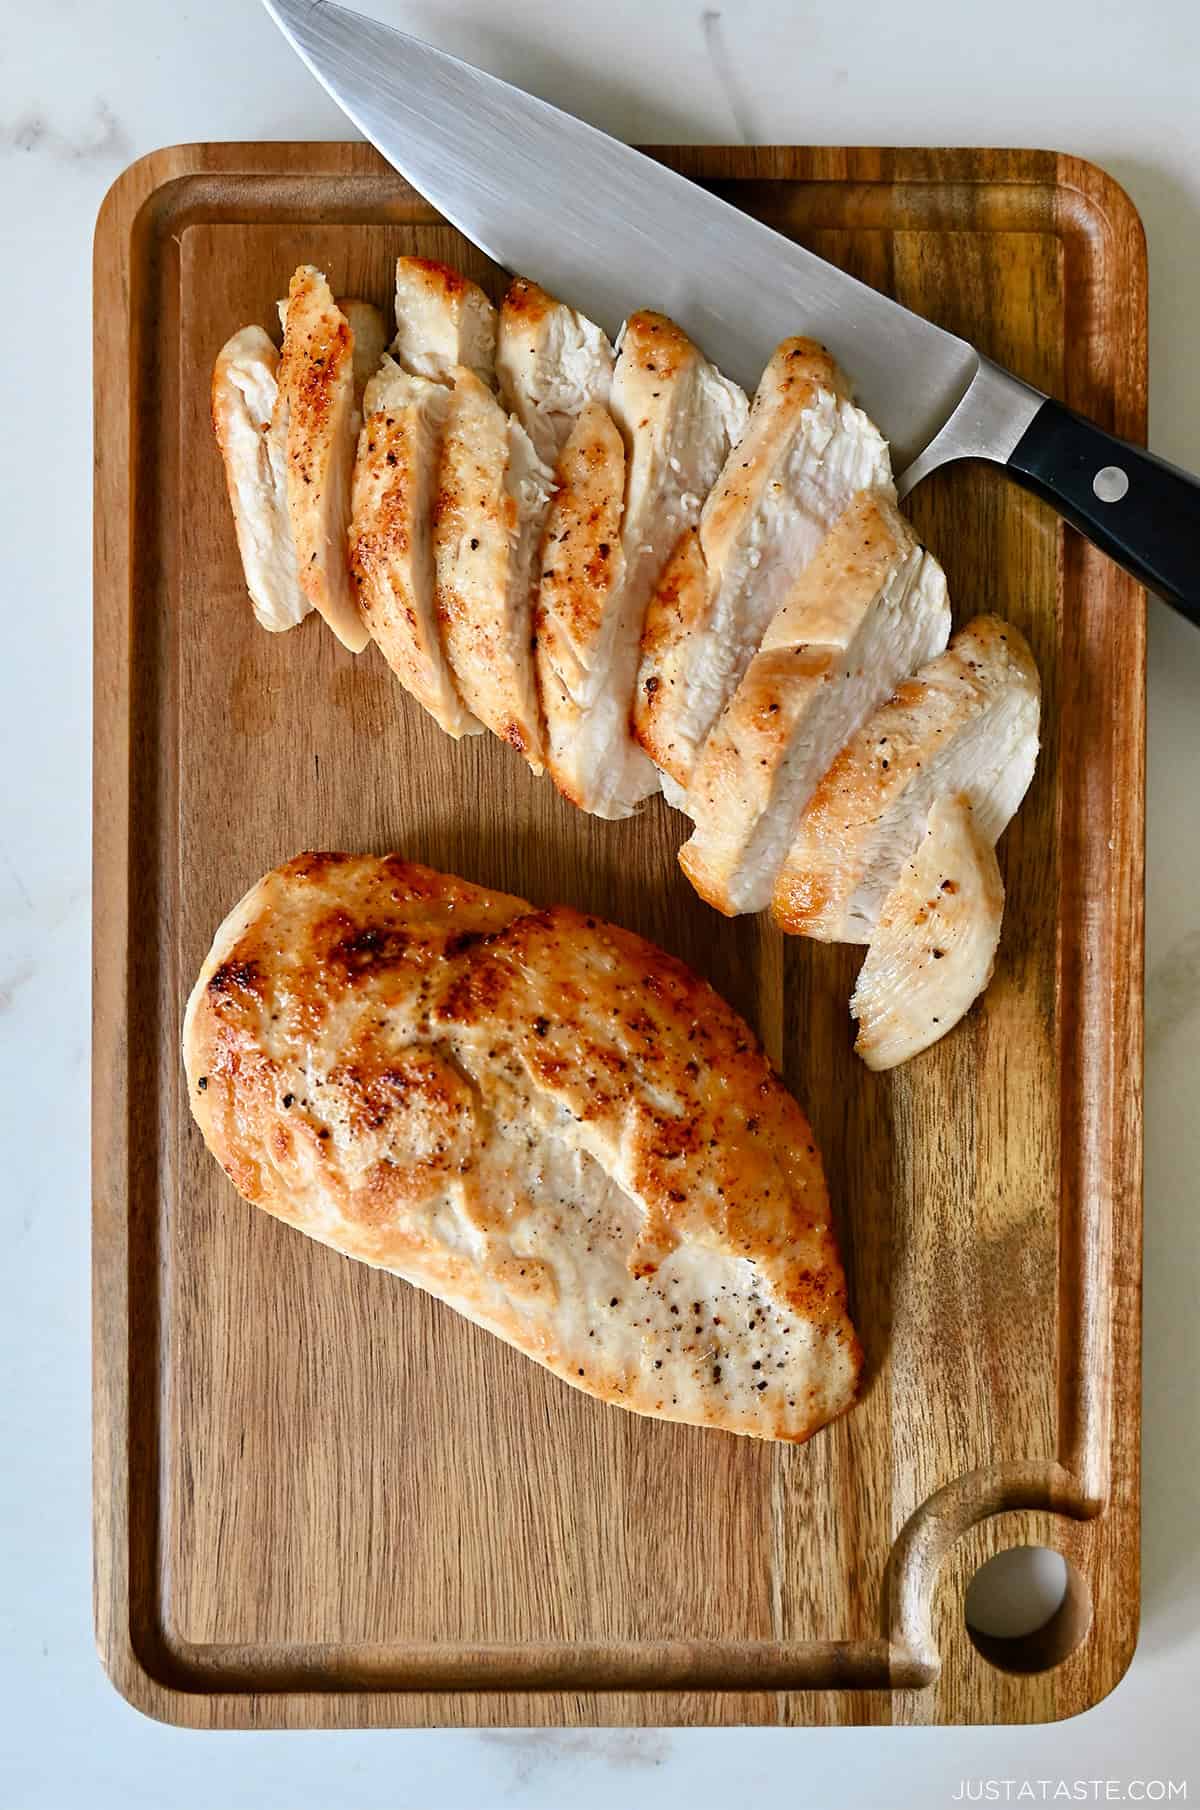
- Let it rest. Transfer the chicken to a cutting board and let it rest for 5 minutes before slicing. This step locks in the juices, so your chicken stays nice and tender when you slice it.
Using Skin-On Boneless Chicken Breasts?
You can absolutely use skin-on boneless chicken breasts with this stovetop method! Just be sure to place them skin-side down first in the hot pan. Cook undisturbed until the skin is golden and crisp (about 6–7 minutes), then flip and continue as directed. The rendered fat from the skin adds extra flavor, so you might even need a little less oil.

- Invest in a thermometer. This is one kitchen tool I always recommend having on hand. It takes all the guesswork out of cooking chicken (and steak… and pork tenderloin…), and it’s a must if you’re cooking for kids.
- Adjust the heat mid-cook. If your pan seems too hot halfway through (oil smoking or edges browning too fast), lower to medium to ensure the inside cooks without burning the outside.
- Finish with butter. This is optional, but so worth it for the flavor it adds. I like to add about ½ tablespoon of butter per chicken breast during the last minute of cooking, or right after it comes off the heat. It melts into the pan juices and gives the chicken a rich, restaurant-style finish.
- Keep the seasoning simple (or don’t!). Salt and pepper are all you really need, but sometimes I’ll add garlic powder, smoked paprika, Italian seasoning or even a little taco seasoning depending on what I’m serving it with. Keep it simple, or get creative—it’s hard to go wrong.
- Slice against the grain. This one’s easy to overlook, but it makes a big difference in tenderness. Just look for the lines running through the chicken breast and cut across them—not with them.
- Thick or uneven chicken breasts? Pound them out. If your chicken breasts are especially thick or uneven, they’ll cook faster on one side than the other (and usually dry out in the process). I like to place them between two sheets of parchment or plastic wrap and gently pound them with a meat mallet to an even thickness—about ½ inch is ideal. You don’t have to do this every time, but it makes a big difference for even cooking and juicy results.
Serving Suggestions
I serve these pan-cooked chicken breasts with just about everything, because they go with just about everything. For a quick weeknight dinner, pair them with roasted potatoes and broccoli cheese casserole. Or, keep it light with my Greek cucumber tomato salad or spinach strawberry salad. If I’m feeling fancy, I’ll slice them over Baked Boursin Cheese Pasta or tuck them into toasted garlicky bread rolls for the ultimate Chicken Caesar Sandwich.
FAQs
If you don’t have a thermometer, slice into the thickest part of the breast. The meat should be white and opaque all the way through, with no pink or translucent spots. The juices should run clear.
Don’t force it! If your chicken is sticking, it’s not ready to flip yet. Give it another minute or two—once a good crust forms, it’ll naturally release from the pan.
You might’ve overcooked it (even just a minute too long can do it!). Next time, try pulling it off the heat at 160°F and letting it rest—the carryover cooking brings it right to 165°F and keeps it nice and juicy.
Yes! Boneless, skinless chicken thighs cook beautifully in a skillet. They’ll take slightly longer—about 7 to 9 minutes per side, depending on thickness—but they’re more forgiving than chicken breasts and stay juicy even if you slightly overcook them.
Ingredients
- 2 boneless, skinless chicken breasts (about 1 pound total)
- 3/4 teaspoon kosher salt
- 1/4 teaspoon freshly ground black pepper
- 1 Tablespoon oil (avocado oil or olive oil)
- 1 Tablespoon butter (optional, for finishing)
Instructions
- Use paper towels to pat the chicken breasts dry—this helps get a great sear. Season both sides generously with salt and pepper.
- Place a large skillet over medium-high heat. Add the oil and heat for 1–2 minutes, until it shimmers.
- Sear the first side. Add the chicken to the hot pan and don’t move it. Let it cook for 5 to 7 minutes, until a golden crust forms and it releases easily.
- Flip the chicken and cook the second side for another 5 to 7 minutes. Cover the pan for the final 1 to 2 minutes to finish cooking through.
- Use an instant-read thermometer to check the thickest part—it should register 165°F.
- Transfer to a cutting board, let rest for 5 minutes, then slice and serve. For extra flavor, add a small pat of butter per breast before serving.
Kelly’s Notes
- If your chicken is thick or uneven, gently pound it to an even 1/2-inch thickness before cooking.
- Add extra flavor by seasoning with garlic powder, smoked paprika or your favorite spice mix.
- Skin-on boneless breasts? Start skin-side down and render until crisp before flipping.
- Storage tips: Store leftover cooked chicken breasts in an airtight container in the fridge for up to 3–4 days. To reheat, gently warm in a skillet over low heat or slice cold for salads and sandwiches (looking at you, Caesar Pasta Salad!). You can also freeze cooked chicken for up to 3 months—just thaw overnight in the fridge before using.
Nutrition
Did you try this recipe?
Leave a comment below with your star rating!
This post may contain affiliate links.


Thank you for this cooking lesson – now I know what I have been doing wrong for so many years!! I really love this recipe!
So glad you found it helpful, Amy!
Thank you for this recipe. My chicken breasts turned out perfectly juicy and golden. 5 stars!
So glad you enjoyed it, Shauna!
I appreciate having just a basic recipe to follow. Thank you for all of your tips
So thrilled you found it helpful, Mark!
Loved how easy your instructions were to follow. Thank you!
So glad you found it helpful!
This was SO helpful! I’ve never cooked chicken breasts before so I was really nervous that I would either under or over cook them. I followed all of your tips and they turned out perfect! Thank you!
So glad you found it helpful, Coley!
Is it the same process for thin cut checked breasts?
Yes! You’ll just need to decrease the cook time.