These homemade fudge pops are rich, creamy, and full of nostalgic chocolate flavor—no pudding mix or mystery ingredients required. Made with just six simple staples from your pantry and fridge, they’re a frozen treat the whole family will love.
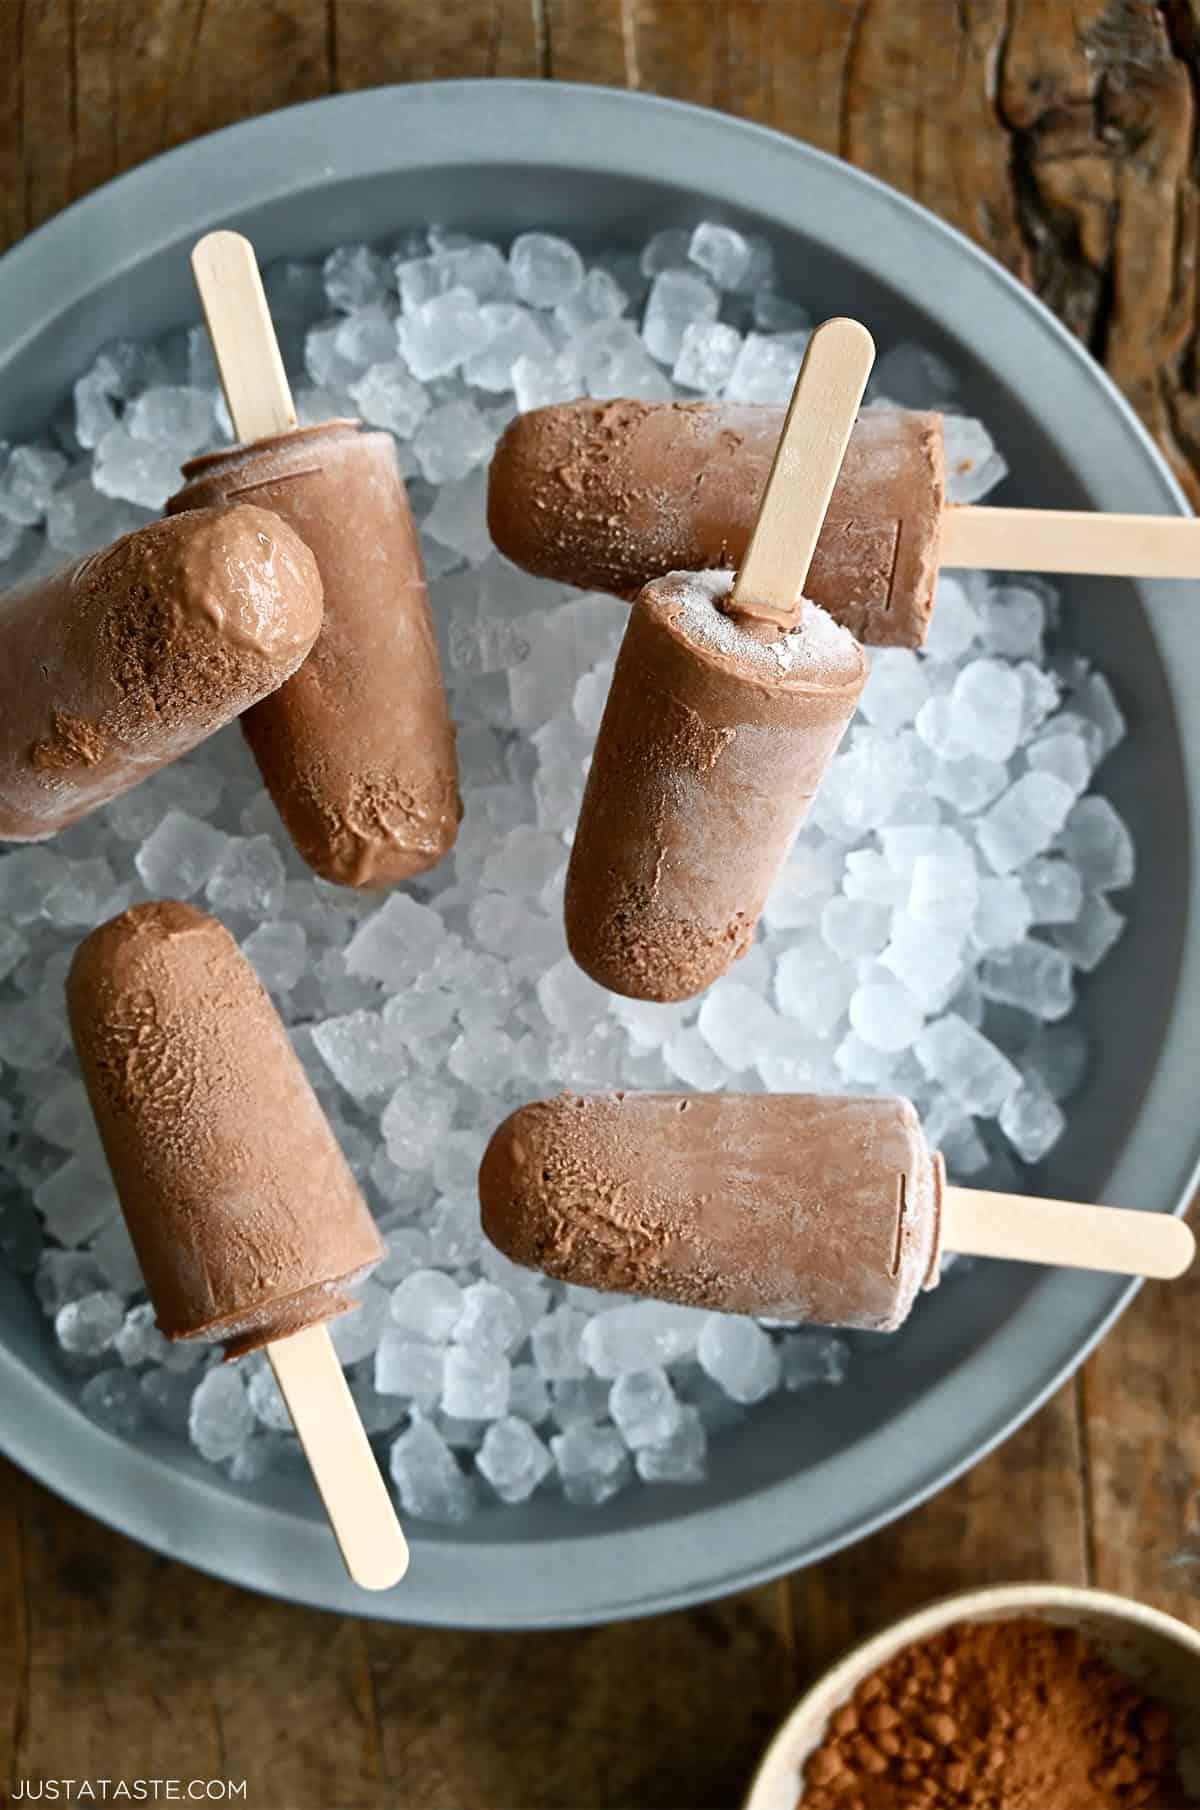
Table of Contents
I originally shared this recipe way back in 2012—long before I was a mom and answering “Can I have a snack?” approximately 97 times before lunch.
Back then, these homemade fudge pops were just a nostalgic summer treat. Now? They’re a freezer staple. They’re rich, creamy and made with simple pantry staples.
Fudgesicles were one of my favorite childhood desserts (right up there with choco tacos and cookie ice cream sandwiches), and this homemade version brings all the classic chocolatey goodness with none of the hard-to-pronounce ingredients.
These homemade fudge pops skip the artificial stuff in favor of real, everyday ingredients. No box mixes, no fancy chocolate bars and definitely no complicated techniques. Here’s what you’ll need:
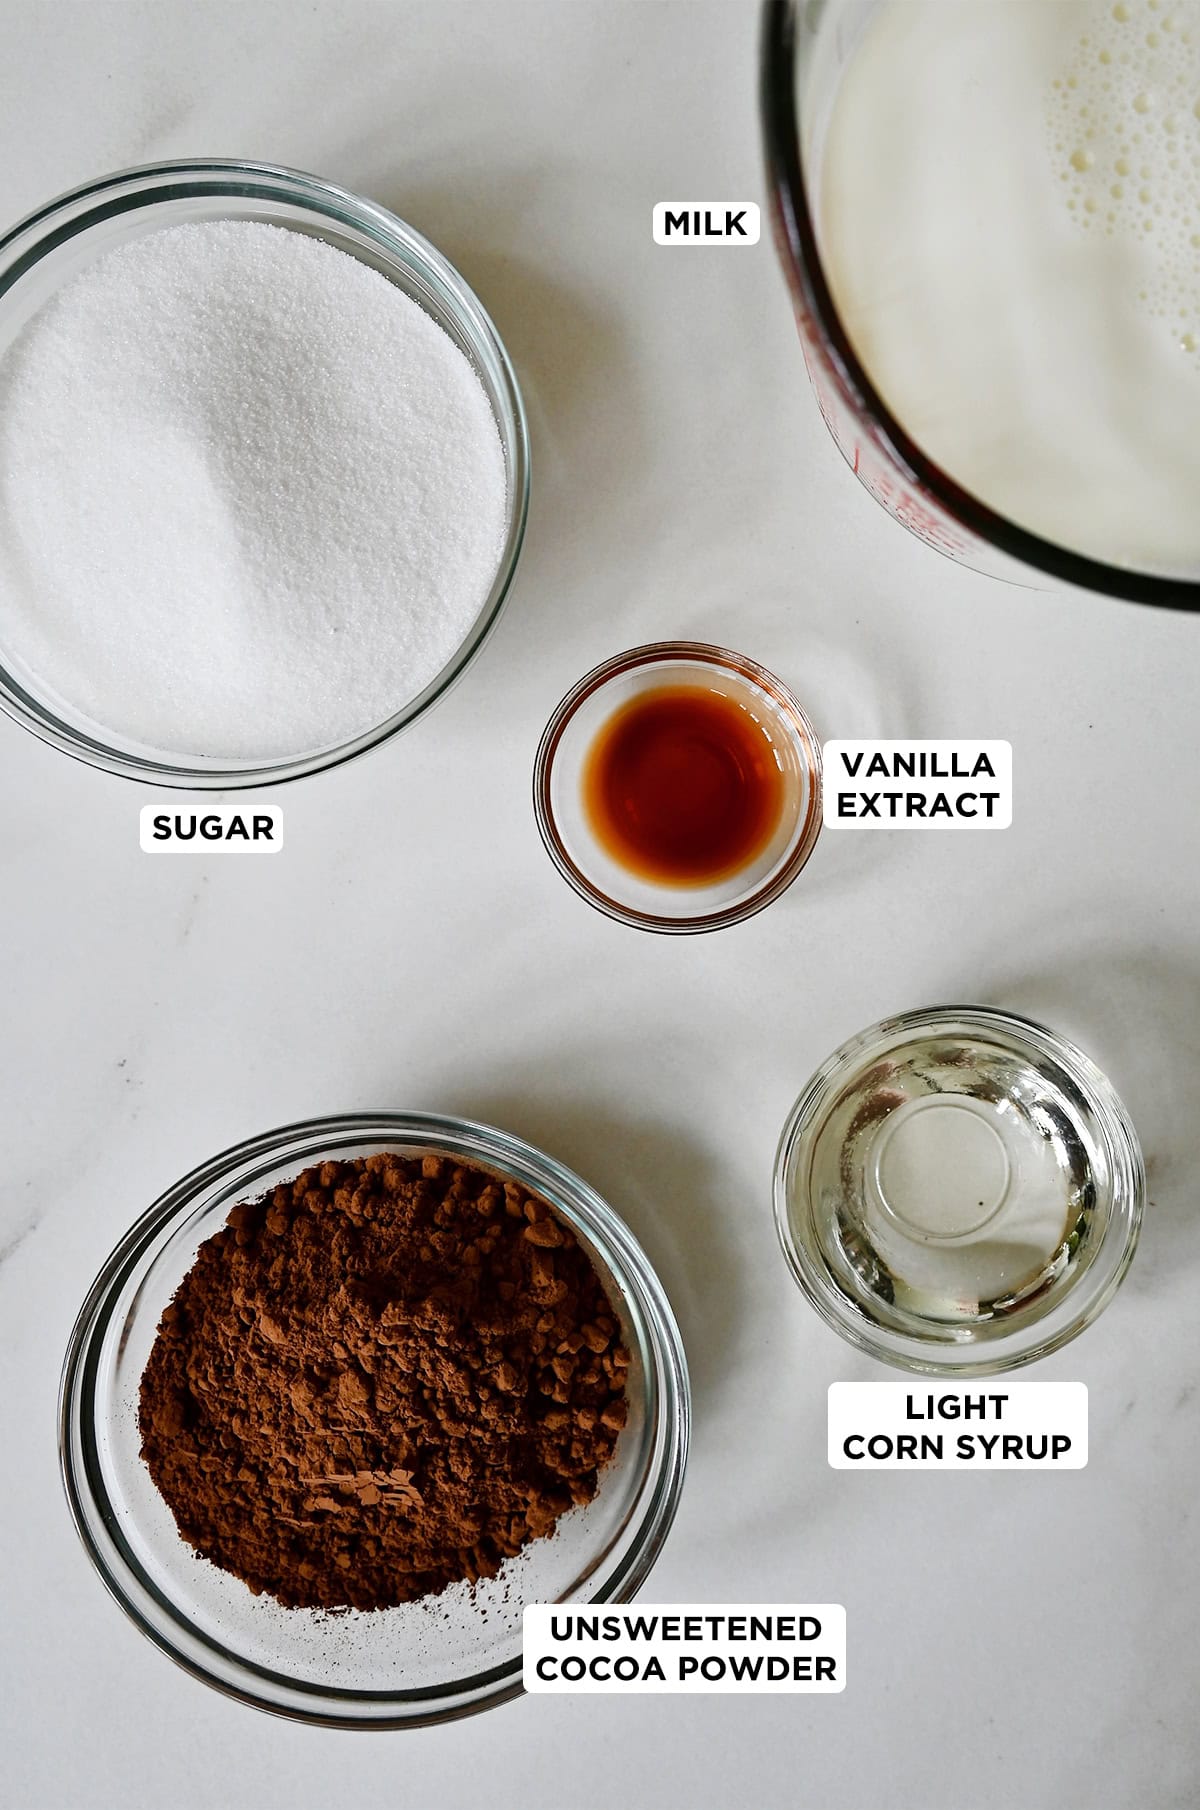
- Milk: I use 1% milk for a lighter texture that still tastes rich and creamy. You can use 2% or whole milk for extra indulgence, or go dairy-free with oat or almond milk (just know the texture may vary slightly).
- Unsweetened cocoa powder: This is where all that deep, fudgy flavor comes from! Use a high-quality Dutch-process cocoa for a smoother, more intense chocolatey taste. Natural cocoa works too, but the flavor will be slightly more bitter.
- Sugar: Regular granulated sugar sweetens the mixture and helps prevent the popsicles from becoming icy. It’s key to that creamy bite!
- Light corn syrup: This isn’t just for sweetness—it’s the secret to a smooth, creamy texture. Corn syrup helps prevent ice crystals from forming, making your fudge pops ultra-smooth.
Not a fan of corn syrup? Agave or honey can work in a pinch, though the texture may not be quite as smooth.
- Salt: Just a pinch balances the sweetness and enhances the chocolate flavor.
- Vanilla extract: Rounds out the chocolate flavor. If you have homemade vanilla extract on hand, use it!
See the recipe card for full information on ingredients and quantities.
If you can whisk and pour, you can make these ultra-fudgy popsicles. Just grab a saucepan, your favorite popsicle molds, and let’s make the frozen treat your summer’s been waiting for!
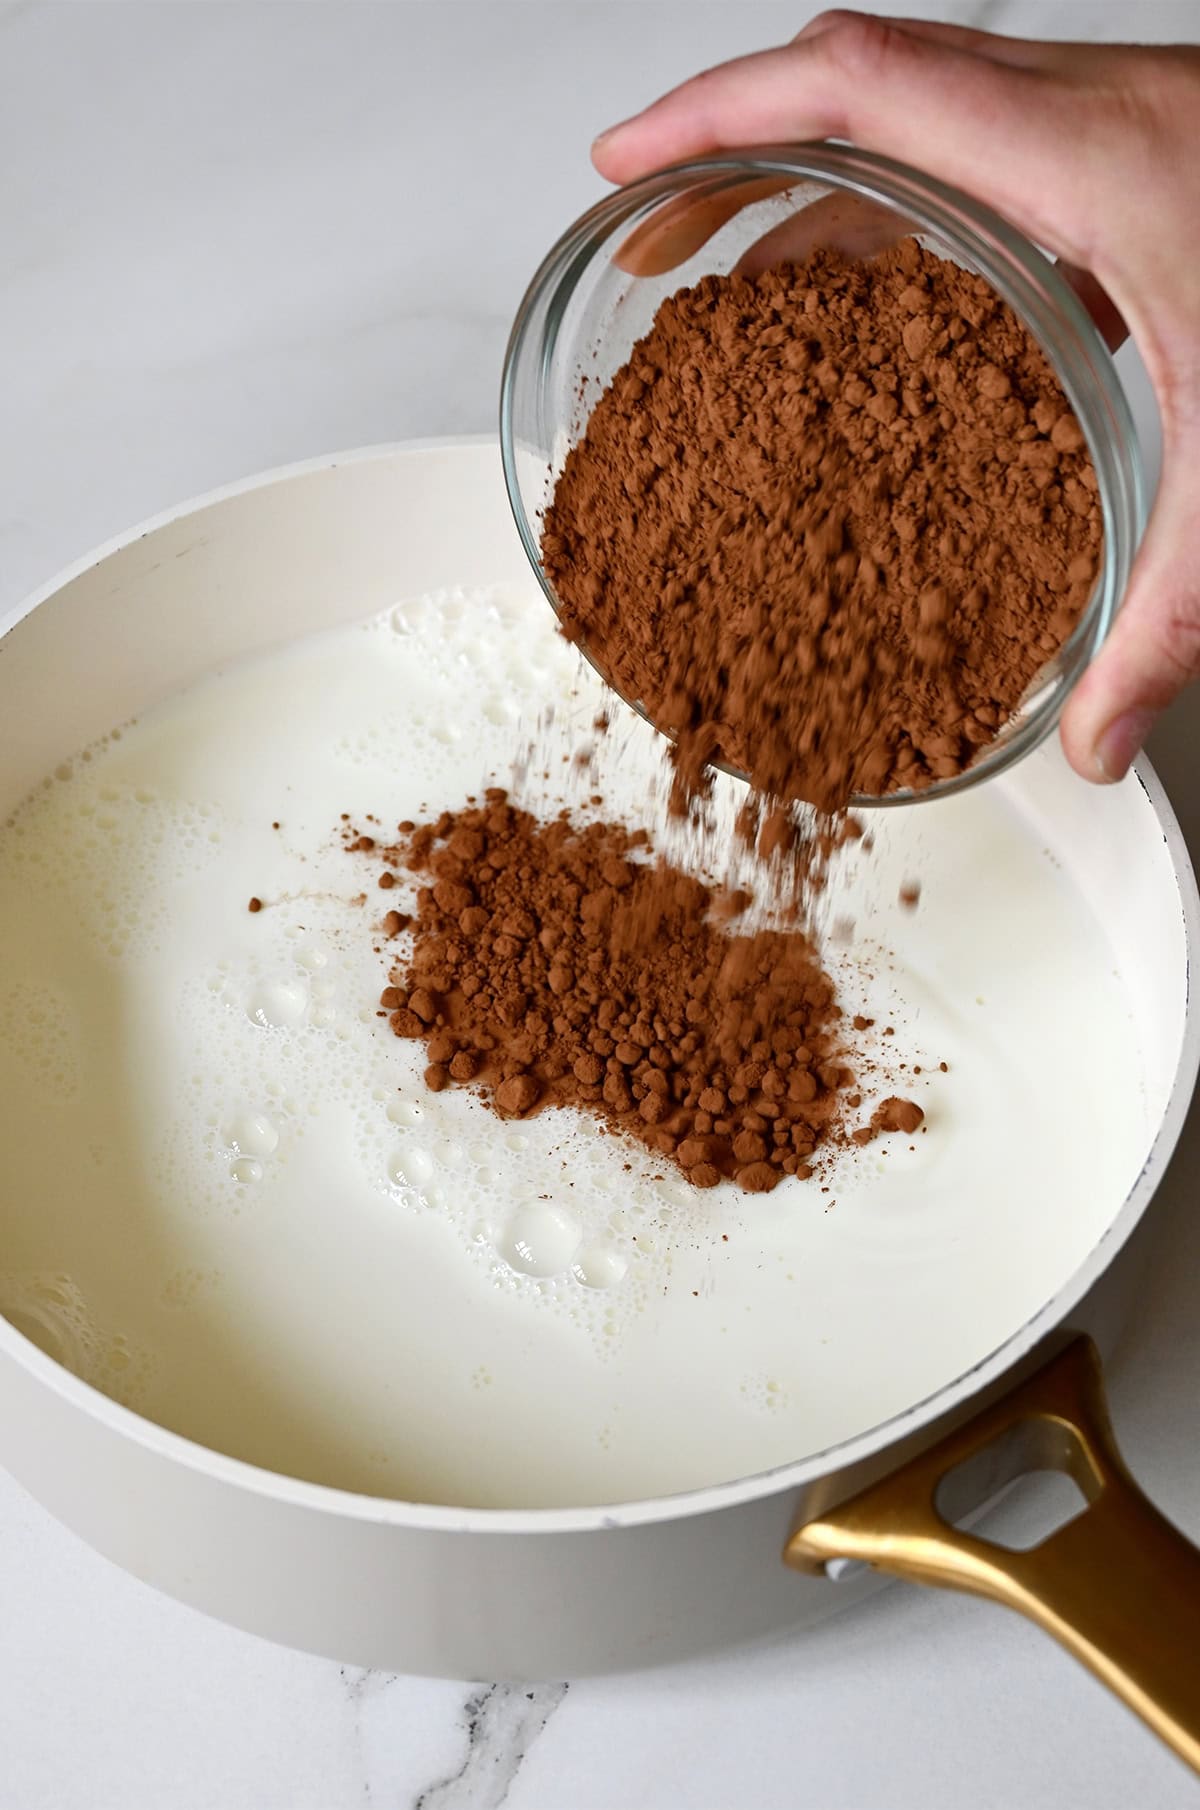
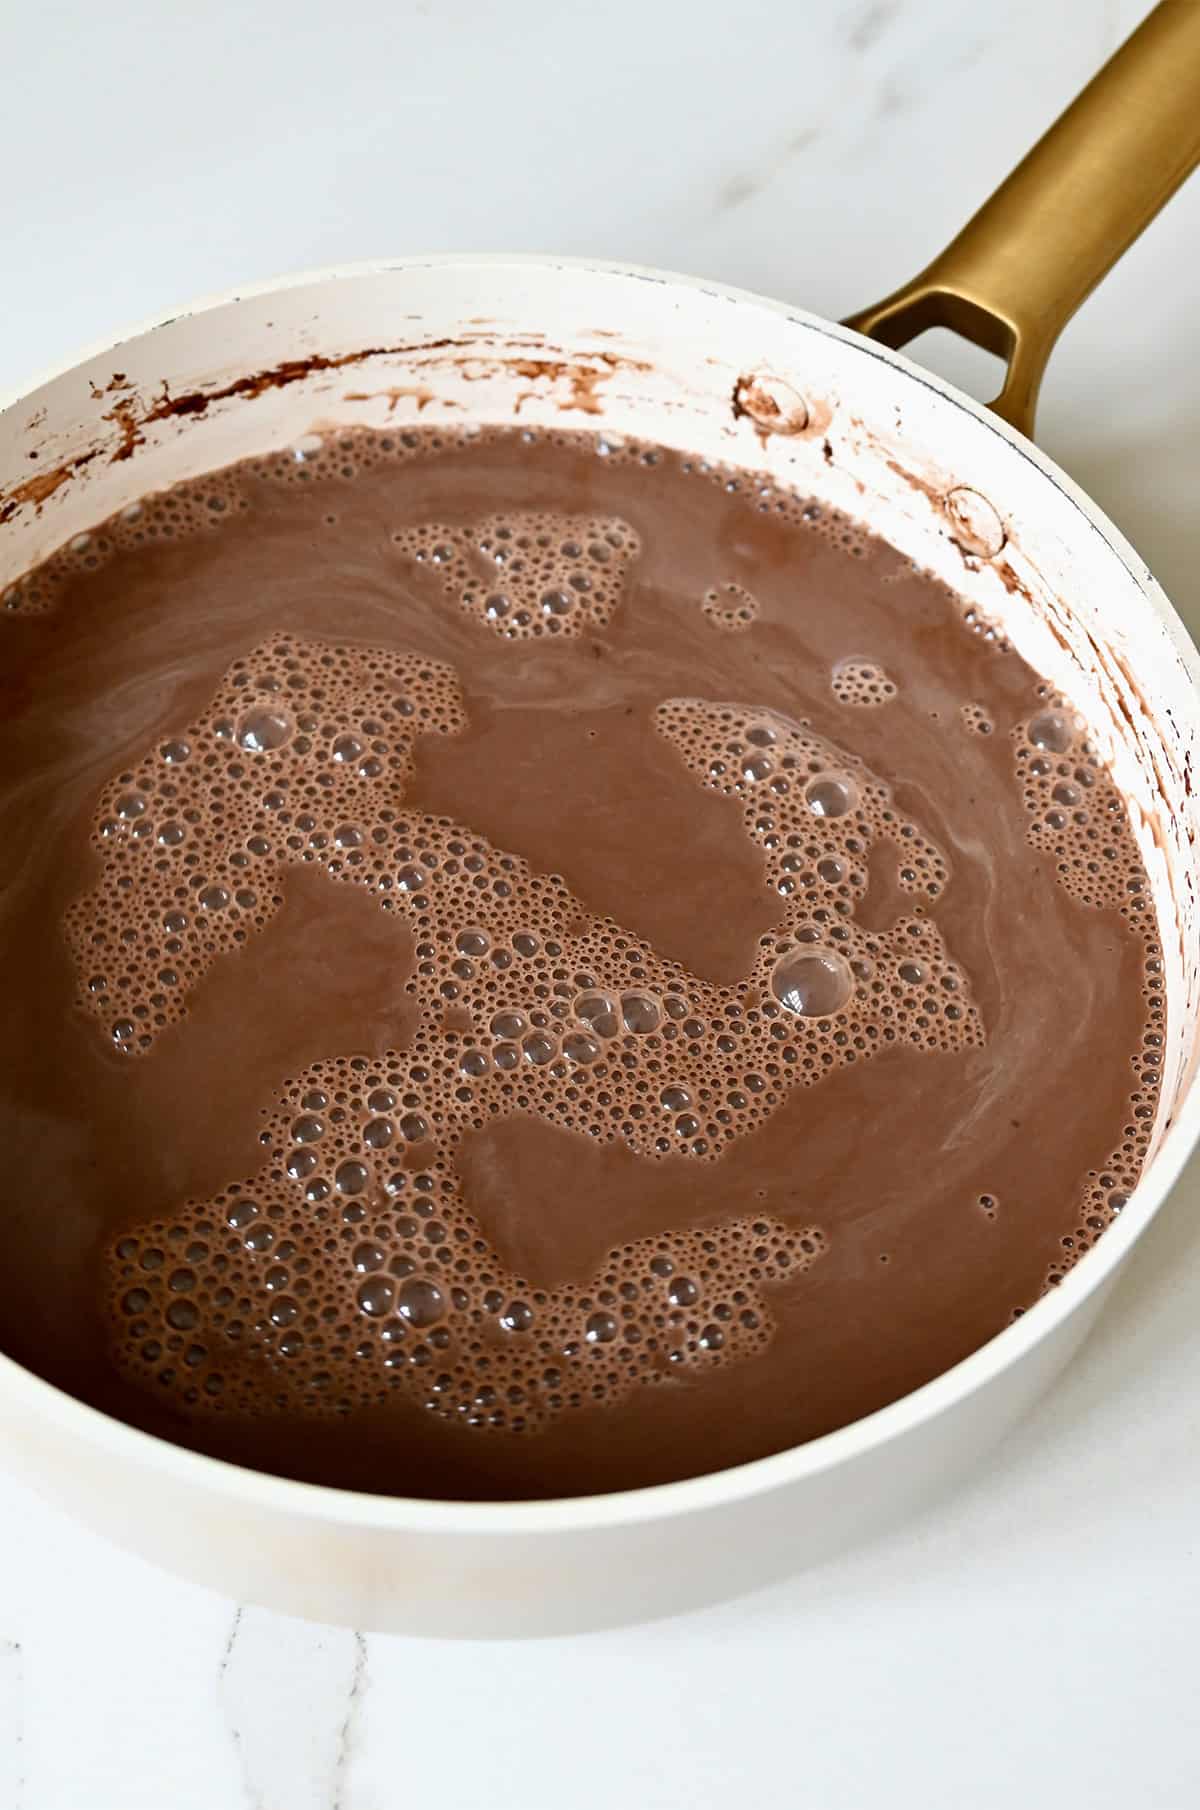
- Combine and whisk the base. In your saucepan, whisk together the milk, sugar, cocoa powder, corn syrup and salt. Keep the heat low and whisk constantly until everything is smooth and the sugar has fully dissolved—about 4 to 5 minutes. No boiling here! You’re just warming things up so the cocoa dissolves and the flavors meld.
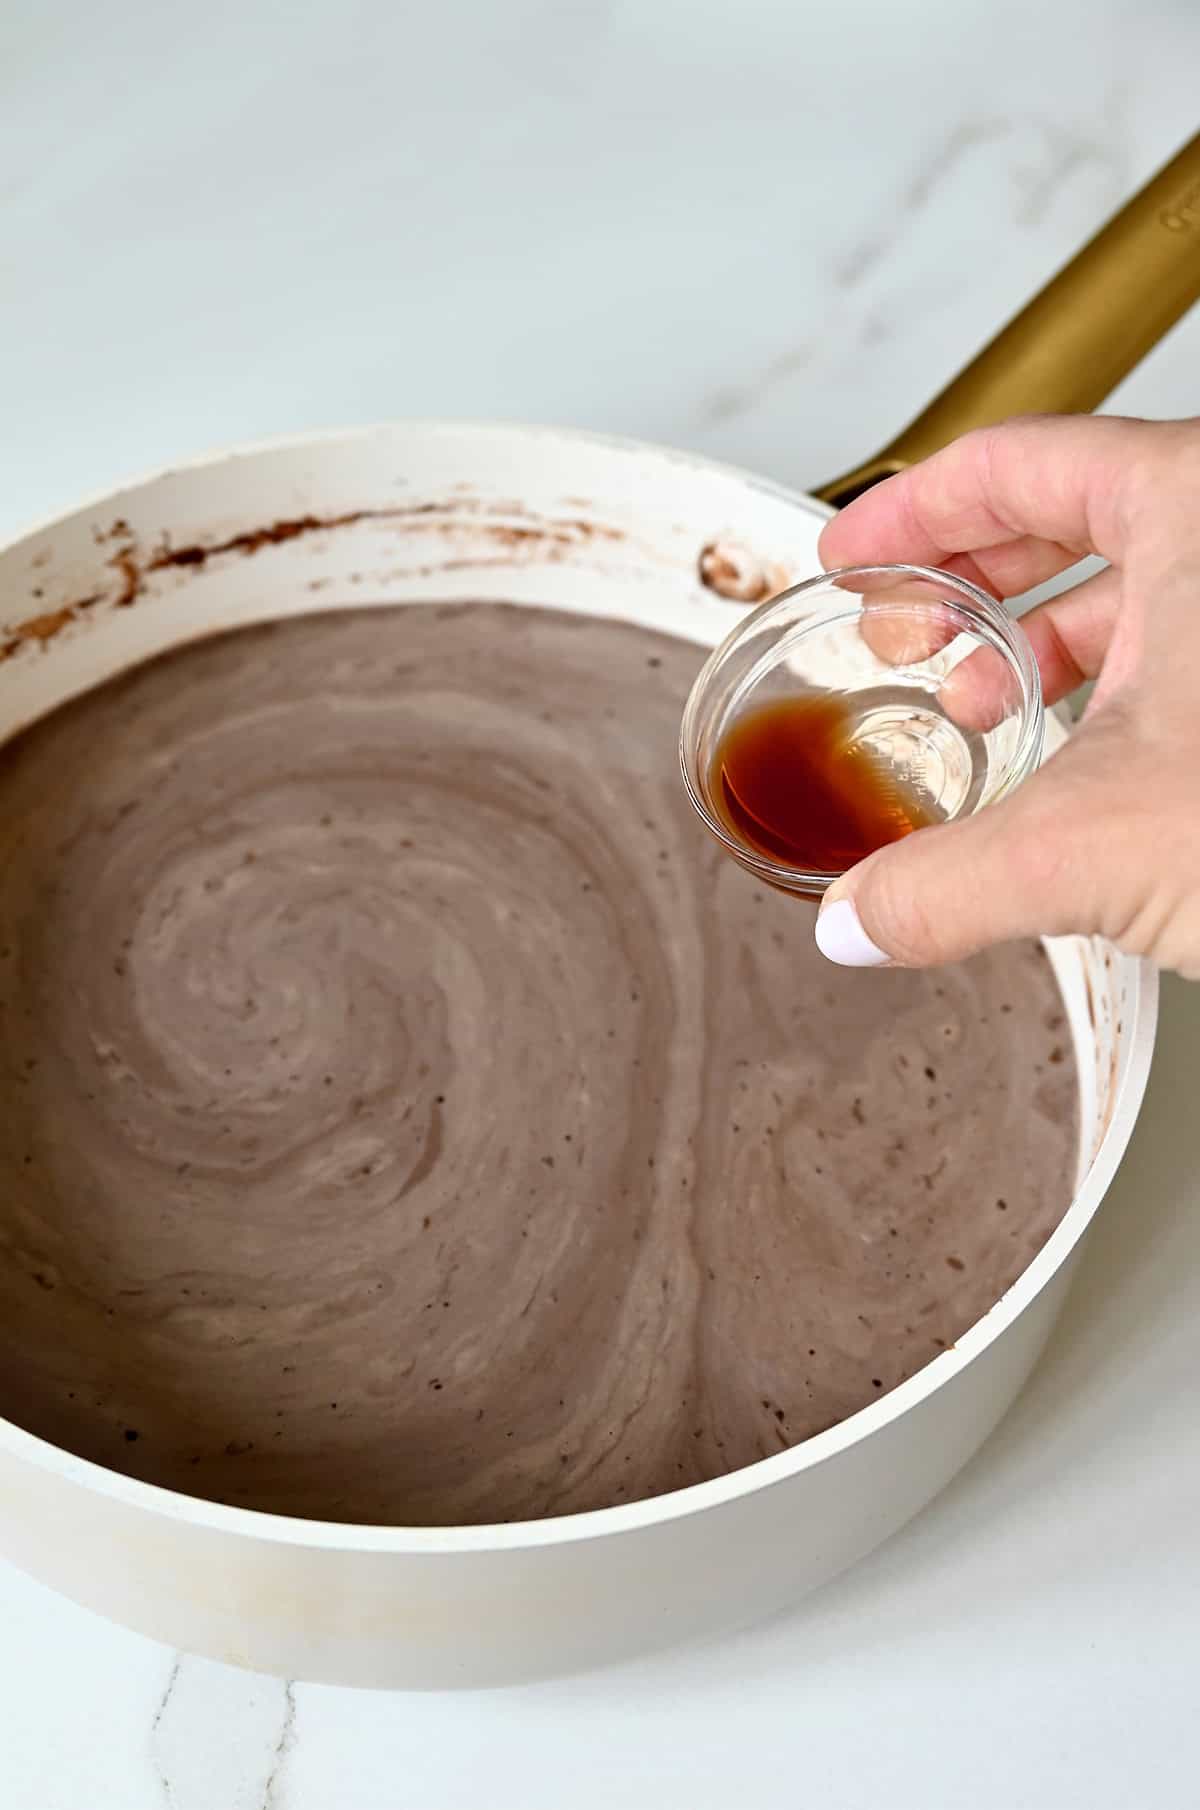
- Stir in the vanilla. Once the base is smooth, remove the pan from the heat and stir in the vanilla extract. Adding it off the heat helps preserve the flavor.
- Cool the mixture. You want the mixture to come to room temp before pouring it into your molds. To speed things up, nestle the saucepan in a large bowl of ice water and stir every few minutes.
Kelly’s Note: Pouring hot liquid into plastic molds can warp them, and cooling the mixture helps avoid ice crystals for a creamier texture.
- Fill your molds. Once cooled, carefully pour the mixture into your popsicle molds. Leave a tiny bit of space at the top to allow for expansion as they freeze.
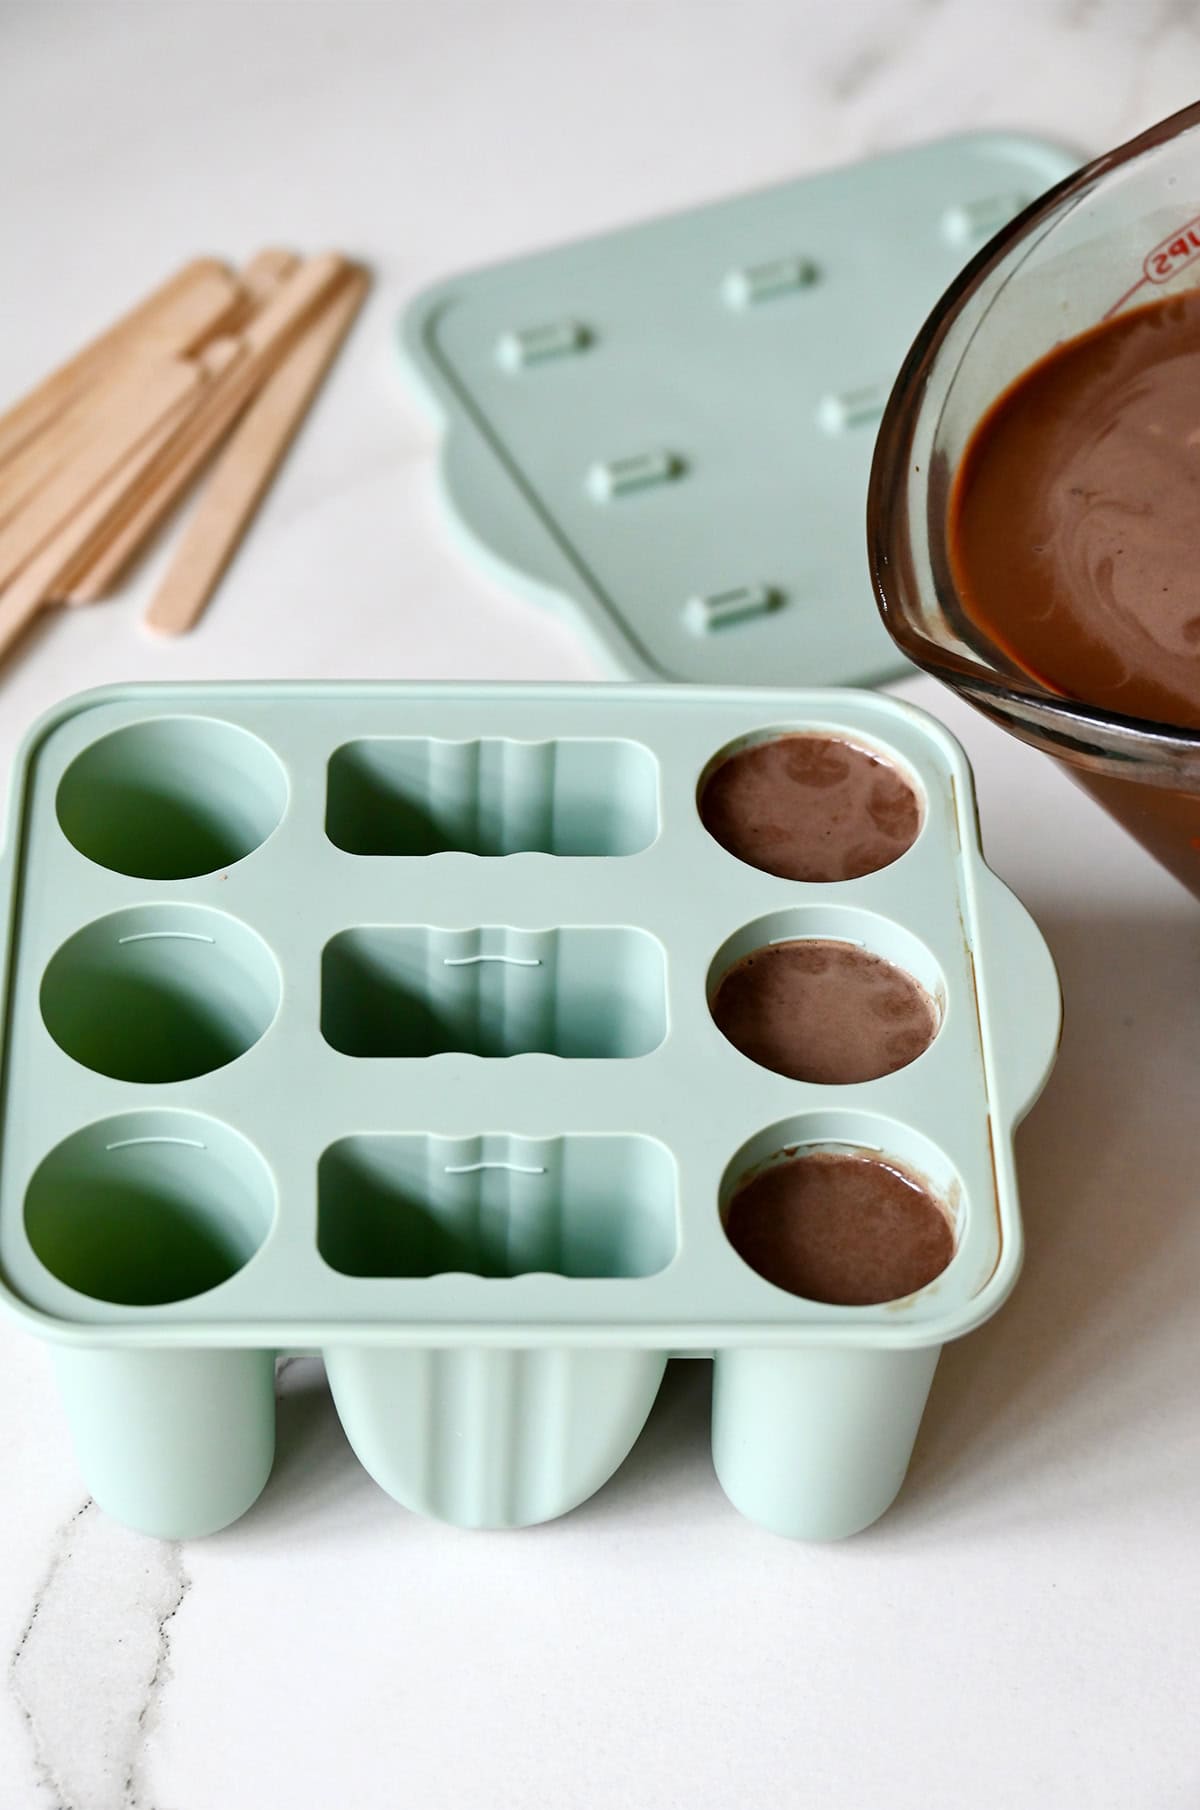
- Freeze in two steps. Freeze for 1 hour, then insert your sticks (this keeps them upright). Freeze again until completely solid—at least 6 hours or overnight for best results. Using a silicone mold with a lid and built-in stick slots (like this one)? Skip the pause—just insert the sticks right away and freeze until firm!
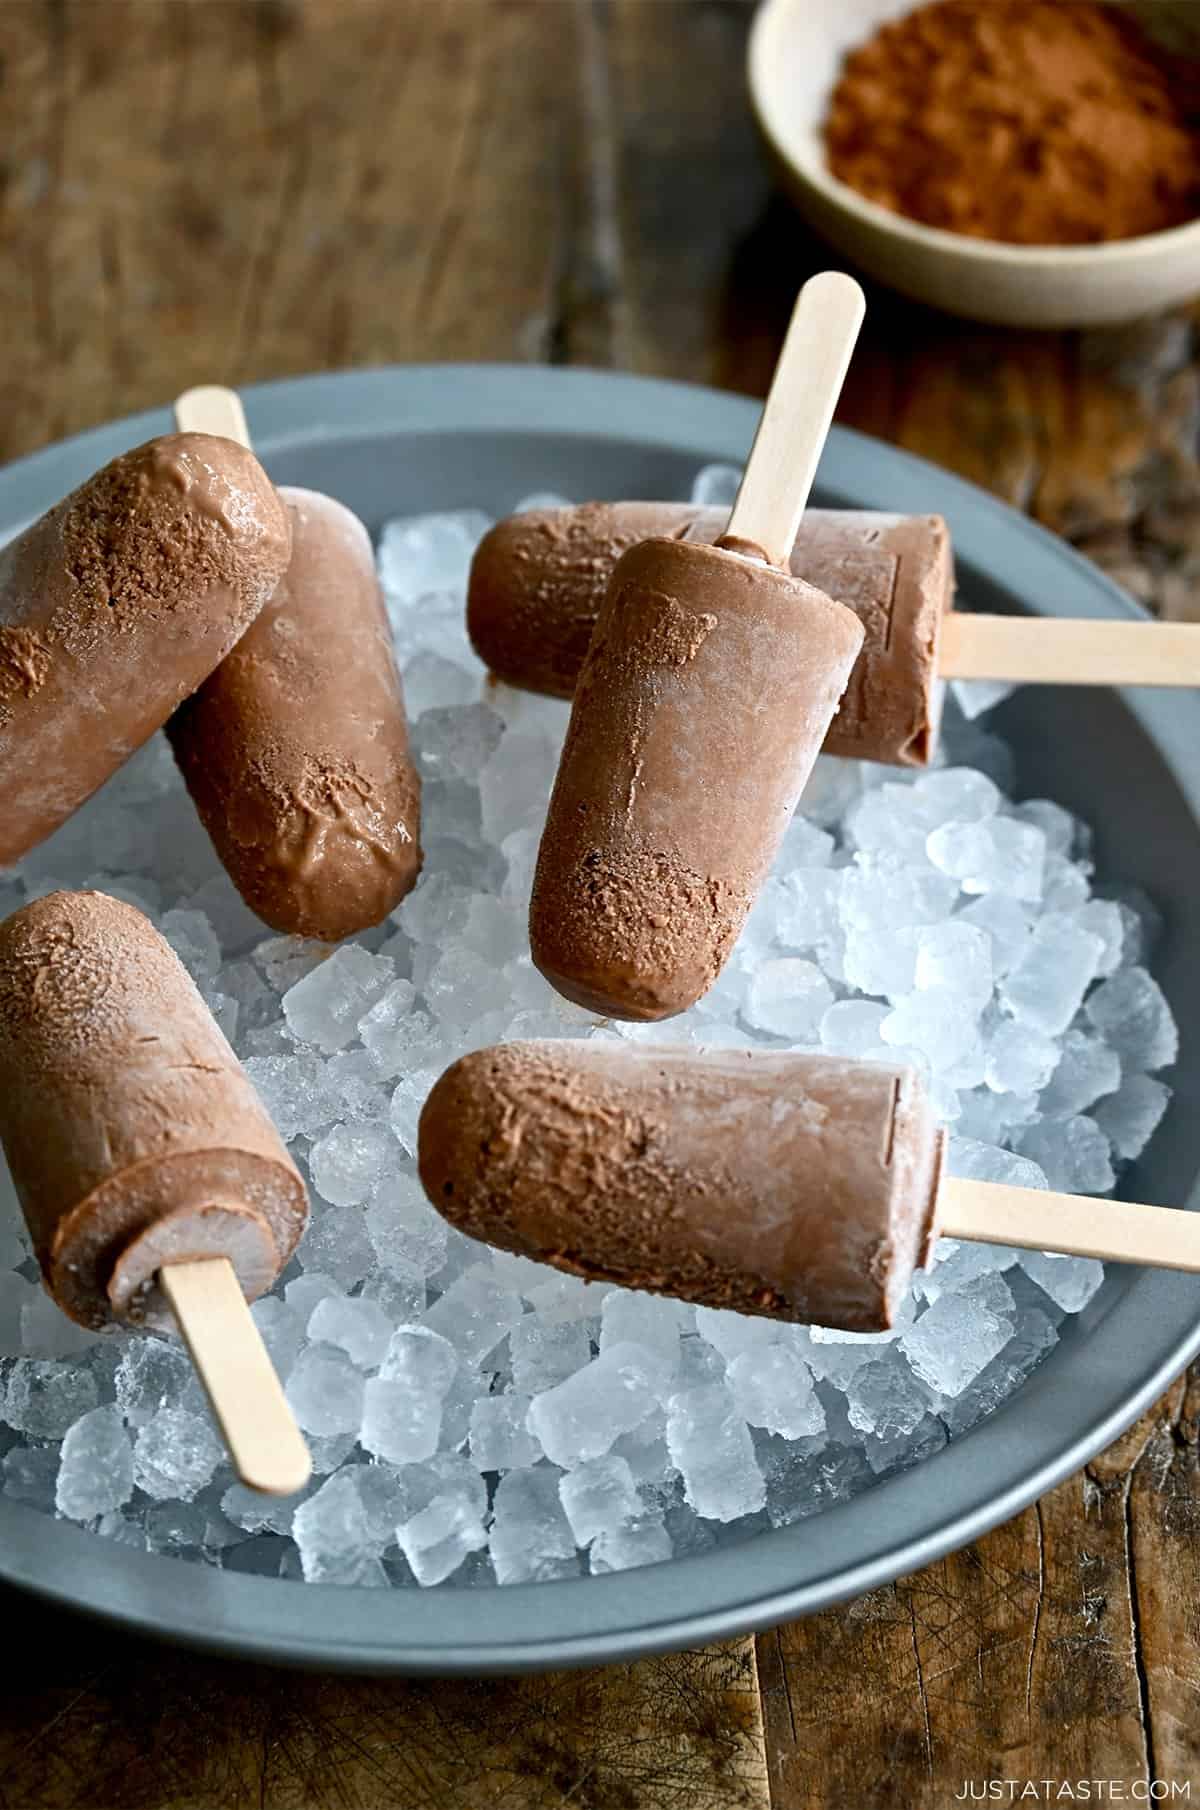
- Unmold and enjoy! Run the molds under warm water for 10–15 seconds to loosen. Gently wiggle the sticks to release each fudgesicle.
🍓Add strawberries! To throw it back to the original version of this recipe, place 1–2 tablespoons of sliced strawberries into each mold before adding the chocolate mixture. Totally optional but super fun and fruity!
How to Store
Store popsicles in a freezer-safe container or bag (sealed tightly to prevent freezer burn). They’ll stay delicious for up to 2 months, although they rarely last that long!
FAQs
Corn syrup is key to that classic fudgy, creamy texture, but if you’d rather skip it, try replacing it with maple syrup or honey. The pops may not be quite as smooth, but they’ll still be delicious.
I don’t recommend it. Chocolate milk often contains added sugar and thickeners that can throw off the balance and texture of the fudge pops. Stick to plain milk and unsweetened cocoa for the richest, creamiest results.
This can happen if the mixture isn’t cooled before freezing or if the ingredients weren’t fully whisked to dissolve the sugar and cocoa. Corn syrup also helps prevent iciness by lowering the freezing point, so don’t skip it unless you’re okay with a slightly icier texture.
Yes! Full-fat canned coconut milk works best for a creamy result. Note that the flavor and texture may vary slightly.
Equipment
- Popsicle mold
- Popsicle sticks
Ingredients
- 3 cups 1% milk
- 1 cup sugar
- 3/4 cup unsweetened cocoa powder
- 1/4 cup light corn syrup
- 1/4 teaspoon salt
- 1 teaspoon pure vanilla extract
Instructions
- Combine milk, sugar, cocoa powder, corn syrup and salt in a medium saucepan over low heat, whisking until sugar has dissolved.
- Remove mixture from heat and stir in vanilla.
- Cool mixture to room temperature by placing the pan in a bowl of ice water and stirring occasionally. (Be careful that the ice water doesn’t overflow into the pan.)
- Once cooled, carefully pour the mixture into your popsicle molds. Leave a tiny bit of space at the top to allow for expansion as they freeze. Freeze for 1 hour, insert the popsicle sticks, and then continue freezing until solid, about 24 hours.
- When ready to serve, run warm water over the molds to release fudgesicles.
Kelly’s Notes
- I use 1% milk for a lighter texture that still tastes rich and creamy. You can use 2% or whole milk for extra indulgence, or go dairy-free with oat or almond milk (just know the texture may vary slightly).
- Corn syrup is key to that classic fudgy, creamy texture, but if you’d rather skip it, try replacing it with maple syrup or honey. The pops may not be quite as smooth, but they’ll still be delicious.
- Add strawberries: To throw it back to the original version of this recipe, place 1–2 tablespoons of sliced strawberries into each mold before adding the chocolate mixture. Totally optional but super fun and fruity!
- Storage: Store popsicles in a freezer-safe container or bag (sealed tightly to prevent freezer burn). They’ll stay delicious for up to 2 months, although they rarely last that long!
- ★ Did you make this recipe? Don’t forget to give it a star rating below!
Nutrition
Did you try this recipe?
Leave a comment below with your star rating!
This post may contain affiliate links.
Recipe adapted from Gourmet.


Very delicious! Can these be made sugar free?
So glad you enjoyed the recipe, Susana! Using a sugar substitute could work but it depends on what you’re considering!
So delicious!!!!
Parabéns maravilhosas receitas!!!
Acriançada vai amar .
Lindas fotos,receitas bem elaborada tudo muito perfeito ,e deliciosas receitas amei.
Hi – these look so good! Is there a way to make them without having to use corn syrup?
Thanks!
I made these with raspberries, otherwise followed exactly EXCEPT no popsicle mold so I used little Dixie cups instead.
Yes! These look amazing! I love fudgesicles more now than I did when I was a kid. Okay… and be honest with me, how excited are you for Monday!!
TOO EXCITED! Except that I read a spoiler, dang it :)
ummm these look and sound amazing! I’ve been wanting to make fudgesicles! I just need to get an ice pop container mould. You crack me up about the heat–come down to Florida then you can really complain! lol.
This looks like the perfect way to get through even the worst of summer heat waves.
LOL! The pop quiz was funny. I’m flying into NYC tomorrow and it seems like the heat wave has passed…hopefully!
perfect resolution to the hot weather, we have it too. These are amazing, Kelly!
These look amazing! What a good idea :) Can’t wait to make these…even though it’s perfect 79 degrees here in San Diego!
yum these look perfect for this time of year
How beautiful! Sorry about the heat wave :/