Skip the store-bought frosting in favor of this 6-ingredient chocolate buttercream frosting that takes just 5 minutes to make. My go-to recipe since 2015, it’s rich, fluffy and perfect for frosting cakes, cupcakes, brownies and more.
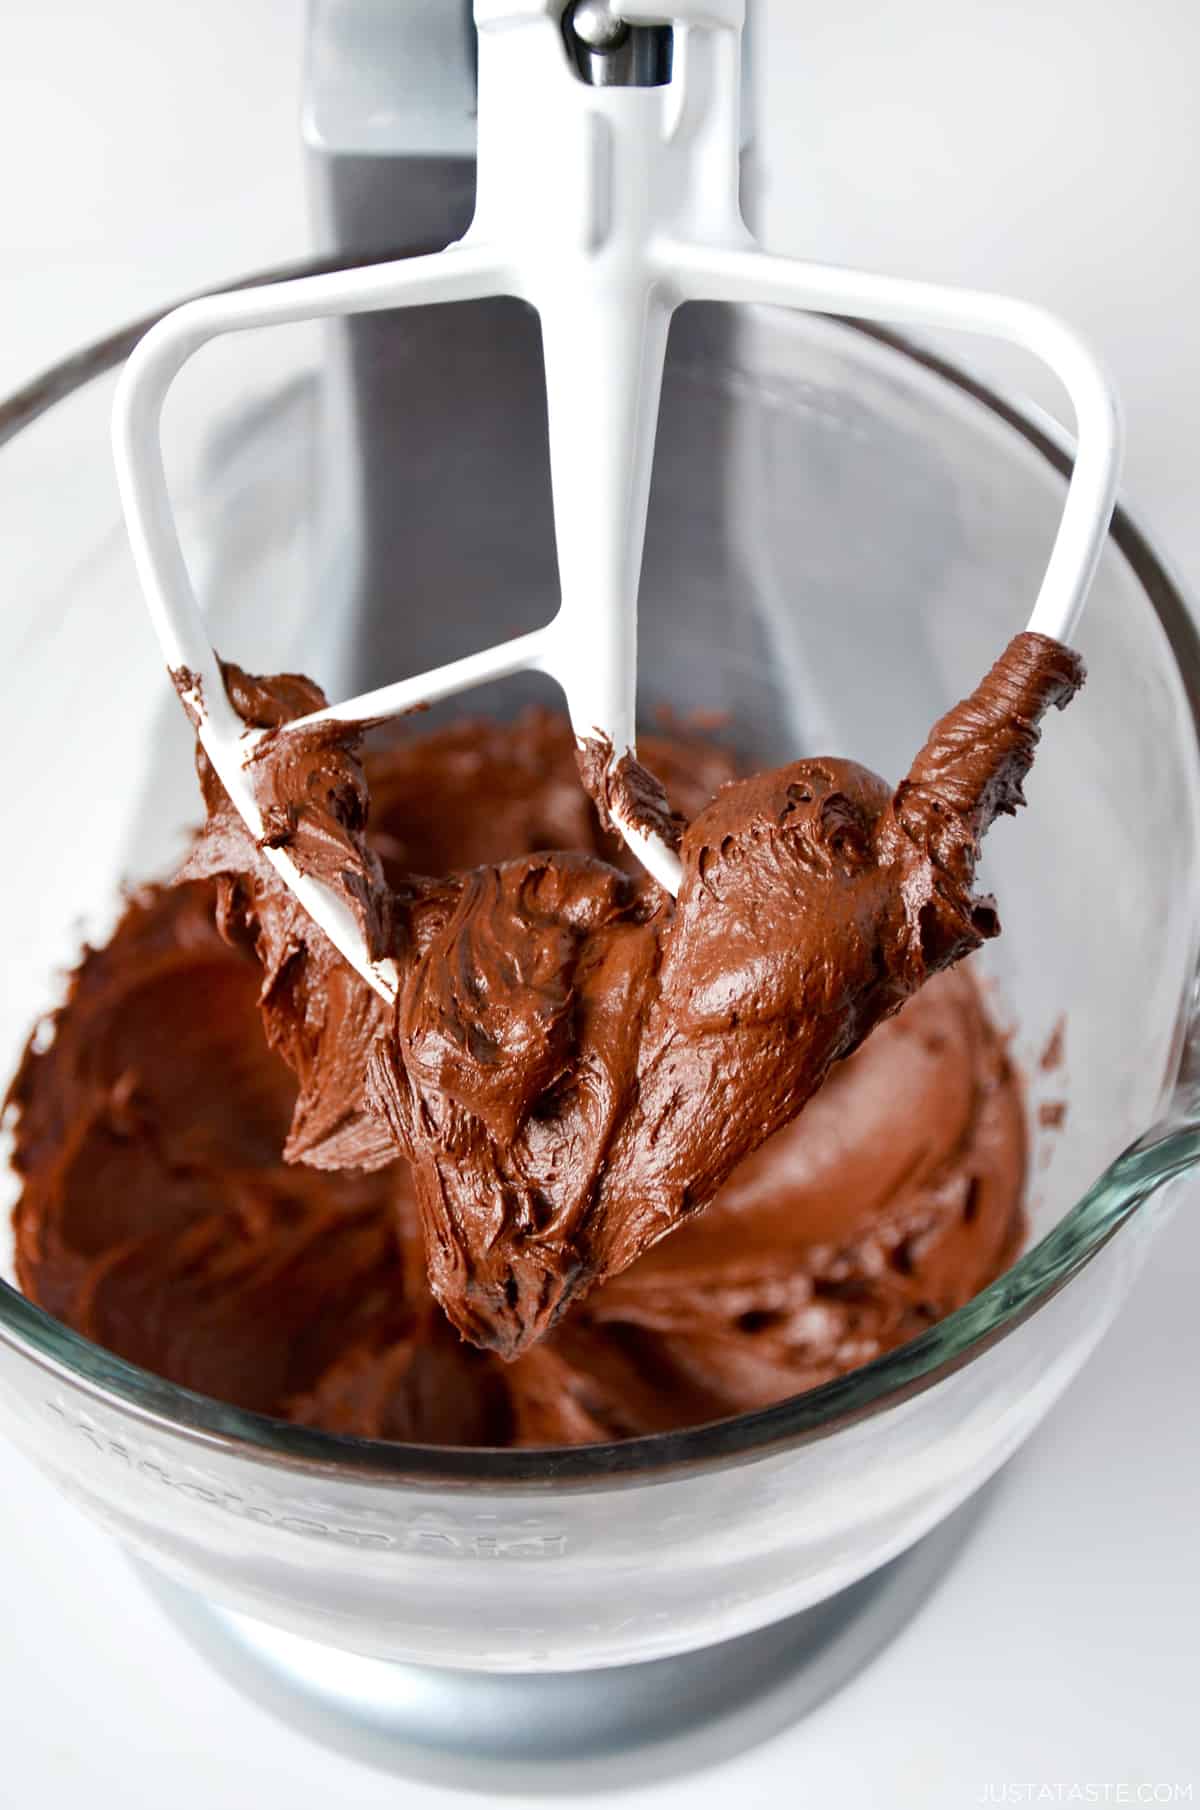
Table of Contents
I have a confession: Chocolate buttercream frosting used to be a store-bought staple in my kitchen. Who has time to make frosting from scratch when you can toss a tub into your cart and call it a day?
But after a reader emailed asking for an easy chocolate buttercream frosting recipe (to follow up on my vanilla buttercream), I finally ditched the pre-made stuff and went the DIY route.
Little did I know that just 5 minutes and a few pantry staples later, I’d be licking the spatula clean—this is hands-down the best chocolate buttercream ever to cross my lips. Rich, creamy, chocolatey perfection… and ready in minutes.
How to Make Chocolate Buttercream Frosting (Video)
Watch how this rich, fluffy chocolate buttercream frosting comes together in just 5 minutes with pantry staples!
No fancy preservatives. No seven-syllable ingredients. Just six simple ingredients:
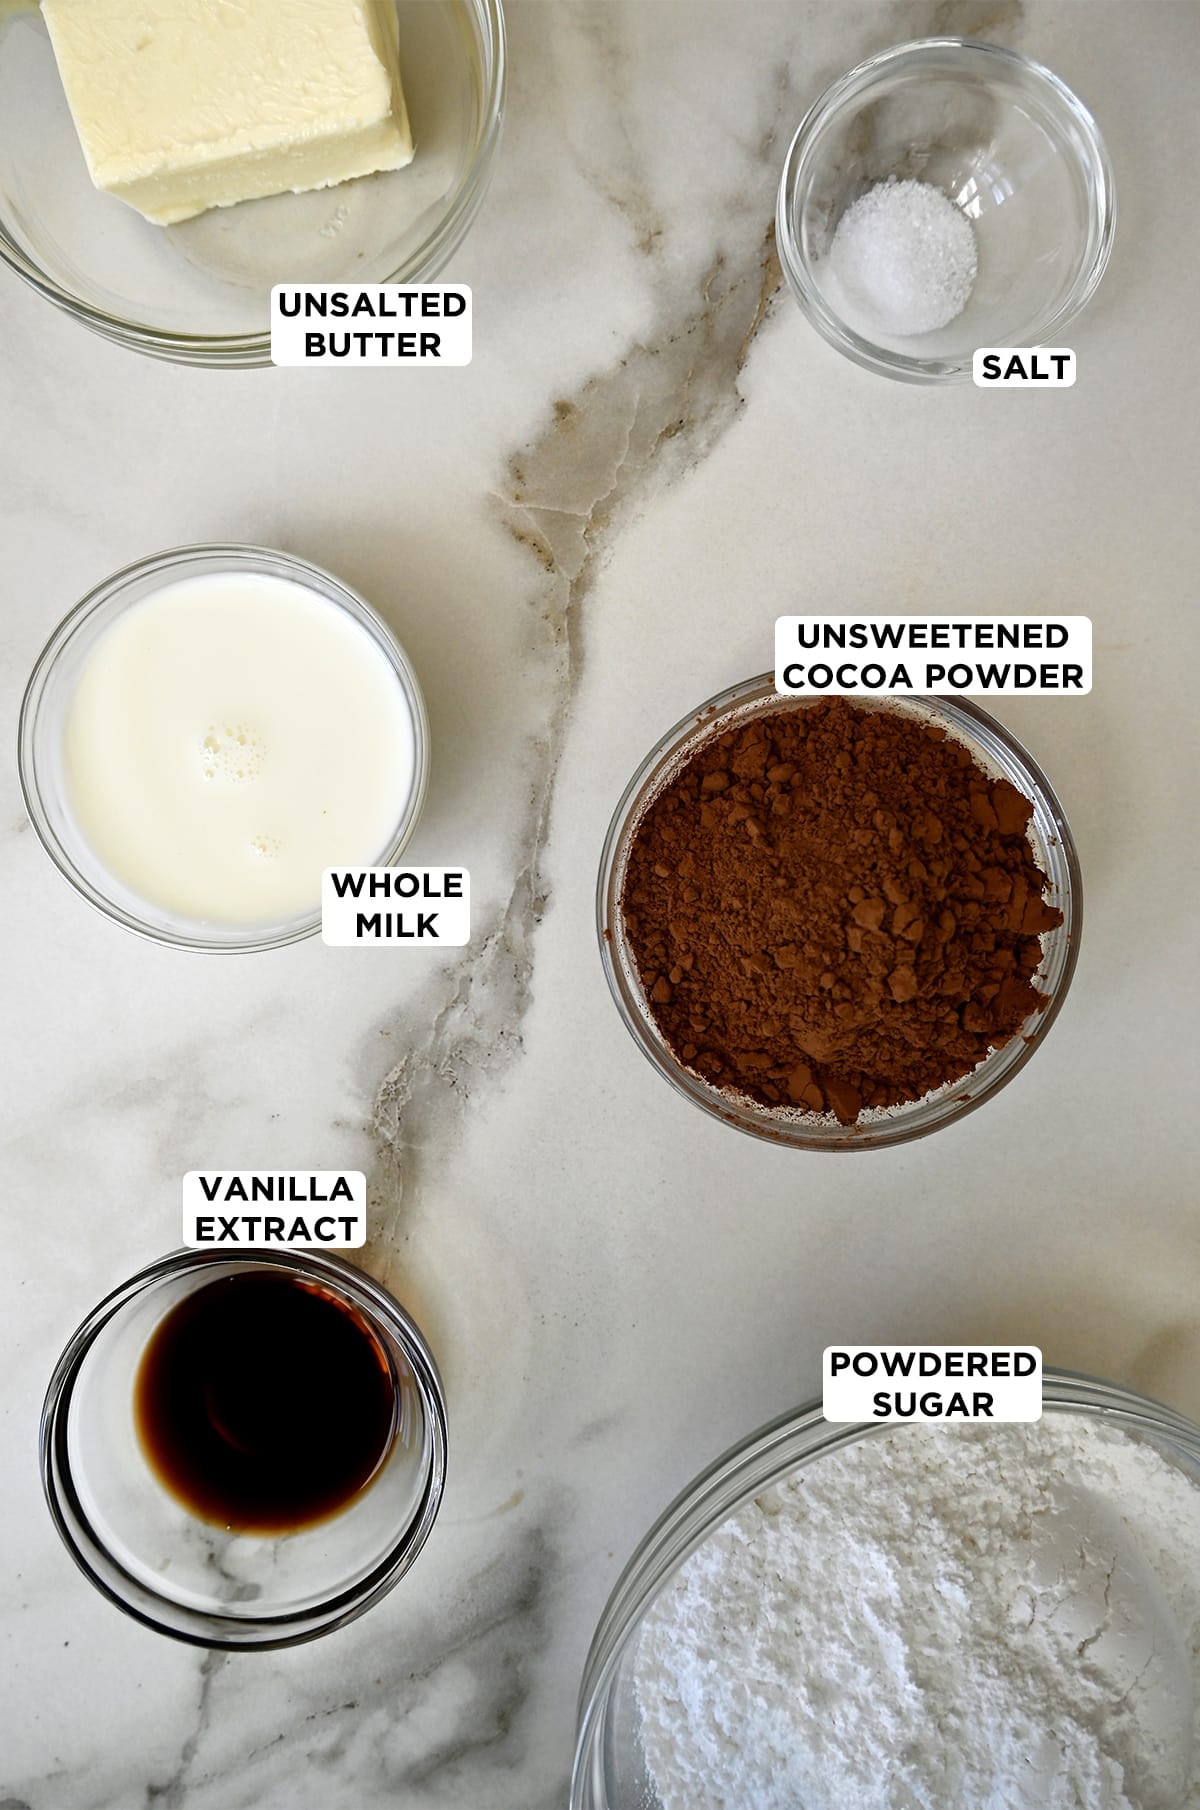
- Unsalted butter: Make sure it’s softened to room temperature before you start. It should be cool to the touch and give slightly when pressed. Avoid melting it—soft, not soupy, is key to fluffy frosting.
- Unsweetened cocoa powder: Natural or Dutch-process both work well here. Just skip any cocoa mix with added sugar so you stay in control of the sweetness. This is what gives the frosting its deep chocolate flavor without needing melted chocolate.
- Confectioners’ sugar: Also known as powdered sugar. It dissolves easily for that silky-smooth texture.
- Milk: Whole milk gives the creamiest consistency, but any milk will work. Just know that lower-fat and non-dairy options may yield a slightly thinner frosting.
- Vanilla: Use pure vanilla extract for the best flavor.
- Salt: My secret ingredient! Just a pinch of salt helps balance out the sweetness and round out the flavors.
See the recipe card for full information on ingredients and quantities.
I usually make this in my stand mixer, but a hand mixer works great, too! Just know the texture might be a bit less silky, but still totally spreadable and delicious.
Kelly’s Note: Some bakers swear by sifting the cocoa powder and powdered sugar, but I say skip it. Follow this recipe and you’ll get silky-smooth frosting—no extra steps needed.
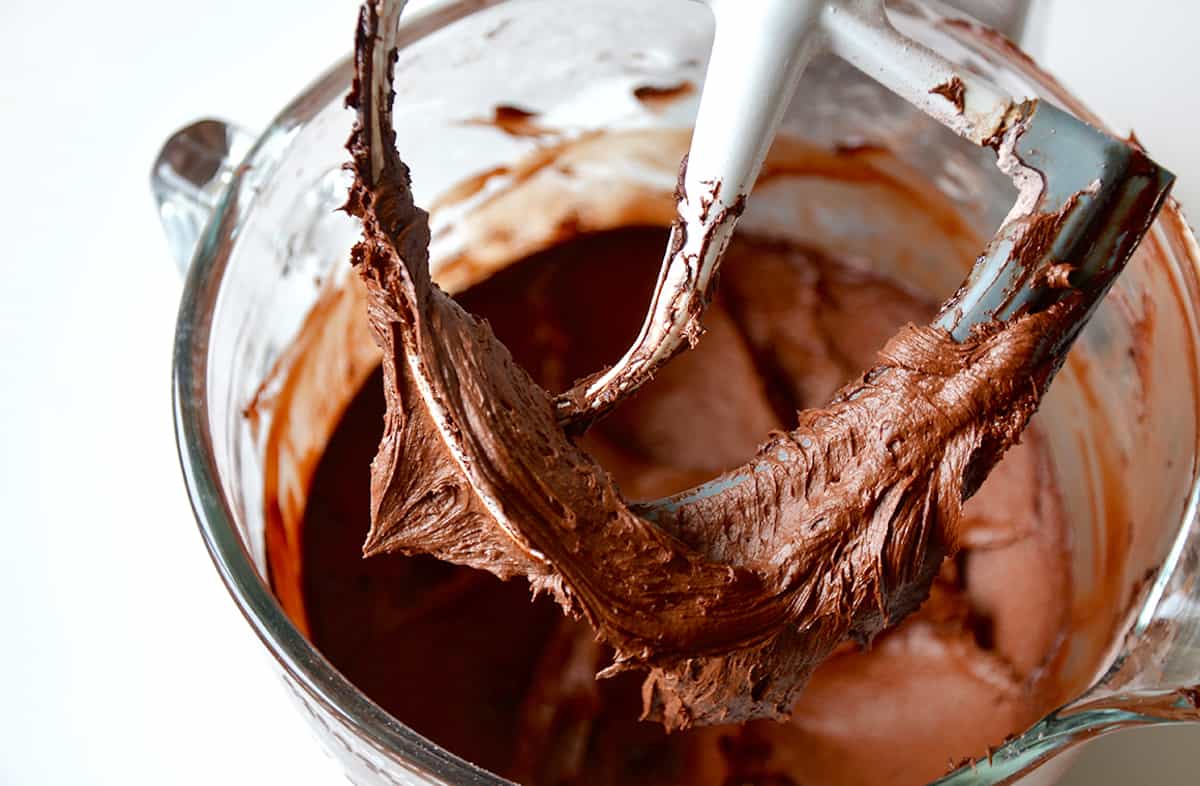
- Beat the butter. In the bowl of a stand mixer fitted with the paddle attachment, beat the butter on medium speed until it is smooth. This will take about 1 minute.
- Add the confectioners’ sugar and cocoa powder to the bowl and beat until combined.
- With the stand mixer running on low speed, slowly stream in the milk and vanilla extract. Add the salt and continue beating until well combined. Be sure to scrape down the sides as needed so everything gets incorporated.
- Increase the speed to high and beat the frosting for an additional 2 minutes.
Kelly’s Note: The key to achieving a light and smooth buttercream is giving it a good beating. The longer you whip it, the more air gets incorporated, resulting in a lighter and smoother texture. By the end, your buttercream should be a lighter color than when you started.
How Much Frosting Does This Make?
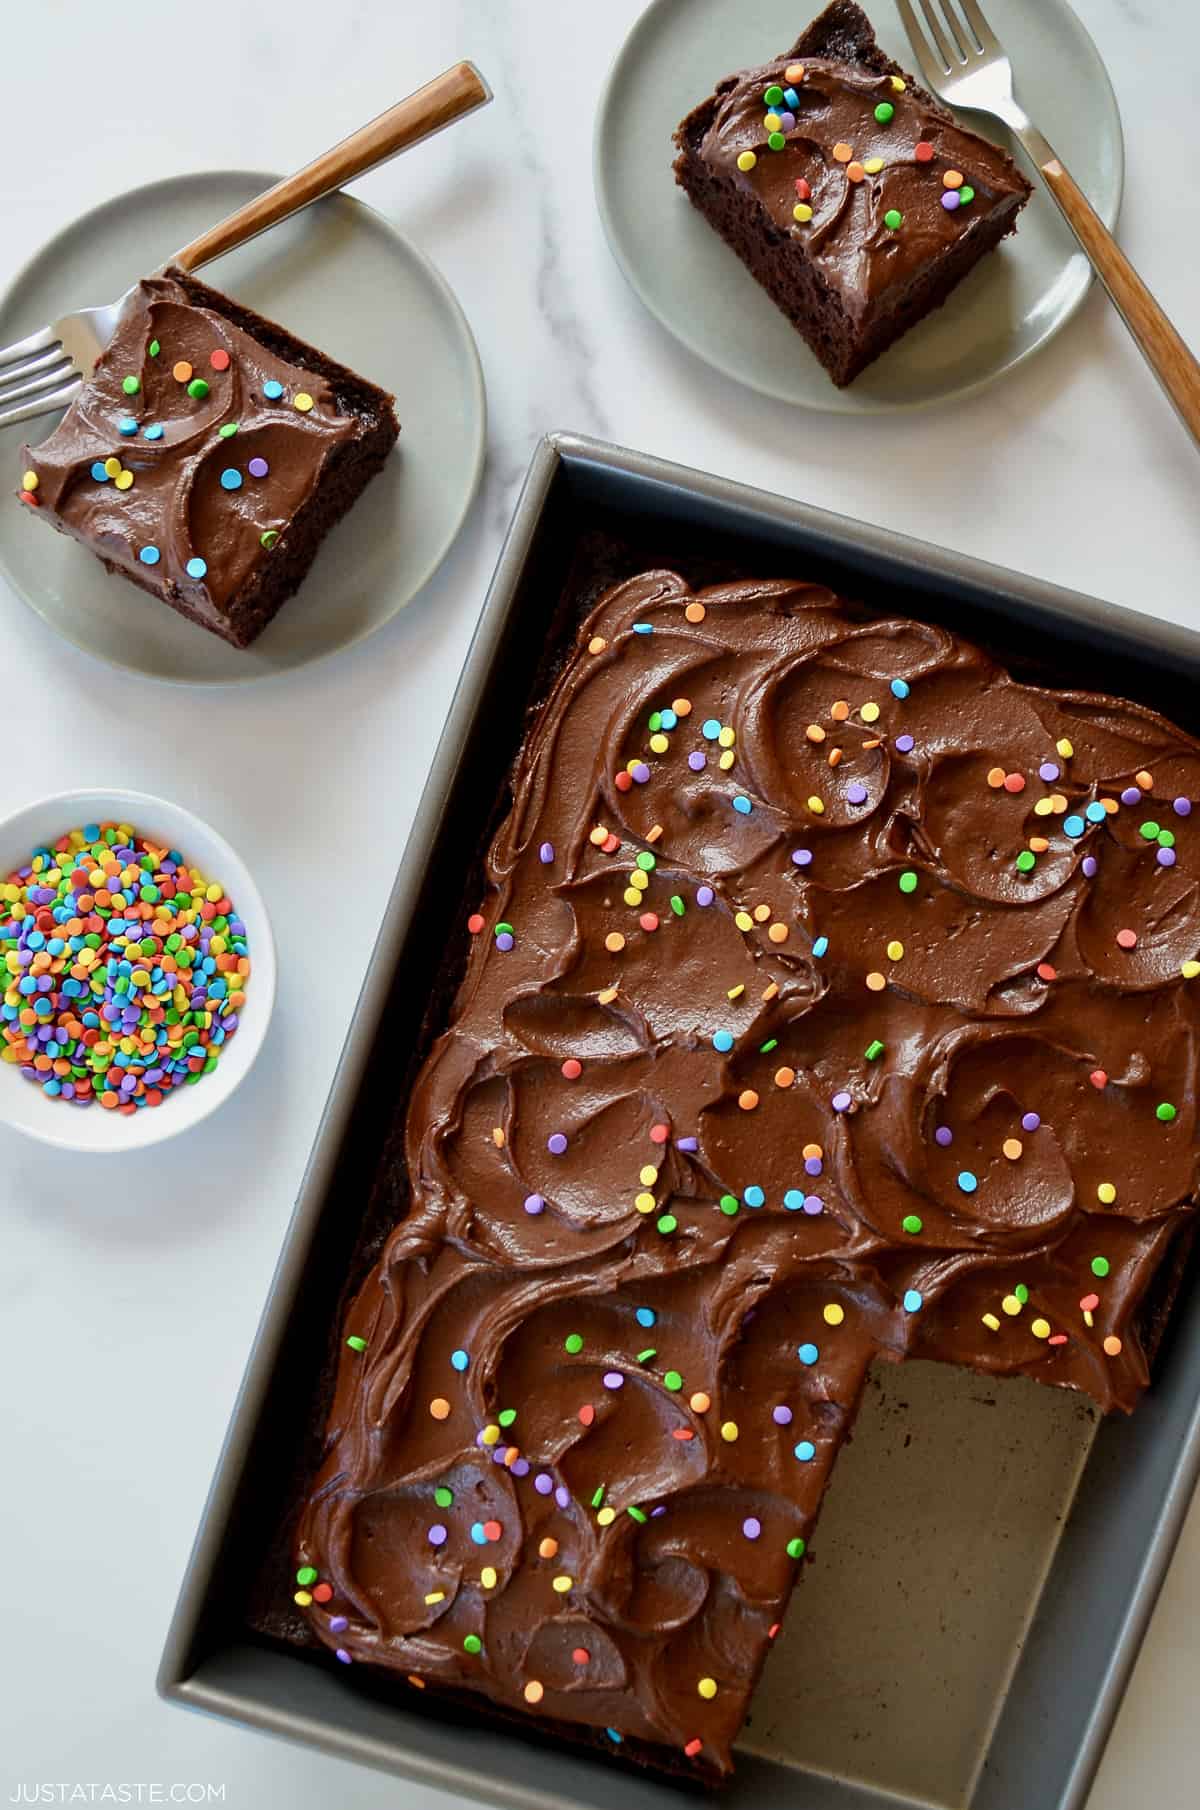
This recipe yields 2 cups of chocolate frosting or about enough to frost 1 ½ – 2 dozen cupcakes or a 9 x 13 sheet cake.
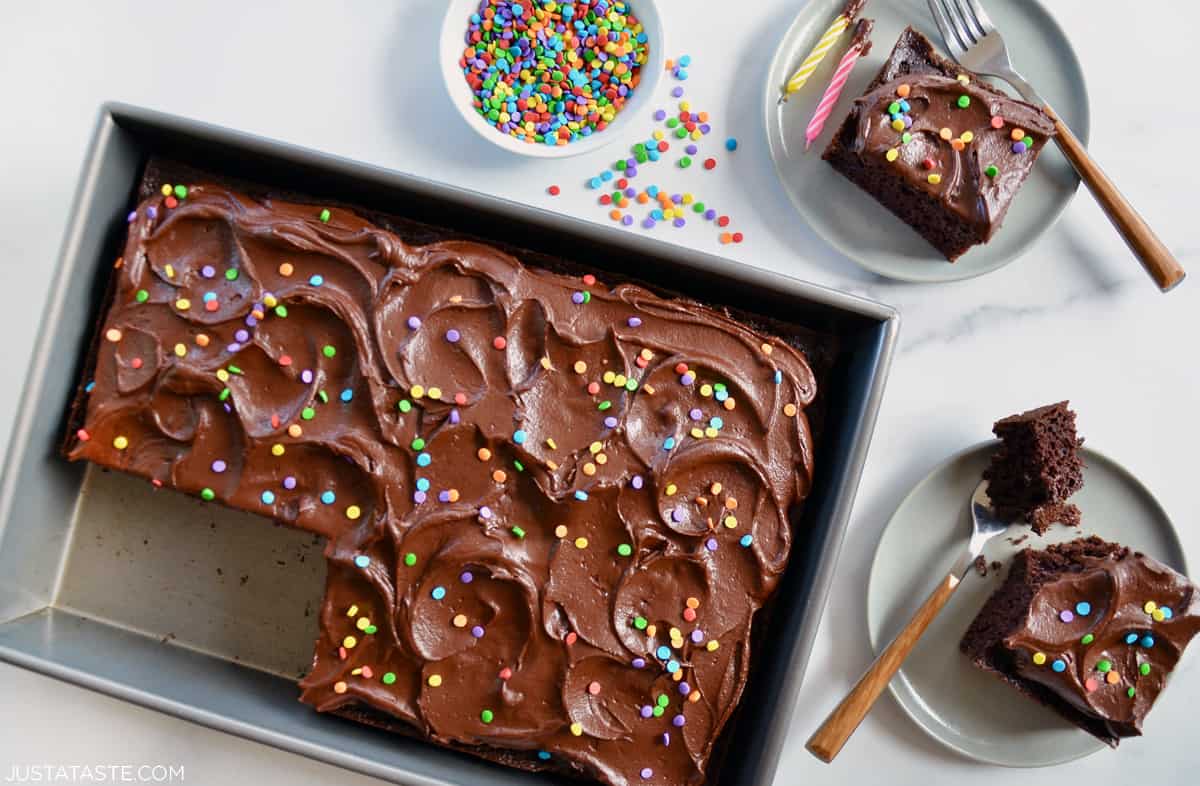
If you’re frosting a 2 layer cake, I recommend doubling the recipe as I’d rather you have ample frosting than not enough. This chocolate buttercream is especially fantastic on my chocolate cake recipe—it’s a match made in dessert heaven!
- Use good quality cocoa powder. The better the quality, the better the taste of your frosting. Natural cocoa powder has a brighter, more acidic flavor, while Dutch-processed cocoa is treated with an alkaline solution, resulting in a milder, smoother taste.
- This recipe can be easily doubled for all my fellow chocoholics out there.
- Use the beater blade with your stand mixer (rather than the whisk). It’ll result in creamy frosting that lightens in color the longer it’s mixed.
- This chocolate frosting pipes like a dream. I love using it for chocolate cupcakes—and if you’re feeling fancy, try my easy trick for piping two-tone swirled frosting. All you need is a piping bag, some plastic wrap and a little confidence. The result? Bakery-worthy cupcakes with that wow-factor swirl.
- If your frosting is runny: Add additional powdered sugar, ¼ cup at a time, until the frosting reaches your desired consistency.
If your frosting is too thick: Slowly add more milk until the desired consistency is reached.
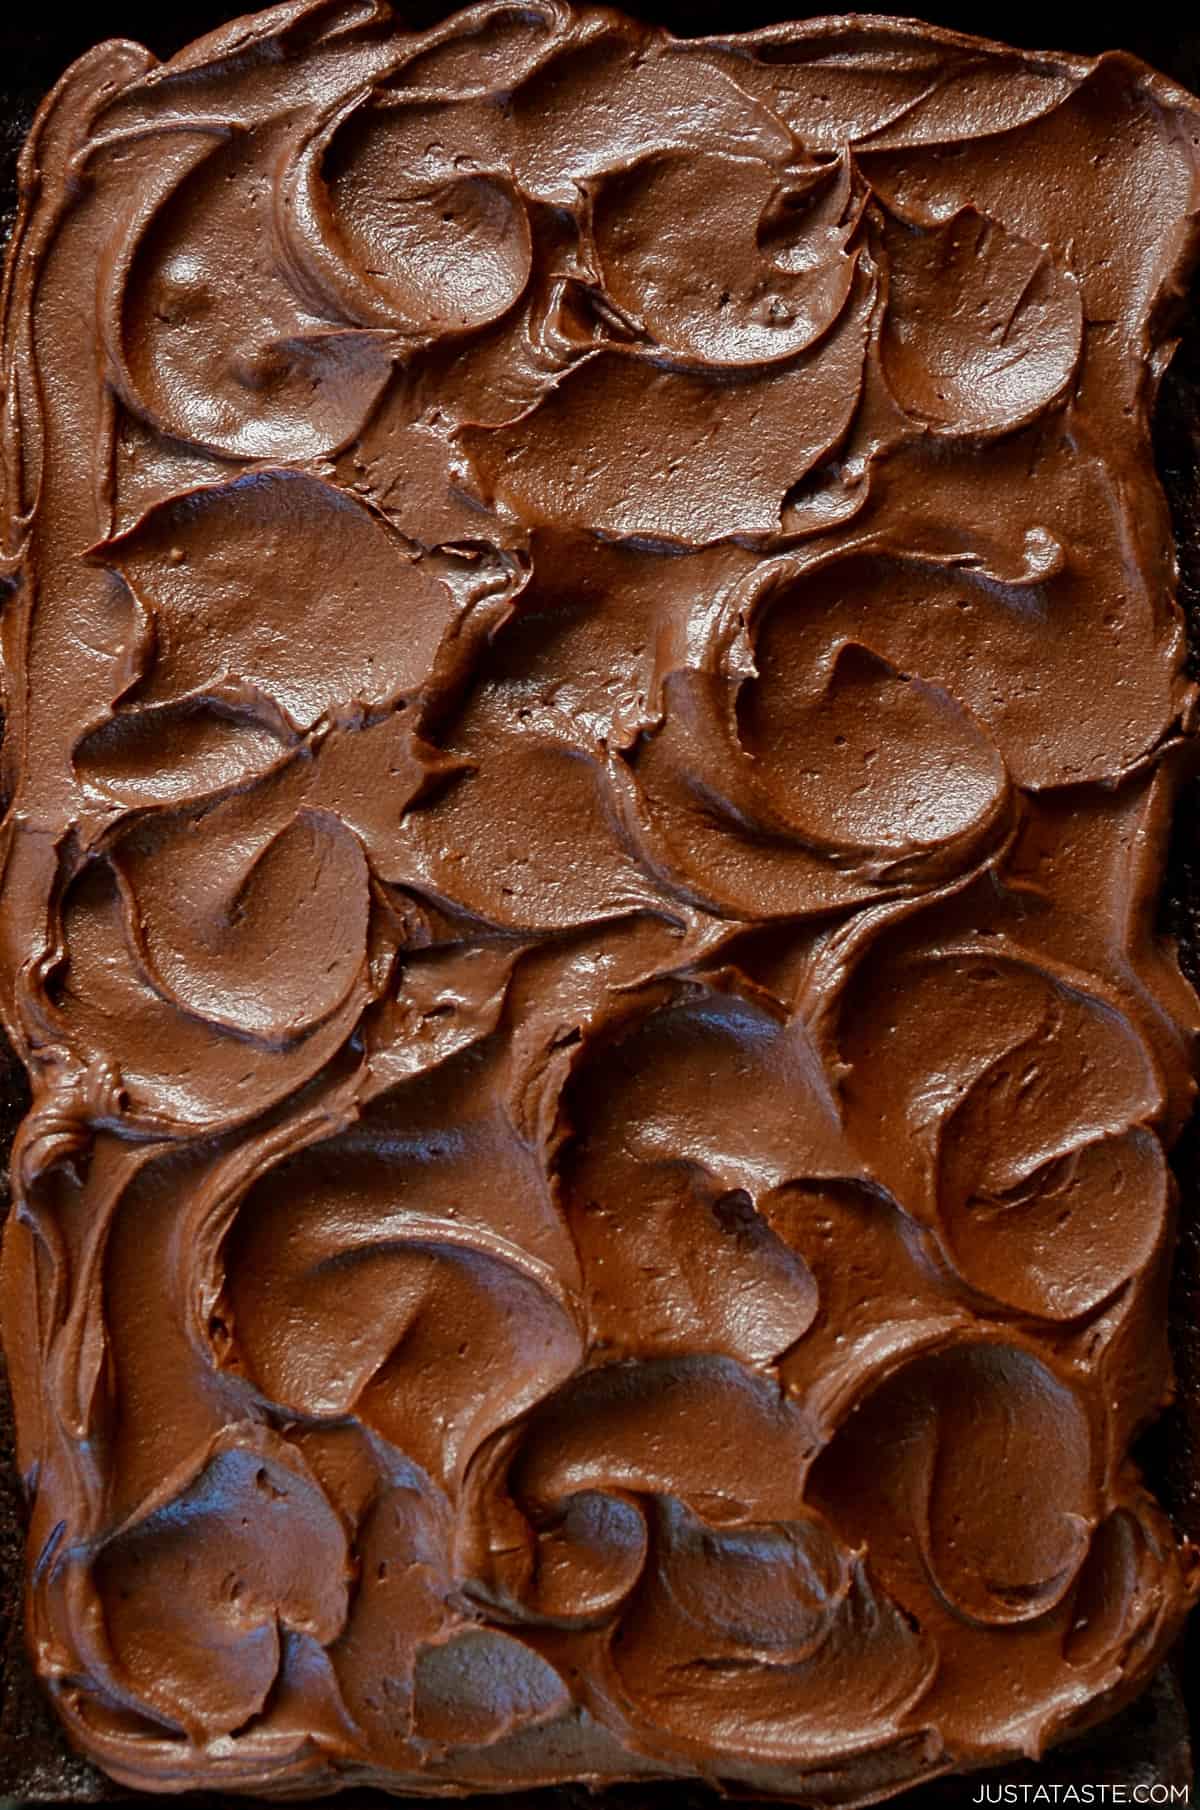
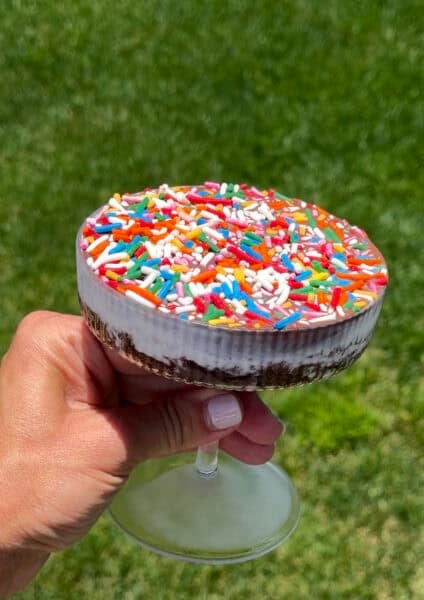
Pro Decorating Tip: Grab a small spoon and use the back of it to make luscious, deep swirls and create the perfect peaks and valleys for a shower of sprinkles in every color.
Ways to Use This Chocolate Buttercream Frosting
This rich, velvety frosting is the ultimate finishing touch for cakes, cupcakes, cookies, brownies—you name it. Here are a few of my favorite treats to frost, swirl or slather with this easy chocolate buttercream:
Storage Tips
Store any leftover chocolate buttercream in an airtight container in the fridge for up to 5 days. When you’re ready to use it, let it come to room temperature, then give it a quick mix with a spoon or electric mixer to bring back that creamy texture.
Can I freeze chocolate buttercream? I go both ways when it comes to this question! Yes, you absolutely can freeze buttercream, but to keep that silky-smooth consistency, it’s all about how you thaw it. Once your frosting is frozen solid (in an airtight container), bring it to room temp slowly in the fridge. Then re-whip it in a stand mixer to bring back the fluffy texture.
FAQs
A decorated cake with buttercream frosting can be stored at room temperature for up to 3 days. However, if it’s hot or humid where you live, store the cake in the fridge.
Absolutely! But you might need to adjust the quantity since it’s a bit thicker.
Yes, you can, but be mindful of the overall saltiness. Adjust the added salt accordingly or omit it if using salted butter.
I haven’t tried this substitution but it should work. However, you might need to adjust the quantity since it’s a bit thinner.
The most common culprit is that the sugar didn’t dissolve into the butter properly, so really take your time to cream the ingredients together.
Balance sweetness by adding more cocoa powder or a pinch of salt. Adjust gradually, tasting as you go.
Chocolate buttercream is a type of chocolate frosting that includes butter as a base, making it richer, creamier, and easier to pipe than some other types of chocolate frosting.
Ingredients
- 6 Tablespoons unsalted butter, softened
- 2 1/3 cups confectioners’ sugar
- 3/4 cup unsweetened cocoa powder
- 1/3 cup whole milk
- 2 teaspoons vanilla extract
- 1/4 teaspoon salt
Instructions
- In the bowl of a stand mixer fitted with the paddle attachment, beat the butter on medium speed until it is smooth, about 1 minute.
- Add the confectioners’ sugar and cocoa powder to the bowl and beat until combined. With the stand mixer running on low speed, slowly stream in the milk and vanilla extract then add the salt and continue beating until well combined, scraping down the sides as needed, about 2 minutes.
- Increase the speed to high and beat the frosting for an additional 2 minutes. Use the frosting immediately or store in an airtight container in the fridge. (If you refrigerate the frosting, you may want to re-blend it for a few seconds in the stand mixer before using it.)
Video
5-Minute Chocolate Buttercream Frosting
This will be the richest, creamiest, most delicious Chocolate Buttercream Frosting to ever cross your lips. It’s silky smooth, made with six simple ingredients and has a rich chocolate flavor. It’s perfect for frosting cakes, cupcakes, brownies and more! FULL RECIPE: https://www.justataste.com/5-minute-chocolate-buttercream-frosting-recipe/
Kelly’s Notes
- This recipe yields 2 cups of frosting or about enough to frost 1 ½ – 2 dozen cupcakes or a 9 x 13 sheet cake.
- If you’re frosting a 2 layer cake, I recommend doubling the recipe as I’d rather you have ample frosting than not enough.
- No stand mixer? No problem! You can make this using a large bowl and a hand mixer.
- Use good quality cocoa powder. The better the quality, the better the taste of your frosting.
- This recipe can be easily doubled.
- Use the beater blade with your stand mixer (rather than the whisk). It’ll result in creamy frosting that lightens in color the longer it’s mixed.
- If your frosting is runny: Add additional powdered sugar, ¼ cup at a time, until the frosting reaches your desired consistency.
- If your frosting is too thick: Slowly add more milk until the desired consistency is reached.
- Store the chocolate buttercream in an airtight container in the fridge for up to five days. When ready to use, allow it to come to room temp and mix with a spoon or electric mixer.
- ★ Did you make this recipe? Don’t forget to give it a star rating below!
Nutrition
Did you try this recipe?
Leave a comment below with your star rating!
This post may contain affiliate links.
Recipe by Kelly Senyei of Just a Taste. Please do not reprint this recipe without my permission. If you'd like to feature this recipe on your site, please rewrite the method of preparation and link to this post as the original source.


My teen daughter made this and it is wonderful!! Frosted a 9×13 pan with plenty leftover! I added a little coconut cream to the leftover and it is so, so good on vanilla ice cream!
So glad you enjoyed the recipe, Heather!
Easy recipe but insanely sweet.
I felt like it was too much coco powder. I thought that as I was making it. I should have listened to my gut feeling. It had a strong bitter chocolate taste to it. I kept adding more powdered sugar to not have it be so powerful. I made the frosting for brownies for a funeral luncheon for my church. A bit worried about how they will taste.
Also wanted to note. I used evaporated milk instead of whole milk. Again, it came out so good. It was hard not to eat it before I put it on the cake.
So glad you enjoyed it, Kris!
Best chocolate buttercream ever. I made the 2 cup for a 13 x 9 cake I made. I made this frosting did not use the mixer. Just used a whisk and it came out perfect!!!
Love reading this!
yum thx
So glad you enjoyed it!
This was delicious and easy! I was able to frost a 2 layer 9″ round cake with plenty to spare.
I’m thrilled you enjoyed the recipe, Rebecca!
I cannot find the recipe card with the amount of ingredients needed.
Hi Lisa! If you scroll up you’ll see the full recipe card.
Can I use heavy whipping cream instead of whole milk?
You can, but you just might need less since it’s thicker!
I made two 9 inch cakes and doubled the recipe. It wasn’t good. Densely chocolate. The butter amount wasn’t enough.
This turned out really well- thank you. (I halved it and it turned out perfectly.)
I’m thrilled you enjoyed the recipe, Autumn!
My new “go to”! It covered 24 cupcakes, as it said it would! I use an offset spatula and not a piping bag – I had leftover (never a bad thing).
Thanks !!
You are so welcome, Faith! I’m thrilled you enjoyed the recipe!
Can I use maple syrup instead of confectioners sugar?
Hi Lauren – That sub won’t work!
This recipe doesn’t really make enough for a two layer cake. I followed the recipe exactly and didn’t have enough to cover the cake.
Hi Bill – What size were the layers?
I am making my daughter a smash cake and want to make this icing but I will way too much! Could I cut this in half? would it still work? Thanks!!
Hi Alexis! You can definitely cut the recipe in half.