
Pan-searing is the easiest way to cook a steak from the comfort of your kitchen. I’ll walk you through every step, from choosing your cut and seasoning, to picking the right pan for that perfect sear, plus how to test for doneness. So cancel those steakhouse reservations and get ready for golden crusts, juicy centers and restaurant flavor at home.

Table of Contents
How do you cook the perfect steak?

It’s an age-old question with as many answers as there are cuts of beef. Do you bake it, broil it, sear it, grill it? The options are truly endless, but when it comes to cooking the perfect steak, I turn time and time again to a restaurant-tested technique: a hot pan and a quick sear.
This stovetop method transforms steak from a special-occasion splurge into an easy, weeknight-worthy meal. And the best part? You don’t need a grill or any fancy equipment — just a cast-iron or stainless steel skillet (more on that below!), high heat, and a few pro tips I learned in culinary school (plus plenty of home kitchen trial and error).
Ready to master how to cook steak on the stovetop? Let’s dive in!
Best Steaks for Pan-Searing
The best steak for cooking on the stovetop comes down to 2 things: thickness and marbling.
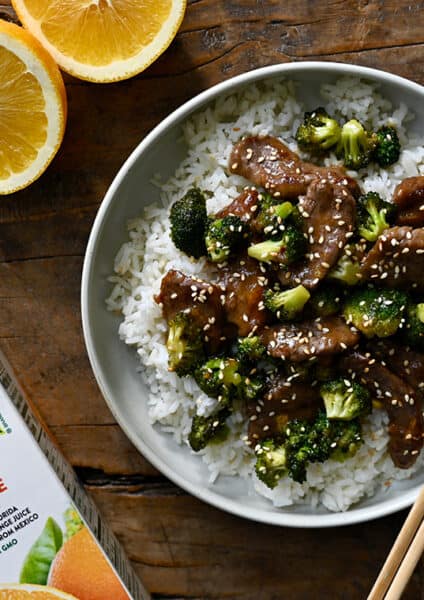
- Use boneless steaks that are between 1 and 1.5 inches thick. Thin steaks (like flank or flat-iron) can be pan-seared, but you’ll need to work fast (I reserve those for whipping up beef stir-fry). Thicker steaks (over 2 inches, like a big filet mignon or porterhouse) benefit from a sear-then-oven finish so the inside cooks without burning the crust. Boneless steaks also cook more evenly in a pan since bones act as insulators, which can throw off the doneness near the bone.
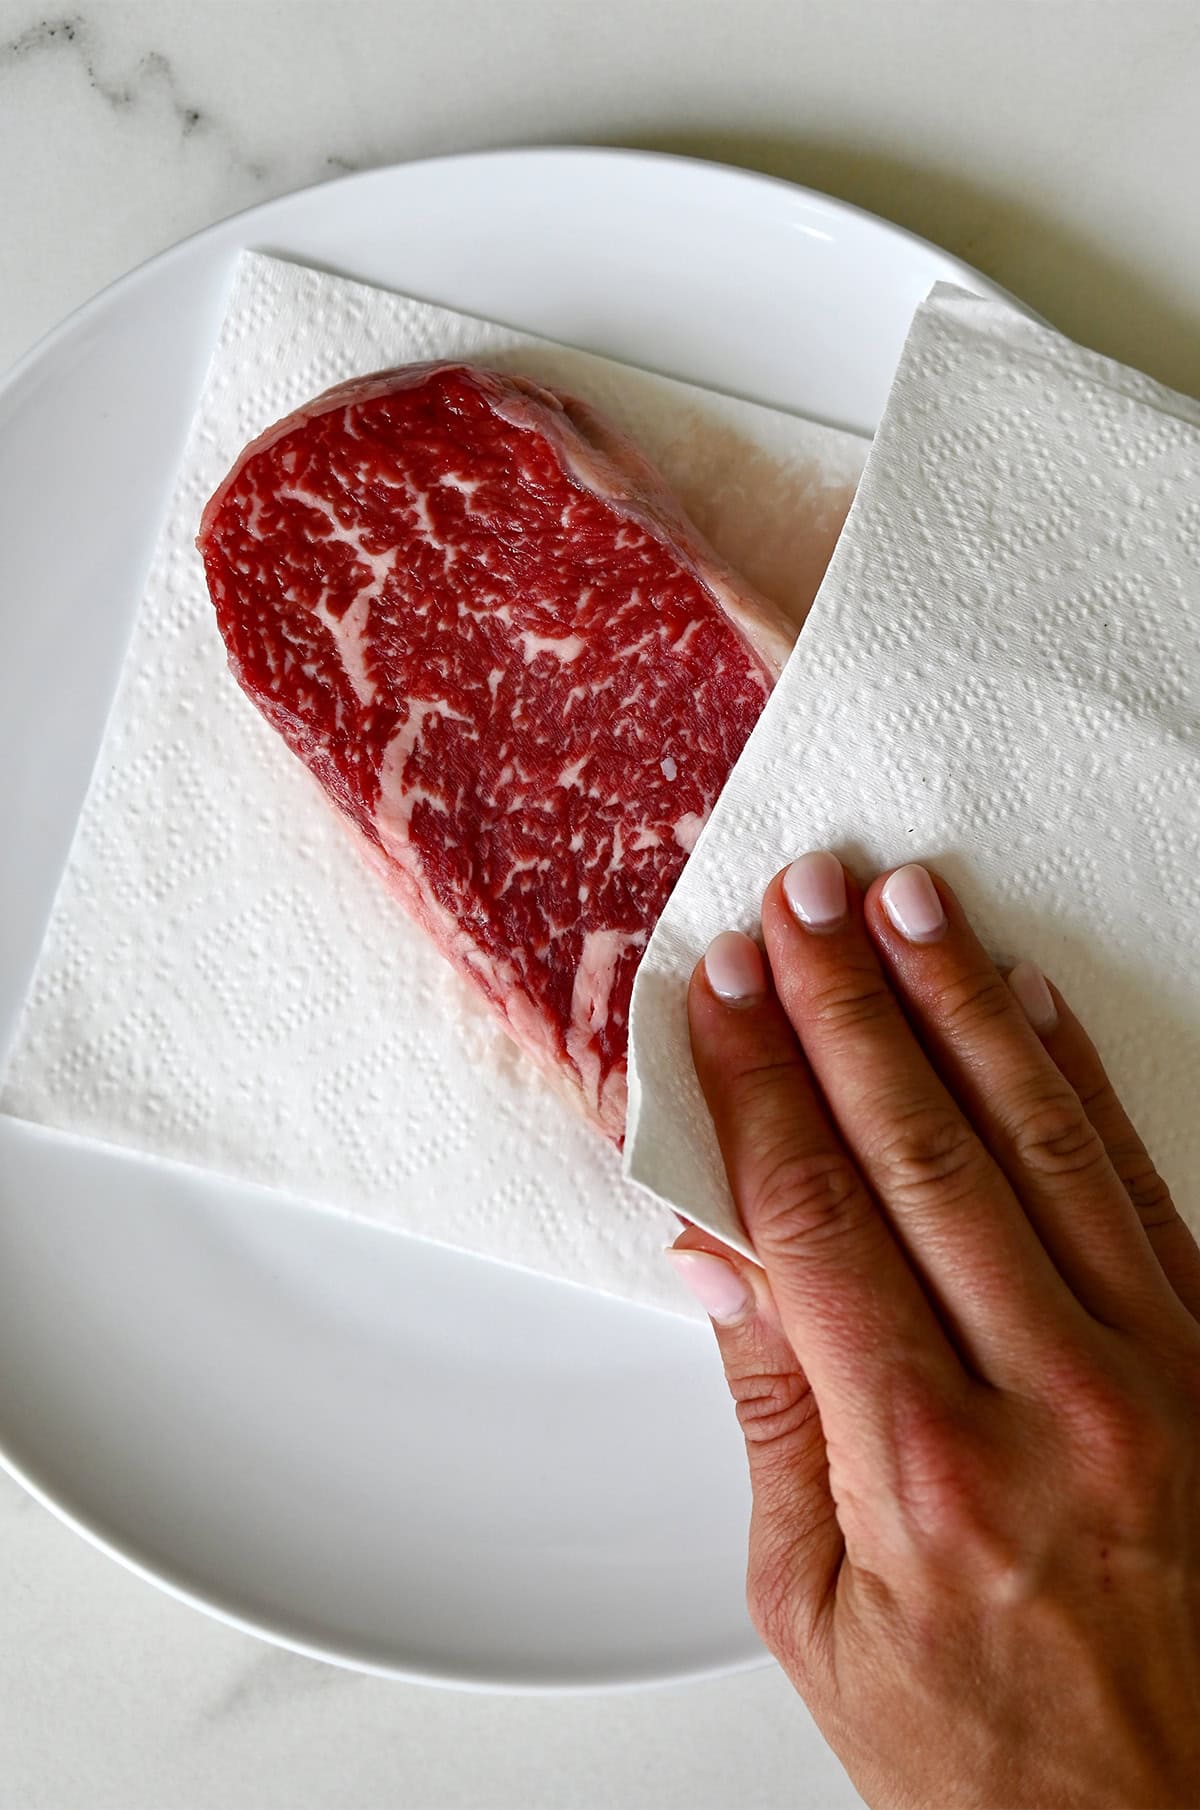
- Marbling = flavor. That visible web of white intramuscular fat that runs throughout the muscle tissue of any cut of beef is called “marbling.” That’s your built-in flavor insurance. When cooked, that intramuscular fat in highly marbled steaks liquifies, creating a self-basting effect for a juicy, tender, more flavorful steak. Leaner cuts of beef with less marbling will have less flavor.
My Favorite Cuts for Pan-Searing
- New York Strip: Great balance of flavor and tenderness, perfect for stovetop cooking.
- Ribeye: Incredibly juicy with big, beefy flavor thanks to higher fat content.
- Filet Mignon: Lean and ultra-tender; great for special occasions.
- Top Sirloin: More budget-friendly, still flavorful and takes well to a hot sear.
- Bavette (my current favorite from Snake River Farms!): A butcher’s cut with intense flavor and a looser grain that makes it especially satisfying when sliced against the grain.
What About Bone-In Steaks?
Can you pan-sear a bone-in ribeye or T-bone? Yes—but here’s the catch: the bone slows down cooking and can lead to uneven doneness. For best stovetop results, stick with boneless cuts. Save tomahawks, porterhouses, and other bone-in cuts for the grill or oven, where the heat can circulate more evenly.
Seasoning: Keep It Simple
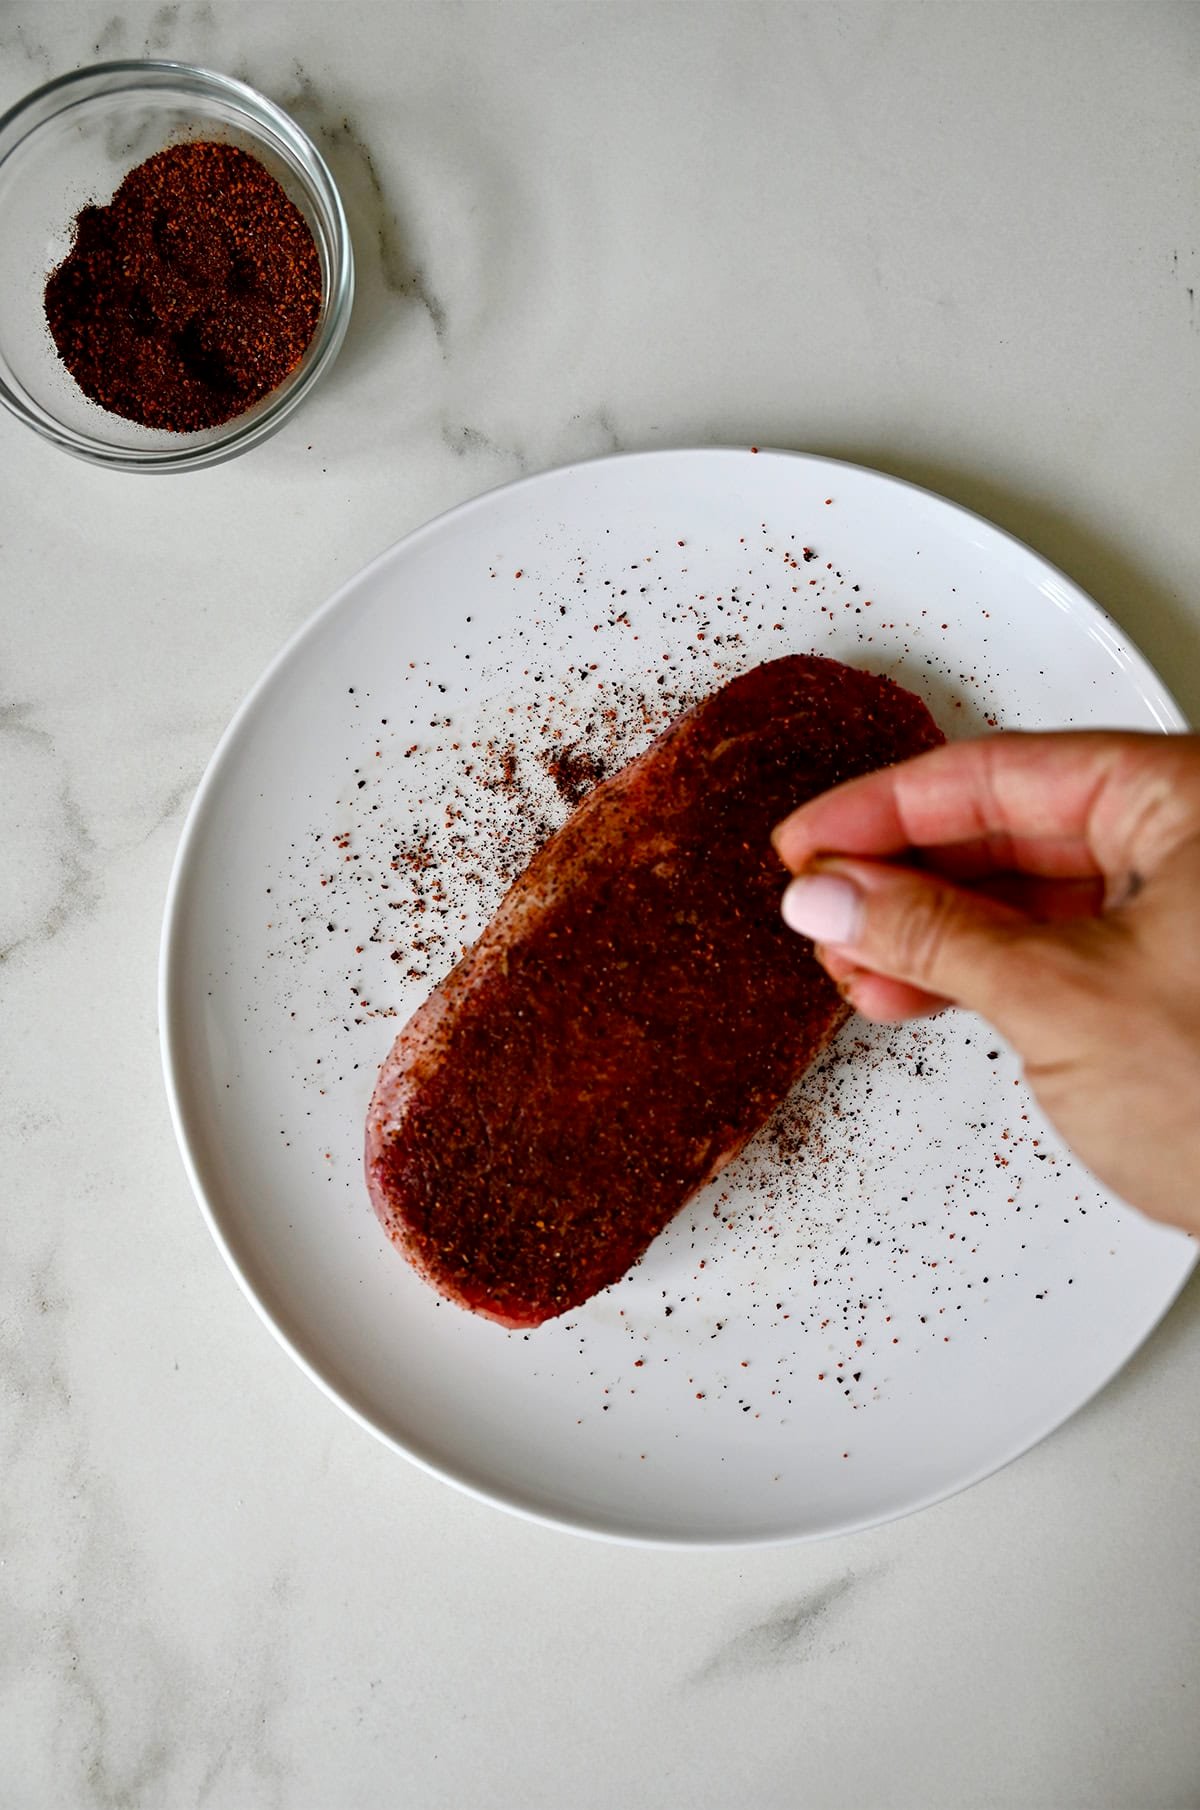
Once you’ve selected your steak, keep it at room temperature for at least 30 minutes before cooking then pat it dry on all sides with paper towels (moisture is the enemy of a good crust). Season generously with kosher salt, and if you’d like, add a crack of freshly ground black pepper. A great cut of beef doesn’t need much more than salt to shine—but feel free to experiment with your favorite rubs and spices.
Speaking of rubs, my Coffee Rub seasoning from my latest collab with Snake River Farms is a rich, smoky mix with the perfect savory blend of warming spices and premium coffee. A sprinkle before searing adds incredible depth and a steakhouse-worthy crust you’ll want to put on repeat.
Preheated Pan = Perfect Crust
The secret to a steak that rivals your favorite steakhouse lies in one word: preheat. A hot pan will give you that irresistible outer crust with a tender, juicy center.
Here’s where science meets steak: the golden-brown crust and savory flavor you love come from the Maillard reaction, a complex browning process that happens when amino acids and sugars in the meat react at high heat. Translation? Heat is flavor.
My go-to pan for cooking steak is cast iron, but stainless steel also works well. Cast iron and stainless steel, rather than nonstick, give the meat a chance to “stick” just long enough for the crust to form before naturally releasing.
Kelly’s Tip: Preheat your pan over medium-high for at least 2 minutes before adding the steak. If you think it’s hot enough, give it one more minute.
Choosing the Right Fat
Before the steak hits the pan, you’ll want to add just enough oil to coat the bottom. The key is picking an oil with a high smoke point, so it won’t burn before your steak is done searing. Vegetable and avocado oil are both great options, but you should steer clear of extra virgin olive oil because it’ll smoke and burn very quickly.
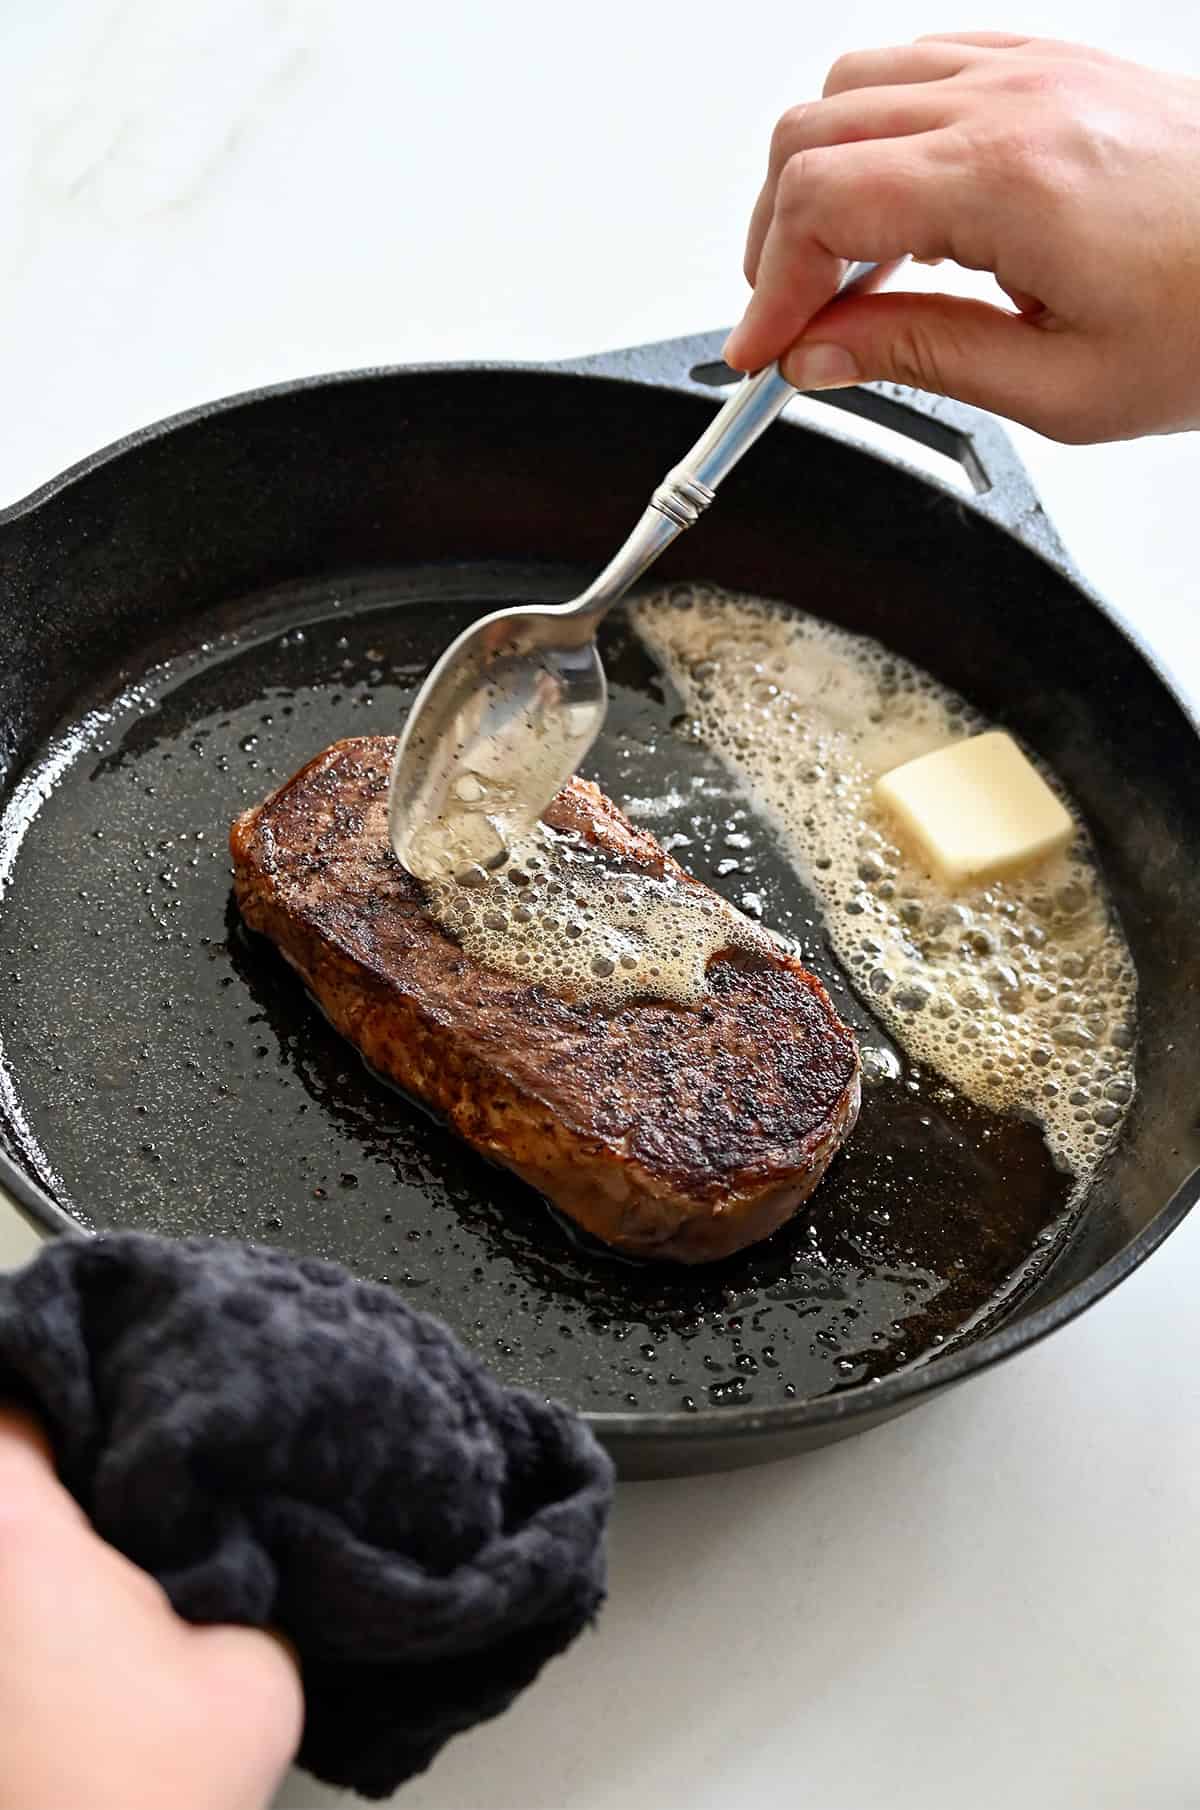
And butter? Save it for the end. It adds rich flavor, but it scorches if used for the initial sear. Add it after flipping for that steakhouse-style butter baste.
Cook Your Steak Hot and Fast
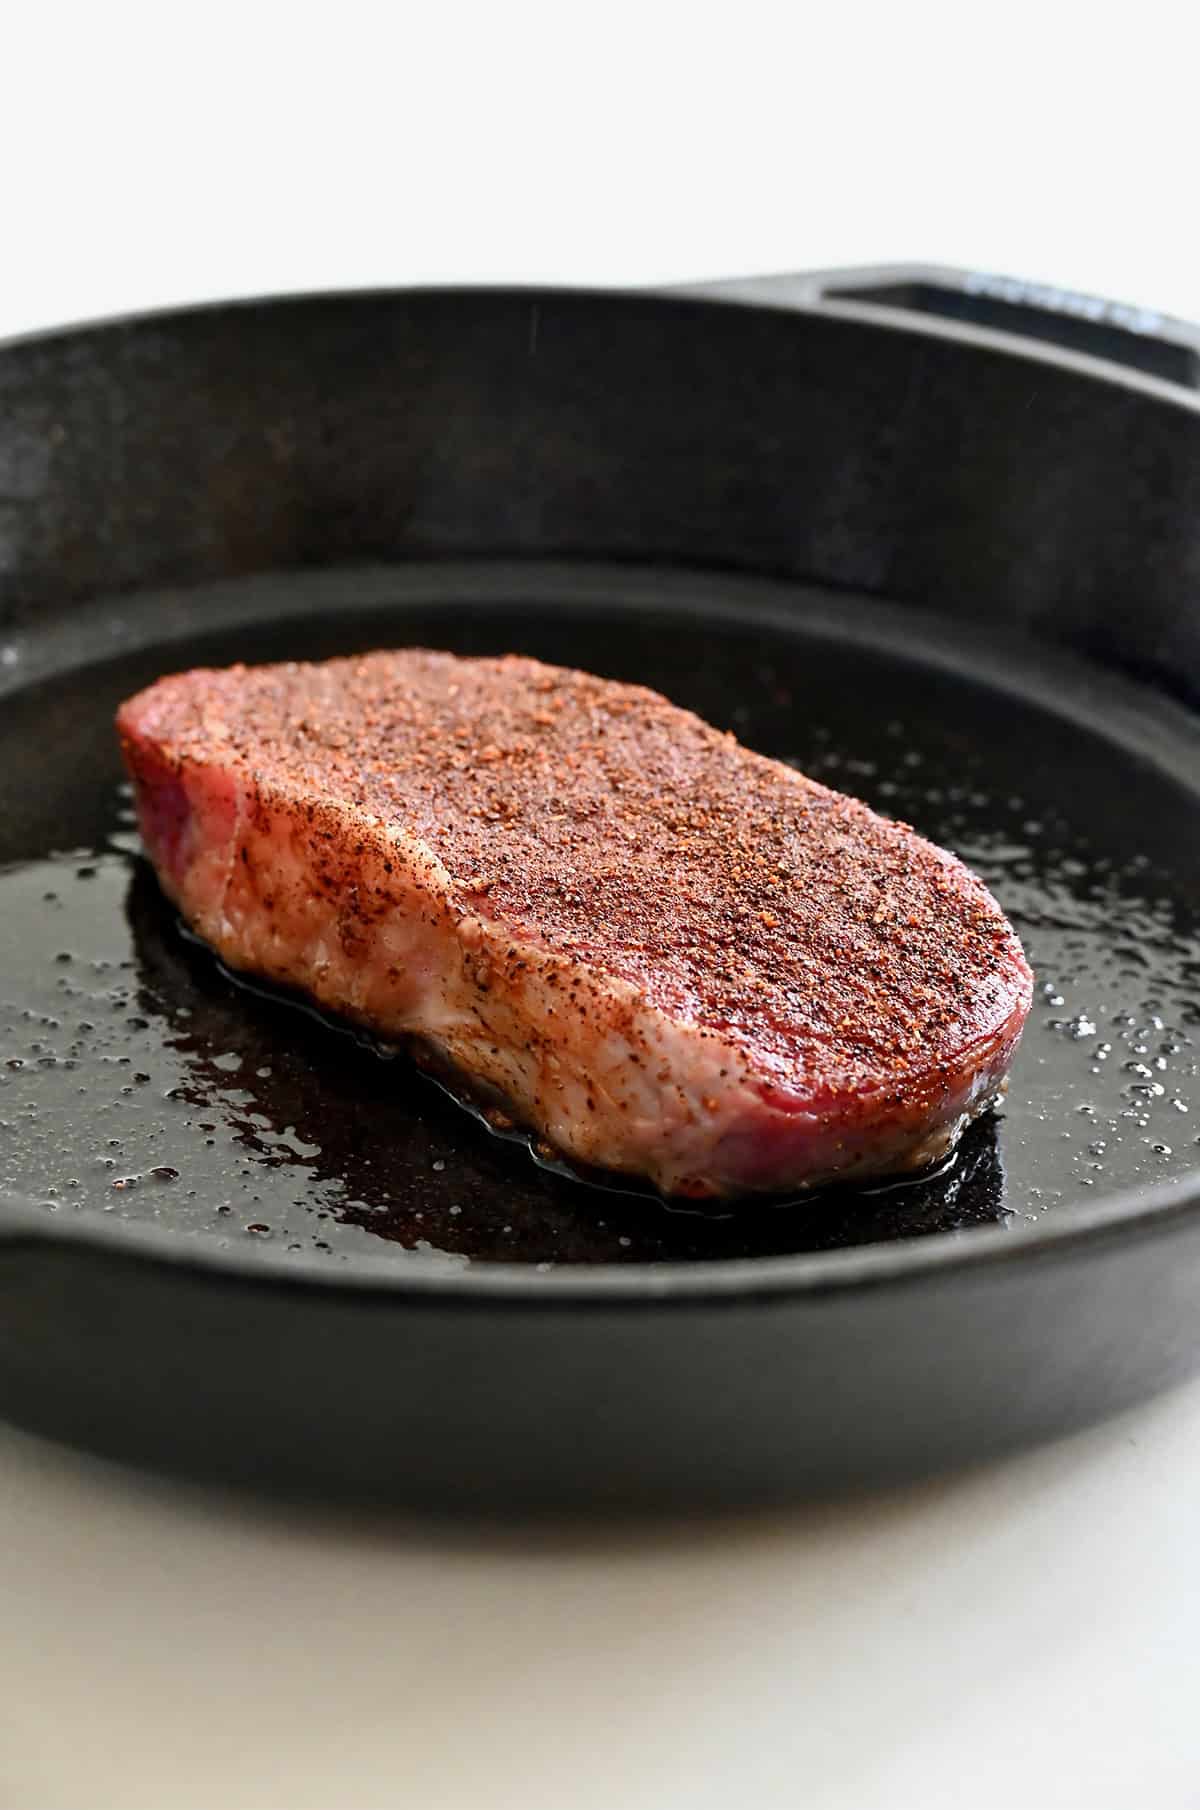
Once your oil is shimmering, add the steak. As soon as it hits the pan, resist the urge to touch it. When you leave the steak alone, it bonds with the hot surface, the Maillard reaction kicks in and that golden crust begins to form. The steak will naturally release from the pan when it’s ready to flip, usually 3 to 5 minutes, depending on thickness. If it’s sticking, it’s not ready. Do not rush the initial searing process.
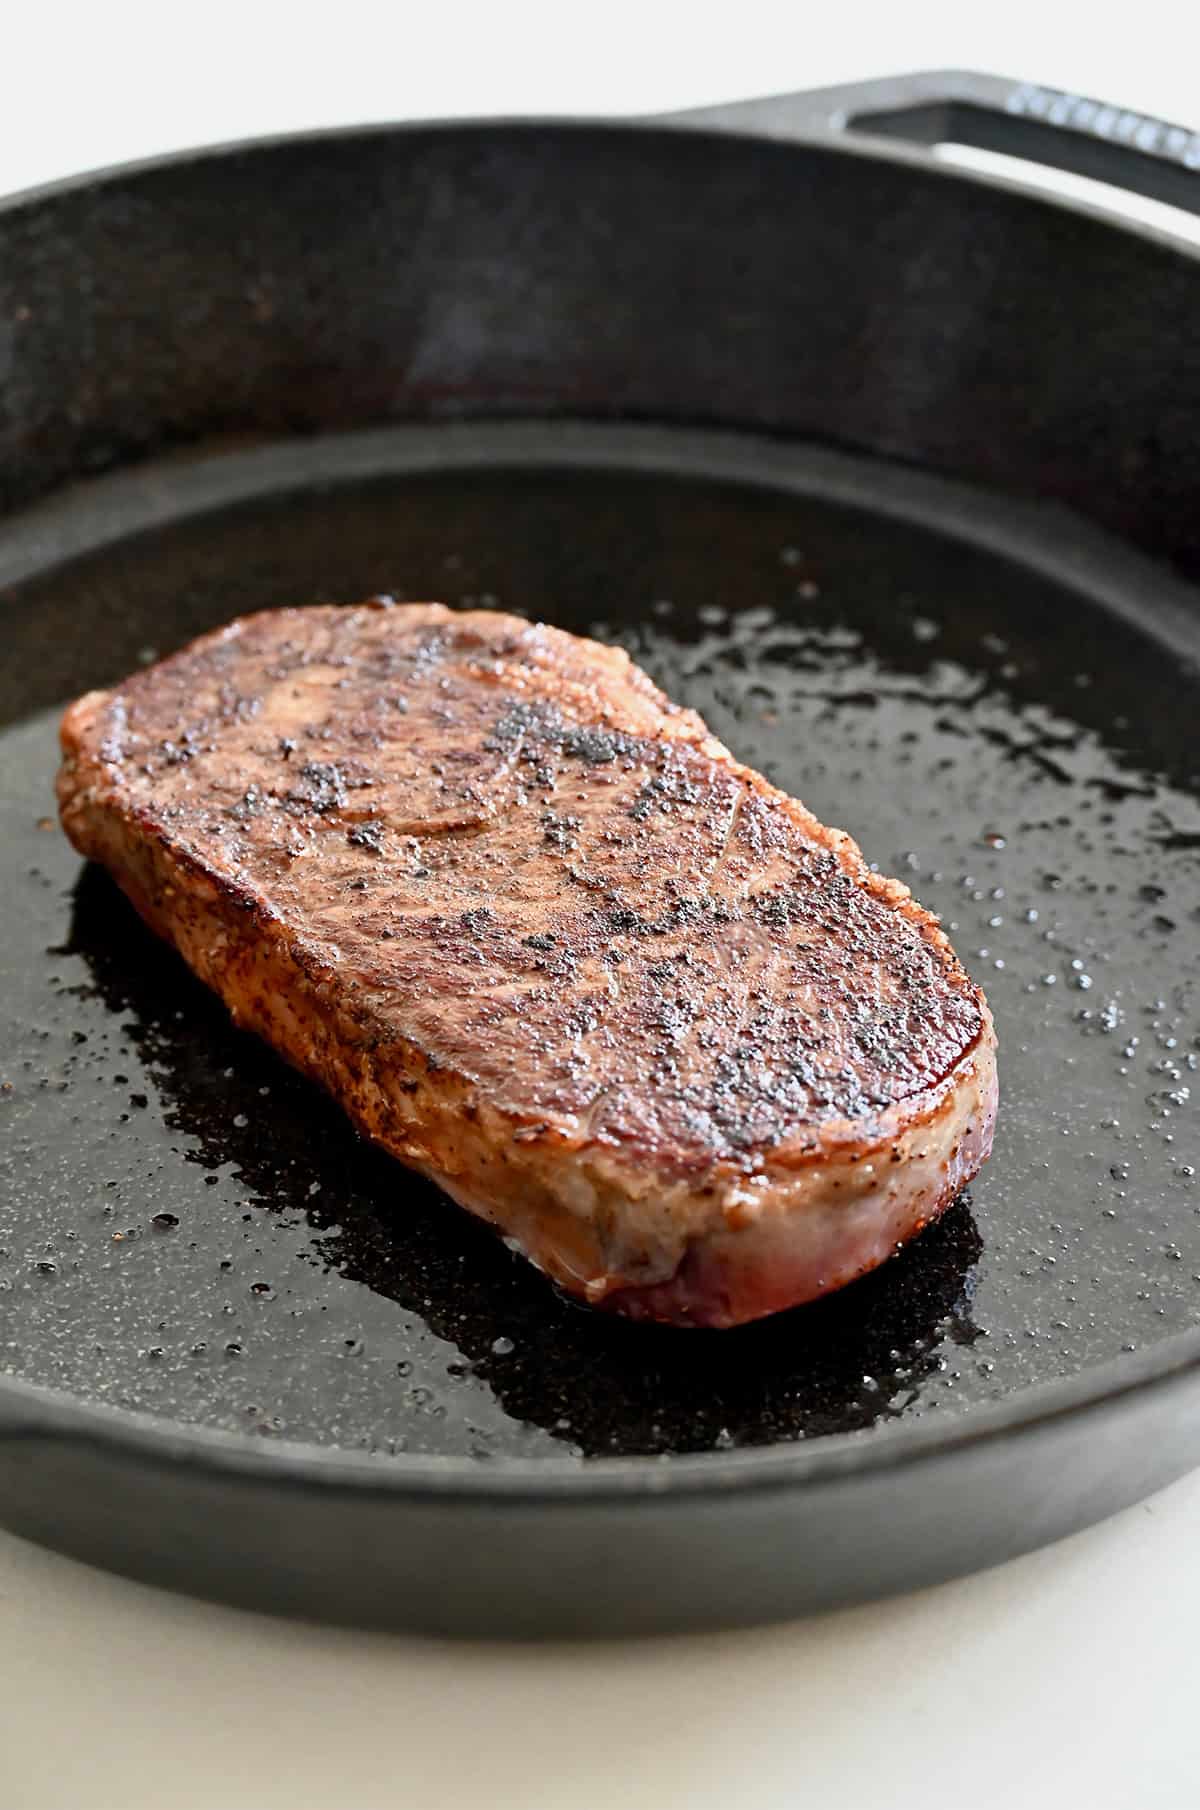
Once your steak releases from the pan, flip it once to sear the other side.
Now for the technique professional chefs swear by: the butter baste. About halfway through cooking, add a knob of butter (plus a couple of smashed garlic cloves and sprigs of thyme or rosemary, optional but delicious!). Tilt the pan slightly and spoon the hot butter over the steak. Butter basting not only adds rich flavor but also keeps the surface moist while the crust finishes developing.
How to Tell When Your Steak Is Done
The most reliable way to know when your steak is cooked to perfection is with a digital meat thermometer. Begin checking the temperature about halfway through cooking—usually around the 4-minute mark for most steaks—so you can gauge how much longer it needs. Thickness, heat and cut all play a role, and a thermometer takes out the guesswork.
Kelly’s Tip: Remove the steak from the pan 5 to 10°F before your desired doneness, since the temperature will continue to rise as it rests (a process called carryover cooking).
Here’s an easy guide to internal temps:
- Rare = 125ºF (cool red center): Remove at 120–125°F for a final temp of 125–130°F
- Medium Rare = 130 – 135ºF (warm red center): Remove at 125–130°F for a final temp of 130–135°F
- Medium = 135 – 140ºF (some pink inside): Remove at 135°F for a final temp of 140°F
- Medium Well = 140 – 150ºF (slightly pink center): Remove at 145°F for a final temp of 150°F
- Well Done = 150ºF (fully cooked, little to no pink): Remove at 155°F for a final temp of 160°F+
The USDA recommends cooking steak to at least 145°F for safety, but many chefs (myself included) cook to lower temps for the best flavor and texture.
Rest, Then Slice
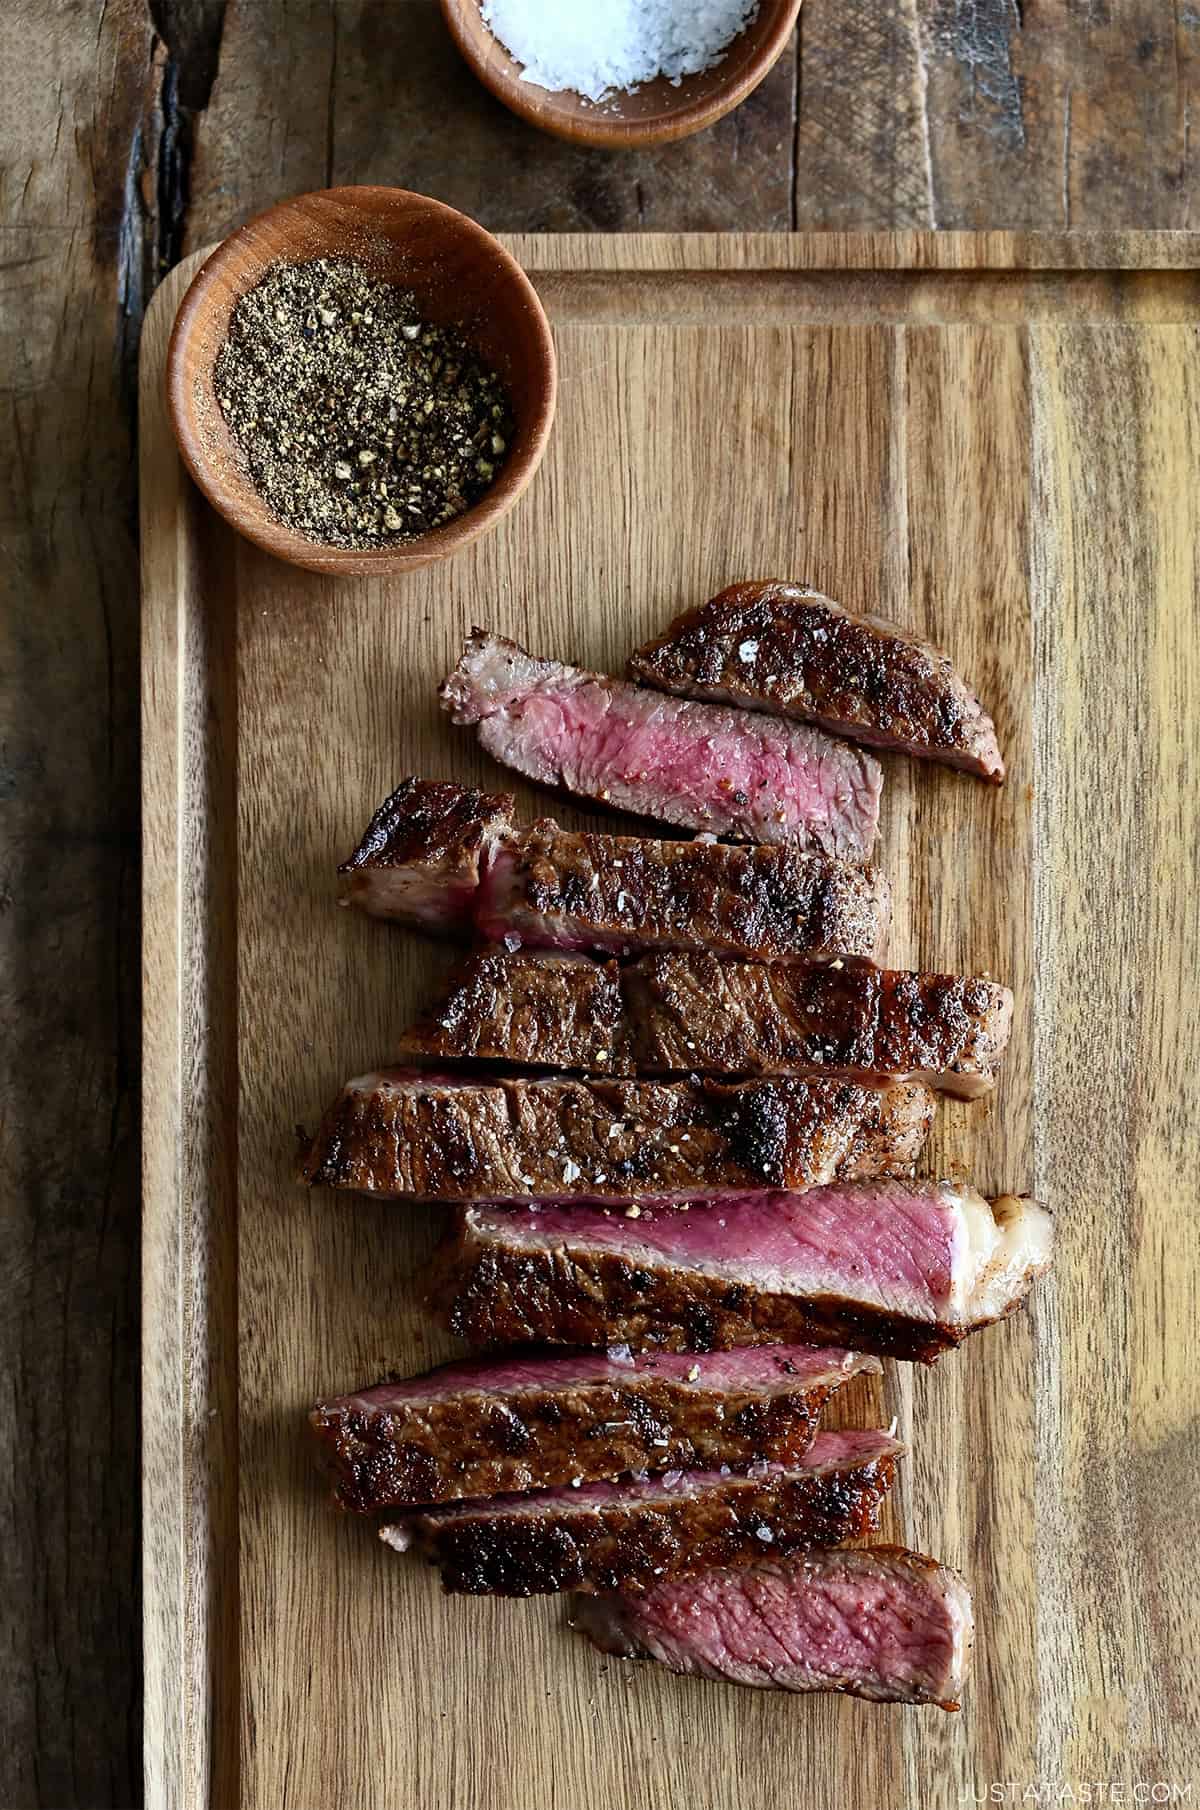
Once your steak hits your target temp, transfer it to a cutting board, tent loosely with foil and allow it to rest for at least 5 minutes before slicing into it. This resting period allows the juices to redistribute throughout the meat, so your first bite is just as juicy and flavorful as the last.
When it’s time to slice, always cut against the grain. The “grain” refers to the natural lines of muscle fibers running through the steak. You’ll see them as faint lines running in one direction across the surface. Position your knife perpendicular to those lines (so you’re cutting across them, not along them). This shortens the muscle fibers, making each bite more tender and easier to chew.
If you’re not sure, look closely at the steak’s surface after cooking—the grain usually runs lengthwise. Rotate your cutting board so your knife slices across those lines, not parallel to them.
What to Serve with Steak
One of the best parts about stovetop steak is how versatile it is. You can keep it classic with steakhouse sides, go light with a salad, or get creative with rice bowls and sauces. Here are some of my favorite pairings:
- Classic appetizers: Wedge Salad with Buttermilk Dressing or Steakhouse Tomato Salad with Blue Cheese
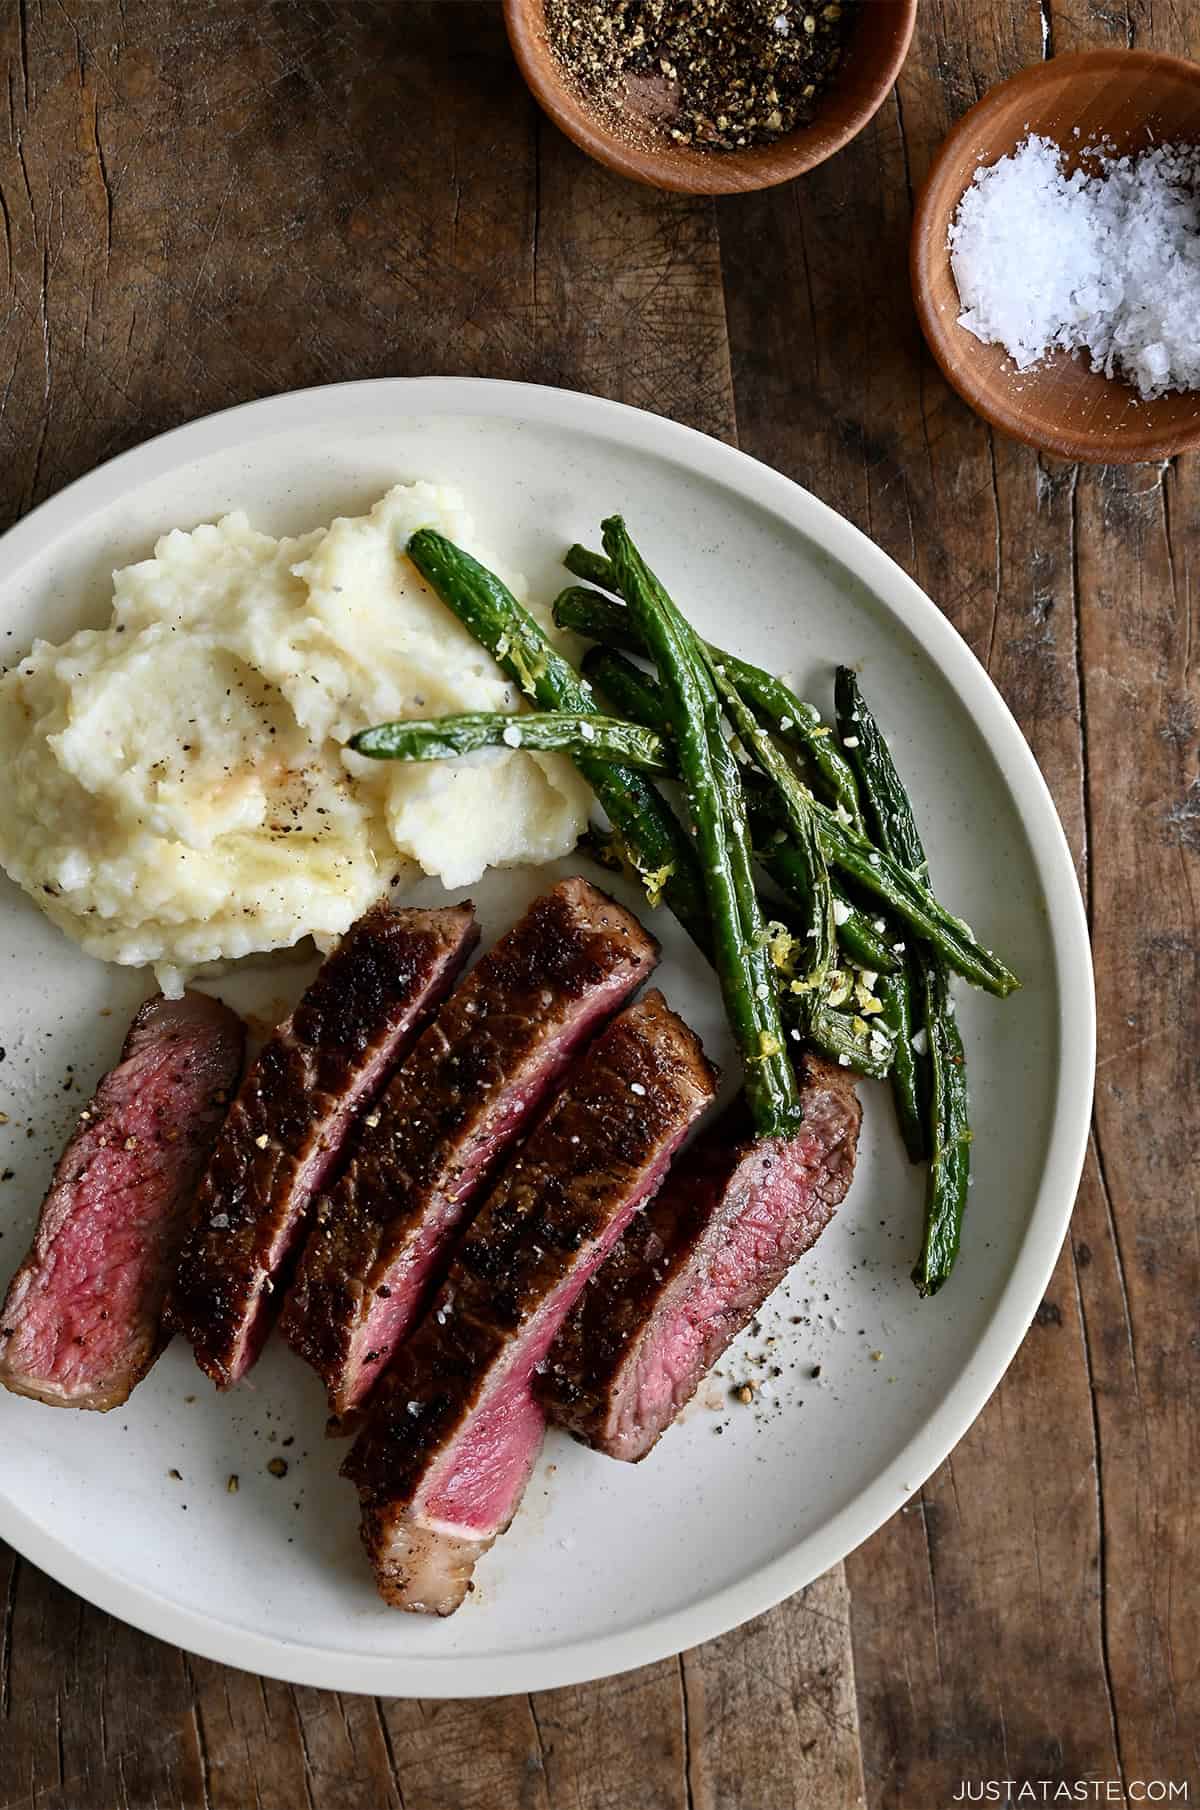
- Veggie sides: Roasted Green Beans (the same recipe you see above!), Roasted Brussels Sprouts with Pancetta or Bacon-Wrapped Asparagus
- Comfort food favorites: Drop Biscuits, Creamy Green Bean Casserole or Stovetop Mac & Cheese
- Starch pairings: Mashed Potatoes (shown above) or crispy homemade French Fries
- Sauces and butters: Creamy Mushroom Sauce (my fave!), Chimichurri Sauce (my husband’s favorite!) or Cowboy Butter
- or Homemade Dinner Rolls
- Steak + salad combo: Sliced steak piled on Kale Caesar Salad is one of my favorites
- Or try my latest obsession: Teriyaki Bowls. Slather with Homemade Teriyaki Sauce, serve over Creamy Coconut Rice and add your favorite roasted veggies.
Ingredients
- 4 steaks (New York strip, ribeye, filet mignon or bavette), 6 to 8 ounces each and about 1 to 1½ inches thick
- Kosher salt and freshly ground black pepper, to taste
- 2 Tablespoons vegetable or avocado oil
- 3 Tablespoons unsalted butter
- 3 garlic cloves, smashed (optional)
- 3 to 4 sprigs fresh thyme or rosemary (optional)
Instructions
- Pat the steaks dry and season generously with salt and pepper.
- Place a cast-iron or stainless steel skillet over medium-high heat. Add the oil and heat until shimmering.
- Add the steaks and sear, undisturbed, until a crust forms and they naturally release from the pan, 3 to 5 minutes. Using tongs, flip the steaks once, and add the butter. If you're using garlic and/or herbs, add them now, too. As the butter melts, tilt the skillet and baste the steaks repeatedly with the butter until they reach your desired doneness.
- Transfer the steaks to a cutting board, then tent them with foil and let them rest for 5 to 10 minutes. Slice against the grain and serve.
Kelly’s Notes
- Cook in batches: Unless you have an oversized skillet, sear 2 steaks at a time so the pan stays hot and your steaks sear instead of steam. Transfer the cooked steaks to a cutting board and tent loosely with foil to keep them warm while you finish the rest.
- Slicing steak: Always slice against the grain. Look for the natural lines of muscle fibers running across the steak and cut perpendicular to those lines for the most tender bites.
- Internal temperatures (pull from the pan 5–10°F before final temp):
- Rare: 120–125°F → final 125–130°F
- Medium-rare: 125–130°F → final 130–135°F
- Medium: 135–140°F → final 140–145°F
- Medium-well: 145–150°F → final 150–155°F
- Well-done: 155–160°F → final 160°F
- The USDA recommends cooking steaks to at least 145°F.
- ★ Did you make this recipe? Don’t forget to give it a star rating below!
Nutrition
Did you try this recipe?
Leave a comment below with your star rating!
This post may contain affiliate links.


Hi Kelly— Can the steak be cooked right out of the refrigerator, or should it rest at room temp for half an hour before searing?
Great question, Merrily! I will add a note up above but the steak should be at room temp for a minimum of 30 minutes (depending on thickness). Enjoy!
Your timing couldn’t have been better!! Making steak for the hubs tomorrow and boy, oh boy, I feel like I might actually be able to cook it perfectly. Thank you SO much for so many amazing tips!!
So happy to read that, Melinda!