
Take the stress out of the ultimate breakfast treat with an easy recipe for Overnight Cinnamon Rolls with Cream Cheese Frosting.
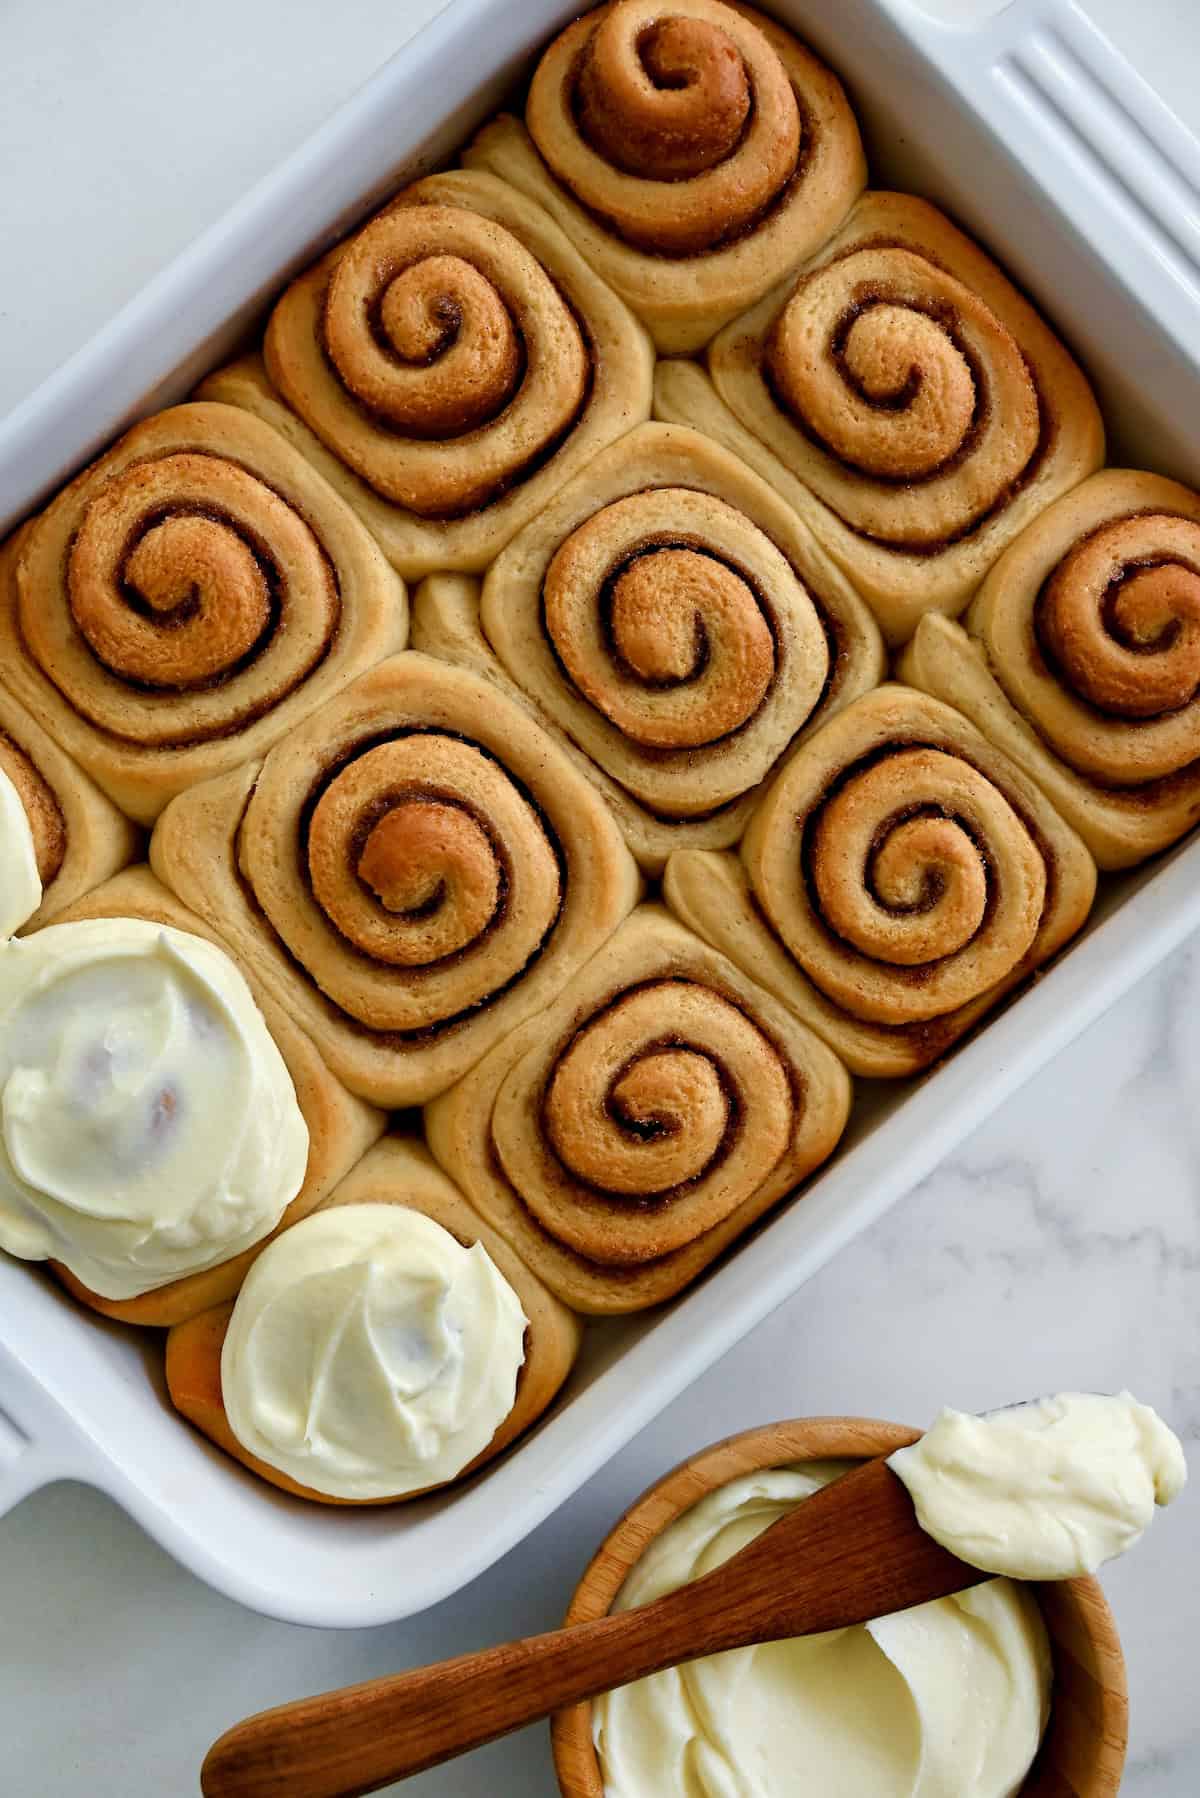
Table of Contents
Few store-bought sweets captivate my attention like Cinnabon cinnamon rolls.
There’s just something about the freshness factor of the cinnamony swirls, whether I spot them at a kiosk in my local mall, or smell the aroma of that classic frosting from 14 gates away at airports across America.
No matter the Cinnabon locale, I concede to my cravings, approach the counter, and greet the friendly face that’s rolling, filling, slicing and icing cinnamon roll after cinnamon roll after cinnamon roll. The rolls are fresh. I mean F-R-E-S-H fresh.
There’s only one other option when it comes to achieving that level of fresh: the DIY route!
Why You’ll Love This Recipe
- Make ahead. These overnight cinnamon rolls will rise in the fridge all night so the only thing you have to do in the morning is pop them in the oven and mix up the frosting.
- Better than a bakery. This from-scratch recipe for soft and fluffy cinnamon rolls is sure to rival those from your favorite bakery.
- Enough for a crowd. You’ll get a dozen rolls out of the pan.
- The best frosting. In my opinion, cream cheese frosting for cinnamon rolls is the only way to go!
Here’s everything you’ll need for these delicious make-ahead cinnamon rolls.
For the cinnamon roll dough and filling you’ll need:
- Milk: Whole milk is best, as it has a high enough fat content that adds tenderness to the dough.
- Butter: For baking, use unsalted butter so you can better control the salt content of your recipes.
- Sugar: Granulated sugar adds sweetness and tenderness to the dough, while light brown sugar lends a caramel note to the filling.
- Yeast: Active dry yeast needs to be mixed with warm liquid before being added to the other ingredients, to begin multiplying.
- Flour: Use the scoop-and-level technique to measure flour accurately.
- Eggs: Don’t use eggs straight out of the fridge or they’ll cool your dough too much. Bring them to room temperature or warm them up for 10 minutes in a bowl of warm water before using.
- Cinnamon: Ground cinnamon has a long shelf life, but if it’s older than two or three years, replace it for the best and most intense flavor.
- Salt: Salt helps control the growth of yeast and also rounds out the flavor of baked goods.
For the frosting you’ll need:
- Vanilla extract: This recipe would be a great place to show off homemade vanilla extract.
- Cream cheese: Let the cream cheese soften completely to avoid lumps.
- Butter: The butter should also be quite soft for the creamiest, smoothest consistency.
- Buttermilk: Amps up the flavor of the frosting. If you don’t have any, you can use a buttermilk substitute. Save the remaining buttermilk for buttermilk pancakes or buttermilk salad dressing.
- Salt: Just a pinch balances out the sweetness.
- Confectioner’s sugar: For the smoothest frosting, sift the confectioner’s sugar before using.
See the recipe card for full information on ingredients and quantities.
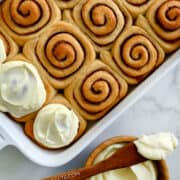
Check out the swirled beauties above. You can make them today and stash them in your fridge, which means you’re 90% of the way there. Then all that’s left to do in the morning is pop them into the oven and start sippin’ on your mimosa while you whip up the topping.
Are homemade cinnamon rolls a labor of love? You bet! But with a few simple tricks for how to successfully start and then stop the prep, you can in fact master Make-Ahead Cinnamon Rolls, a.k.a. Overnight Cinnamon Rolls.
- Activate the yeast. Mixing the active dry yeast with warm milk and sugar will activate it so it can start multiplying. The yeast feeds on the sugar to begin growing.
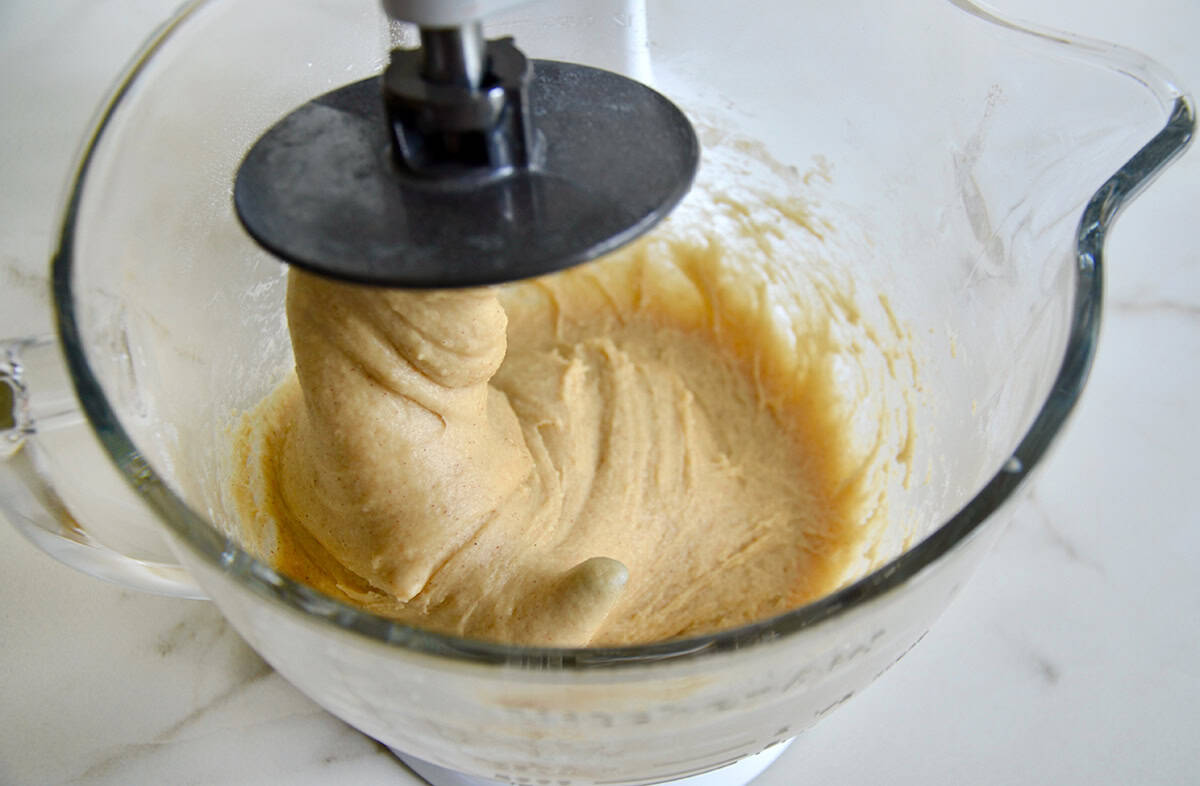
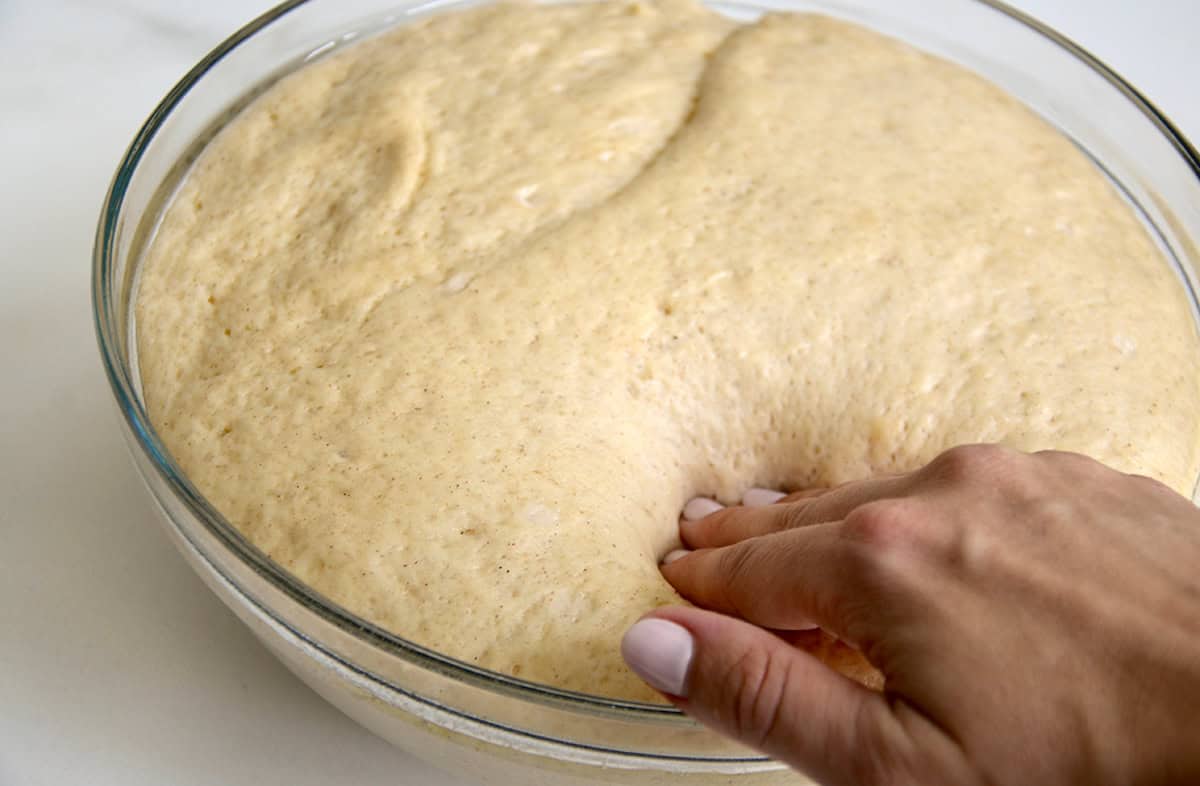
- Mix the dough. The dough hook attachment of the stand mixer is the best tool for combining the wet and dry ingredients and kneading it until it’s smooth. The dough should be proofed until it’s doubled in size (see my tip below for the weird place I’ve found to proof my yeast doughs!).
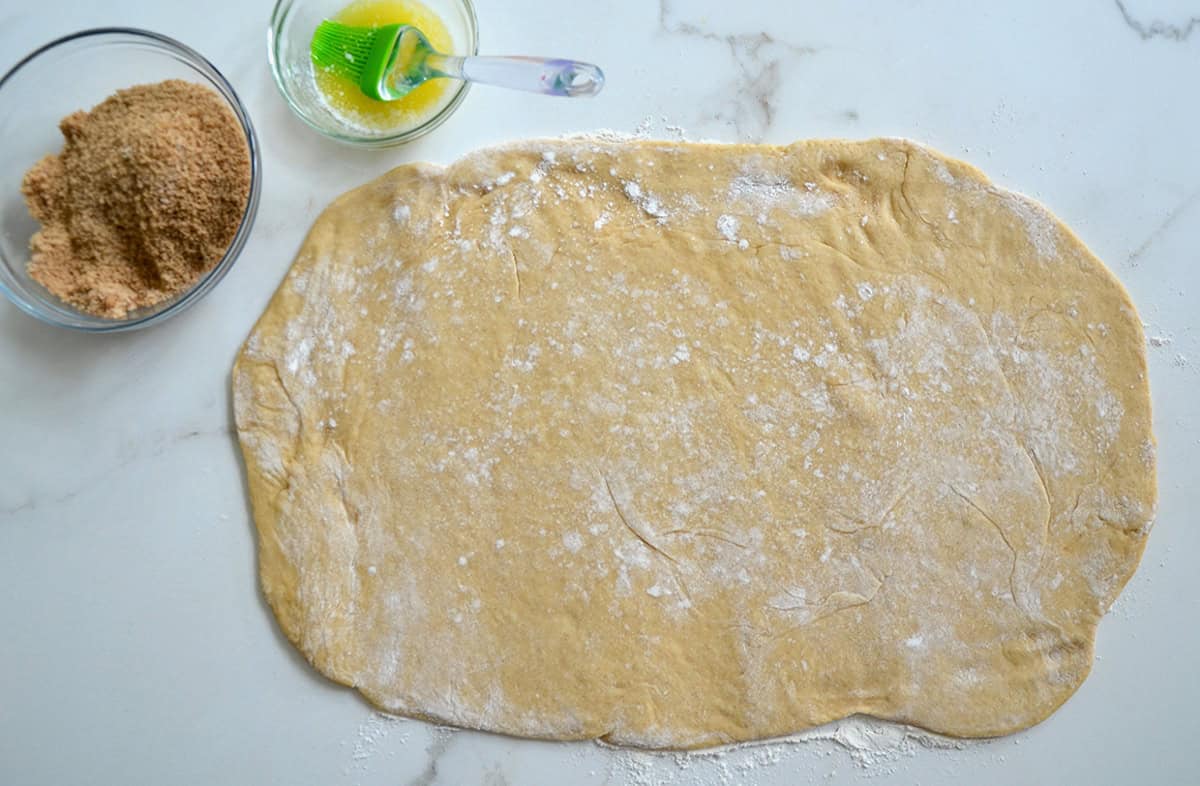
- Roll out the dough. Roll the dough into a rectangular, using flour on your work surface to prevent sticking. Brush with the melted butter.
- Make the filling. Mix together the sugars and the cinnamon. As you sprinkle it over the buttered dough, be sure to sprinkle all the way to the edges so every bite is filled with the gooey goodness.
Pro Tip: A silicone pastry mat is one of the best tools for rolling out dough. Some even have measurement markings so you can make sure you’re rolling to the correct dimensions!
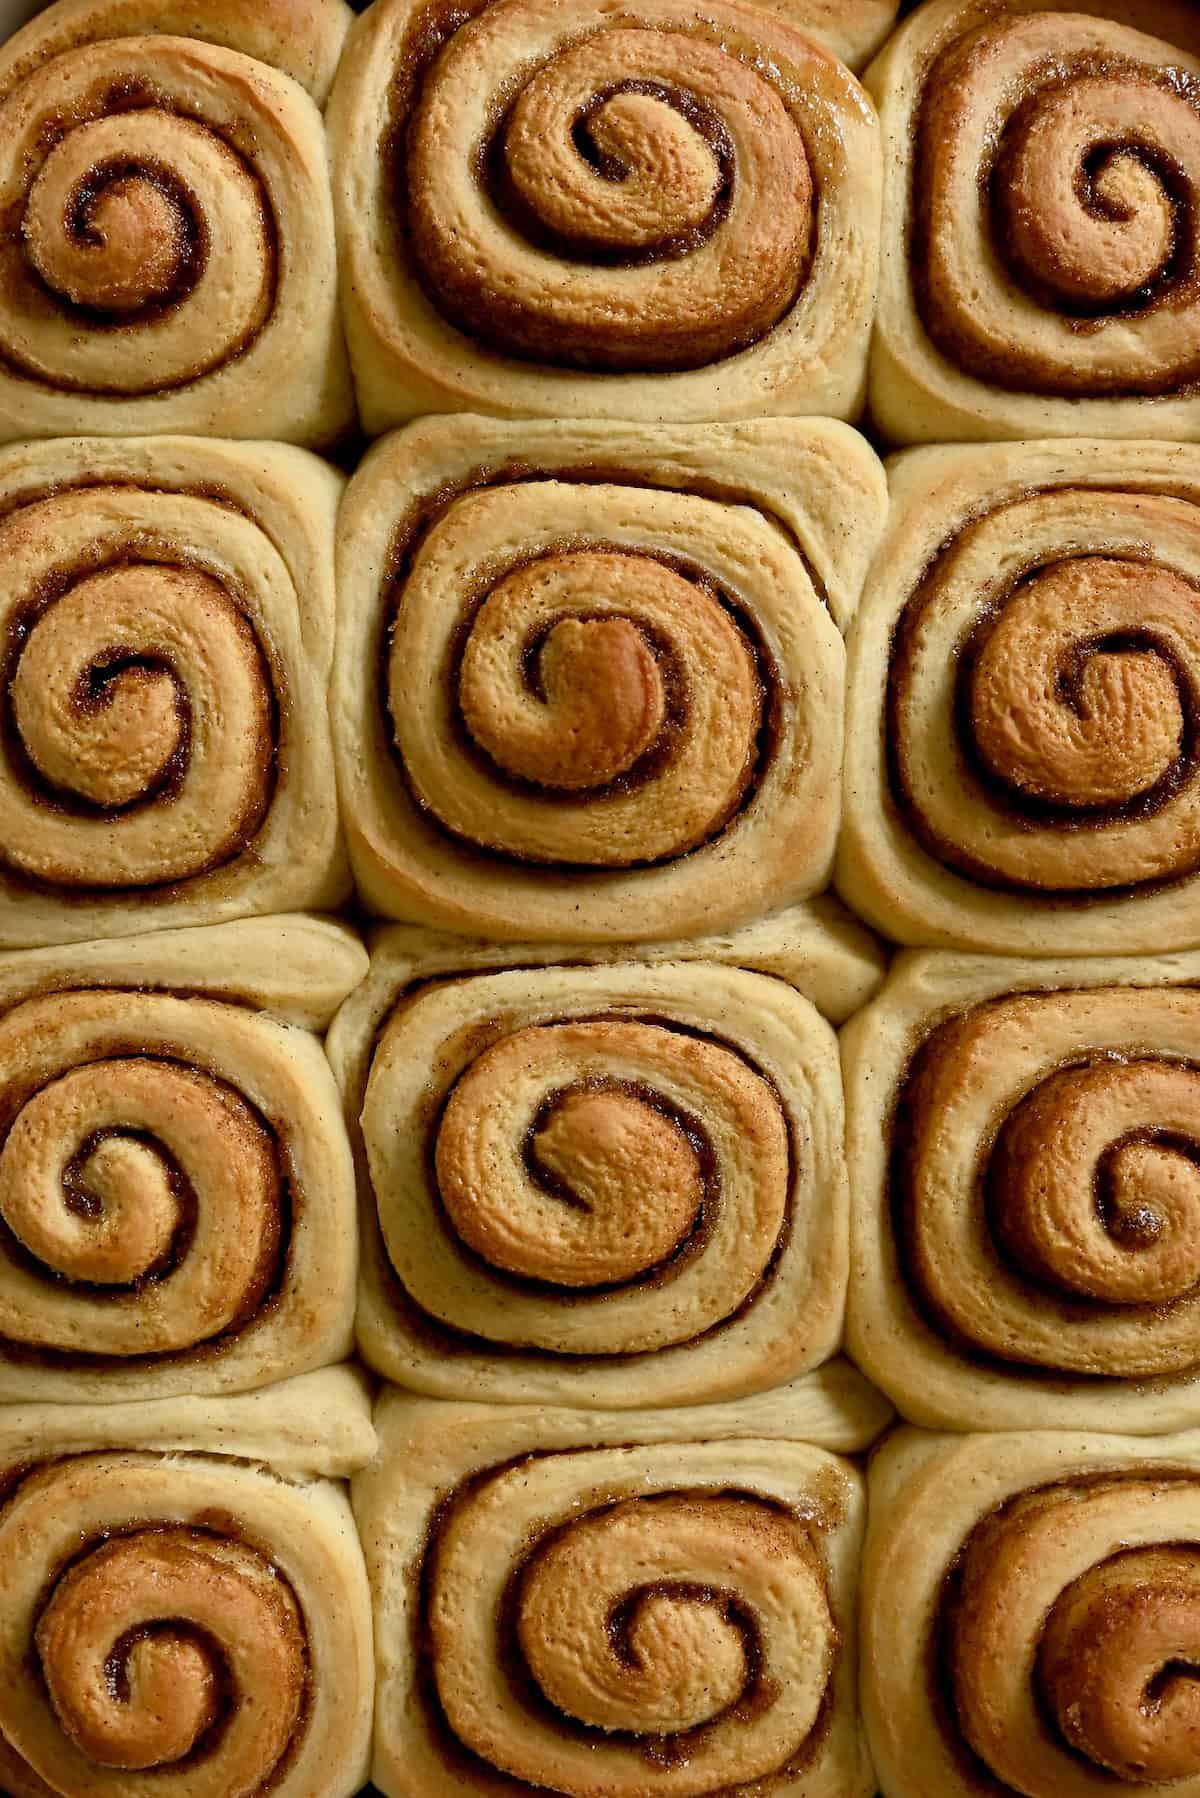
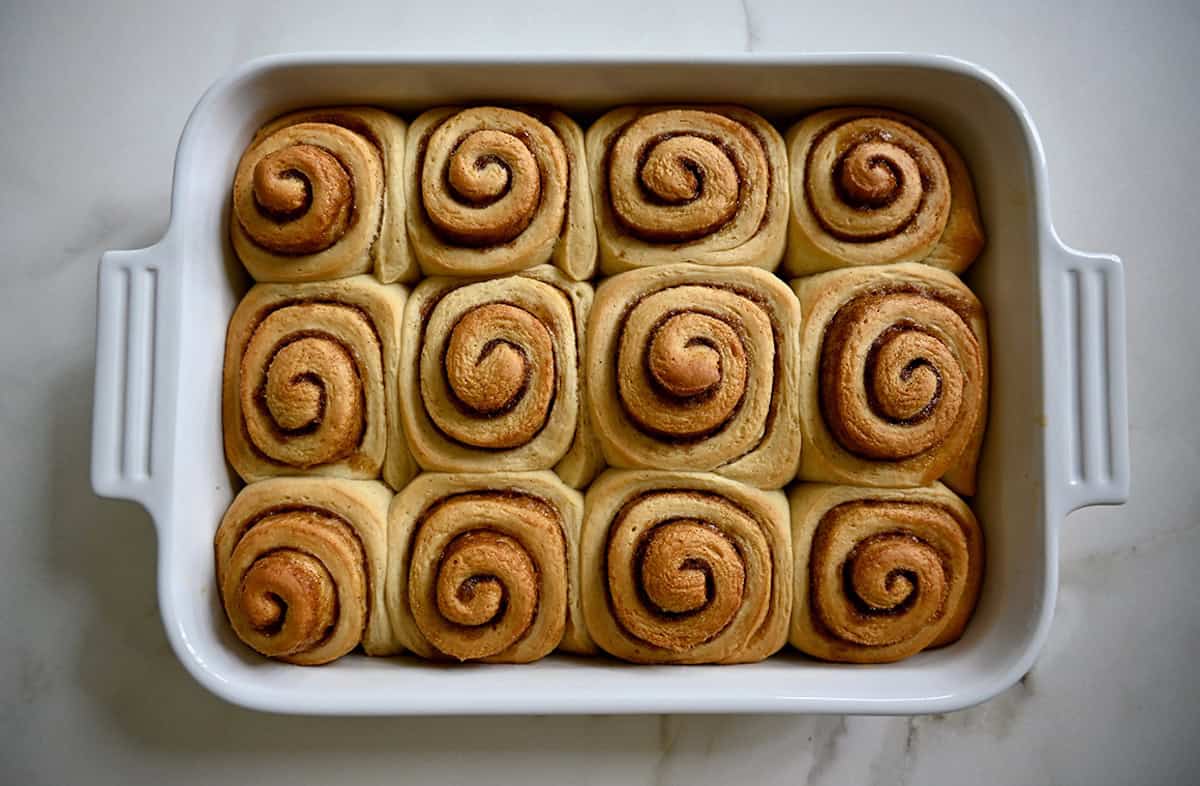
- Assemble the rolls. Roll the prepared dough tightly and evenly, starting with the long side of the rectangle. Slice into spirals, arrange in the pan and cover them with plastic wrap. Let them rise again for about 30 minutes for puffy, airy rolls. At this point, they’re all ready for stashing in your fridge, which means you’re 90% of the way there.
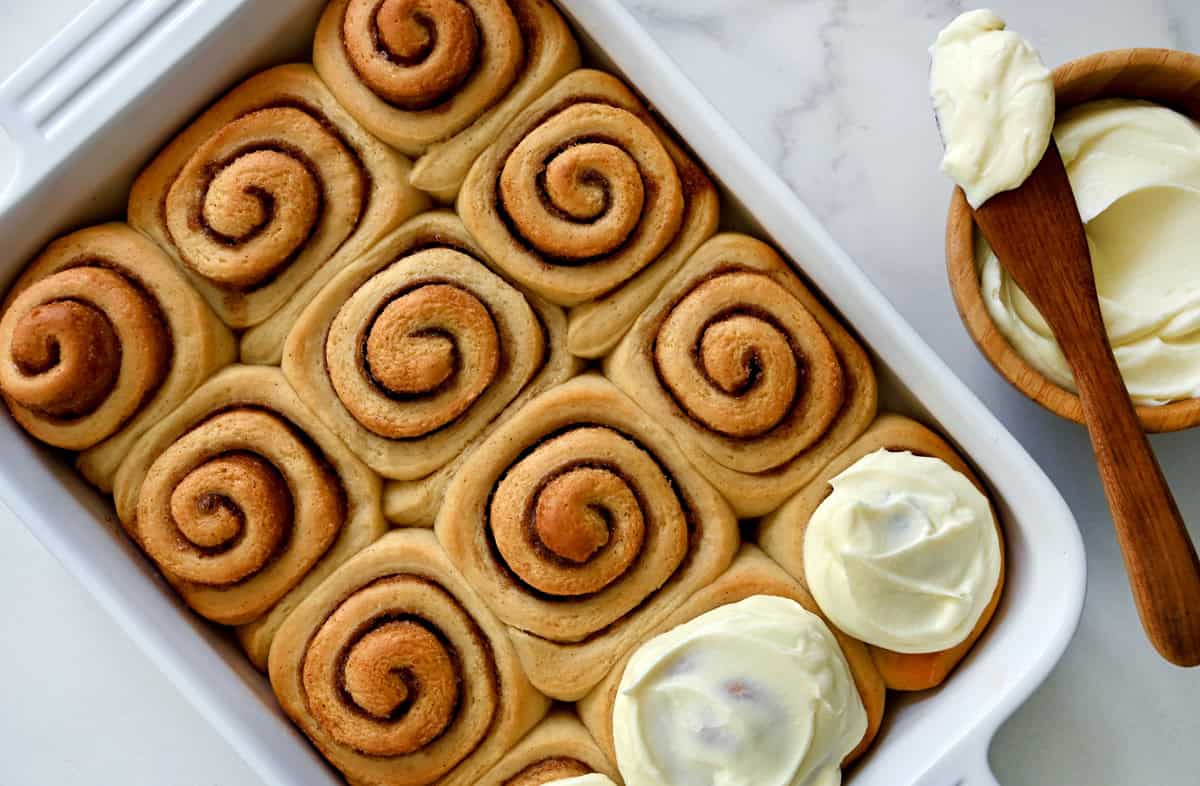
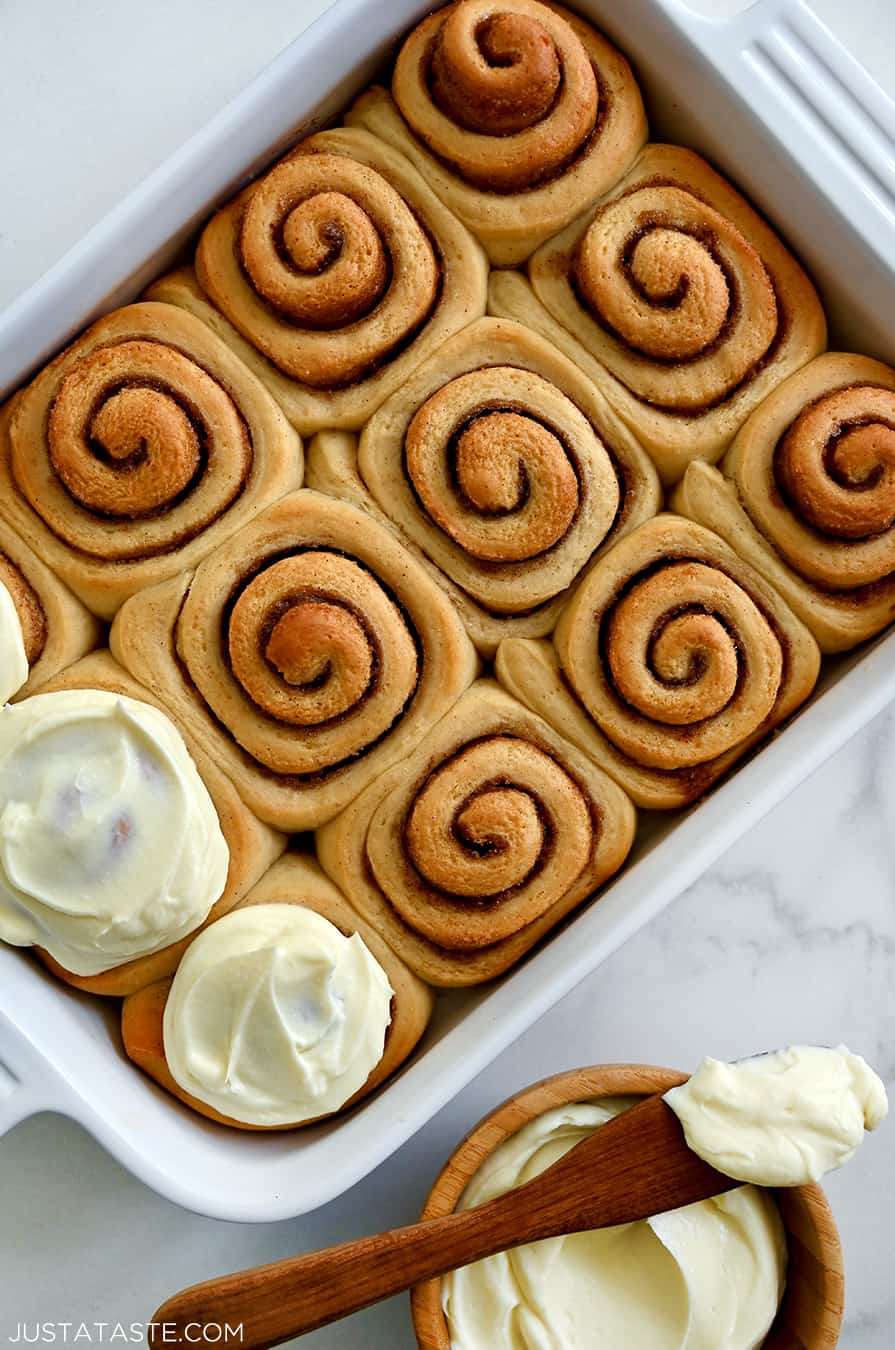
- Bake and frost. While the rolls are baking, mix the frosting ingredients in a stand mixer fitted with the paddle attachment. Cream the butter and cream cheese together until no lumps remain before adding the remaining ingredients, for the smoothest frosting. It’s best to wait until the rolls are completely cooled before icing; otherwise, the icing will melt and slide off.
How to Make the Best Cream Cheese Frosting
Warm cinnamon rolls, meet the lightest, tangiest cream cheese frosting to ever slather your buns. When it comes to mastering cream cheese frosting, there are two key tips that will ensure perfection:
- Beat the cream cheese first until smooth and then beat in the butter
- Sift the confectioners’ sugar and then add it to the bowl in order to prevent lumps
And that right there is a big-time breakfast win. Cinnamony, swirly, buttery, better-than-Cinnabon perfection.
- Proof the dough in the dryer! It sounds odd but I’ve found that the dryer is the perfect warm and humid environment for yeast dough to rise. I run the dryer on empty for 5 minutes, then turn it off and set the bowl inside, covered with a towel or plastic wrap.
- Keep it sticky. Use just enough flour to keep the dough from sticking too much to the work surface when you’re rolling it out. The dough will be tacky. If you use too much flour, your rolls could turn out dry.
- Use toothfloss to cut the rolls. Use a piece of unwaxed, unflavored toothfloss to cleanly cut the individual pieces. Place the center of the floss under the roll where you want to make the cut, cross the ends over the top, and pull ends in opposite directions.
To really master DIY dough, tune in below to discover the surprising place where I proof my cinnamon roll dough!
Baked cinnamon rolls can be frozen for up to 3 months. Wrap each individually in plastic wrap, freeze solid, then transfer to a freezer bag. Thaw overnight in the refrigerator, unwrap and warm in the oven before serving.
You can also freeze the unbaked cinnamon rolls to bake later. I like to use a disposable foil pan for this. Form the rolls in the pan, then wrap tightly with plastic wrap, followed by aluminum foil. Let them thaw overnight in the refrigerator or let thaw at room temperature for 2 to 3 hours and bake as directed.
Frequently Asked Questions
No! If a generous slathering of cream cheese frosting seems too decadent for you, you can leave your rolls unfrosted or make a lighter cinnamon roll icing with powdered sugar mixed with just enough milk until it’s a good consistency for drizzling (add a little vanilla in there for taste!). Or try the cream cheese glaze in my monkey bread recipe. A dusting of powdered sugar is also a nice finishing touch for a less-sweet cinnamon roll.
Leftover cinnamon rolls will keep in the refrigerator for up to 5 days. Wrap them with plastic wrap before storing, and microwave them, unwrapped, for 10 to 15 seconds before eating to freshen them up. Because of the cream cheese in the frosting, the cinnamon rolls should not be stored at room temperature.
If your oven heats unevenly (and most do!) your cinnamon rolls could rise or cook unevenly. To avoid this, turn the pan around halfway through cooking. Also, make sure the oven is completely preheated before baking.
When working with yeast, it must be activated in liquid at the right temperature, around 110˚F. Check that the mixture bubbles after 5 to 10 minutes — if it does not, your yeast could be expired. It’s also important to allow the full amount of time for the dough to rise in a warm place both before and after forming the cinnamon rolls.
- Easy Cream Cheese Danish
- White Chocolate Chip Raspberry Scones
- Pumpkin Spice Waffles
- Overnight French Toast Bake
- Easy Caramel Apple Monkey Bread
- Greek Yogurt Banana Muffins
Craving more? Subscribe to Just a Taste to get new recipes, meal plans and a newsletter delivered straight to your inbox! And stay in touch on Facebook, TikTok, Pinterest and Instagram for all of the latest updates.
Ingredients
For the cinnamon roll dough:
- 1 cup whole milk
- 1/2 cup unsalted butter
- 1/2 cup plus 1 Tablespoon sugar, divided
- 2 ½ teaspoons (one 3/4-oz. packet) active dry yeast
- 4 ¼ cups all-purpose flour, plus more for rolling out dough
- 2 large eggs, at room temp
- 1 teaspoon cinnamon
- 1 teaspoon kosher salt
For the filling:
- 3 Tablespoons unsalted butter, melted
- 1 cup packed light brown sugar
- 1/4 cup sugar
- 1 ½ Tablespoons cinnamon
For the cream cheese frosting:
- 2 teaspoons vanilla extract
- 1 (8-oz.) package cream cheese, at room temp
- 1/2 cup unsalted butter, room temp
- 2 Tablespoons buttermilk
- 1/4 teaspoon kosher salt
- 1 1/3 cups confectioners’ sugar
Instructions
Make the cinnamon roll dough:
- Warm the milk and butter on the stovetop or in the microwave until it is warm but not hot to the touch (it should be below 110°F). Add 1 tablespoon of sugar and the yeast to the milk, stirring to combine, then set it aside for 5 minutes.
- In a stand mixer fitted with the dough hook attachment, mix together the flour, cinnamon, salt and remaining ½ cup sugar. Add the yeast mixture and eggs and mix for 8 minutes until dough is smooth. (The dough will be slightly tacky.) Place the dough in a clean, greased bowl and cover it with plastic wrap. Place the bowl in a warm, dark place to proof until it has doubled in size, about 1 hour.
- Grease a 9×13-inch baking dish with butter.
- Lightly flour your work surface then scrape the dough out, and using a rolling pin, roll the dough into roughly a 12×20-inch rectangle that is 1/4-inch thick.
- Brush the melted butter generously over the dough.
- In a small bowl, whisk together the brown sugar, sugar and cinnamon then sprinkle it atop the melted butter. Starting at the long edge of the rectangle, roll the dough up into a tight log, then using a sharp knife, slice the log into 12 2-inch rounds.
- Arrange the rounds in the prepared baking dish (discarding any smaller ends). Cover the baking dish with plastic wrap and place it in a warm, dark place to allow the cinnamon rolls to rise a second time for 30 minutes. (Note: This is the point at which you can cover the pan securely with plastic wrap and refrigerate the rolls overnight. Continue with the recipe as directed on the day of baking.)
- Preheat the oven to 350°F.
- Bake the cinnamon rolls until they are pale golden, 22 to 25 minutes. (Note: If you are baking the cinnamon rolls directly from the fridge, add about 10 minutes to your bake time.)
- While the cinnamon rolls bake, make the cream cheese frosting.
Make the cream cheese frosting:
- In the bowl of a stand mixer fitted with the paddle attachment, beat together the butter and cream cheese until smooth.
- Add the vanilla extract, buttermilk, salt and confectioners’ sugar and beat until combined.
- Spread generously over completely cooled cinnamon rolls. Best served immediately.
Kelly’s Notes
- The dryer is the perfect warm and humid environment for yeast dough to rise. Run the dryer on empty for 5 minutes, then turn it off and set the bowl inside, covered with a towel.
- Use just enough flour to keep the dough from sticking too much to the work surface when you’re rolling it out.
- Use a piece of unwaxed, unflavored tooth floss to cleanly cut the individual pieces. Place the center of the floss under the roll where you want to make the cut, cross the ends over the top, and pull ends in opposite directions.
- ★ Did you make this recipe? Don’t forget to give it a star rating below!
Nutrition
Did you try this recipe?
Leave a comment below with your star rating!
This post may contain affiliate links.
Recipe by Just a Taste. Please do not reprint this recipe without my permission. If you'd like to feature this recipe on your site, please rewrite the method of preparation and link to this post as the original source.


Easy to follow instructions, timings were all spot on, did not make the frosting, as they were sweet enough. For my liking.
So glad you enjoyed the recipe, David!