This Korean Beef Bowl stars ground beef in a delicious, savory sauce that’s perfectly balanced with sweet, salty and a touch of heat. Serve it over steamed rice with your favorite fresh veggies, and top it with an optional fried egg for a quick, satisfying meal that comes together in 25 minutes or less.
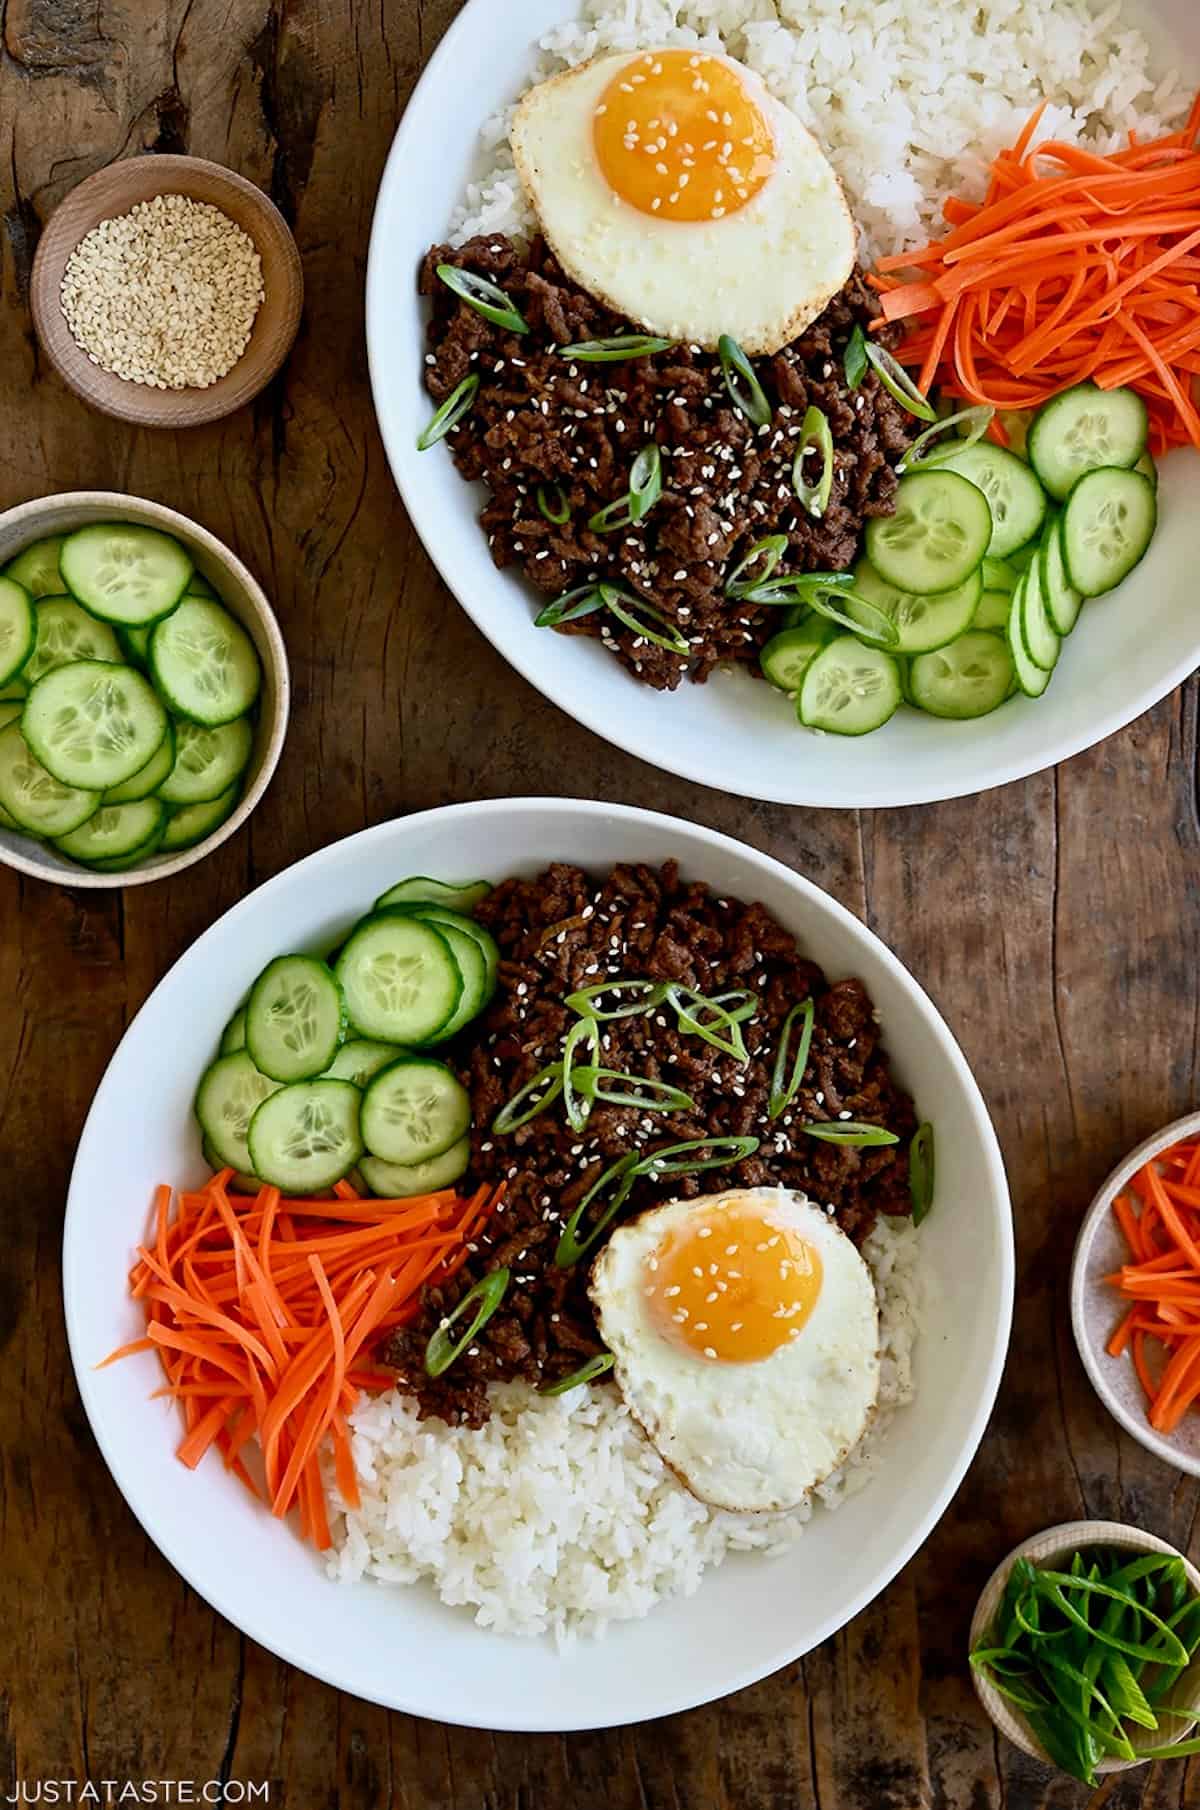
Table of Contents
Ground beef dinners are always a hit in my house—seriously, my kids would eat them every night if I let them! And if you’re anything like me, you’re always on the lookout for a weeknight dinner that checks all the boxes: quick, flavorful and satisfying. That’s where this Korean beef bowl recipe comes in.
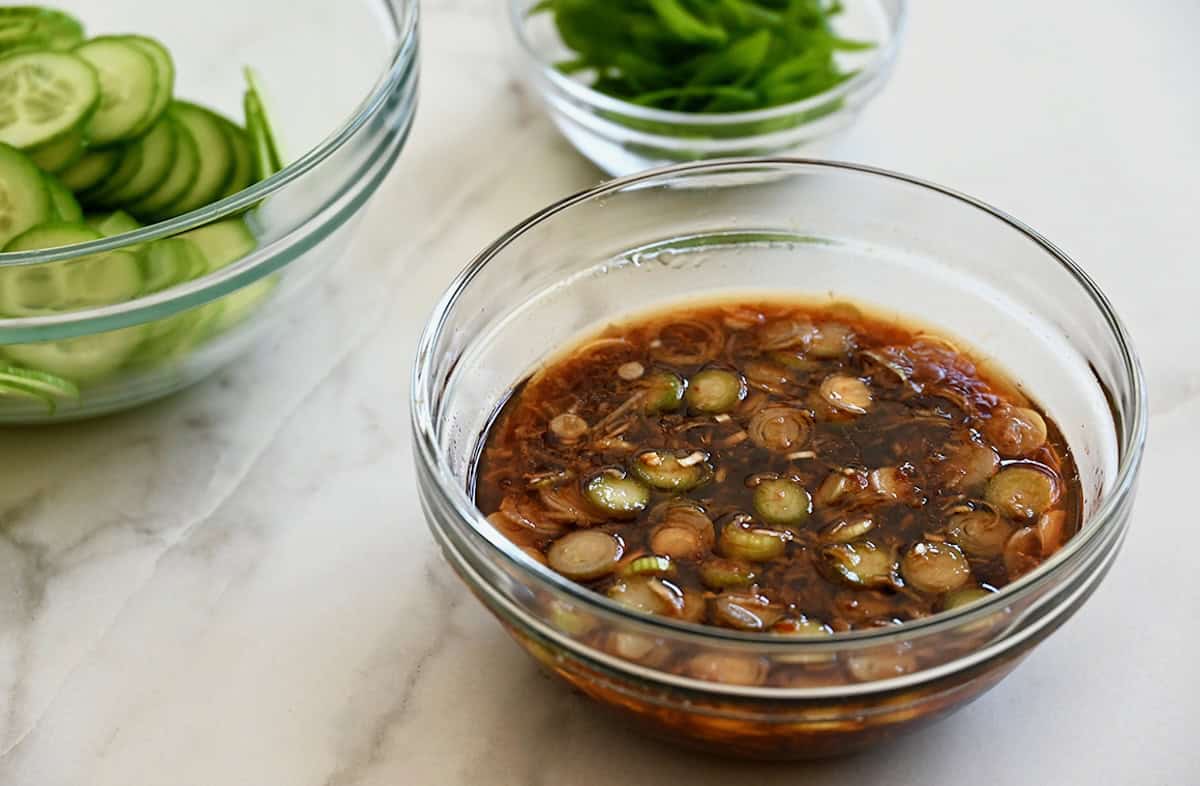
We eat a lot of Asian-inspired dinners, so I always have the ingredients on hand to whip up these beef and rice bowls. The star of the dish? A sweet and savory sauce that’s equal parts tangy and garlicky, with an optional kick of heat from Gochujang chili sauce.
The best part? It’s endlessly customizable! My kids love to pile their ground beef bowls with their favorite toppings, from crunchy cucumbers and carrots to pickled onions and sesame seeds.
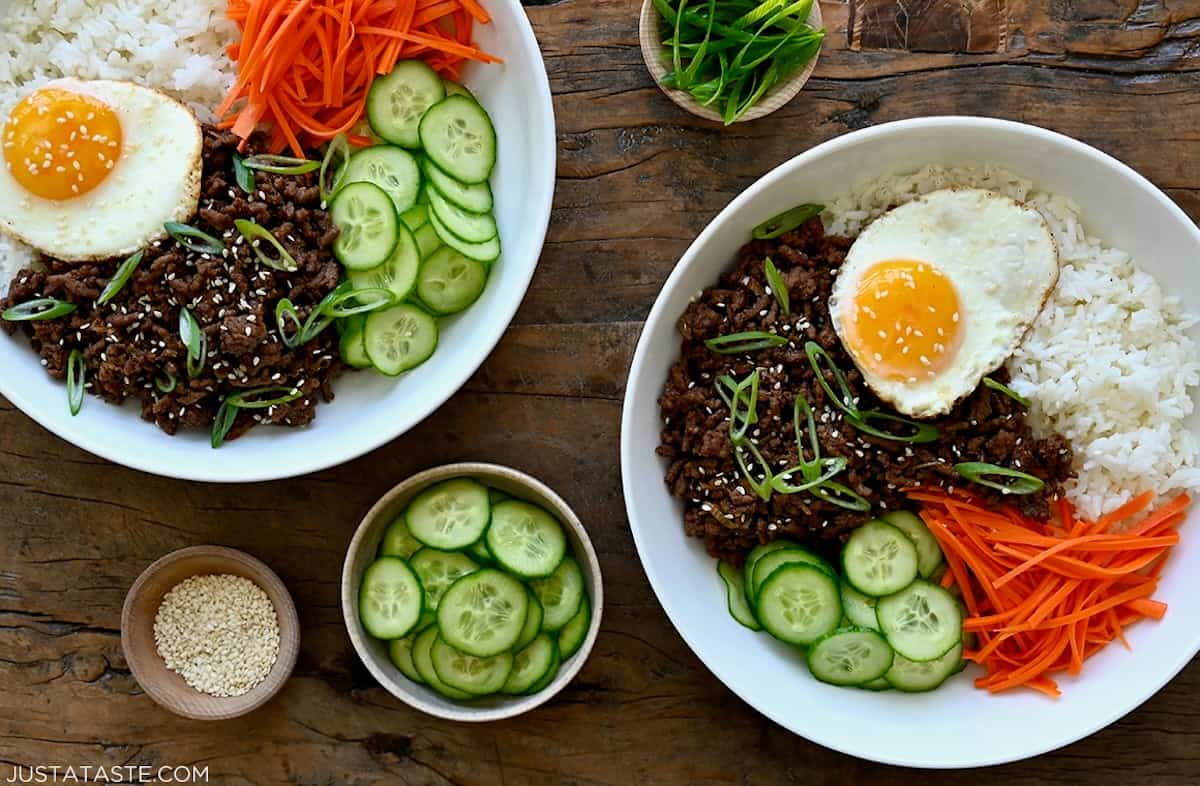
Served over a bed of fluffy rice and finished with a fried egg or a drizzle of extra sauce (or both!), this Korean BBQ bowl is a guaranteed crowd-pleaser that’ll make everyone at the table happy.
Recipe Highlights
- Ready in 25 minutes or less. Perfect for busy weeknights!
- Ideal for meal prep. Like egg roll in a bowl, all the components can be prepped separately and assembled when ready to serve.
- Easy-to-find ingredients. If you regularly make stir-fry recipes, you probably already have all the ingredients on hand.
- Serve over your favorite base. Korean ground beef is delicious over steamed jasmine rice, brown rice or cauliflower rice. See below for more ideas!
- Customize your toppings. Top your rice bowl with shredded carrots, thinly sliced cucumbers or whatever veggies you have on hand. Broccoli and kimchi are two of my favorite Korean beef bowl toppings.
- Ground beef: Lean ground beef (I used 85% lean) keeps this recipe light without sacrificing flavor. If you prefer an even leaner option, 90% lean works well, too!
- Low-sodium soy sauce: The base of the sauce, providing that signature umami flavor without being overly salty. For a gluten-free Korean beef bowl, swap the soy sauce for tamari or coconut aminos.
- Brown sugar: Adds just the right amount of sweetness to balance the savory flavors. Honey works well in this recipe, too.
- Sesame oil: A little goes a long way in delivering a nutty, toasty aroma.
- Rice wine vinegar: For a touch of tang and acidity.
- Garlic and ginger: Freshly minced for a punch of bold flavor.
- Scallions: Use the white parts for the sauce to add a subtle onion flavor and reserve the green parts for garnish.
- Chili garlic sauce or Gochujang: For those who love a hint of heat (optional but highly recommended!).
See the recipe card for full information on ingredients and quantities.
Choose Your Base
One of the best things about these Korean beef bowls is their versatility! The base you choose can completely transform the meal. Here are some of my favorite options:
- Rice: Steamed white rice is a classic choice for these ground beef bowls, but I love the slightly sweet, fragrant flavor of coconut rice paired with the savory beef sauce. Brown rice is another wholesome and delicious option.
- Cauliflower rice: For a low-carb option, cauliflower rice is a light and healthy base that soaks up the delicious sauce like a pro.
- Quinoa: If you’re looking to add a protein boost, quinoa is a great choice. See my tutorial for how to cook quinoa for perfectly fluffy results every time.
- Mixed greens: Turn this into a Korean beef salad bowl by piling the beef and toppings over your favorite greens for a lighter, veggie-packed option.
How to Make a Korean Beef Bowl
- Make the sauce. In a small bowl, whisk together the soy sauce, brown sugar, sesame oil, rice wine vinegar, chili garlic sauce (if using), garlic, ginger and scallions. Set aside.
- Brown the beef. It may be most familiar to cook your ground beef fast and quick, but trust me: A bit of patience will yield juicy and more complex-tasting beef for beef bowls. Allow your ground beef to get to room temperature (about 15 minutes) before cooking to make sure the meat cooks evenly without steaming itself in the pan. Add the beef to your nonstick skillet and cook, breaking it apart with a spatula, until browned. Drain any excess grease.
Pro Tip: Let your ground beef cook for 5 minutes before breaking into chunks, it will gain color and a crispness that gets lost from mashing it up too early.

- Add the sauce. Pour the prepared sauce into the skillet. Stir to coat the beef, then cook for 3-4 minutes until the sauce thickens slightly and the beef is fully cooked.
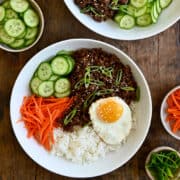
- Assemble the bowls. Spoon the Korean beef over cooked white rice (or your base of choice) and add your favorite toppings.
My dream bowl includes a yolky over-easy egg and plenty of spicy gochujang chili sauce. Once mixed, the yolk and Gochujang form their own magic secret sauce that coats each part of the bowl in savory, spicy deliciousness.
Meal Prep and Storage Instructions
- Meal prep: Cook the beef and sauce, then store in an airtight container in the fridge for up to 4 days. I like to store the rice and crisper vegetable components separately (until ready to eat) so they don’t lose any of their vibrance. Cooked rice will stay fresh for three to four days when stored in an airtight container in the fridge.
- Reheating: Combine all the warm components (like the beef, rice and egg) and microwave in 30-second increments until warmed through. Then top with vegetables and enjoy!
- Freezing: The beef mixture freezes beautifully. Portion into freezer-safe bags and freeze for up to 3 months.
Can I Make This Recipe With A Different Protein?
Absolutely! You can easily swap the beef for your favorite protein. Here are a few of my favorites that pair perfectly with this Korean-inspired dish:
- Tofu: Make this a vegetarian bowl by using extra-firm tofu. Simply press it to remove excess moisture, then marinate and cook as directed for a delicious plant-based option.
- Chicken: Use boneless, skinless chicken thighs or breasts. Or, follow my recipe for easy roast chicken, then slice or shred it for your bowl.
- Pork: Thinly sliced pork tenderloin or pork shoulder works beautifully in this dish.
- Ground turkey, chicken or pork: Brown your favorite ground meat, then mix it with the marinade to create a quick and tasty version of this bowl.

Ingredients
- 1/2 cup low sodium soy sauce
- 1/2 cup packed light brown sugar
- 2 teaspoons sesame oil
- 2 Tablespoons rice wine vinegar
- 1 1/2 teaspoons chili garlic sauce or Gochujang Chili Sauce (optional)
- 1 Tablespoon minced garlic
- 1 Tablespoon minced fresh ginger
- 1/4 cup sliced scallions, white parts only (reserve green parts for garnish)
- 2 pounds lean ground beef
- Cooked white rice, for serving
- Sliced cucumbers, shredded carrots, fried eggs and sesame seeds, for serving (optional)
Instructions
- In a small bowl, whisk together the soy sauce, brown sugar, sesame oil, rice wine vinegar, chili garlic sauce, garlic, ginger and scallions. Set the mixture aside.
- Add the ground beef to a large nonstick skillet set over medium-low heat. Cook, breaking apart the meat with a spatula, until browned. Drain any grease.
- Add the sauce mixture to the pan and increase the heat to medium. Cook, stirring, until the meat is cooked through and the sauce has thickened slightly, 3 to 4 minutes.
- Spoon the ground beef over rice. Garnish with sliced green parts of scallions. Serve with sliced cucumbers, shredded carrots, fried eggs and sesame seeds (optional).
- ★ Did you make this recipe? Don't forget to give it a star rating below!
Nutrition
Did you try this recipe?
Leave a comment below with your star rating!
This post may contain affiliate links.


This recipe is delicious. My husband calls it the Fire Bowl lol. We have been eating basic version of this for two years and the add-ons you have here completely step up the game. This is already a regular in our house. We highly recommend!
I’m so thrilled you and your husband have been enjoying this recipe, Brooklynn!
So easy and delicious! It tastes very similar to authentic bibimbap and full of lots of protein. I make this every few weeks using jasmine rice and everyone loves it! Great recipe.
Thrilled you enjoyed it, Tegan!
So easy and yummy. My whole family loves this meal!
So glad you enjoyed the recipe, Anna!
This is so quick and so flavorful. I easily make this once a week. Definitely recommend the fried egg!
So glad you’re enjoying it, Jess!
Honestly this has become one of my favorite go-to recipes! As someone who can only tolerate the heat level of cheddar jalepeno Cheetos, the spicy/heat from the chili garlic sauce is totally manageable!
6 servings is way too much for just me to eat in a week, so I cut the recipe in half and make 1 cup (dry) of jasmine rice to split for all the servings for the base of the dish. Sometimes I’ll swap for cauliflower rice. I normally get between 3 and 4 servings.
I’ve eaten leftovers both cold and reheated and it’s just as good as the day you made it. If you are reheating, I would suggest adding the cucumbers and carrots after its been reheated so you keep the crunch of the fresh veggies!
So excited you’re enjoying it, Allison!
So easy and very yummy! Even my 1 year old loved it
I’m so glad you all enjoyed the recipe, Morgan!
Delicious and so quick and easy! Also used your recipe for coconut rice and served together. So yummy!
I’m so glad you enjoyed the recipe, Holly!
Would this sauce be for chicken stir fry?
Absolutely! It’d work great.
Actually incredible. Made for my family and even my 1 ½ year old loved it! I’ve now made this recipe 3 times
This comment makes me so happy, Jonah! Thrilled your entire family is enjoying this recipe.
Very easy and so flavorful! I will be adding this to our regular dinners. Thank you!
I’m so glad that you enjoyed the recipe, Paula!
Love how quick and easy this recipe is! I made extra sauce and put it on roasted salmon. So delicious with both the salmon and the beef!
I’m so thrilled you enjoyed the recipe, Liv!
This is really, really good. It doesn’t get much better as far as a quick and easy weeknight dish. I do back off on the sugar a little bit, personally. My only suggestion is to add the sesame oil at the very end off the heat rather than mixing it into the sauce cause it can get bitter when cooked. A runny egg is a must, and to really trick it out I top it with the famous Francis Lam ginger scallion sauce recipe rather than putting those things in the meat mixture.
I’m thrilled you’ve been enjoying the recipe, Matthew!
My Korean food lovers enjoyed it. Will make it again!
I’m so happy to read this, Laurel!