
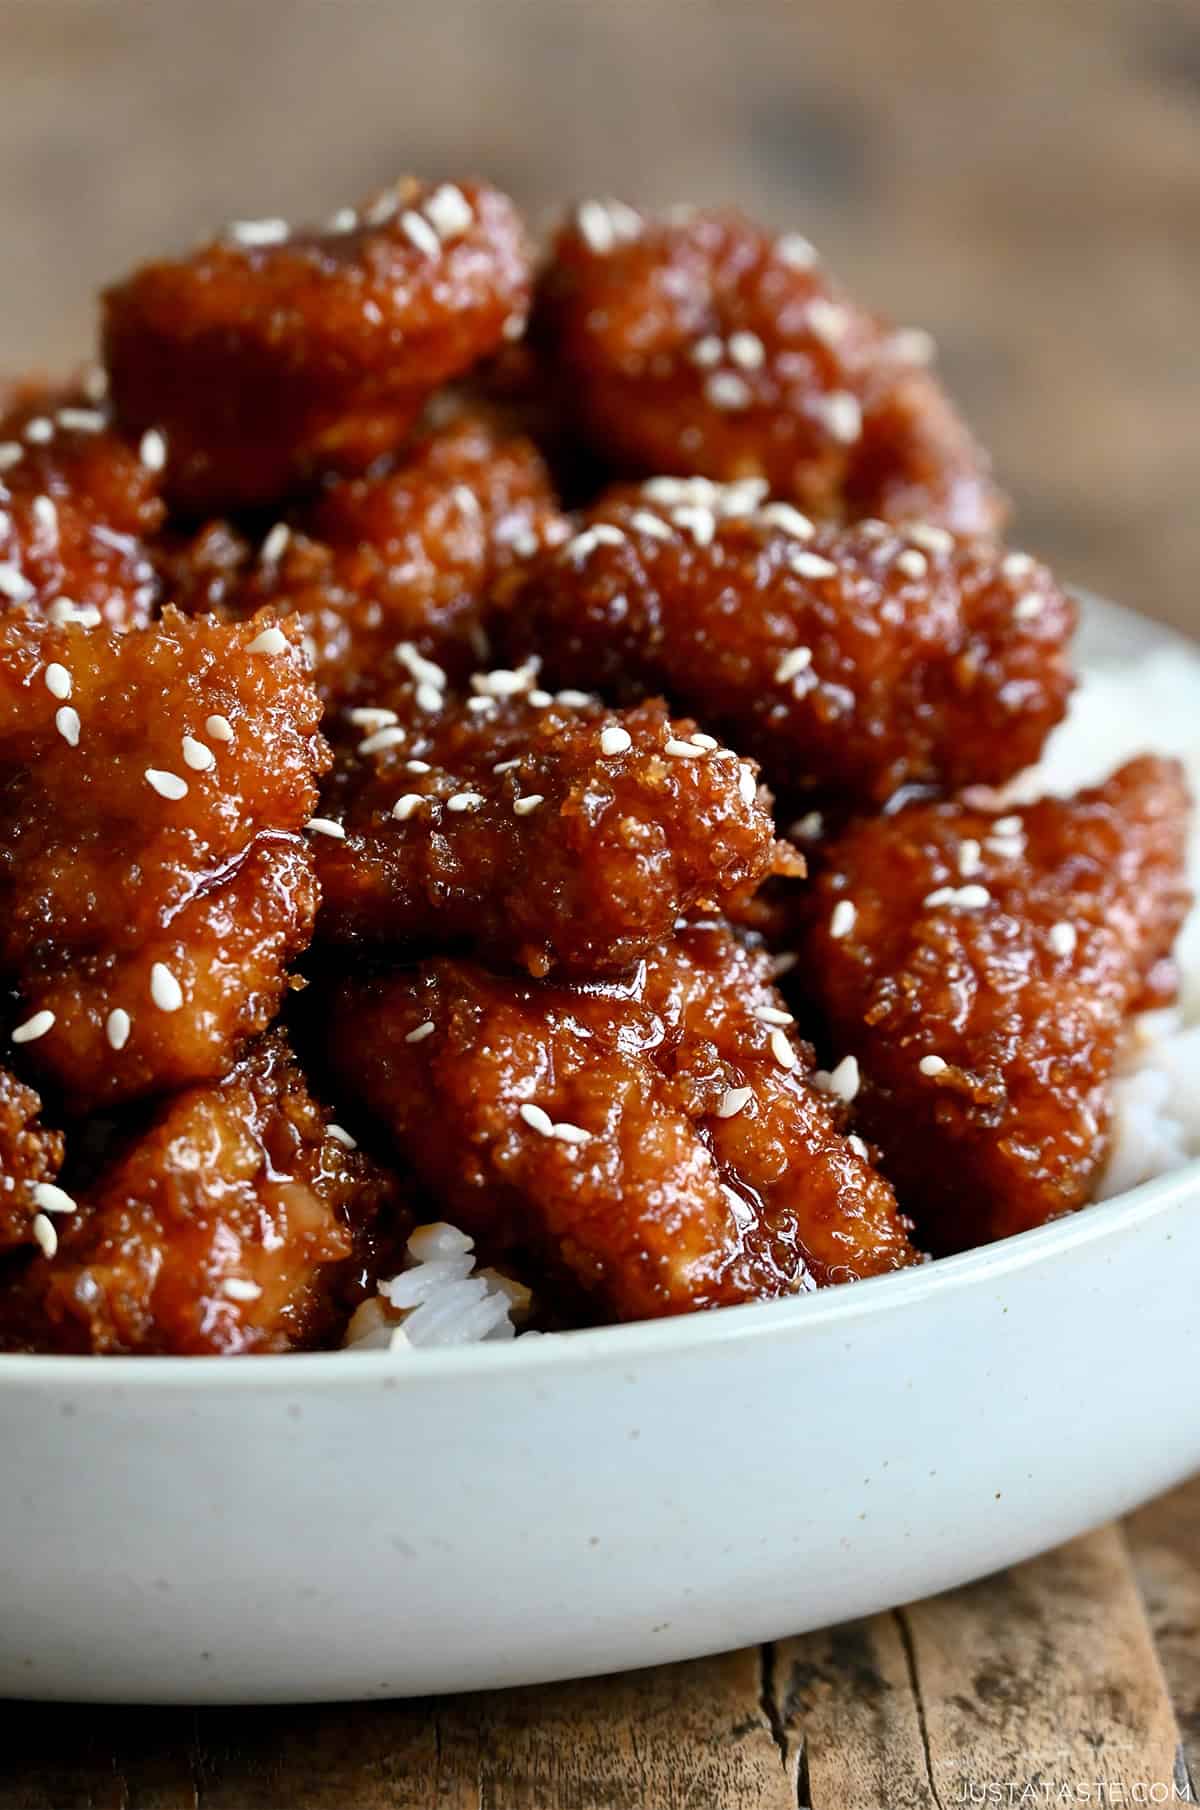
This crispy sesame chicken tastes just like your favorite Chinese restaurant, made right at home. Bite-sized pieces of juicy chicken thighs, an extra-crunchy Panko crust and a lick-the-spatula homemade sticky-sweet sesame sauce. Serve it over white rice, and dinner is done!
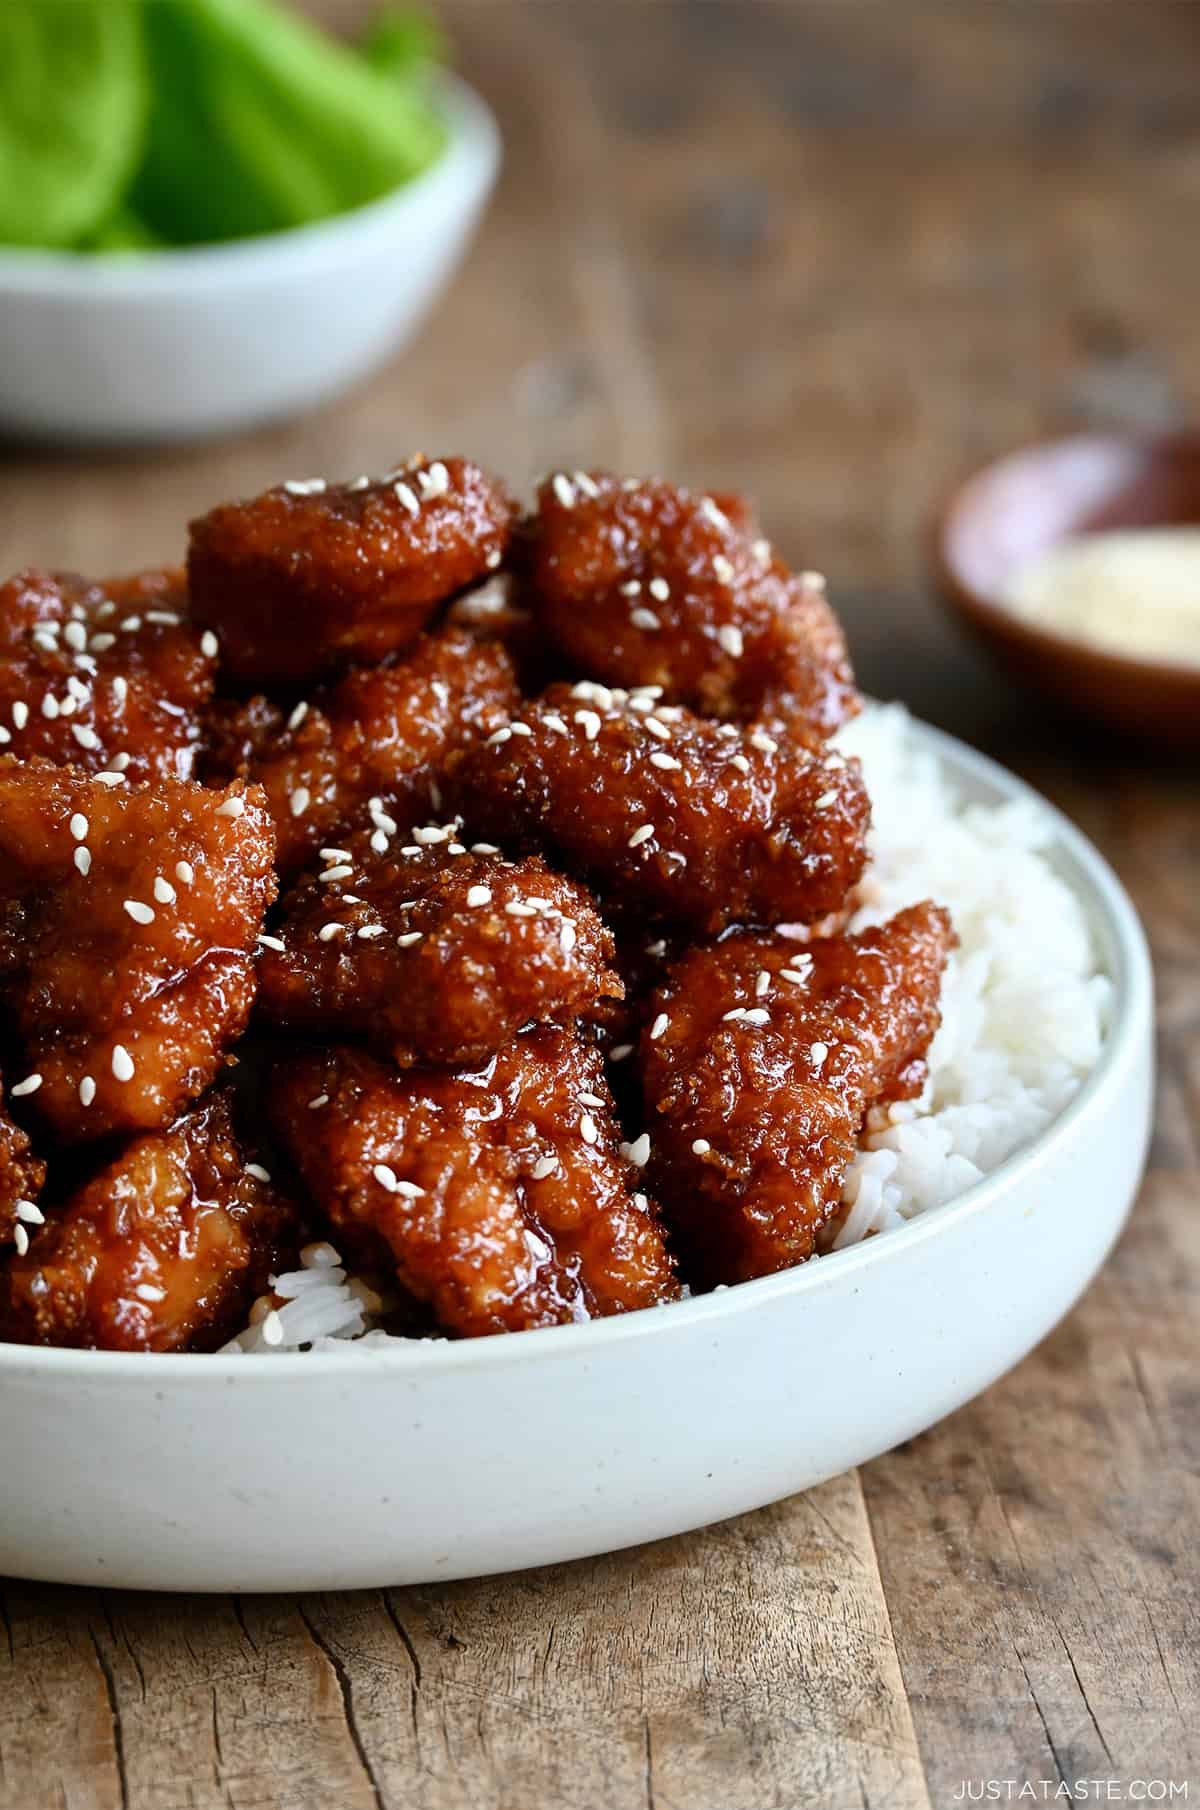

I first shared this sesame chicken back in 2020 as a baked recipe, and the response blew me away. So many of you have made it and reported back with rave reviews, including my four tiny taste-testers. But over the years, I kept getting requests for the traditional sesame chicken you get at a Chinese restaurant. And as much as I love a good ol’ baked chicken recipe, there are some things you just can’t replicate without a vat of hot oil, and that signature crunch is one of them.
So I went back to the kitchen and came out with this: shatteringly crispy, Panko-crusted chicken pieces deep-fried and tossed in that same oh-so-addicting sesame sauce that’s both sweet and tangy in every bite.
It’s become an instant family favorite around our house and the version my kids now request on repeat. If you love the baked version, don’t worry. I kept those instructions in the recipe card notes so you’ll always have them. And just like the original recipe, this takeout-inspired meal will be on your dinner table in less than 40 minutes.
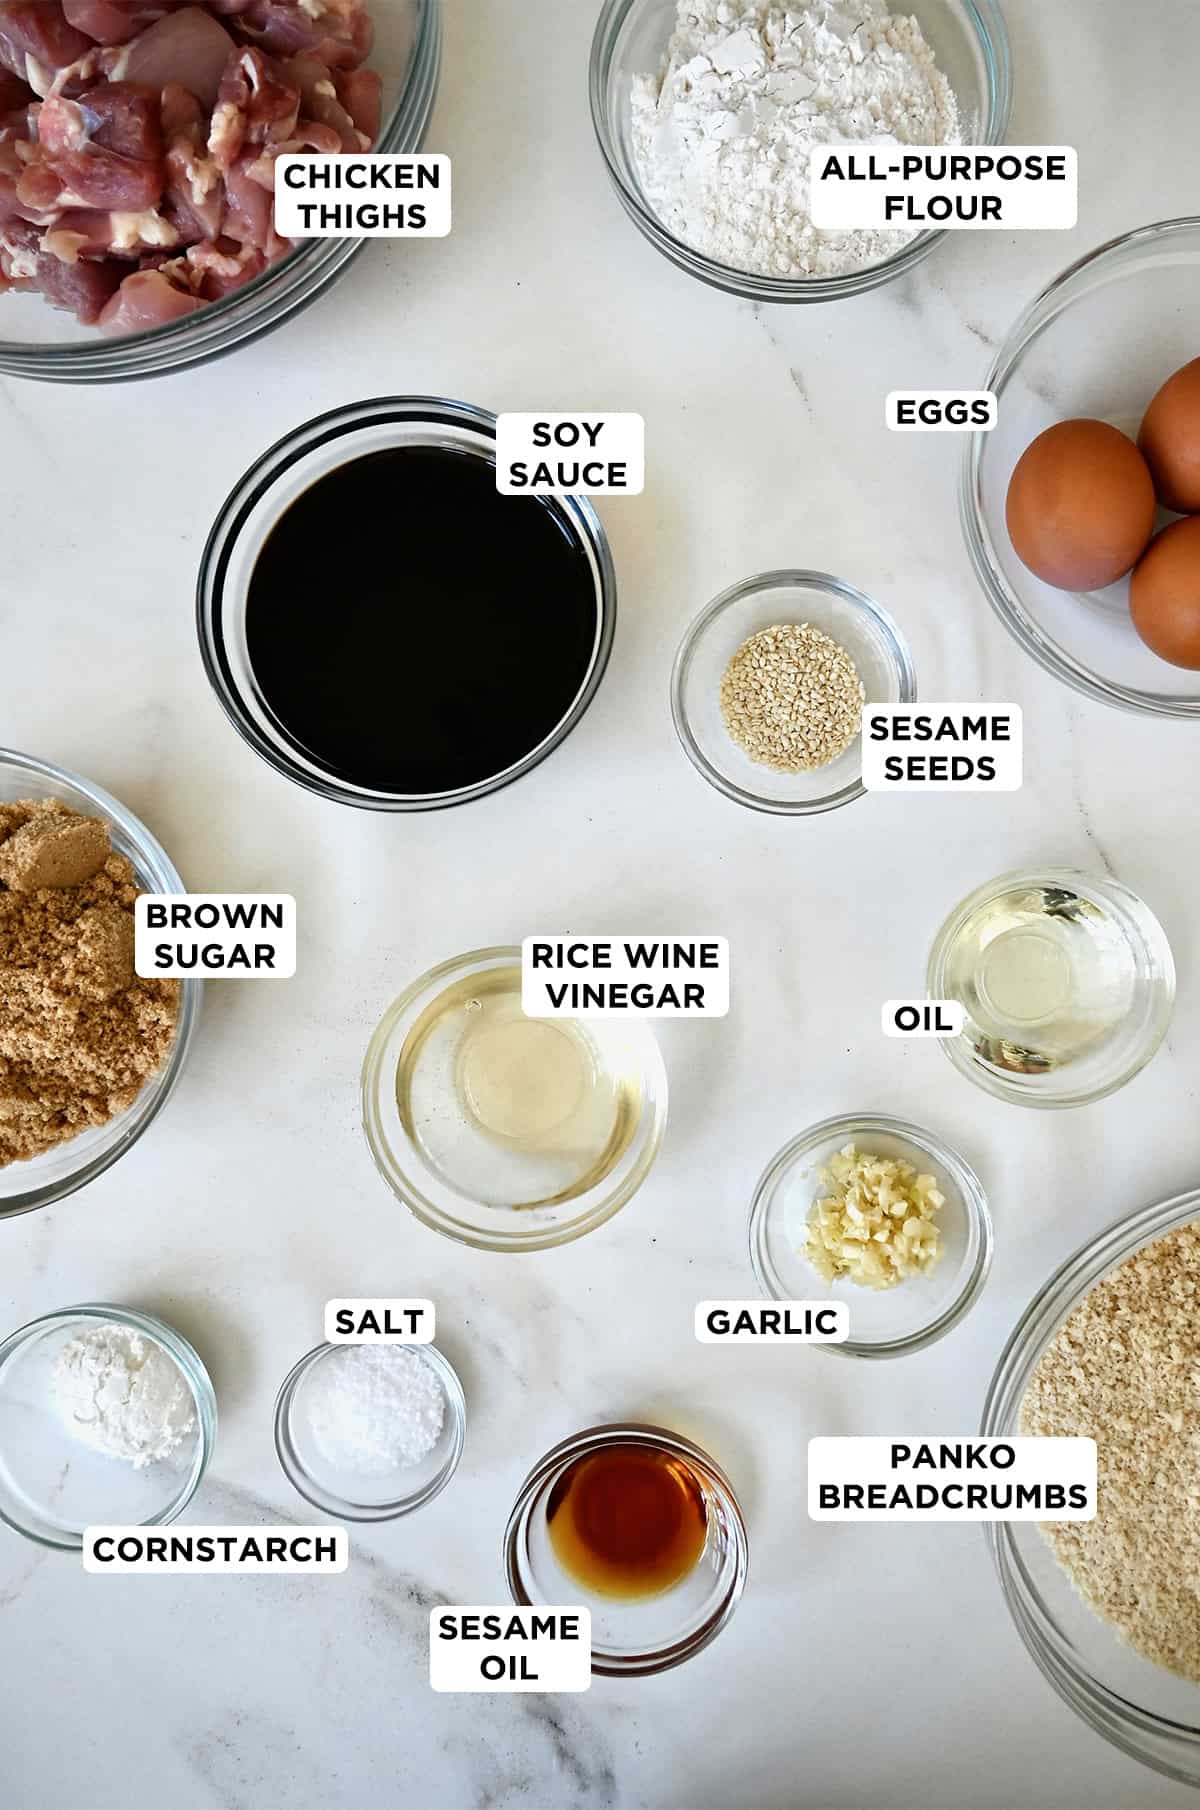
- Chicken thighs: The real secret to the one-two punch of crunchy and juicy chicken is using boneless, skinless thighs. I’m a big believer in chicken thighs being super underrated in the poultry department. I use them in so many of my favorite chicken dinner recipes, from General Tso’s chicken to sticky pineapple chicken. That being said, you can 100% make this recipe with chicken breasts if you prefer white meat, but they’re more prone to drying out under high heat.
- Flour, eggs and Panko breadcrumbs: This three-step coating is what gives the chicken its ultra-crispy exterior. Flour helps the egg stick, the egg acts as the glue for the breadcrumbs, and Panko creates a lighter, airier crust than regular breadcrumbs. It’s why I use Panko for extra-crispy chicken katsu and sweet and sour chicken, too.
- Garlic: We bloom the minced garlic in oil before building the sauce, which draws out the flavor and takes the raw edge off.
- Low-sodium soy sauce: The savory, umami backbone of the sauce. Low-sodium keeps the saltiness in check.
- Rice wine vinegar: Adds a subtle tang that keeps the sauce from being one-dimensional.
- Sesame oil: The key ingredient for that distinct, nutty flavor.
- Light brown sugar: Adds sweetness and depth of flavor.
- Cornstarch slurry: Cornstarch mixed with water that gives the sauce its glossy, sticky, restaurant-style consistency.
- Vegetable oil: For frying. Its neutral flavor and high smoke point make it the go-to here. Canola oil works equally well.
Start by Coating the Chicken
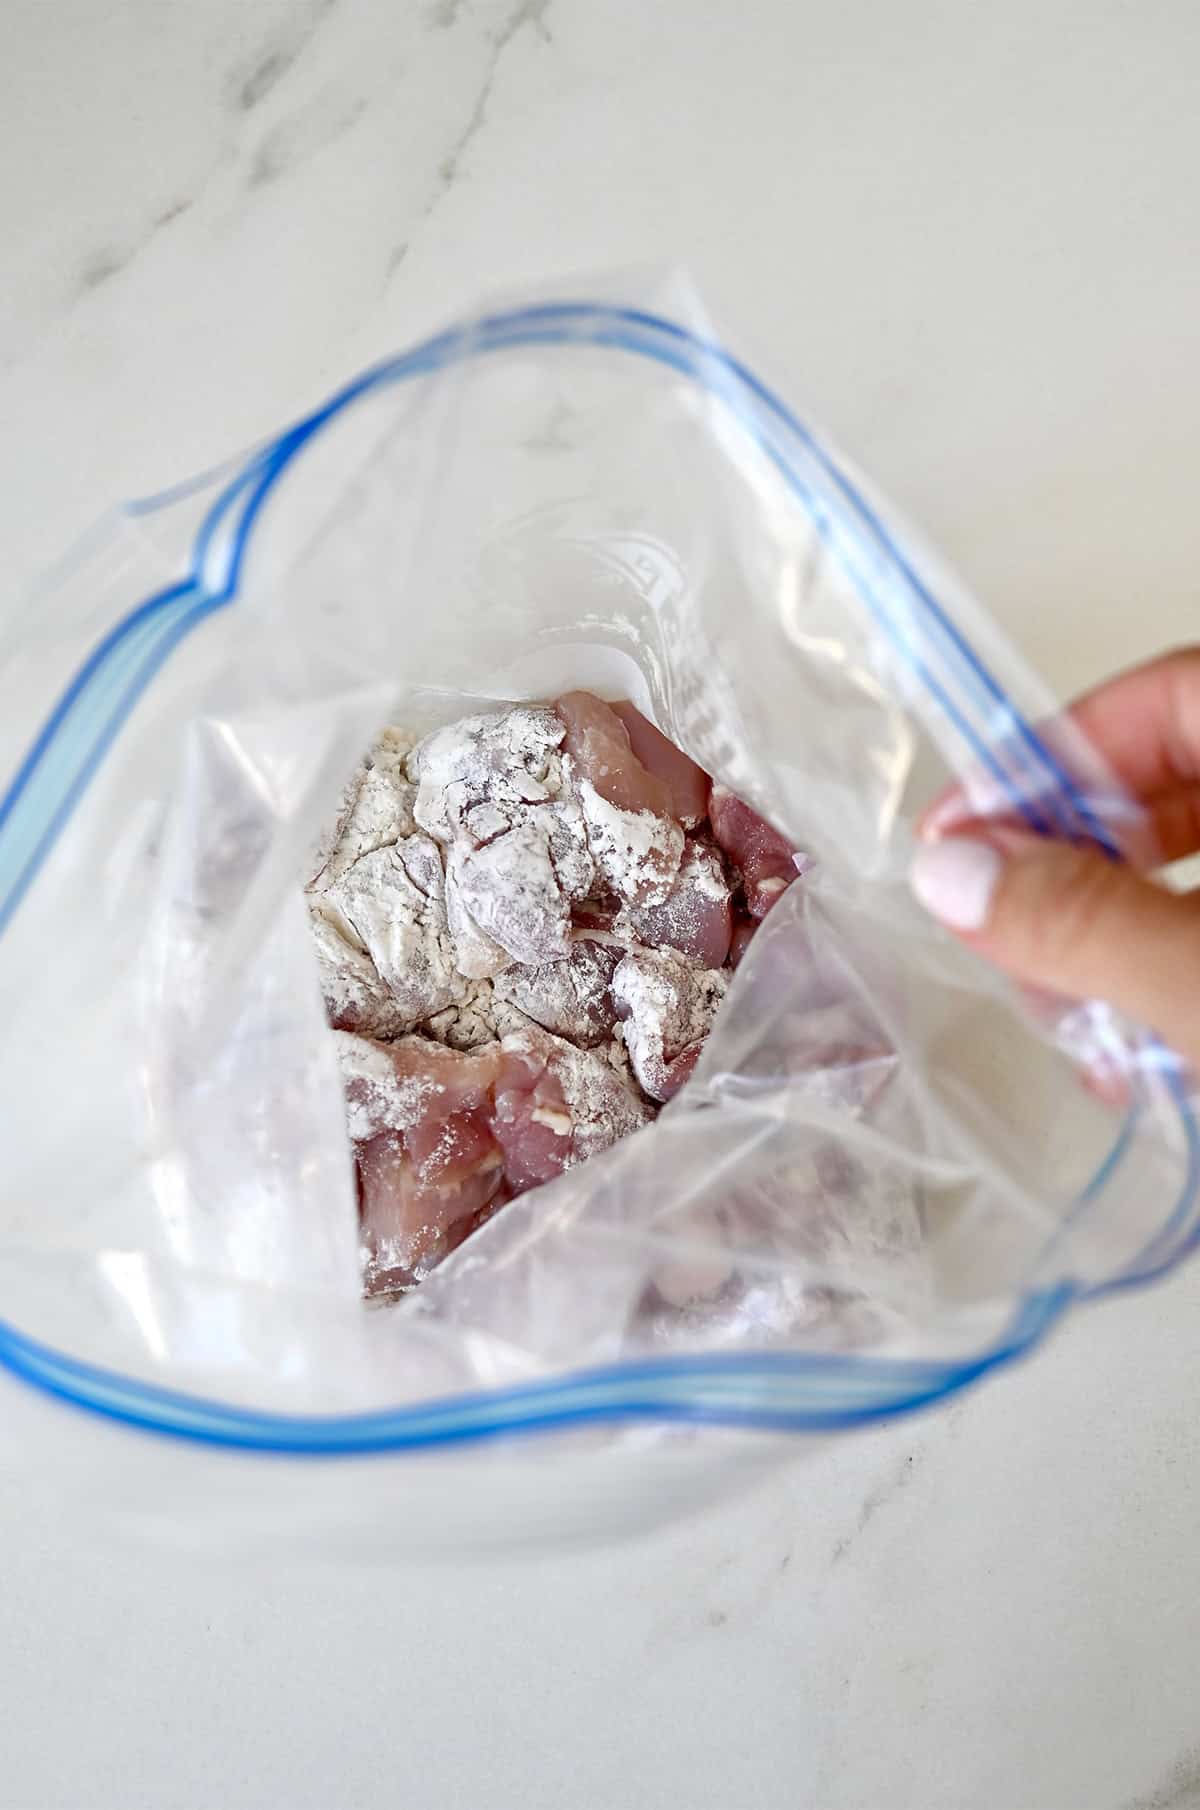
The process for coating the chicken is the same as my honey-glazed popcorn chicken and orange chicken recipes. When it comes to coating chicken pieces in flour, I use a sealable plastic bag instead of a bowl. Shake, coat, done. It’s faster, easier and cleanup is a total breeze.
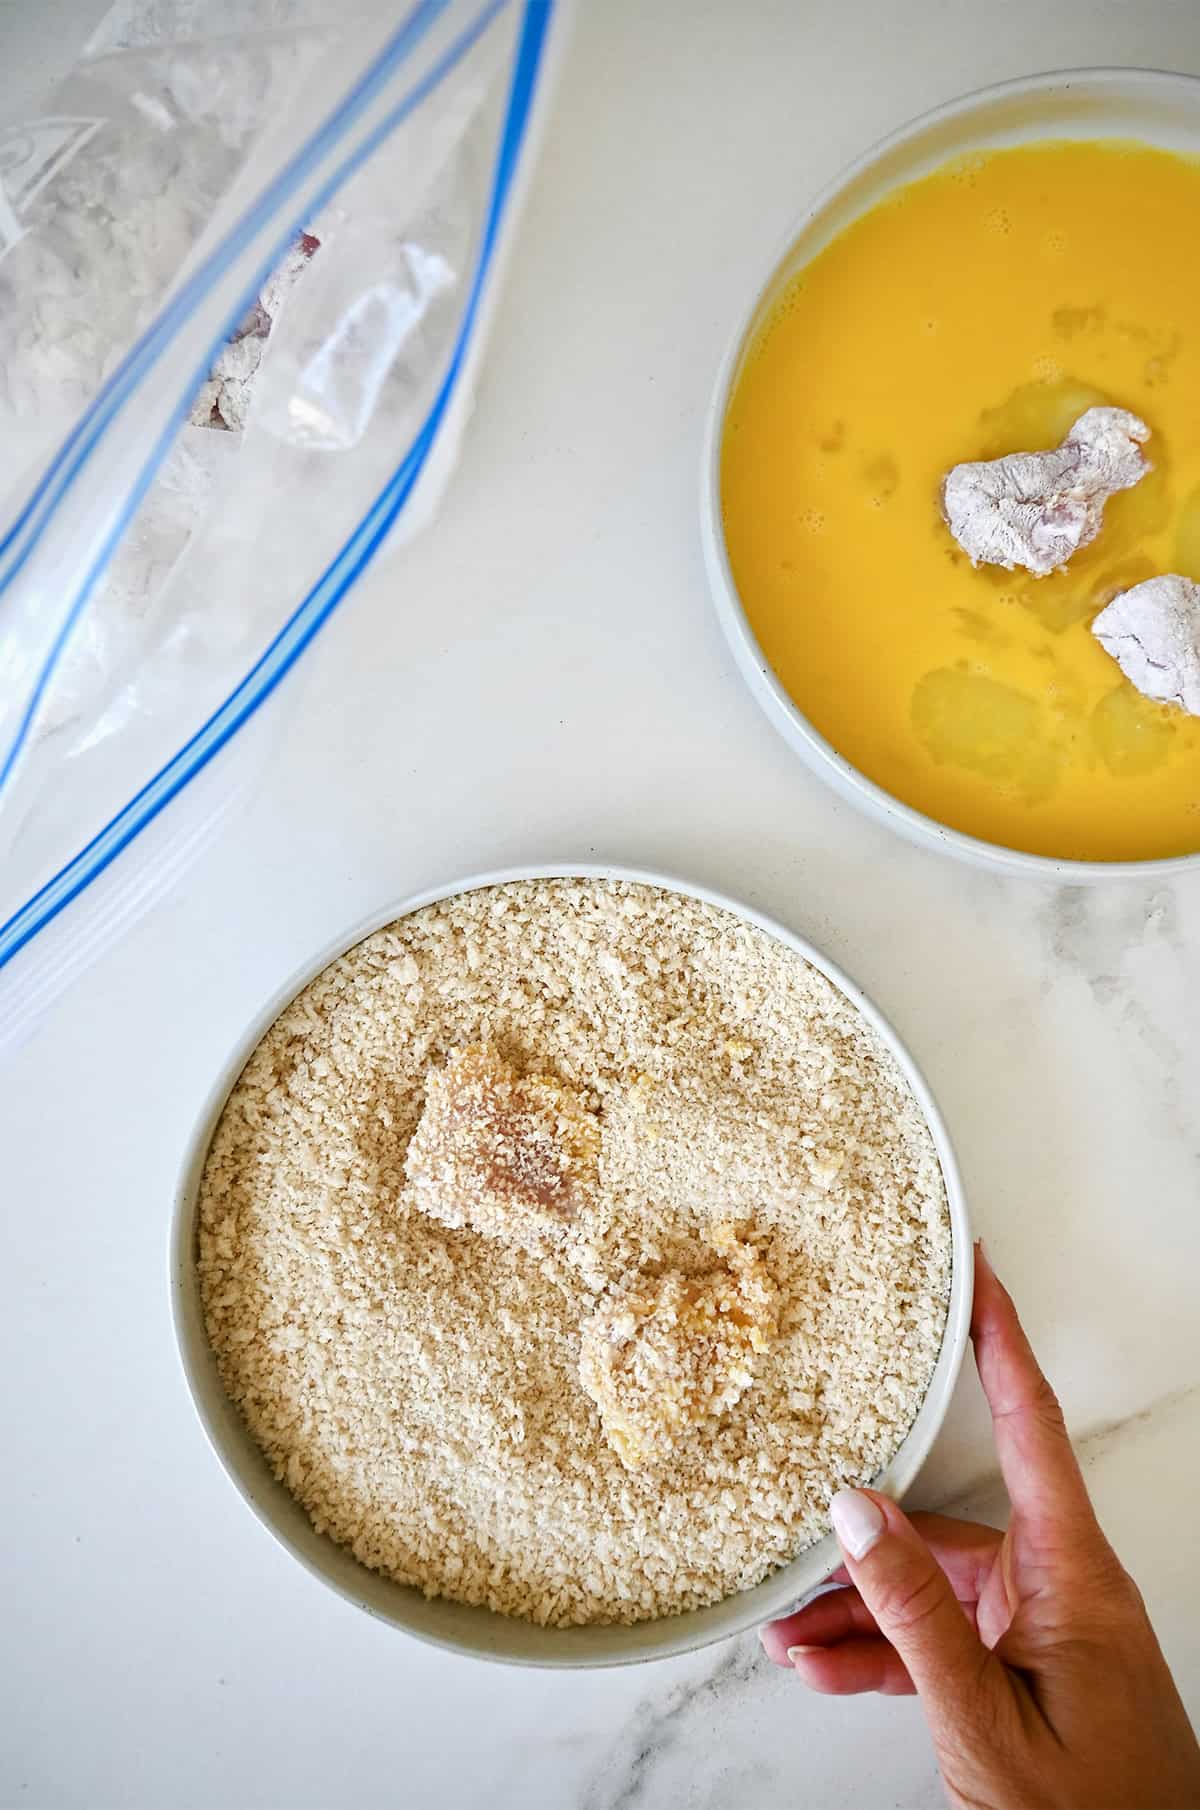
Shake off any excess flour from the chicken pieces, dunk them into the egg mixture, then coat them generously in the Panko breadcrumbs.
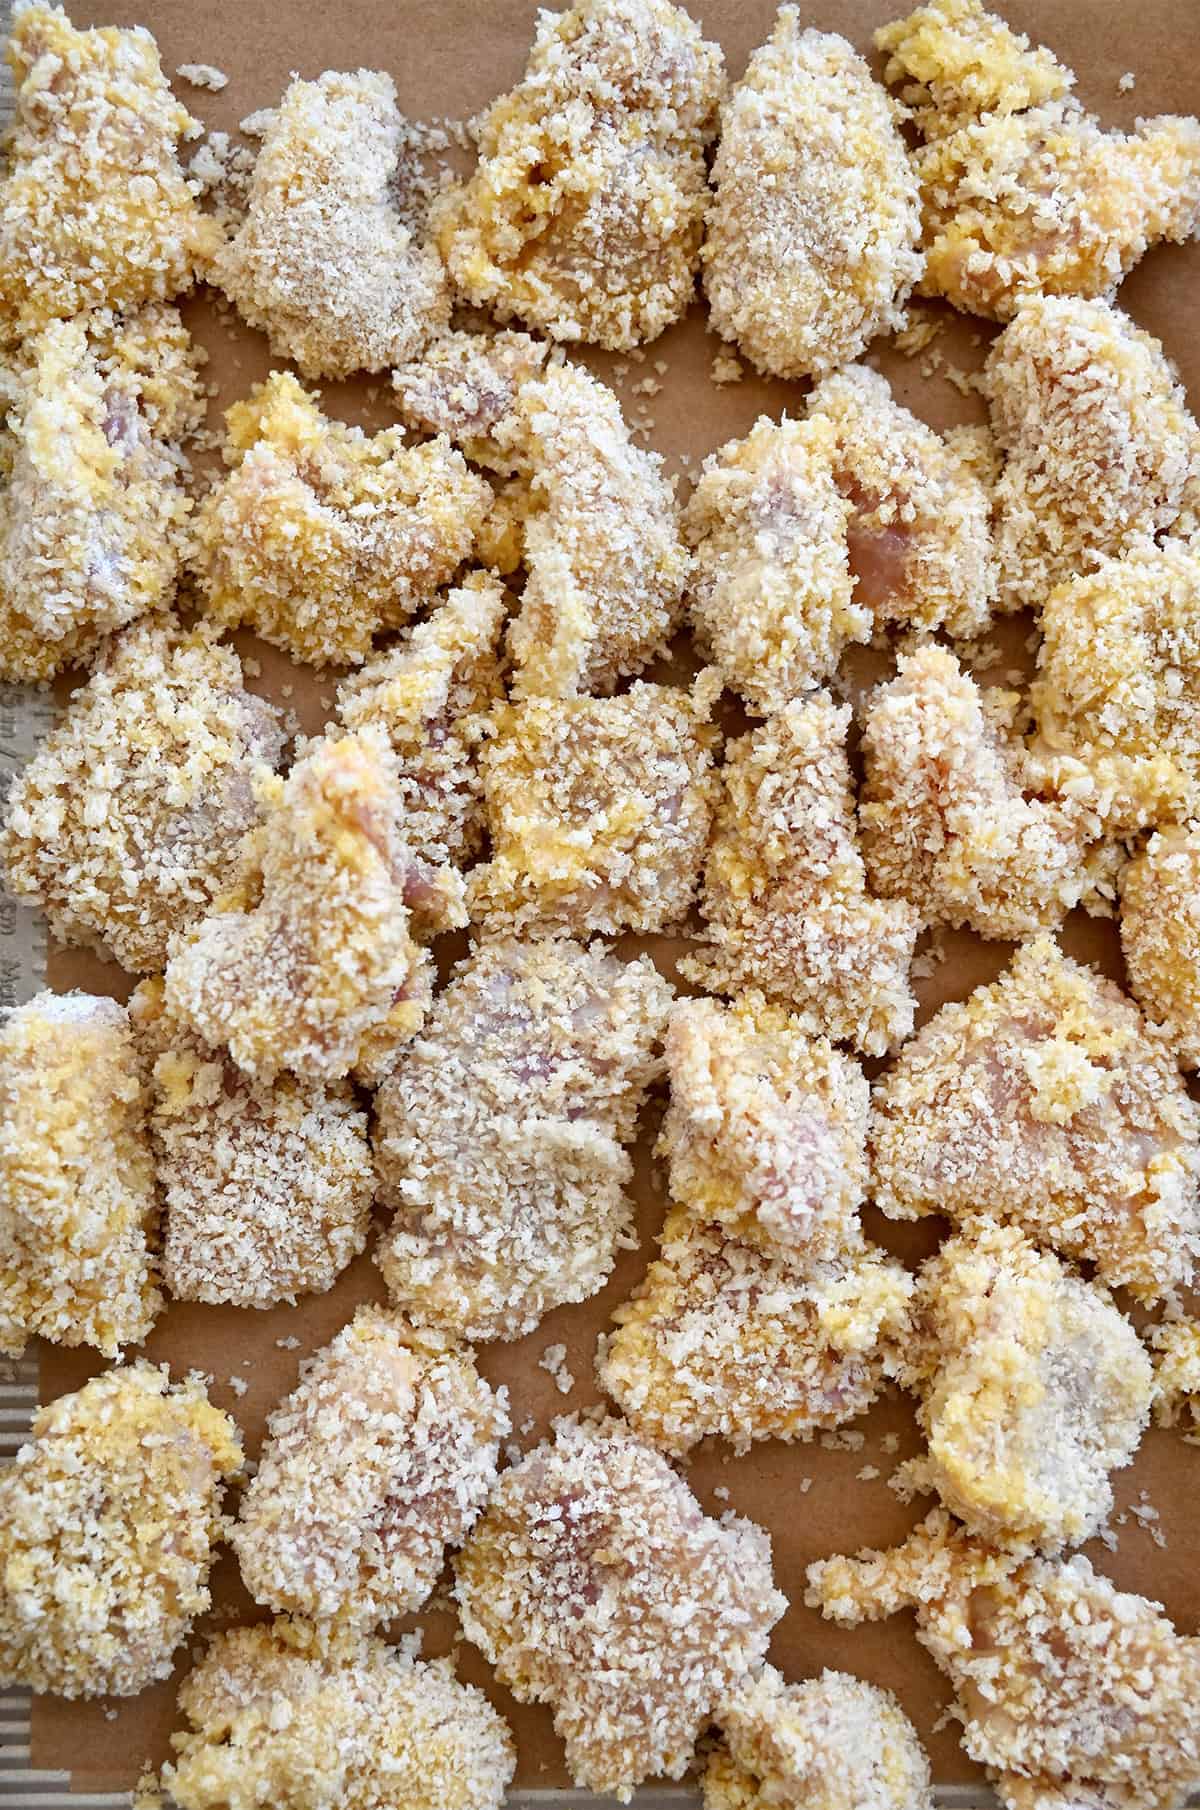
Fry or Bake
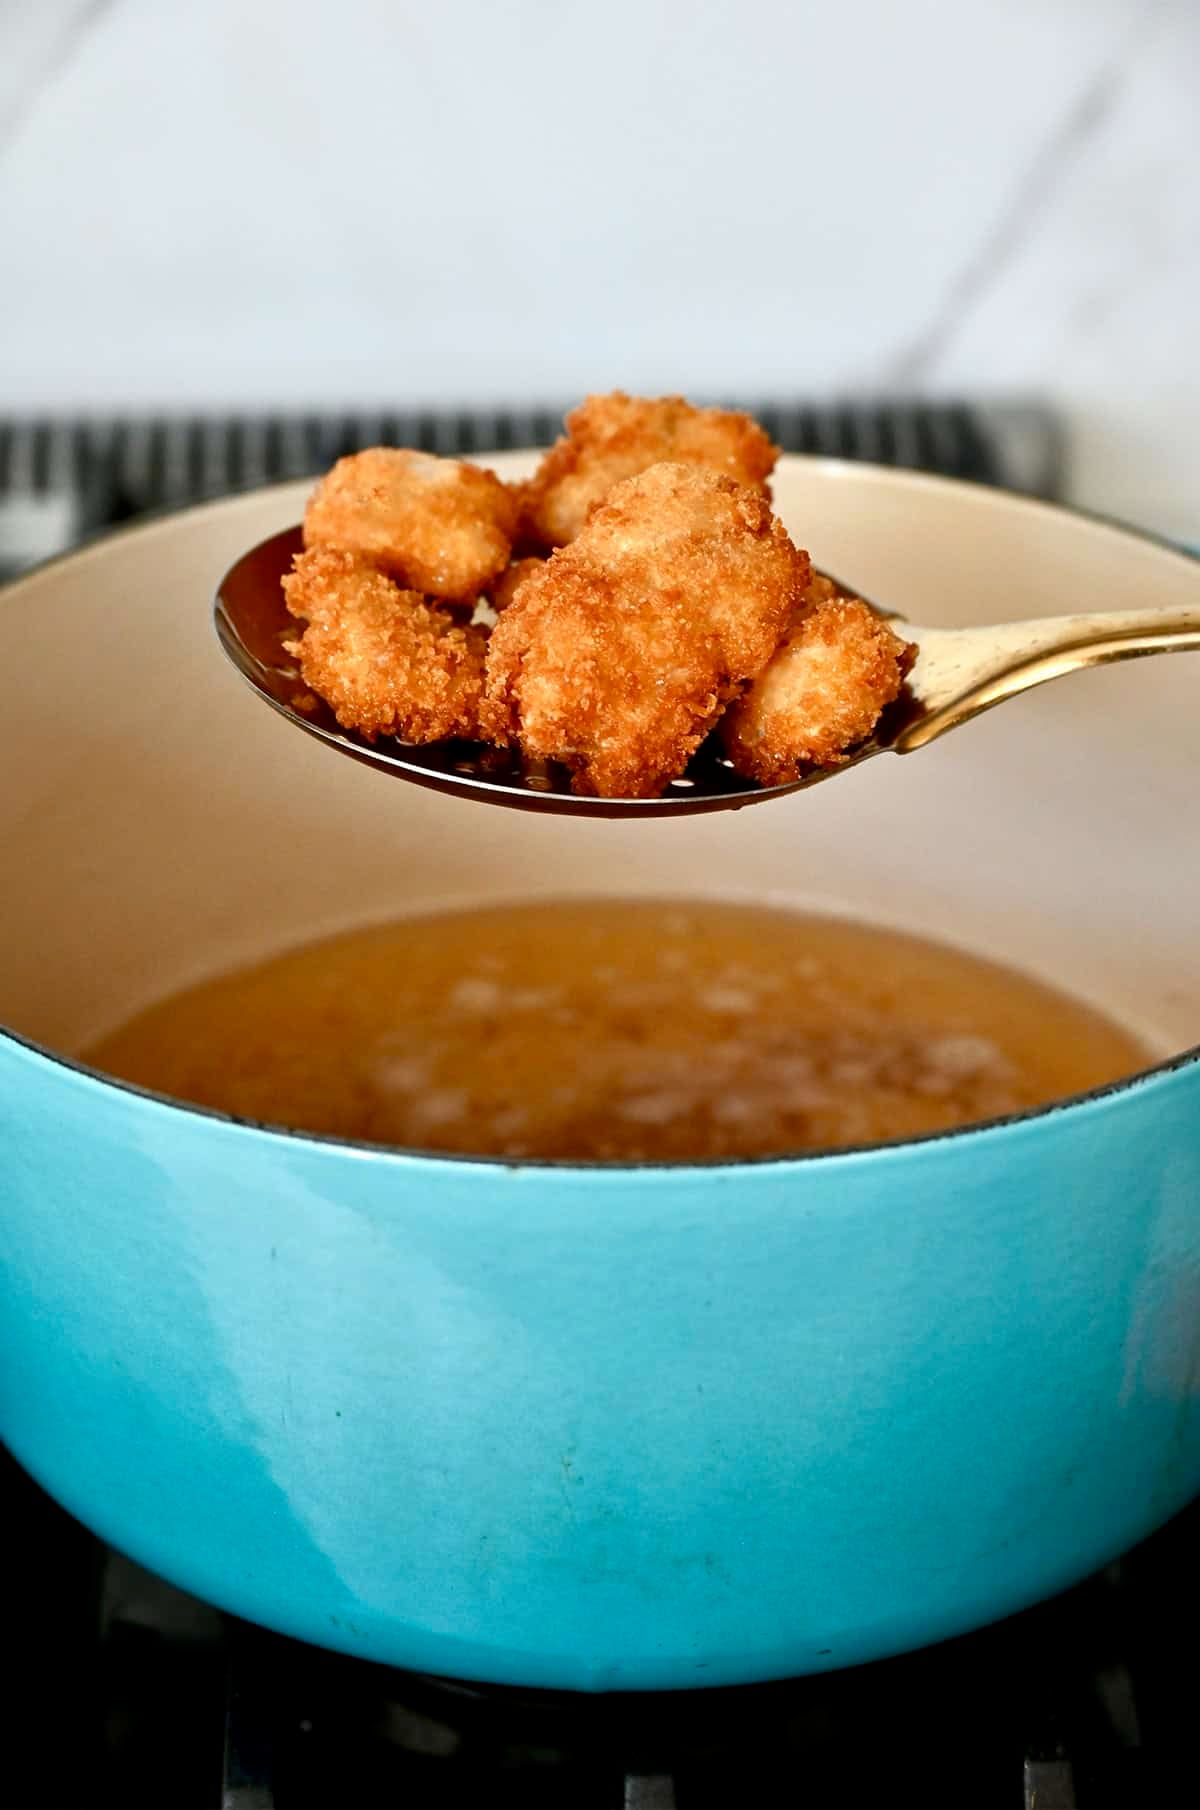
To fry, add 2 inches of vegetable oil to a large heavy-bottomed pot set over medium heat and line a baking sheet with paper towels. A few things I never skip when frying:
- A deep-fry thermometer. Oil temperature is everything. Too hot and the outside burns before the chicken cooks through. Too cool and the chicken absorbs excess oil and turns greasy. A deep-fry thermometer takes all the guesswork out of it.
- Frying in batches. Adding too much chicken at once drops the oil temperature, which leads to soggy results. See #1 above!
- Bringing the oil back to 360°F between batches. Again, see #1 above!
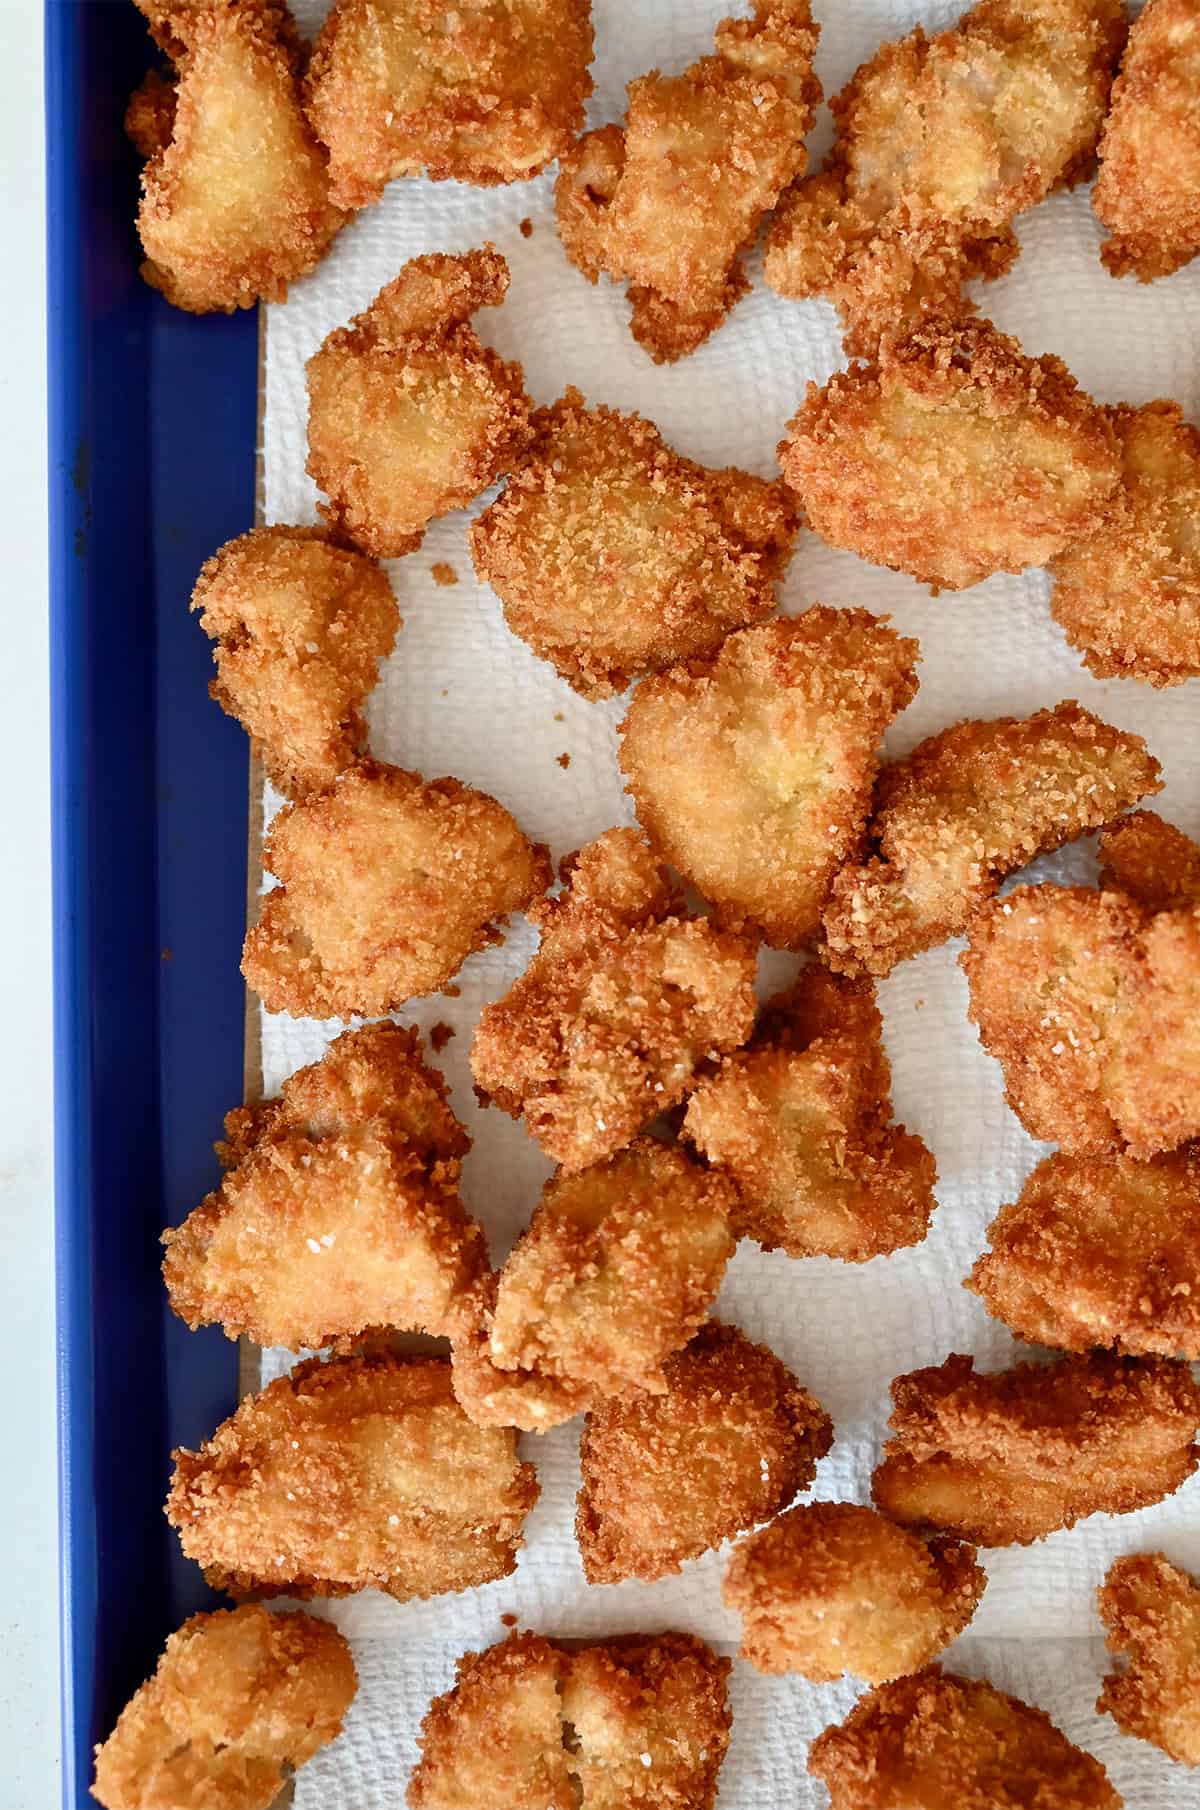
Prefer to bake? Preheat your oven to 450°F, arrange the coated chicken pieces on a greased foil-lined baking sheet, spray lightly with cooking spray and bake for 10 minutes. Flip each piece and continue baking until cooked through and crispy, an additional 5 to 10 minutes. Full instructions are in the recipe card notes below.
Make the Sesame Sauce and Toss to Coat
While the chicken drains on paper towels, make the sesame sauce. It comes together in just 5 minutes in a small saucepan.
Success tip: The mixture needs to come to a boil after adding the cornstarch slurry to thicken properly.
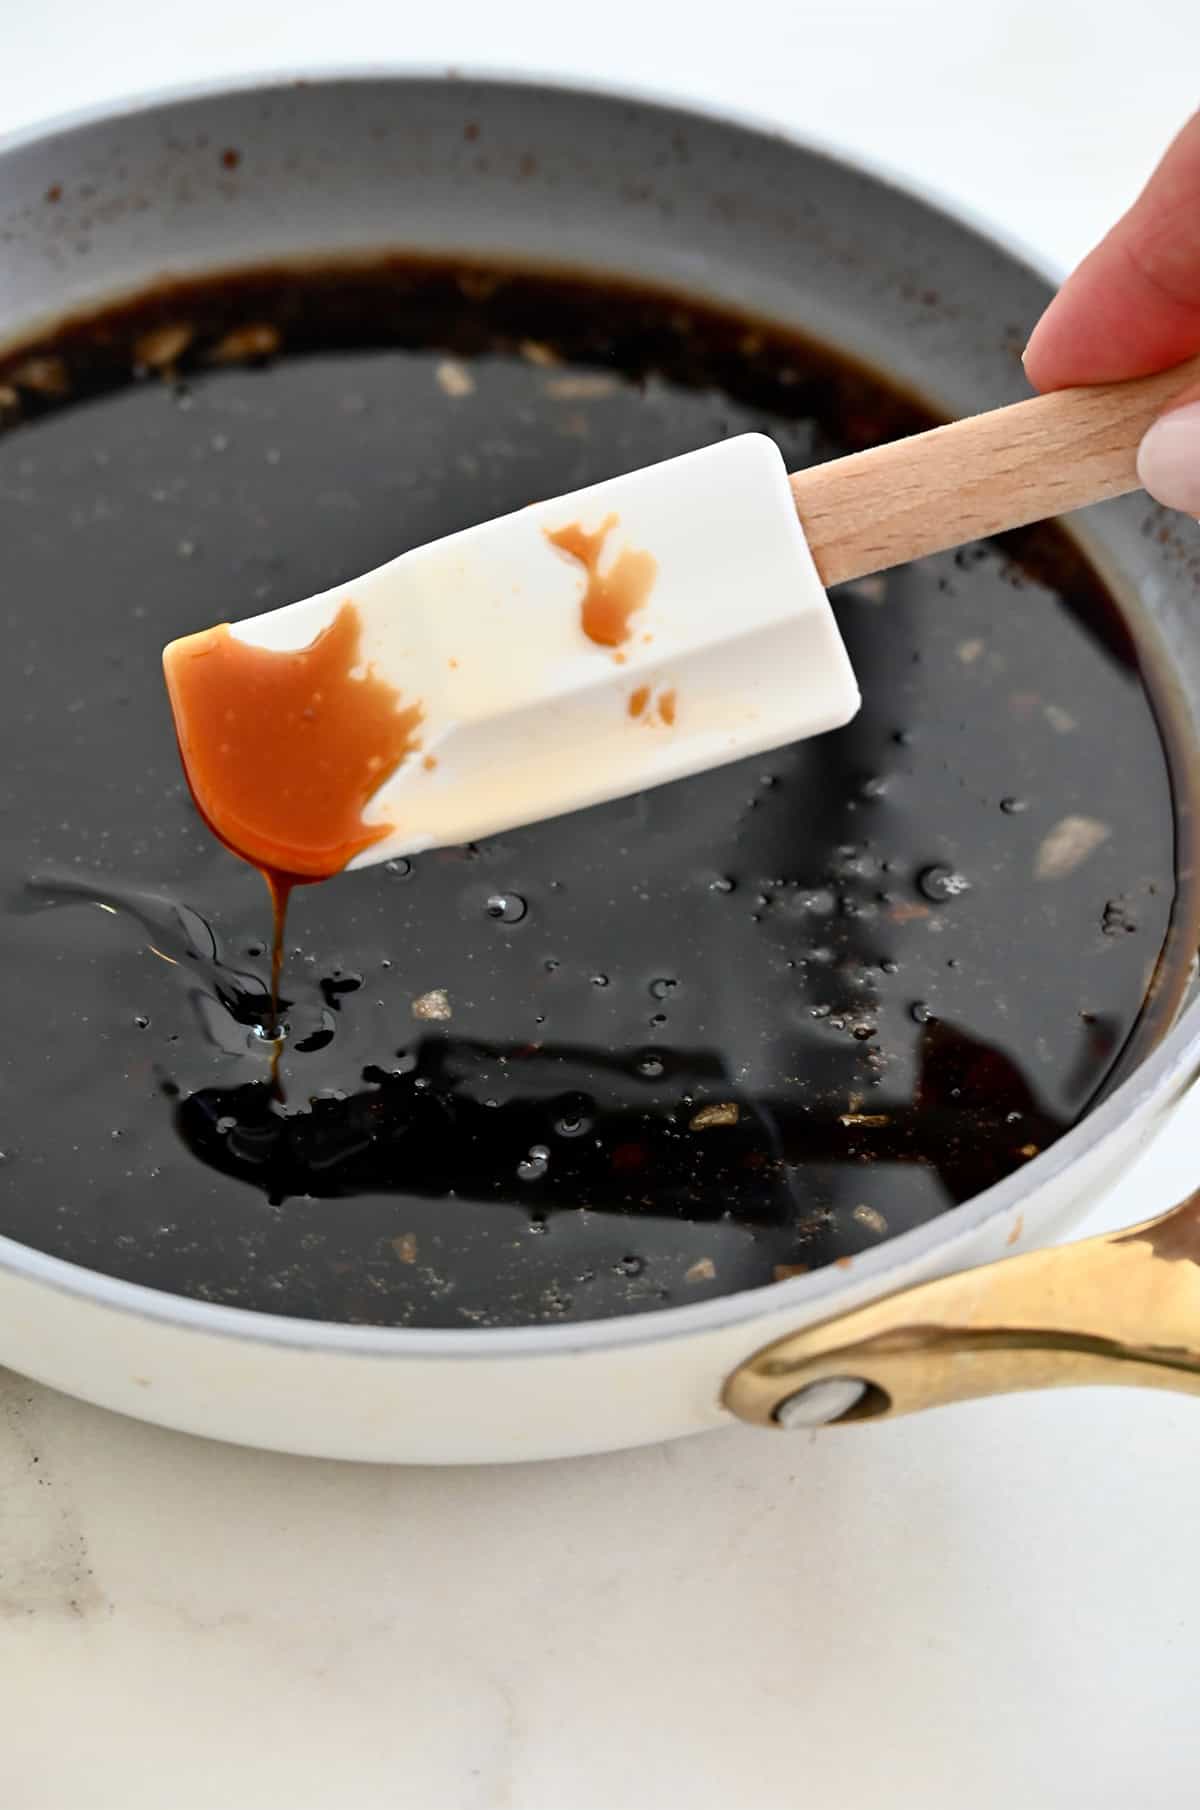
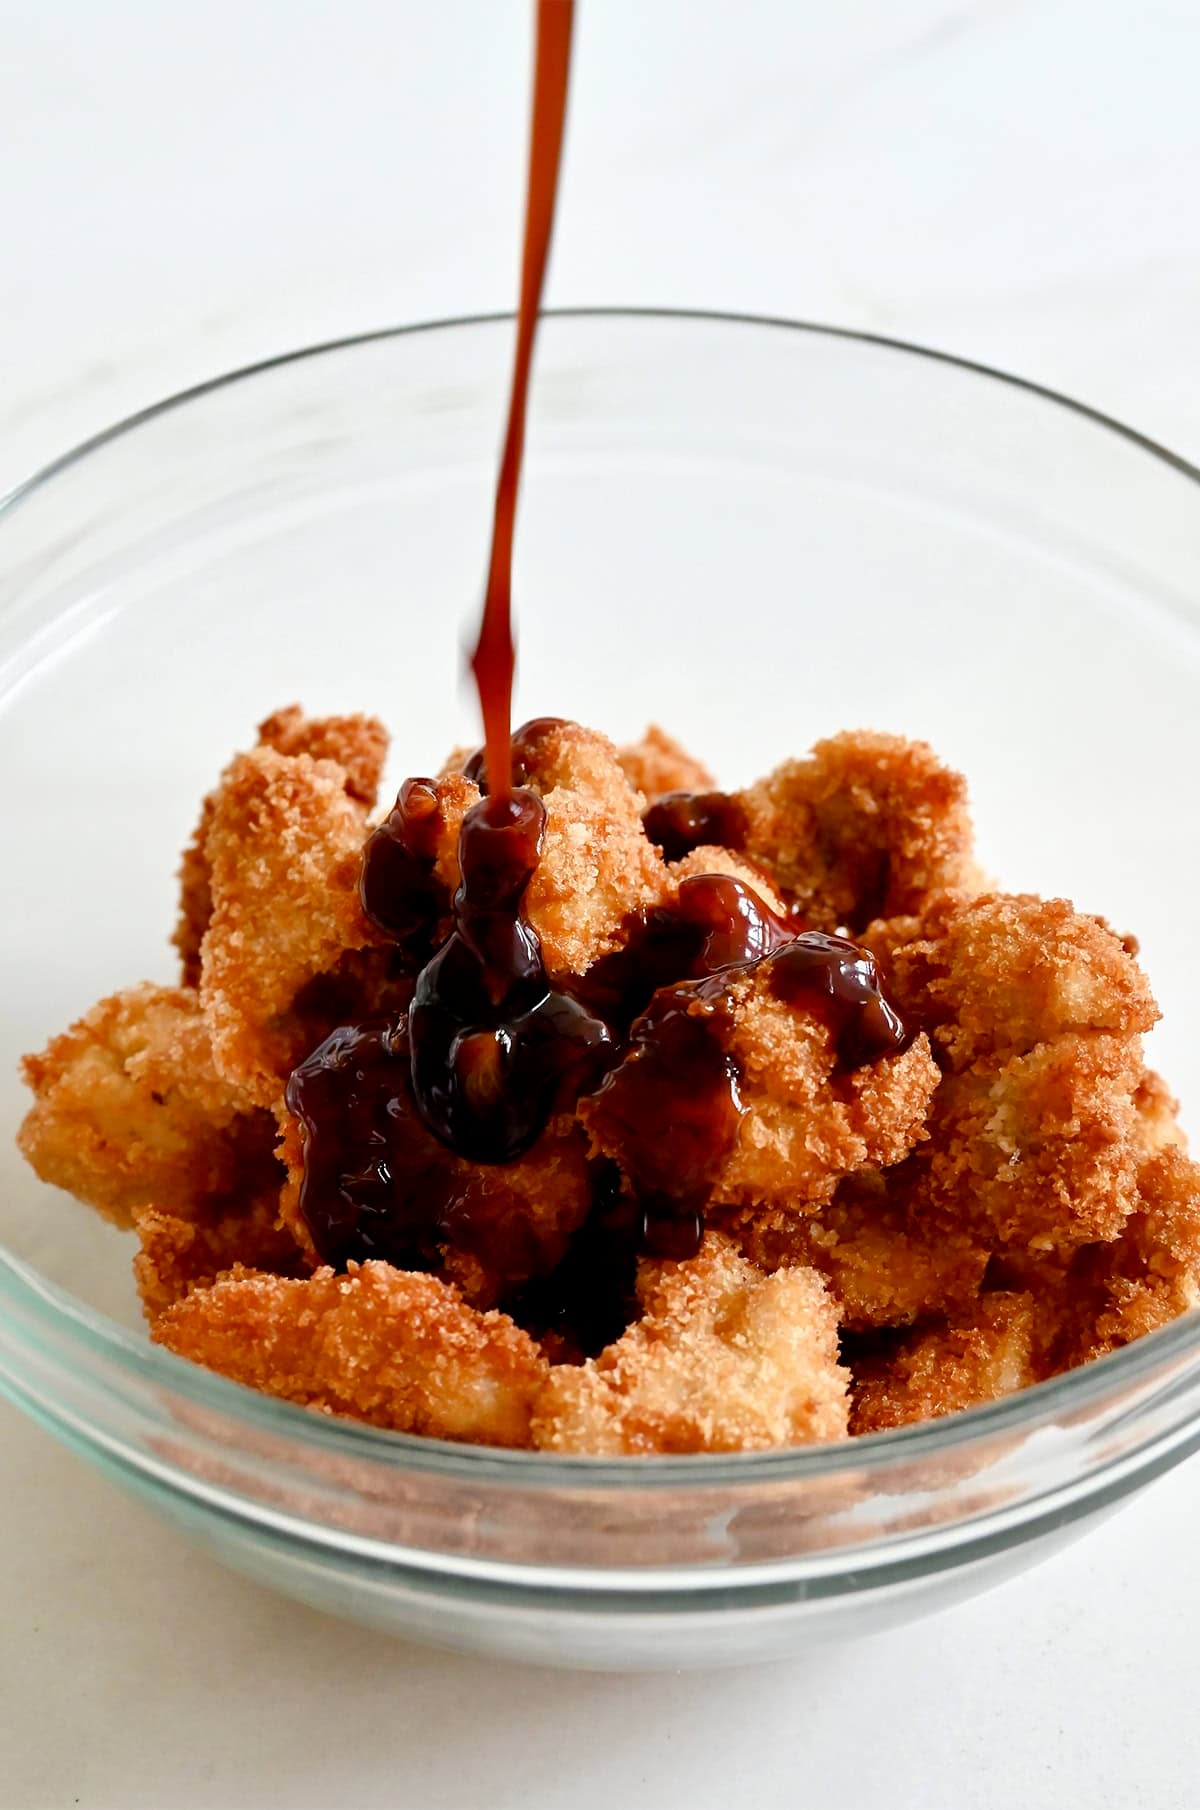
Add the fried chicken pieces to a large bowl, pour the sauce on top and toss to coat. Garnish with sesame seeds and serve immediately over white rice or bacon and egg fried rice. And if you really want to commit to a full takeout-fakeout night, I’d start with crab rangoon and round it out with Chinese garlic green beans or garlic bok choy. YUM!
FAQs
Yes! The sesame chicken sauce can be made up to 3 days in advance and stored in an airtight container in the refrigerator. Reheat it gently in a small saucepan over low heat before tossing with the chicken.
Yes! Just like my air fryer chicken nuggets recipe, preheat your air fryer to 400°F, arrange the coated chicken pieces in a single layer, spray lightly with cooking spray and cook for 10 to 12 minutes, flipping halfway through, until golden and crispy. Make the sauce using the same instructions above, then toss to coat and serve.
A few things can cause this. First, make sure you pat your chicken dry before coating in flour and shake off any excess flour and egg before each step. Too much of either prevents the Panko from adhering properly. Second, press the Panko firmly onto each piece of chicken rather than just rolling it through. And finally, make sure your oil is at 360°F before adding the chicken.
Equipment
Ingredients
For the chicken:
- 1 pound boneless, skinless chicken thighs
- 1 teaspoon kosher salt
- 3/4 cup all-purpose flour
- 3 large eggs
- 2 cups Panko breadcrumbs
- Vegetable oil, for frying
For the sauce:
- 2 Tablespoons vegetable oil
- 1 Tablespoon minced garlic
- 3/4 cup low-sodium soy sauce
- 1/4 cup rice wine vinegar
- 1 Tablespoon sesame oil
- 1 cup packed light brown sugar
- 1 Tablespoon corn starch, mixed with 2 Tablespoons water
- Sesame seeds, for serving
Instructions
Make the chicken:
- Trim any fat from the chicken thighs and cut them into 1-inch pieces.
- Add the flour and salt to a sealable plastic bag. Add the chicken to the bag, press out any air then seal the bag shut. Shake the bag until the chicken pieces are coated on all sides.
- In a shallow dish, whisk together the eggs.
- Add the breadcrumbs to a second shallow dish.
- Remove each piece of chicken from the bag and shake off any excess flour. Dip the chicken in the eggs, shake off any excess, then dip it in the breadcrumbs, pressing to coat the chicken on all sides. Repeat the coating process with all of the chicken pieces.
- Add 2 inches of vegetable oil to a large heavy-bottomed stock pot set over medium heat. Line a baking sheet with paper towels.
- Once the oil reaches 360°F, add a portion of the chicken to the oil and stir once. Cook the chicken, stirring occasionally, until it is golden brown, about 2 minutes. Using a slotted spoon, transfer the chicken onto the baking sheet then repeat the frying process with the remaining pieces of chicken, returning the oil to 360°F between each batch. Set the cooked chicken aside while you make the sauce.
Make the sauce:
- In a small saucepan set over medium-low heat, add the vegetable oil and garlic. Cook, stirring, until the garlic is golden brown and fragrant, about 2 minutes.
- Whisk in the soy sauce, rice wine vinegar, sesame oil and brown sugar. Cook, whisking occasionally, until the mixture comes to a boil then whisk in the cornstarch mixture and boil until the sauce has thickened enough to coat the back of a spoon, about 5 minutes.
- Add the fried chicken pieces to a large bowl. Drizzle the sauce on top and toss to combine. Garnish with sesame seeds and serve.
Kelly’s Notes
- Baked version: Preheat the oven to 450°F. Line a baking sheet with foil and grease it generously with cooking spray. Coat the chicken using the same flour-egg-Panko method above, then arrange the pieces in a single layer on the prepared baking sheet. Spray the chicken pieces with cooking spray (this helps them crisp and brown) and bake for 10 minutes. Flip each piece, then continue baking until cooked through and crispy, an additional 5 to 10 minutes. While the chicken bakes, follow the same instructions for making the sesame sauce. Remove the chicken from the oven, add it to a large bowl, drizzle the sauce on top and toss to combine.
- Serving: Toss the chicken in the sauce right before serving. The longer the coated chicken sits in the sauce, the softer it gets.
- Make ahead: The sesame sauce can be made up to 3 days in advance and stored in an airtight container in the refrigerator. Reheat gently in a small saucepan over low heat before tossing with the chicken.
- Storing leftovers: Store leftover sesame chicken in an airtight container in the refrigerator for up to 3 days. Note that the Panko coating will soften once tossed in the sauce and refrigerated. Reheat in a skillet over medium heat instead of the microwave to bring back some of the crispiness.
- ★ Did you make this recipe? Don’t forget to give it a star rating below!
Nutrition
Did you try this recipe?
Leave a comment below with your star rating!
This post may contain affiliate links.
Recipe by Kelly Senyei of Just a Taste. Please do not reprint this recipe without my permission. If you'd like to feature this recipe on your site, please rewrite the method of preparation and link to this post as the original source.
This recipe is a favorite for my family! I baked the chicken and it was delicious!
So glad you are all enjoying it, Mindy!
Can you air fry these?
Absolutely, Saralee!
Can these be made ahead of time and frozen?
Absolutely, Mindy!
Thank you! Can I even bake them and then freeze or only freeze raw?
You can freeze them either way, but I like to freeze them after baking and fully cooling. Enjoy!
Can I replace the rice wine vinegar with just rice vinegar? Or will the taste be different?
Hi Morgan! Rice wine vinegar is just another name for rice vinegar; they are the same product. :)
I made this with garlic chinese eggplant and it’s delicious :):) out of curiosity, would you store extra chicken separate from the sauce or can i refrigerate/freeze it with the sauce already on it? Thank you!!
Hi! Either way would work but to preserve the chicken crispness when you bake it after freezing, I’d keep the two separate. Enjoy!
Eating now as I type! We love it! Might double the sauce next time cause the fam loves it over the rice!! It will become a regular for sure! Thanks for sharing!!!
You are so welcome, Amy! I’m thrilled your family enjoyed the recipe!
I made this last night and it was fantastic!!! I used coconut flour, and took one of the suggestions above and used rice cake crumbs. I’ve never used rice cake crumbs as a substitute for Panko, but they were just right. I also added half the amount of sugar for the sauce, and it was perfect.
AWESOME! I’m so thrilled you enjoyed the recipe, Susan!
Can I use rice vinegar if I don’t have rice wine vinegar?
Absolutely!
this looks delicious! does it rewarm well? I’m thinking about cooking it in advance
Yes it definitely rewarms well!
Can you make this with boneless chicken breasts instead of thighs? I want to try this but don’t want to mess with perfection!
Absolutely, Nancy!
I don’t post a lot of reviews, but I made this last night and it was fantastic! The recipe does make a lot of sauce, which is great because we saved the rest and I’ll just have to make this for dinner again soon! So, SO good. Highly recommended.
Thank you so much for taking the time to review this recipe, Jen! I’m thrilled you enjoyed it!
Delicious! The chicken came out so crunchy!! Definitely adding this to my dinner line up. I only had Rice Cooking Wine so used that since I couldn’t find rice wine vinegar specifically at the store. Probably could cut the sauce recipe in half as it makes a lot. The sauce is really well balances not too salty and not too sweet.
I’m so thrilled you enjoyed the recipe, Katie!
Loved this recipe and the sauce just takes it to the next level. I made this with stir fried veggie noodles using the sauce as the base and it was absolutely delicious. Thanks for the great recipe Kelly!
You are so welcome, Natalie! I’m thrilled you enjoyed the recipe!
Legit the BEST homemade Chinese-style dish ever. Discovered this recipe during quarantine and it has become a staple. I use chicken breasts instead of thighs just as a personal preference. I double the batch and freeze half. It’s a super convenient freezer meal- just make the broccoli and rice!
AMAZING! I’m so thrilled you’ve been enjoying the recipe, Allison!
Kelly,
Why do they get sprayed with cooking spray before baking? I don’t have any cooking spray, so not sure if I should “sprinkle” with evoo or something or if I can most likely safely skip this step? I will foil/lightly oil with canola oil the tray so they don’t stick when it’s time to flip them. TIA!
Hi Kerry – The cooking spray moistens the breadcrumbs so that they crisp up but olive oil will work, too!
Making this tomorrow. So what do you think to go with it (Husband sadly won’t do broccoli). White rice with celery- match stick (julienned) carrots- and peapods (sugar snap peas)? He doesn’t eat onion or peppers so maybe this will do??
That sounds perfect, Alison! I hope you and your husband enjoy the recipe!
Any chance of getting nutritional info with your recipes. Sort of thinking, if you have to ask how many calories, probably shouldn’t eat it! :-)))
Hi Carol! You can find the estimated nutritional info by clicking on the purple button below the recipe that says ESTIMATED NUTRITION INFORMATION. :)
This is absolutely am amazing home meal. I hosted friends with this and my group included a chef, everyone including the chef was amazed that this was a home cooked meals. It is definitely being added to my go to meals.
Love reading this, Jeffery! I’m so happy everyone enjoyed the recipe!
Made this twice and it is delicious!! I’m off to 3 other recipes of yours to rate. Loving your site; it’s beautifully arranged and right to the point. You’re also lovely to watch on video!
Awe, thank you so much, Karen! I’m thrilled you’ve been enjoying Just a Taste!
This was SO GOOD. I can’t do gluten so I was searching for a recipe that I could use to make sesame chicken at home. I subbed GF flour/rice cake crumbs/soy sauce and this was absolutely amazing. Thank you!
Woohoo! I’m so glad you enjoyed the recipe, Karin!
What is the nutrition information on this recipe? Thanks!
Hi Demi! You can find the estimated nutritional info for one serving by clicking on the purple button below the recipe that says ESTIMATED NUTRITION INFORMATION. :)
I’m not sure why there are so few reviews here, but I figure I should add one. This is an awesome recipe that I have made several times now. I’m an expat who is missing a trip “home” this year due to the global pandemic. I hosted a few people for an American style Chinese takeout meal the other day. This was a big hit! Thanks for the recipe.
I’m so thrilled you’ve been enjoying the recipe, Kristen! And thank you so much for leaving a review! :)
Delicious!
So glad you enjoyed the recipe, Angela!
I made this for the first time last week and it was a knockout! An absolute crowd pleaser, and is now firmly in our family’s “Can we have …” list!
I even did another batch over the weekend and put them in the freezer, but I’m thinking they will be gone by this weekend!
Woohoo! I’m so thrilled you enjoyed the recipe, David!
I found two kinds of the sesame oil … which one do you suggest? Thank you.
Hi Joan! Any kind of sesame oil will work but I prefer a toasted sesame oil because it has a stronger flavor and adds a deliciously nutty dimension to the dish. :)
Since fresh chicken is hard to come by at the moment, I put this sauce on freezer-aisle chicken nuggets and HOLY COW…soooooo good!
Yesssss! So glad you enjoyed it, Carly!
HI, just wondering why my sauce is so dark. I see that yours is light. What did I do wrong?
Hi Joy – My sauce is fairly dark, too. Did you follow the recipe as written?
Did I read that right? A cup of brown sugar? Can’t wait to try it. Looks delicious!
Yes! I hope you enjoy the recipe, Roxie!
Looks delicious! Can’t wait to try.
Looking forward to hearing your results, Miranda!