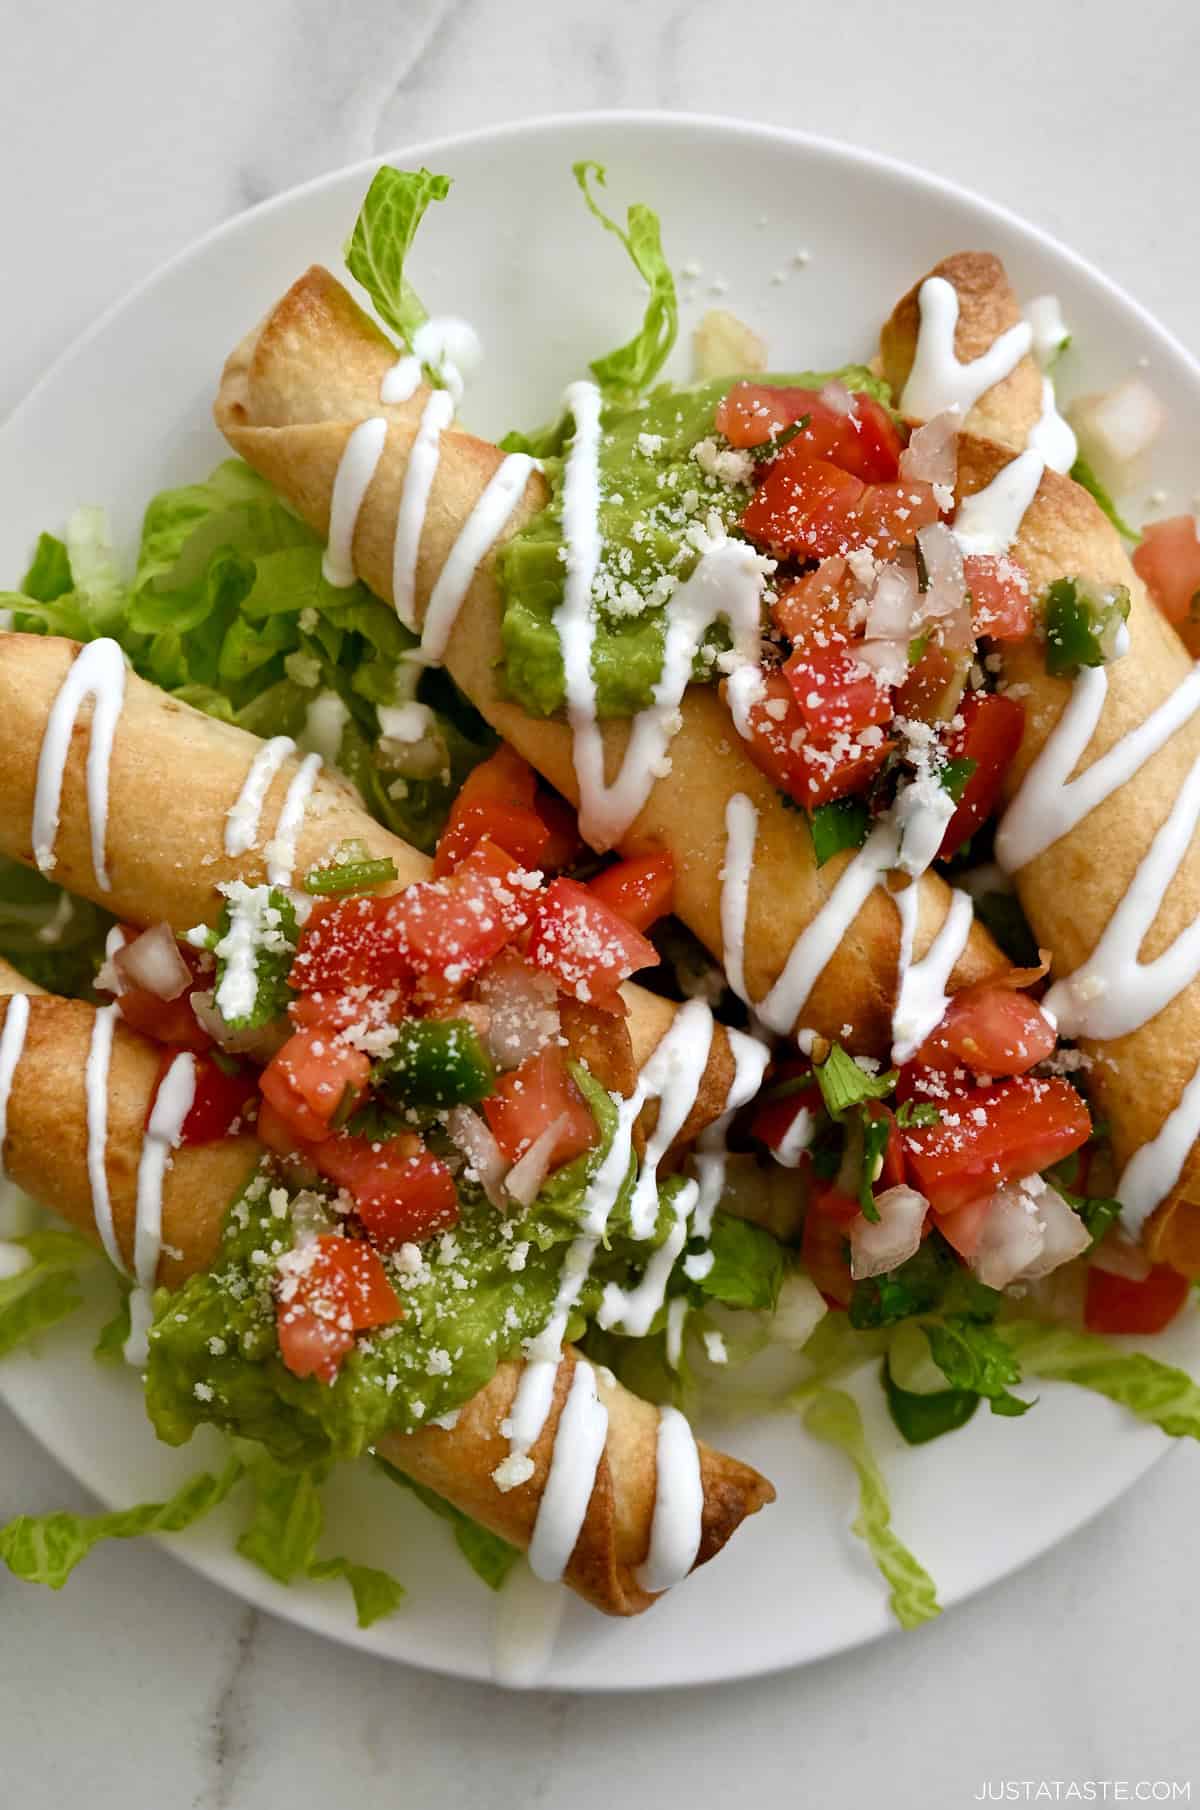
These easy chicken taquitos are made with shredded rotisserie chicken (my favorite store-bought shortcut!), melty cheddar cheese, and warm spices, all rolled into flour tortillas and baked or air-fried until perfectly crispy. They’re one of my go-to freezer meals and always a hit with my whole crew!
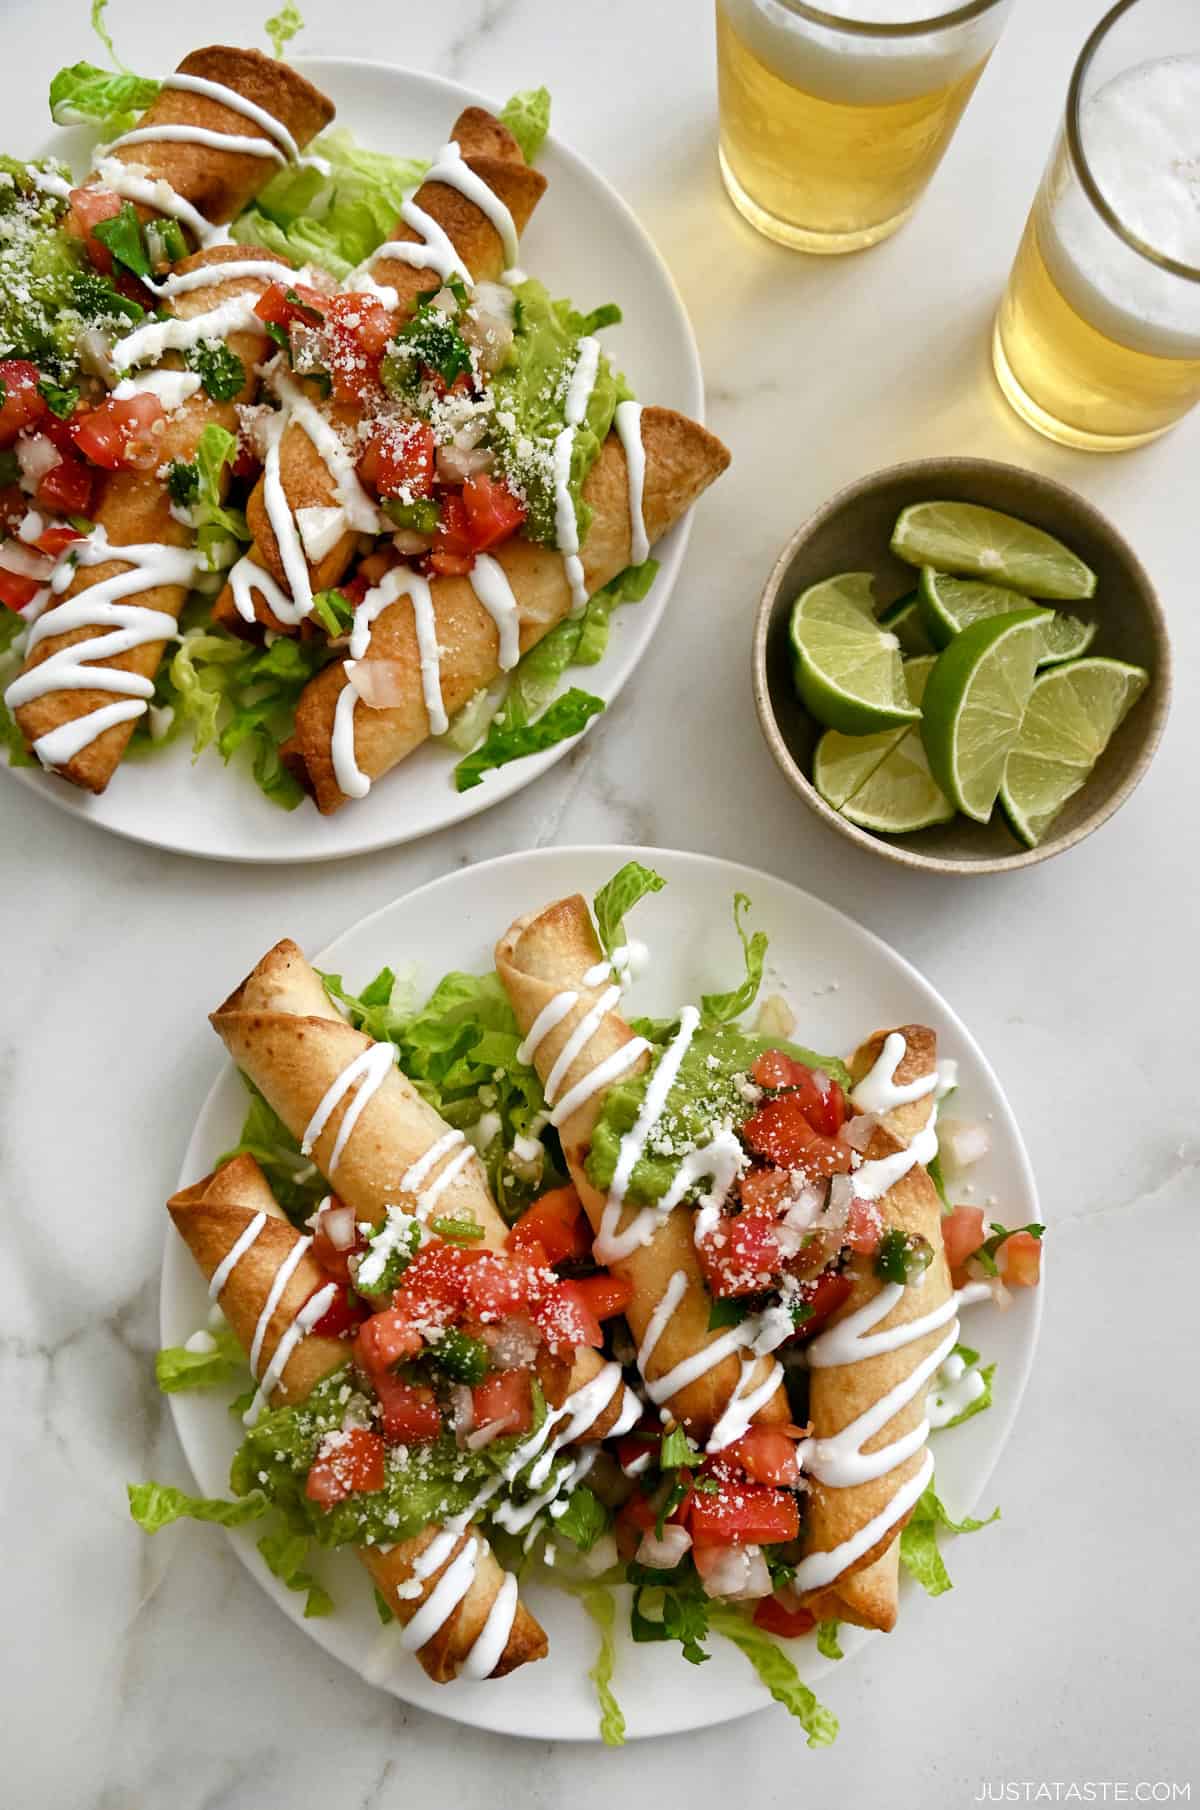
Table of Contents
Growing up in San Diego, taquitos were a staple on our family dinner table—crispy, golden, and filled with seasoned chicken and cheese. And while I’m all for the classic deep-fried variety, I’ve developed a lighter, oven-baked alternative that’s just as crispy and satisfying.
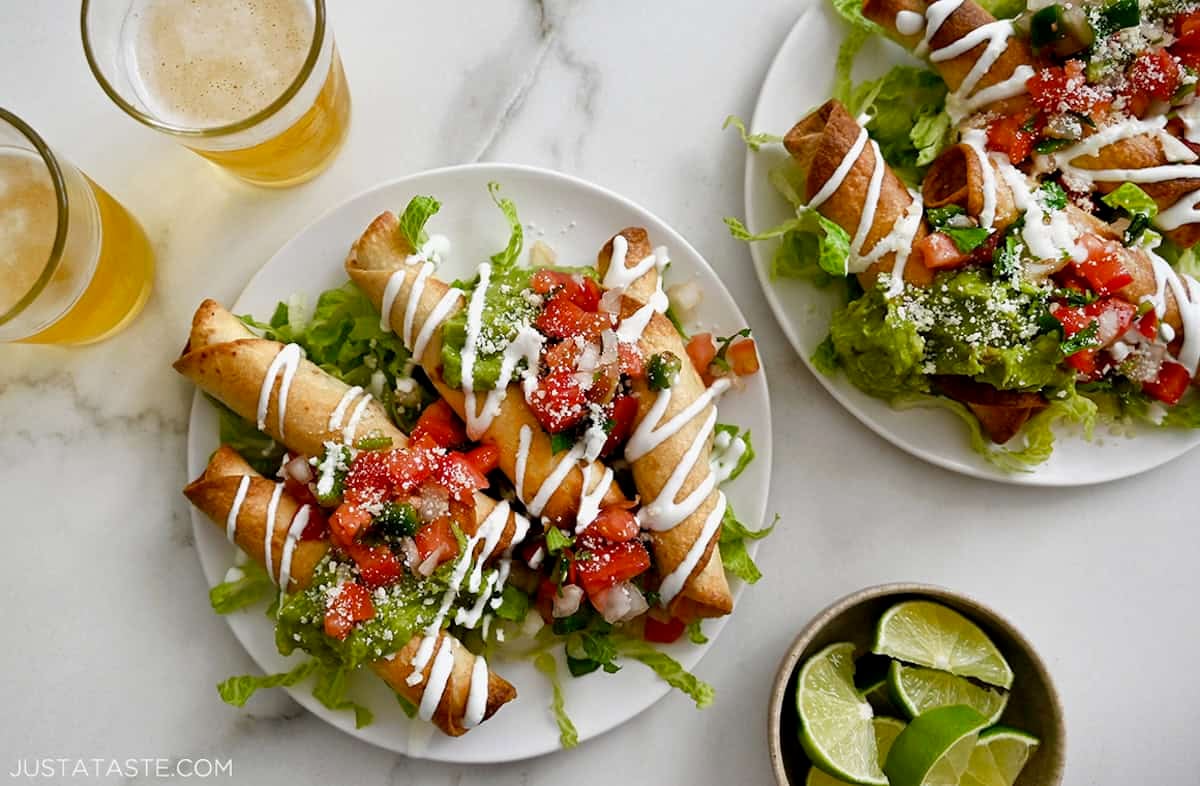
Using rotisserie chicken and a few pantry staples, these chicken and cheese taquitos come together quickly and easily. A quick bake in the oven (or air fryer!) yields an extra-crispy taquito that’s ready and waiting for a dive into chunky homemade guacamole, fresh pineapple salsa or a dollop of sour cream. All that’s missing is a strawberry margarita popsicle for dessert!
- Flour tortillas: Taquitos are typically made with corn tortillas (which you can absolutely use!), but I prefer to use small flour tortillas because they’re more pliable and easier to roll up (ie. less cracking). Want to go the homemade route? My foolproof flour tortilla recipe takes just 30 minutes!
- Chicken: You’ll need 3 cups of cooked, shredded chicken. Just like in my green chicken enchiladas, I use a store-bought rotisserie chicken to keep things quick and easy. If you’ve got leftover grilled or roasted chicken, that works too.
- Cheese: Any variety of shredded cheese works. I usually go for sharp cheddar because it packs a lot of flavor, but Monterey Jack, pepper jack or even a Mexican blend are all delicious, too.
- Yellow onion + garlic: One cup of diced yellow onion adds a sweet, savory base to the taquito filling, while freshly minced garlic brings a punch of flavor.
- Lime juice: A splash of fresh lime juice brightens the whole filling and gives it a subtle zing.
- Spices: Cumin, paprika, salt and pepper add flavor.
See the recipe card for full information on ingredients and quantities.
- Sauté the onion and garlic. In a large pan, heat the olive oil over medium heat. Add the diced onion and cook for 3 to 5 minutes, stirring occasionally, until it softens and turns translucent. Stir in the garlic and cook for another 1 to 2 minutes, just until it’s golden and fragrant.
- Add the spices and cooked chicken. Turn the heat down to low, then stir in the lime juice and seasonings. Add the shredded chicken and toss everything together until it’s evenly coated.
- Cool it down, then add the cheese. Transfer the chicken mixture to a large bowl and let it cool for about 10 minutes—this helps keep the cheese from melting too early. Once it’s cooled slightly, stir in the shredded cheese.
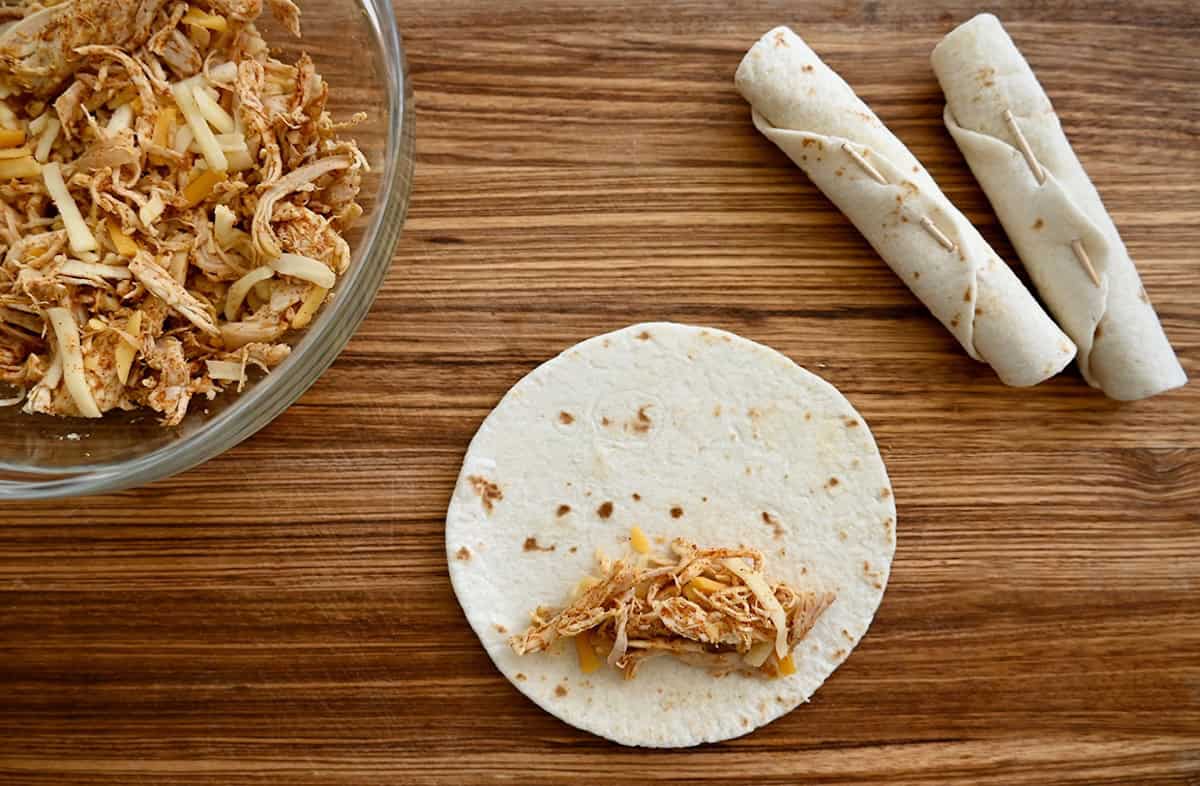
- Roll ’em up! Lay the tortillas out on your work surface and add about 3 tablespoons of filling to the lower third of each one. Roll them up tightly, then secure each one with a toothpick to help them hold their shape.
- Bake or Air-Fry:
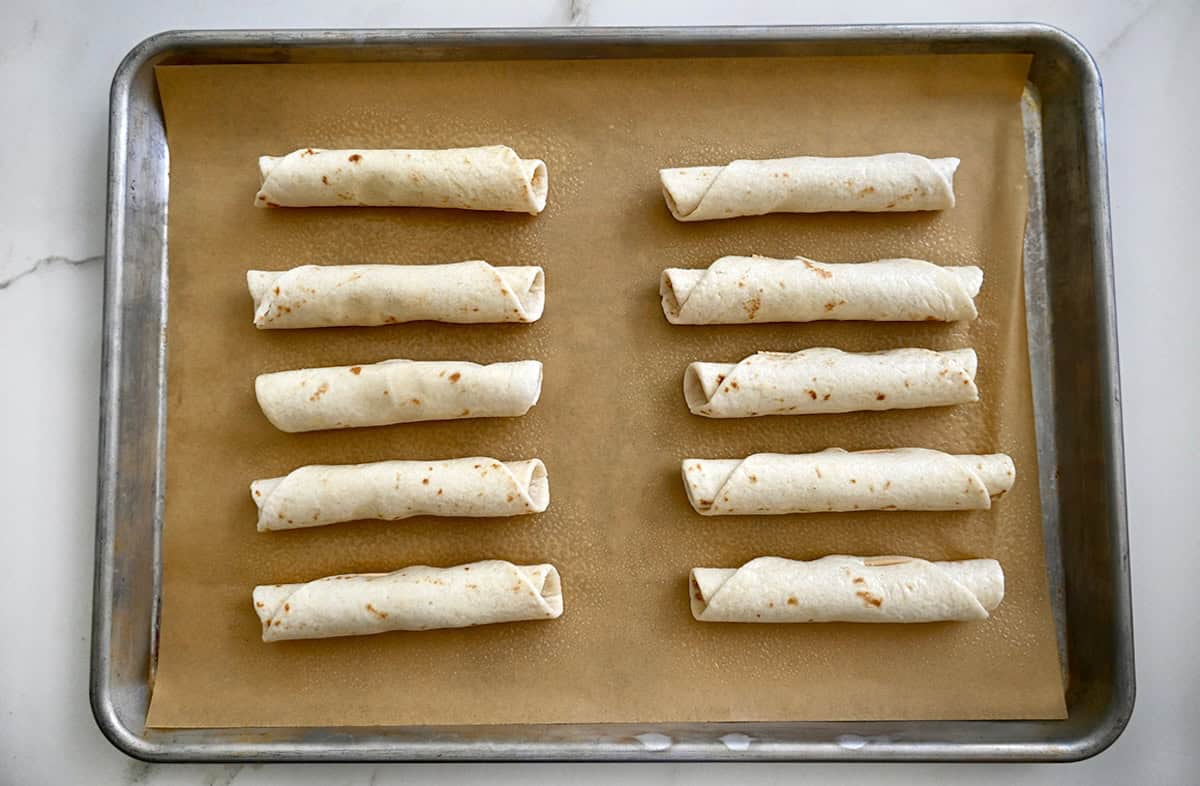
- Baked Taquitos: Preheat the oven to 425ºF and line a baking sheet with parchment paper. Place the taquitos seam-side down on the baking sheet and bake for 15 to 20 minutes until golden brown and crispy.
- Air Fryer Taquitos: Preheat your air fryer to 400°F. Grease the basket with cooking spray, then arrange a portion of the taquitos in an even layer. Coat the taquitos with cooking spray (this ensures they get that crisp, crunchy exterior), then air-fry them until golden brown and crispy, about 8 minutes.
- Serve with your favorite dips and toppings. I love these with chunky guacamole and fresh salsa—especially my homemade salsa verde. They’re also great with sour cream or a drizzle of hot sauce if you’re feeling spicy.
Make-Ahead, Storage & Freezing Tips
To make ahead: You can prep the filling up to 2 days in advance. Store it in an airtight container in the fridge, then assemble and bake the taquitos when you’re ready. You can even roll them up a few hours ahead of time—just keep them covered in the fridge until you’re ready to bake.
To store leftovers: Store cooked taquitos in an airtight container in the fridge for up to 4 days. Reheat them in a 350ºF oven or air fryer for a few minutes until they’re hot and crispy again. (The microwave works too, but they won’t be quite as crunchy.)
To freeze: Assemble the taquitos, but don’t bake them—just place them in a single layer on a parchment-lined baking sheet and freeze until firm, about 1 hour. Then transfer them to a freezer-safe bag or container. When you’re ready to eat, bake them straight from frozen at 425ºF for 20 to 25 minutes, or until golden and heated through.
Sides to Serve
These easy chicken taquitos are a popular snack or appetizer, but I love serving them with a few sides to turn them into a full meal. Some of my favorite sides to serve with them include Cuban black beans, Mexican rice or a zesty elote corn salad.
Ingredients
- 2 Tablespoons extra-virgin olive oil
- 1 cup diced yellow onion
- 2 cloves garlic, minced
- 2 Tablespoons fresh lime juice
- 1 1/2 teaspoons ground cumin
- 1 1/2 teaspoons paprika
- 1/4 teaspoon kosher salt
- 1/4 teaspoon fresh black pepper
- 3 cups shredded rotisserie chicken
- 1 cup shredded cheddar or Mexican blend cheese
- 12 (6-inch) flour tortillas
Instructions
- Preheat the oven to 425ºF and line a baking sheet with parchment paper. (See Kelly's Notes for air fryer instructions.)
- In a large saucepan, heat the olive oil over medium heat. Add the diced onion and cook until it’s translucent, 3 to 5 minutes. Add the garlic, and cook, stirring occasionally, for about 3 minutes until it’s golden and fragrant.
- Reduce the heat to low, and then add the lime juice, cumin, paprika, salt and black pepper to the pan, stirring to combine. Add the shredded chicken, tossing to combine.
- Transfer the chicken mixture to a large bowl and let it cool for 10 minutes, and then stir in the shredded cheese.
- Arrange the tortillas on work surface then place about 3 tablespoons of the chicken mixture on the lower third of each tortilla. Tightly roll up the tortilla, secure it with a toothpick, and then place it seam-side down on the prepared baking sheet. Repeat the filling and rolling process with the remaining tortillas.
- Bake the taquitos for 15 to 20 minutes until golden brown and crispy. (See below for air fryer instructions.) Serve with guacamole and salsa.
Kelly’s Notes
- Taquitos are traditionally made with corn tortillas, however you can use flour tortillas, which are much more pliable, and thus easier to roll. Want to go the homemade route? My foolproof flour tortilla recipe takes just 30 minutes!
- To cook the taquitos in an air fryer: Preheat the air fryer to 400°F. Grease the basket with cooking spray then arrange a portion of the taquitos in an even layer. Coat the taquitos with cooking spray then air-fry them until golden brown and crispy, about 8 minutes.
- To make ahead: You can prep the filling up to 2 days in advance. Store it in an airtight container in the fridge, then assemble and bake the taquitos when you’re ready. You can even roll them up a few hours ahead of time—just keep them covered in the fridge until you’re ready to bake.
- To store leftovers: Store cooked taquitos in an airtight container in the fridge for up to 4 days. Reheat them in a 350ºF oven or air fryer for a few minutes until they’re hot and crispy again. (The microwave works too, but they won’t be quite as crunchy.)
- To freeze: Assemble the taquitos, but don’t bake them—just place them in a single layer on a parchment-lined baking sheet and freeze until firm, about 1 hour. Then transfer them to a freezer-safe bag or container. When you’re ready to eat, bake them straight from frozen at 425ºF for 20 to 25 minutes, or until golden and heated through.
-
★ Did you make this recipe? Don’t forget to give it a star rating below!
Nutrition
Did you try this recipe?
Leave a comment below with your star rating!
This post may contain affiliate links.
Recipe by Kelly Senyei of Just a Taste. Please do not reprint this recipe without my permission. If you'd like to feature this recipe on your site, please rewrite the method of preparation and link to this post as the original source.


So easy and so good! My husband asked if we could have them for dinner two nights in a row :)
So glad you enjoyed the recipe, Nora!