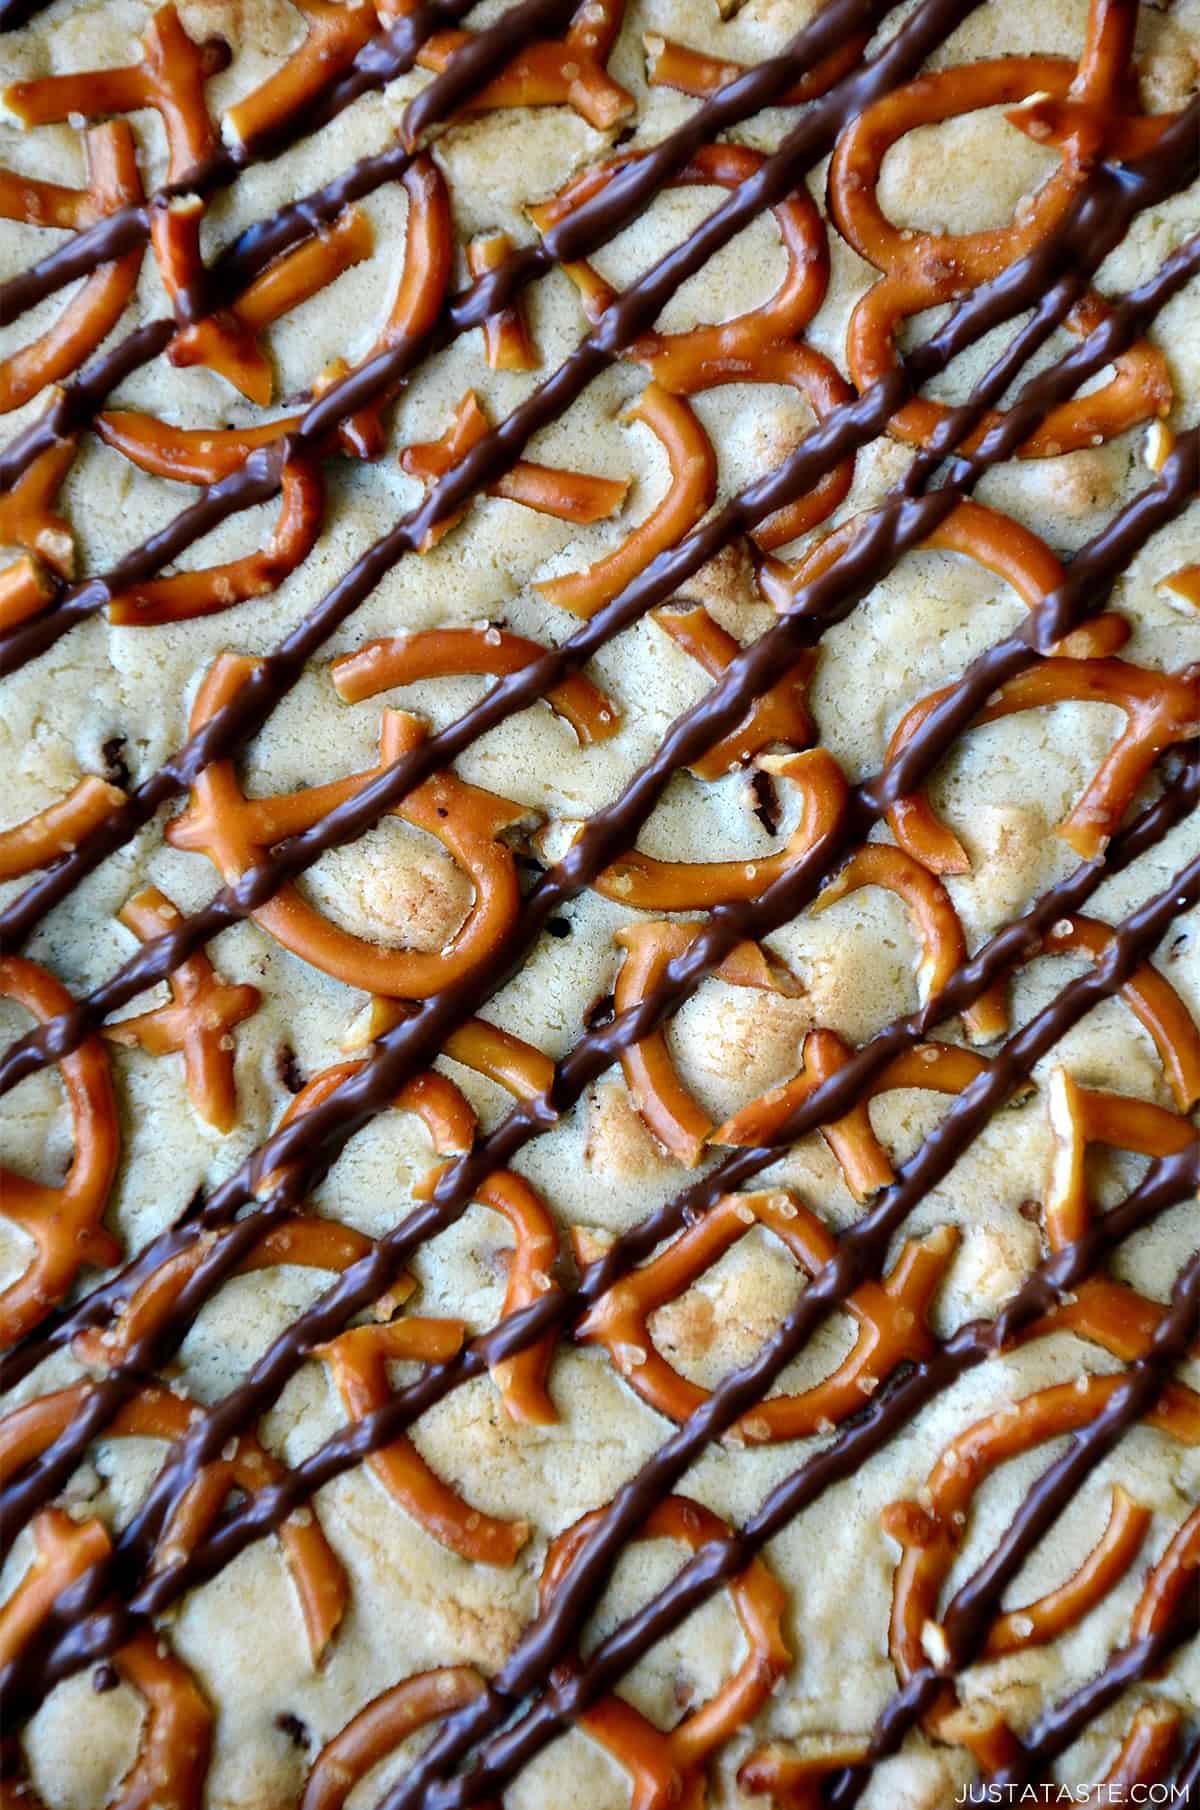
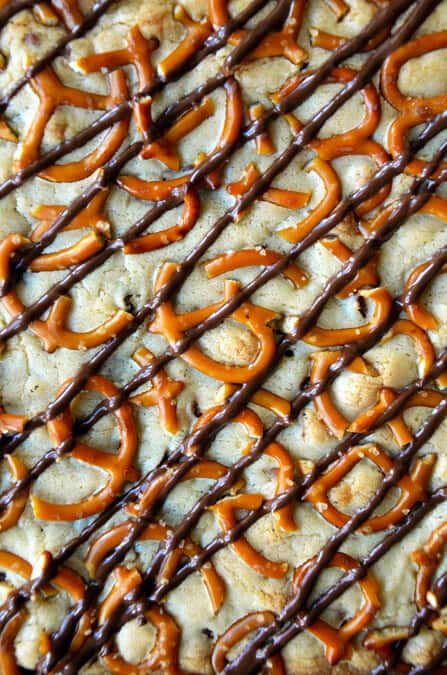
Discover the ultimate sweet and salty treat with these Pretzel Chocolate Chip Cookie Bars! Soft, chewy cookie bars are packed with chocolate chips and crunchy pretzel pieces, offering a perfect balance of flavors and textures in every bite.

Table of Contents
Chicken and waffles. Peanut butter and jelly. Ham and pineapple pizza. There is a method to this culinary magic in which sweet joins forces with salty for one seriously irresistible duo.
I’ve got one more sweet-salty marriage to add to the list with this recipe for Pretzel Chocolate Chip Cookie Bars. Just imagine the best chocolate chip cookies, but in soft and chewy cookie bar form. Stir in some crushed salted pretzels, sprinkle a few more on top and then finish off the baked bars with a final drizzle of melted chocolate for the ultimate sweet and salty dessert.
This is one of those someone-hide-these-from-me-or-I’m-destined-for-Spanx desserts. And sure enough, after talking myself into taste-testing a second one of those deceptively small squares above, I finally got a grip and stepped away … after wrapping the remaining cookie bars in six layers of plastic wrap, which I reinforced with tape and sealed in two plastic bags. Spanx, party of one, your table is now ready.
Why You’ll Love This Recipe
- Soft, chewy, sweet and salty!
- Crowd-pleasing. I love making this sweet and salty treat for parties.
- Made in 1 bowl.
- Kids love’em. These easy cookie bars with pretzels are an awesome lunchbox addition.
- Butter: Salted butter will make the bars too salty, especially since they have added salt from the pretzels, so I’d go with unsalted butter.
- Brown and granulated sugar: The mix of sugars makes these pretzel chocolate bars moist and chewy.
- Eggs: Add moisture and bind the ingredients together. I like to crack the eggs in a separate bowl to make sure no eggshell bits end up in the final baked good.
- Vanilla extract: All bar desserts deserve a healthy splash of vanilla extract. If you have homemade vanilla extract on hand, use it!
- All-purpose flour: This adds structure, making these bars perfectly sliceable.
- Chocolate chips: You’ll put most of the chocolate chips in the batter and melt the rest for drizzling atop the baked bars. Use your favorite variety, such as semi-sweet, milk chocolate or dark chocolate, to customize the flavor of the bars.
- Crushed salted pretzels: I recommend placing the pretzels in a zippered, plastic bag and hitting them with a meat pounder or rolling pin to crush them.
- Vegetable oil: Melting the chocolate chips with vegetable oil will make sure the chocolate doesn’t seize and has a drizzle-worthy texture.
See the recipe card for full information on ingredients and quantities.
- Heat the oven to 350ºF. Line an 8-inch square baking pan with parchment paper, letting the paper hang over the sides so you can easily lift the bars out after baking. Grease the parchment paper with cooking spray.
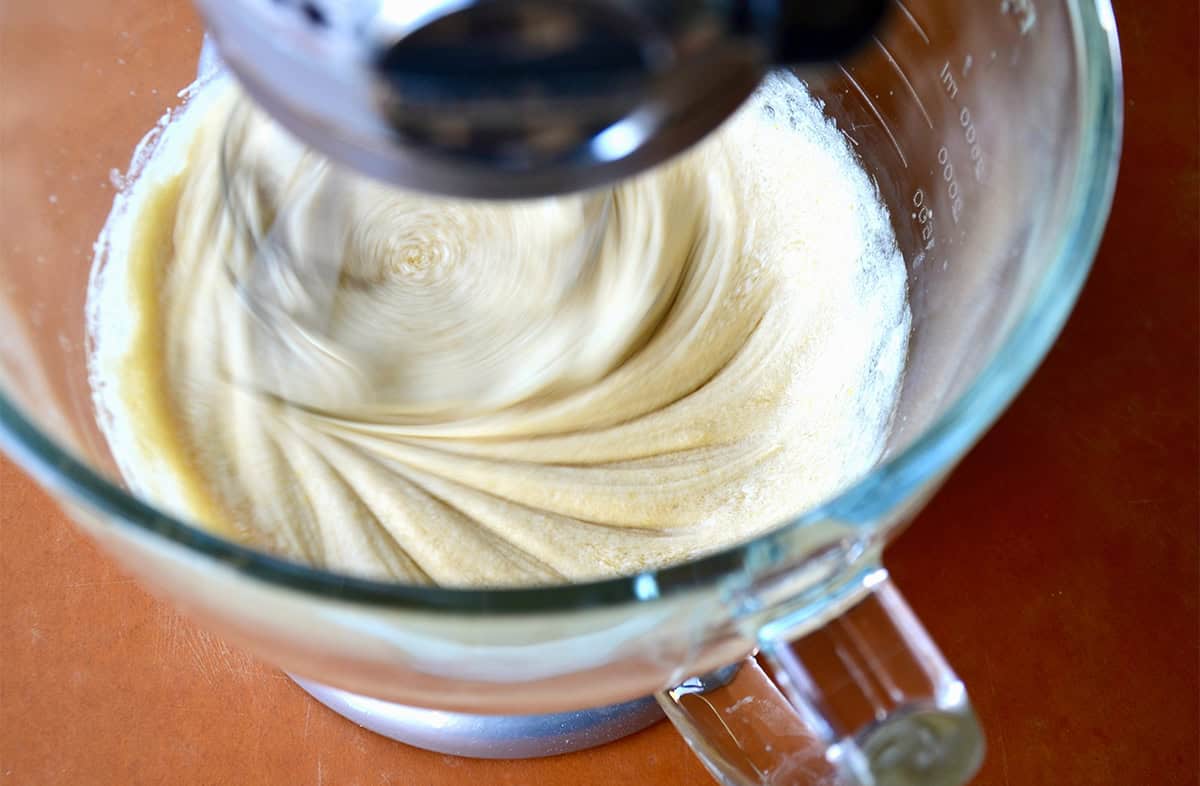
- Mix the wet ingredients. In a stand mixer with with the whisk attachment, whisk the butter, and sugar together for a couple of minutes. Add the eggs and vanilla, whisking until combined.
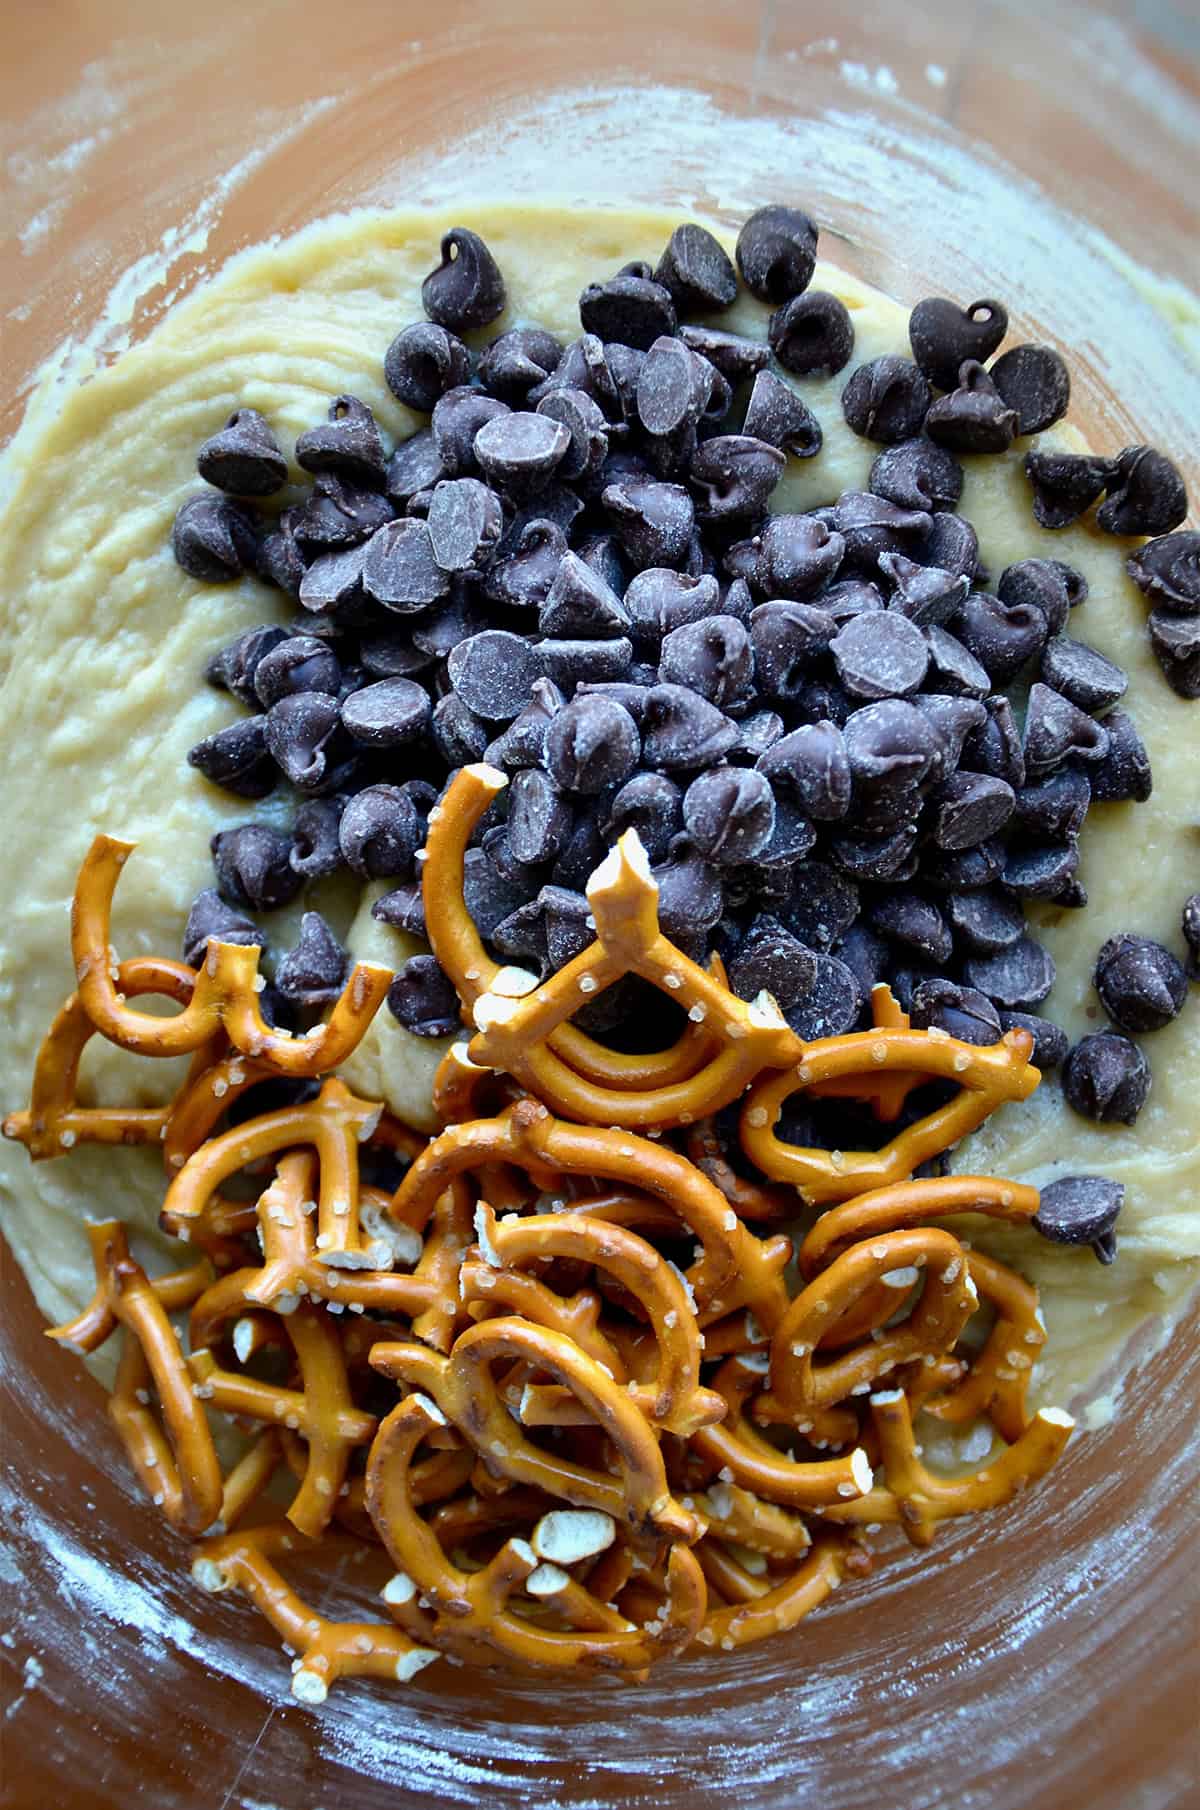
- Add the dry ingredients. Stir the flour into the wet ingredients until just incorporated (over-mixing will make the bars tough). Stir in 1 cup of the chocolate chips and ½ cup of the pretzels.
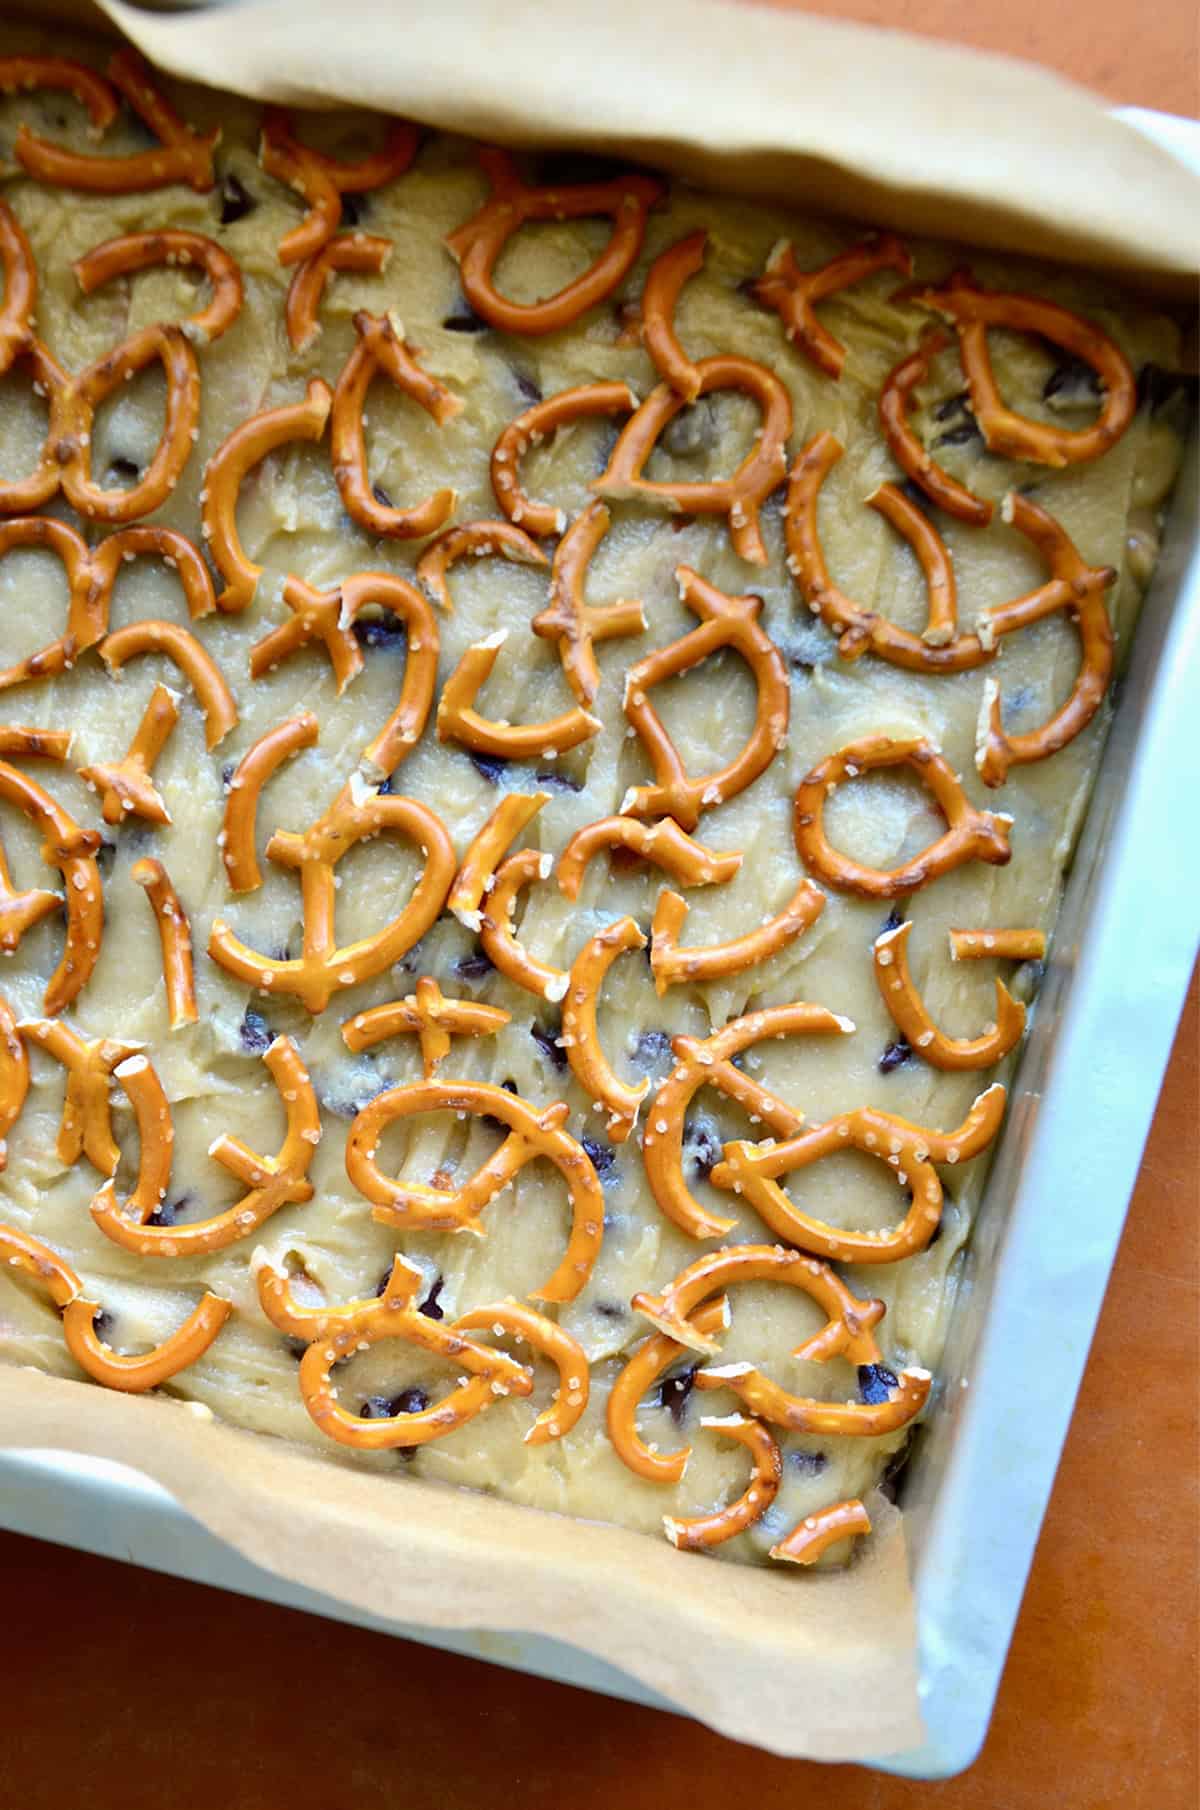
- Add the batter to the pan. Press the cookie dough evenly into the bottom of the baking pan to ensure uniform baking and consistent texture throughout the bars. Smooth the top using a rubber or offset spatula. Add the remaining pretzels to the top of the batter, pressing them in gently.
- Bake. The bars will take 35 to 40 minutes—when they’re done, a toothpick will come out clean. Don’t try to use a metal skewer, as its slippery texture won’t pick up uncooked batter as well.
- Melt the chocolate. Melt the ½ cup of chocolate chips and vegetable oil in a microwave-safe bowl in 30-second bursts.
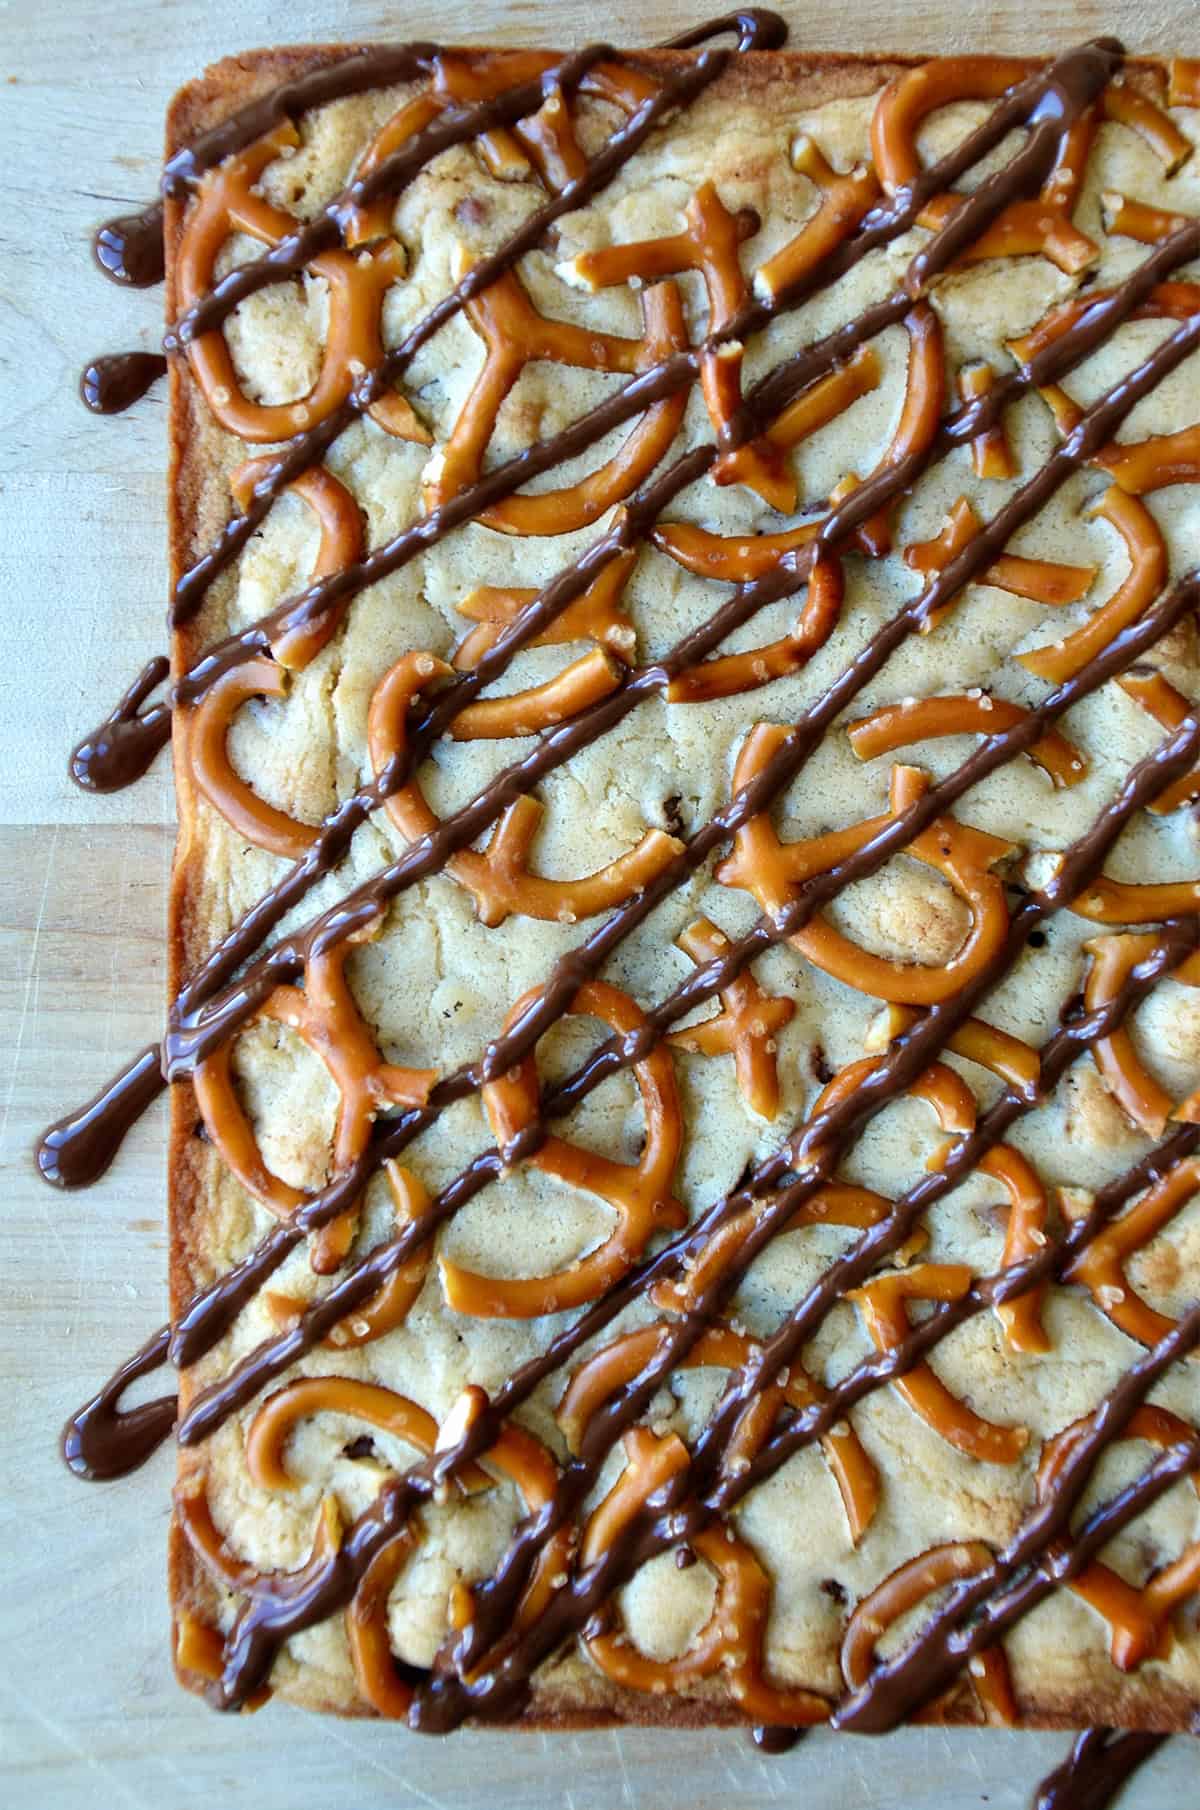
- Cool the bars. After the bars have cooled completely in their pan, use the parchment paper overhang to lift the bars out. Drizzle with the melted chocolate and slice.
- When crushing the pretzels, aim for small pieces without turning them into powder. Keep that satisfying crunch intact!
- Achieve that perfect chewy texture by underbaking your cookie bars slightly. Remove them from the oven when the edges are just set but the center is still slightly soft. Letting them cool in the pan allows them to finish setting while retaining that delicious chewiness.
- When drizzling melted chocolate over the bars, use a spoon or fork to create a decorative pattern. You can also place the melted chocolate in a small plastic bag and snip off the corner for more precise drizzling.
- Allow the cookie bars to cool completely in the pan before slicing and serving. This helps them set and ensures clean cuts without crumbling.
Once the cookie bars have cooled completely, store them in an airtight container or resealable plastic bag at room temperature. They’ll stay fresh for up to a week.
Once cooled, wrap the bars individually in plastic wrap or aluminum foil, then place them in a freezer-safe container or resealable plastic bag. They will keep well in the freezer for up to 2-3 months.
Frequently Asked Questions
The crushed pretzels should just be broken into pieces but not to the point where they’re powdered.
A simple way of knowing whether these bars are done is to grab a toothpick. Insert the toothpick into the center of the bars. If the toothpick comes out with batter on it, they’re not done. If just a few crumbs cling to the toothpick, the bake’s finished.
Yes, you can freeze the cookie bars. I recommend wrapping each individual square in plastic wrap, then plastic them into a zipper-lock freezer bag. This will prevent freezer burn.
- Salted Chocolate Chip Cookie Bars
- Monster Cookie Bars
- Frosted Soft Sugar Cookie Bars
- Homemade Samoas Cookie Bars
- Chocolate Chip Cookie Brownies (Brookies)
Ingredients
- 1 cup unsalted butter, melted
- 1 cup packed light brown sugar
- 1/2 cup sugar
- 2 large eggs
- 1 1/2 teaspoons pure vanilla extract
- 2 cups all-purpose flour
- 1 teaspoon salt
- 1 1/2 cups chocolate chips, divided
- 1 cup crushed salted pretzels, divided
- 2 teaspoons vegetable oil
Instructions
- Preheat the oven to 350ºF.
- Line an 8-inch square baking pan with parchment paper, allowing it to hang over two sides. Coat the paper with cooking spray.
- In a stand mixer fitted with the whisk attachment, whisk together the melted butter with the sugar and light brown sugar until smooth, about 2 minutes. Add the eggs and vanilla and whisk until combined.
- Remove the bowl from the stand mixer and stir in the flour and salt just until incorporated. Stir in 1 cup of the chocolate chips and ½ a cup of the crushed pretzels.
- Pour the batter into the prepared pan, smoothing the top, then sprinkle the remaining ½ cup of crushed pretzels on top, pressing them lightly into the batter.
- Bake for 35 to 40 minutes until a toothpick inserted comes out clean. While the cookie bars are baking, melt the remaining ½ cup chocolate chips with the vegetable oil in a double boiler or in the microwave.
- Remove the cookie bars from the oven and allow them to cool completely in the pan then remove the cookies using the parchment paper overhang. Drizzle the cookie bars with the melted chocolate and allow them to cool until the chocolate hardens. Cut the cookie bars into 16 squares and serve.
Kelly’s Notes
- The crushed pretzels should just be broken into pieces but not to the point where they’re powdered.
- Achieve that perfect chewy texture by underbaking your cookie bars slightly. Remove them from the oven when the edges are just set but the center is still slightly soft. Letting them cool in the pan allows them to finish setting while retaining that delicious chewiness.
- When drizzling melted chocolate over the bars, use a spoon or fork to create a decorative pattern. You can also place the melted chocolate in a small plastic bag and snip off the corner for more precise drizzling.
- Storing: Once the cookie bars have cooled completely, store them in an airtight container or resealable plastic bag at room temperature. They’ll stay fresh for up to a week.
- Freezing: Once cooled, wrap the bars individually in plastic wrap or aluminum foil, then place them in a freezer-safe container or resealable plastic bag. They will keep well in the freezer for up to 2-3 months.
- ★ Did you make this recipe? Don’t forget to give it a star rating below!
Nutrition
Did you try this recipe?
Leave a comment below with your star rating!
This post may contain affiliate links.
Recipe by Kelly Senyei of Just a Taste. Please do not reprint this recipe without my permission. If you'd like to feature this recipe on your site, please rewrite the method of preparation and link to this post as the original source.


Could I double the recipe and make in a 9×13 pan?
Thx!
Sure thing, Martha! You’ll just need to adjust the bake time.
Is there no leavening agent in the recipe? Not sure if that is a mistake or if they don’t rise?
Hi Rachel! No leavening in this recipe.
What is the texture of these? I can’t tell from the picture. Are they crumbly, chewy, or goey? I’m a fan or goey cookies, and don’t want to make an entire batch if they wont get eaten. Thank you!
Hi Mckenna! These cookie bars are soft and chewy :)
I’ve made these cookie bars many times over the years and they are SO good! A major crowd pleaser!! I’m making them again tonight and thought I’d leave a comment. Thanks for the wonderful recipe!!
Amazing! I’m so thrilled you’ve been enjoying the recipe, Hannah! Thank you for leaving a comment :)
These look delicous! Do you think you could make ahead and either refrigerate or freeze? How long do you expect them to last (if hidden away from snacking hands that is…)
Hi Nikki! I’ve never tried freezing the cookie bars so I can’t say for certain what the resulting taste/texture would be.
Just took these out of the oven and they are delicious! Planning to make them again for holiday guests this Christmas. :)
I’m so glad you enjoyed the recipe, Rachel!
I just made a batch of these yesterday… and then I made another batch today because they were so good! I had to cook a little longer than 45 min, more like 60, but they still turned out great!
Love it! So glad you’re enjoying the recipe, Beth!
I made these yesterday as a gift for the ladies at my daughters school. I read the previous reviews and was a little skeptical but honestly they came out great. I followed the recipe for the batter, the only change I made was I used my metal cake pan I think it was 13×9 only because I don’t have a metal 8×8 pan and they were done in 35 minutes. My daughter and I tried them because who bakes for others without first making sure it tastes good, and they were super yummy.
Awesome! So glad you enjoyed the recipe, Michelle!