Ditch the pie dough in favor of cereal with this foolproof recipe for Pumpkin Pie Rice Krispies Treats!
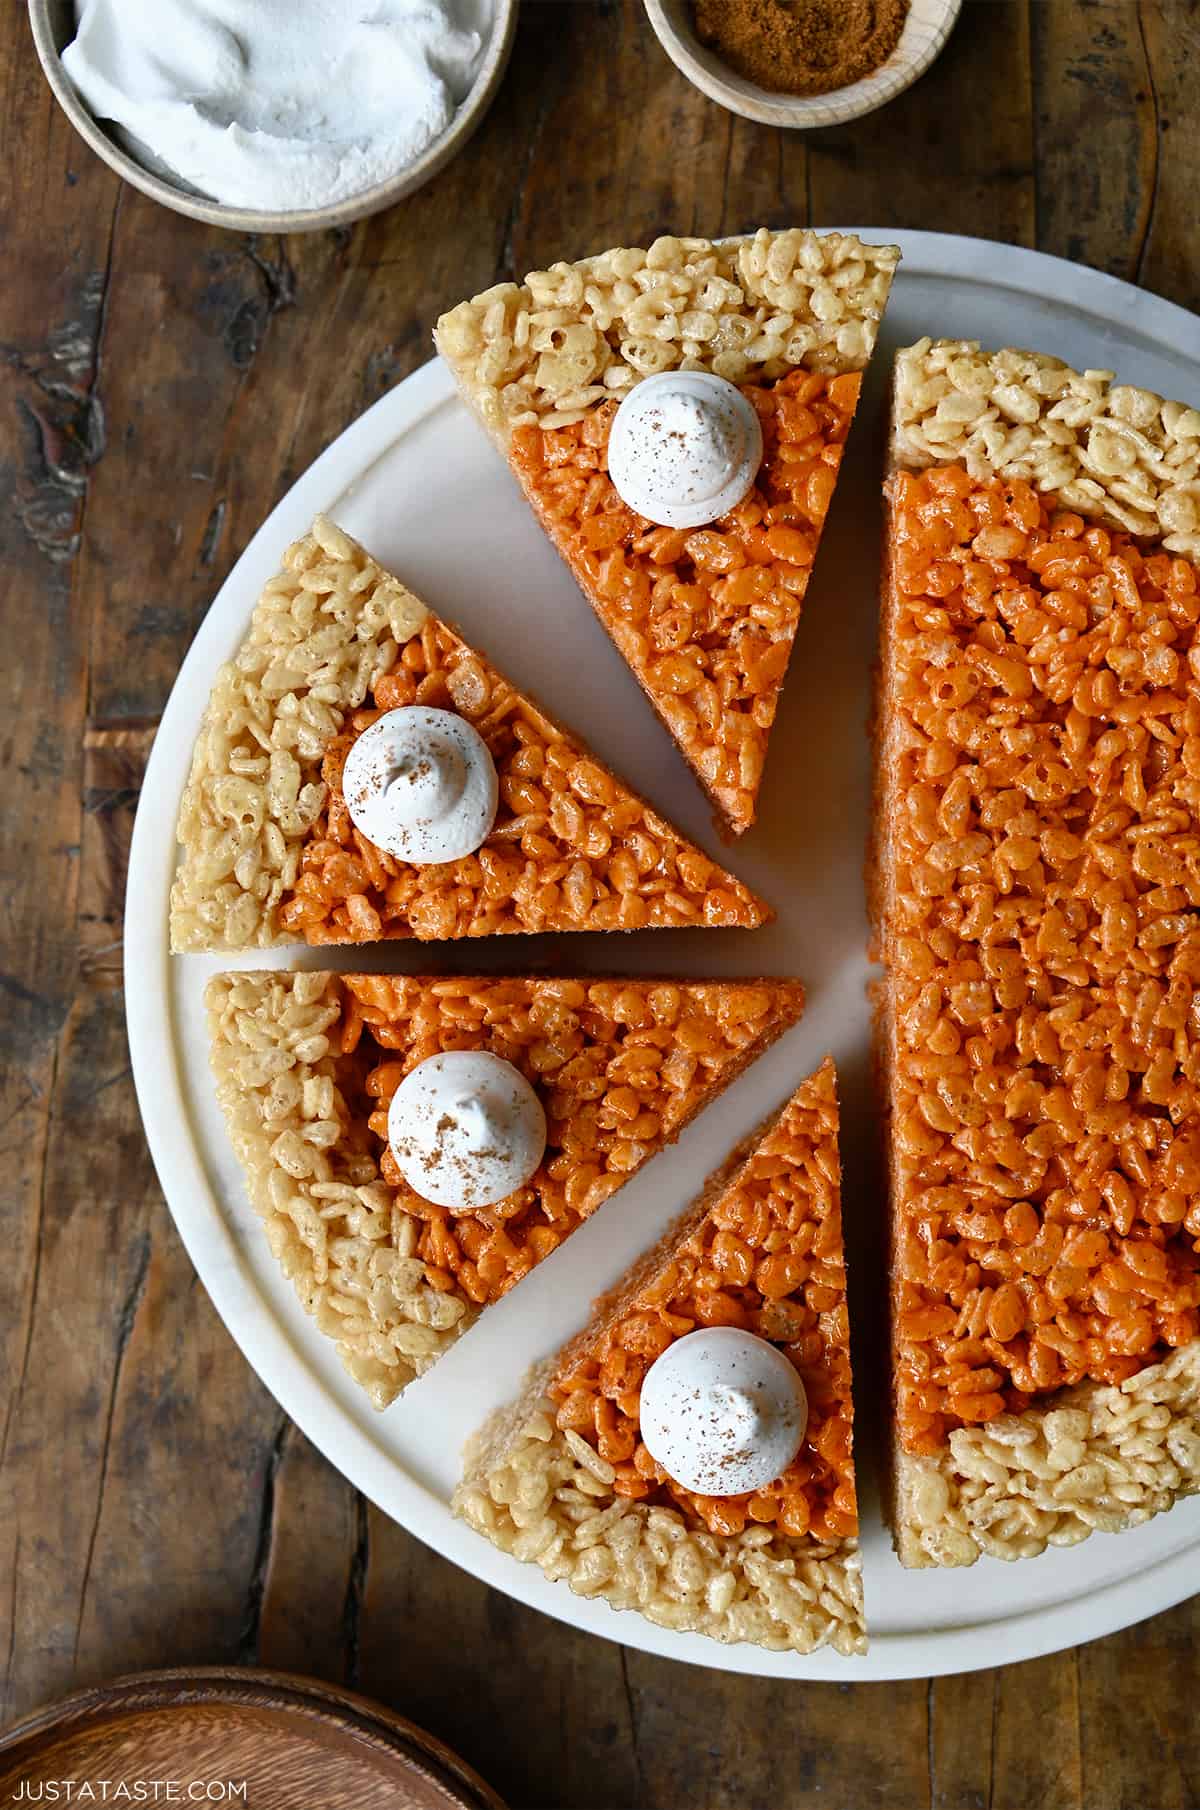
Table of Contents
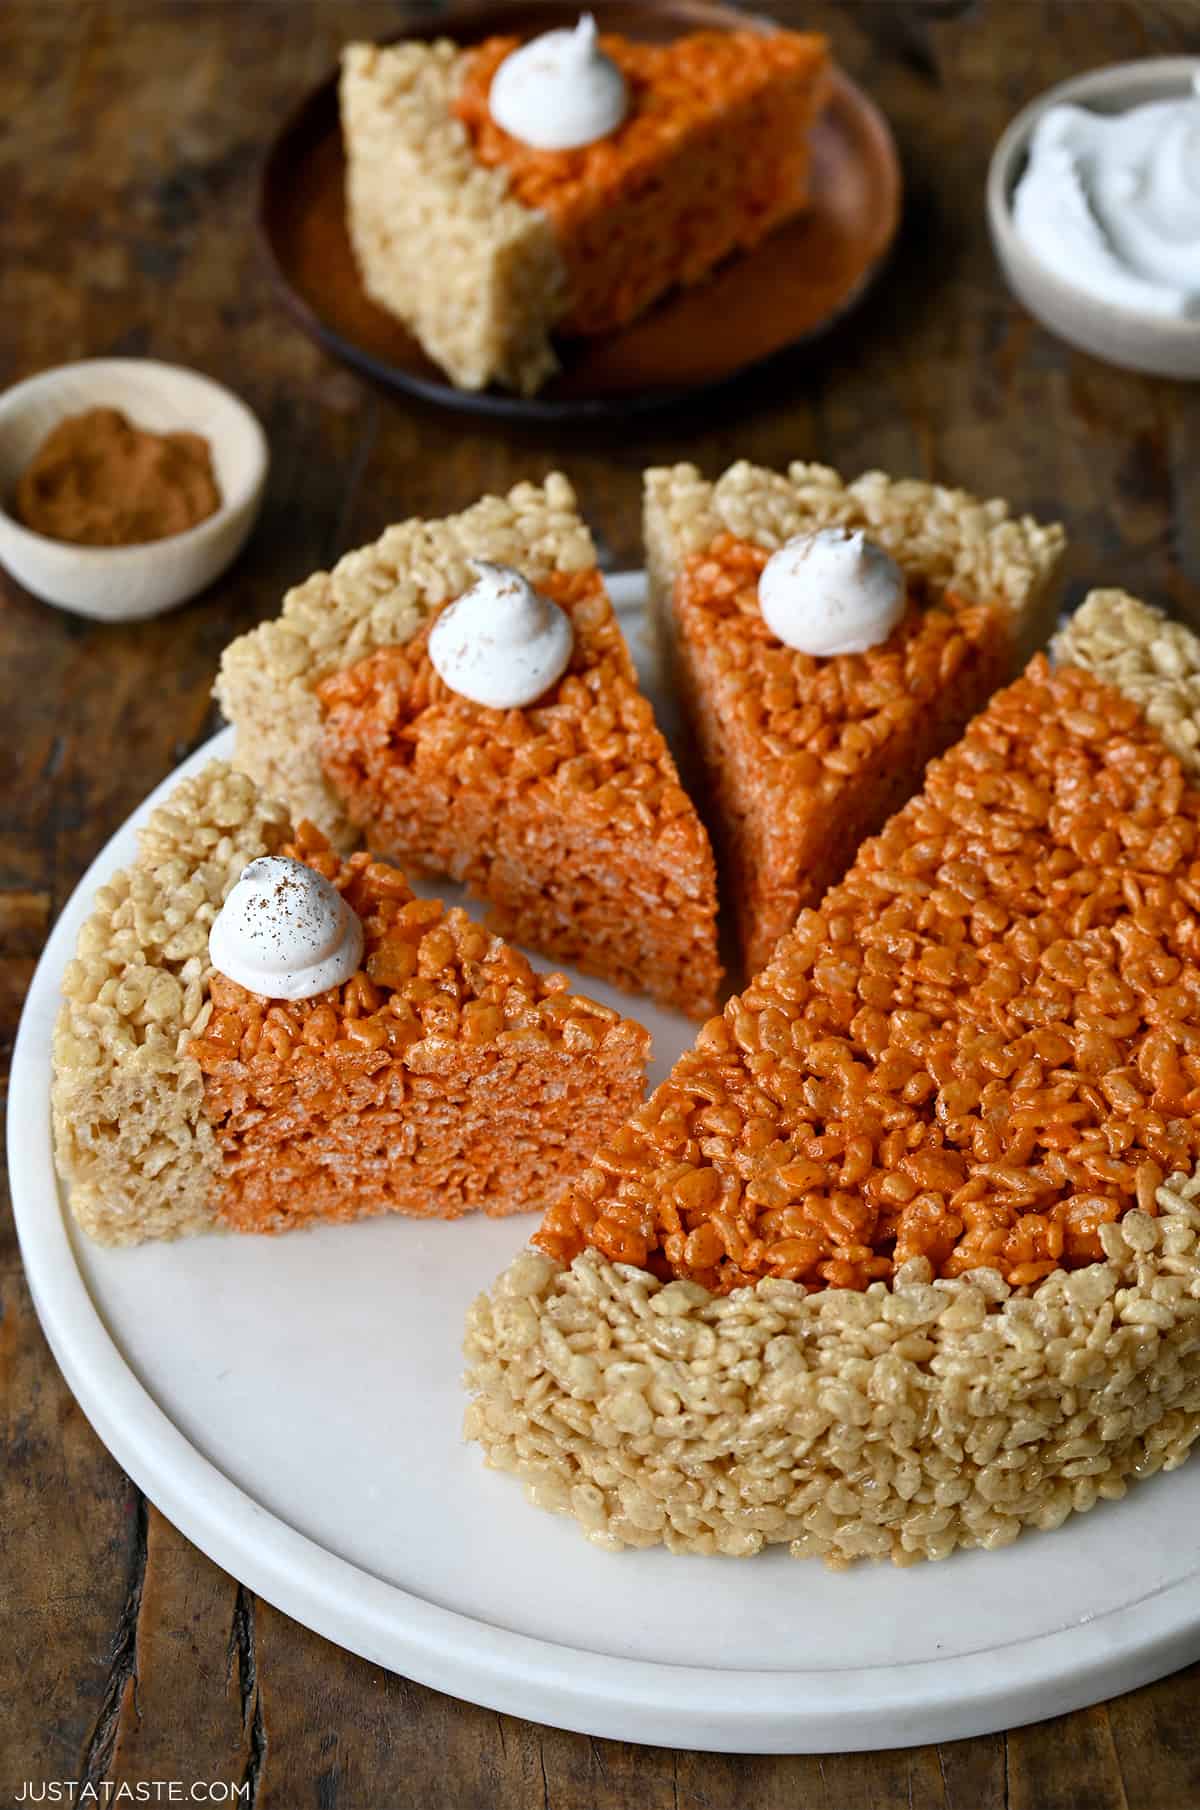
What’s there to say about Pumpkin Pie Rice Krispies Treats that hasn’t already been said? The classic treats get a seasonal update thanks to a bit of pumpkin pie spice, but I’m taking things one step further by forming the marshmallow treats into the shape of a pie. Add a dollop of whipped cream on each slice, and your Thanksgiving guests might be calling April Fool’s at your holiday table.
If you love this seasonal twist, don’t miss my Halloween Rice Krispies Treats and Reindeer Rice Krispie Treats.
Why You’ll Love this Recipe
- Easy but impressive.
- No baking required! You can whip up a batch of these treats in 30 minutes or less.
- Make-ahead friendly. This quick, crowd-pleasing dessert is perfect for Halloween, Thanksgiving or any fall gathering.
- Kid-friendly. This recipe is an easy and fun way to get your whole family cooking together.
- Delivers big flavor without all the fuss of the traditional dessert. If you love all things pumpkin, you’ll love these pumpkin cereal treats!
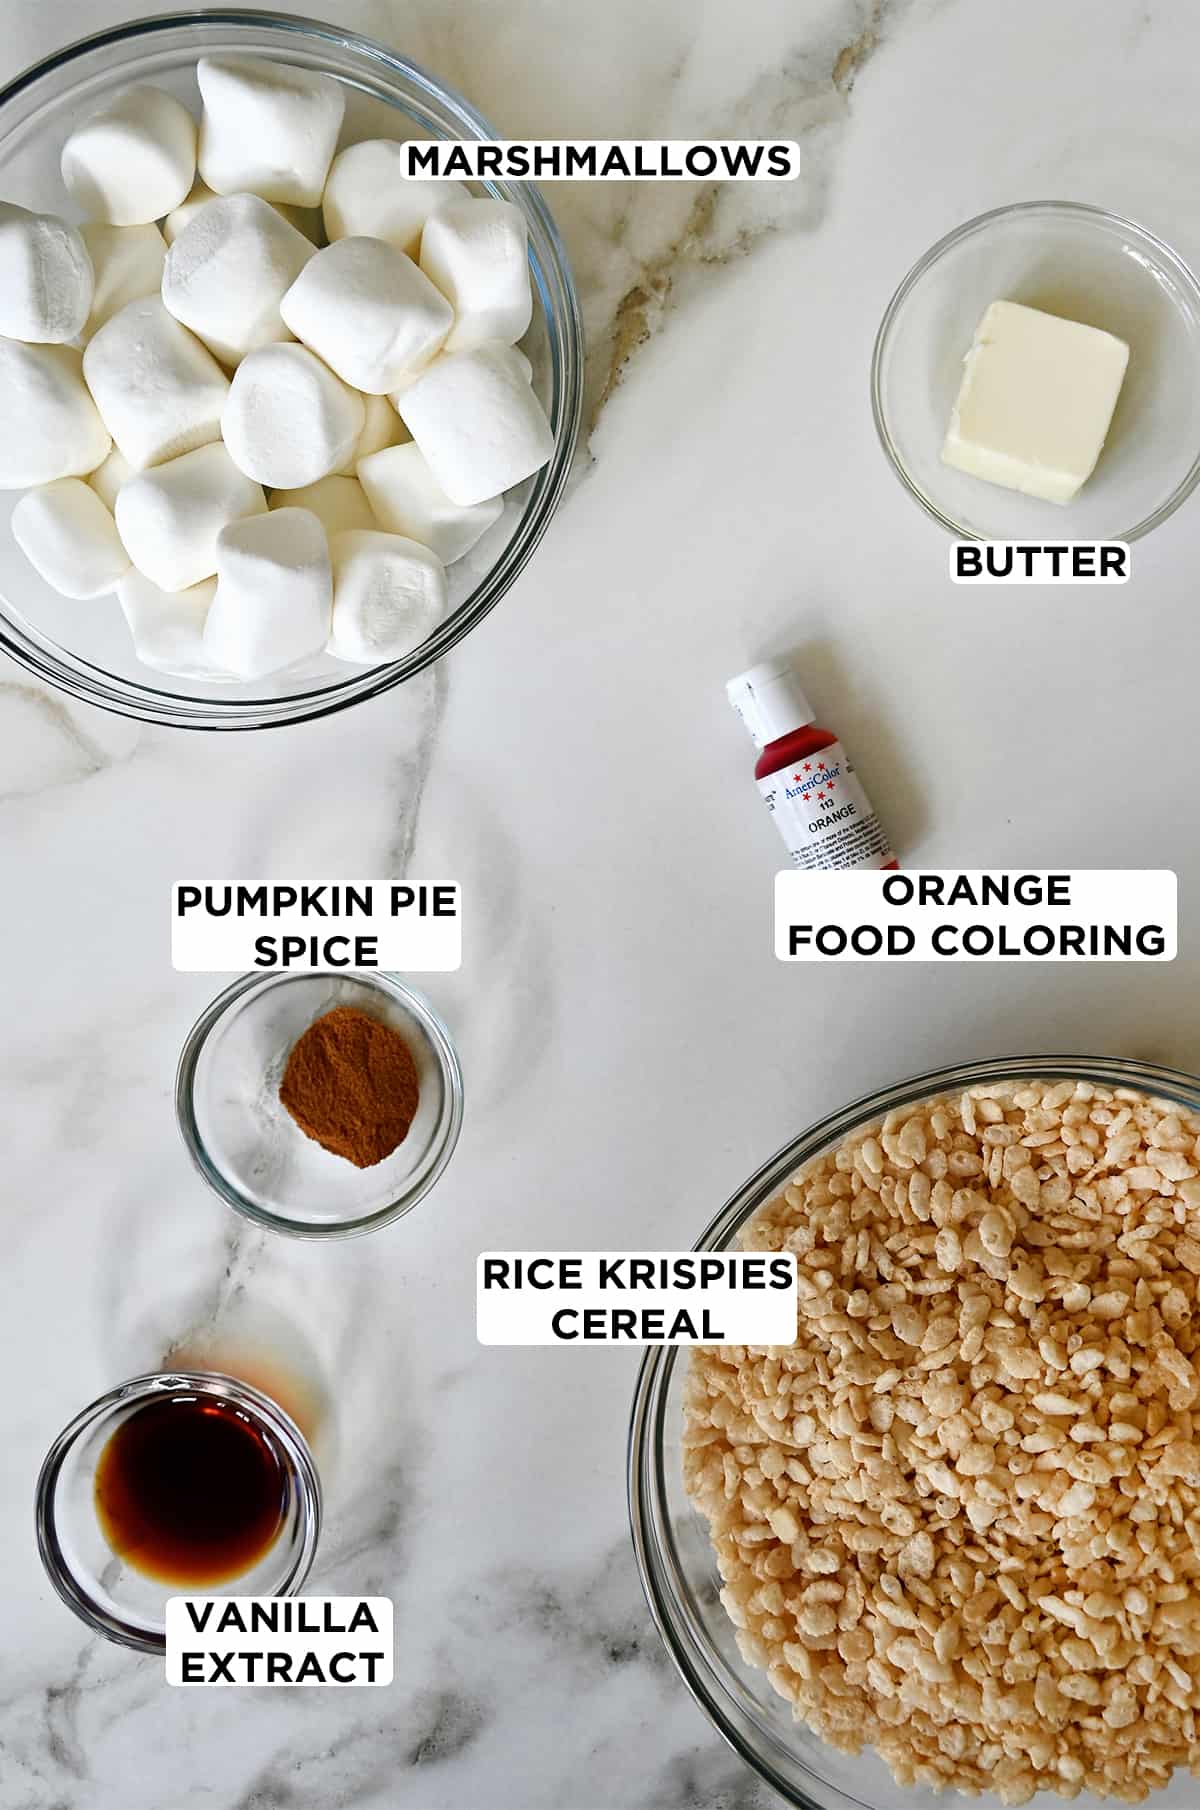
- Rice Krispies cereal: The foundation of any Rice Krispies treat (unless it’s my go-to popcorn marshmallow treats!).
- Pumpkin pie spice: Provides that quintessential pumpkin flavor that we all know and love. You can make your own pumpkin spice blend by combining ⅛ teaspoon cloves, ¼ teaspoon ginger and ⅛ teaspoon nutmeg.
- Marshmallows: The glue that holds it all together, marshmallows add the perfect amount of ooey, gooey goodness.
- Butter: A touch of butter provides a rich, creamy element that complements the pumpkin flavor beautifully.
- Orange food coloring: I always opt for gel-based food coloring. Unlike water-based alternatives, it delivers exceptionally vibrant colors with just a few drops.
Pro Tip: In place of the regular marshmallows and the pumpkin pie spice, you can use the Pumpkin Spice Mallows for the pumpkin filling.
See the recipe card for full information on ingredients and quantities.
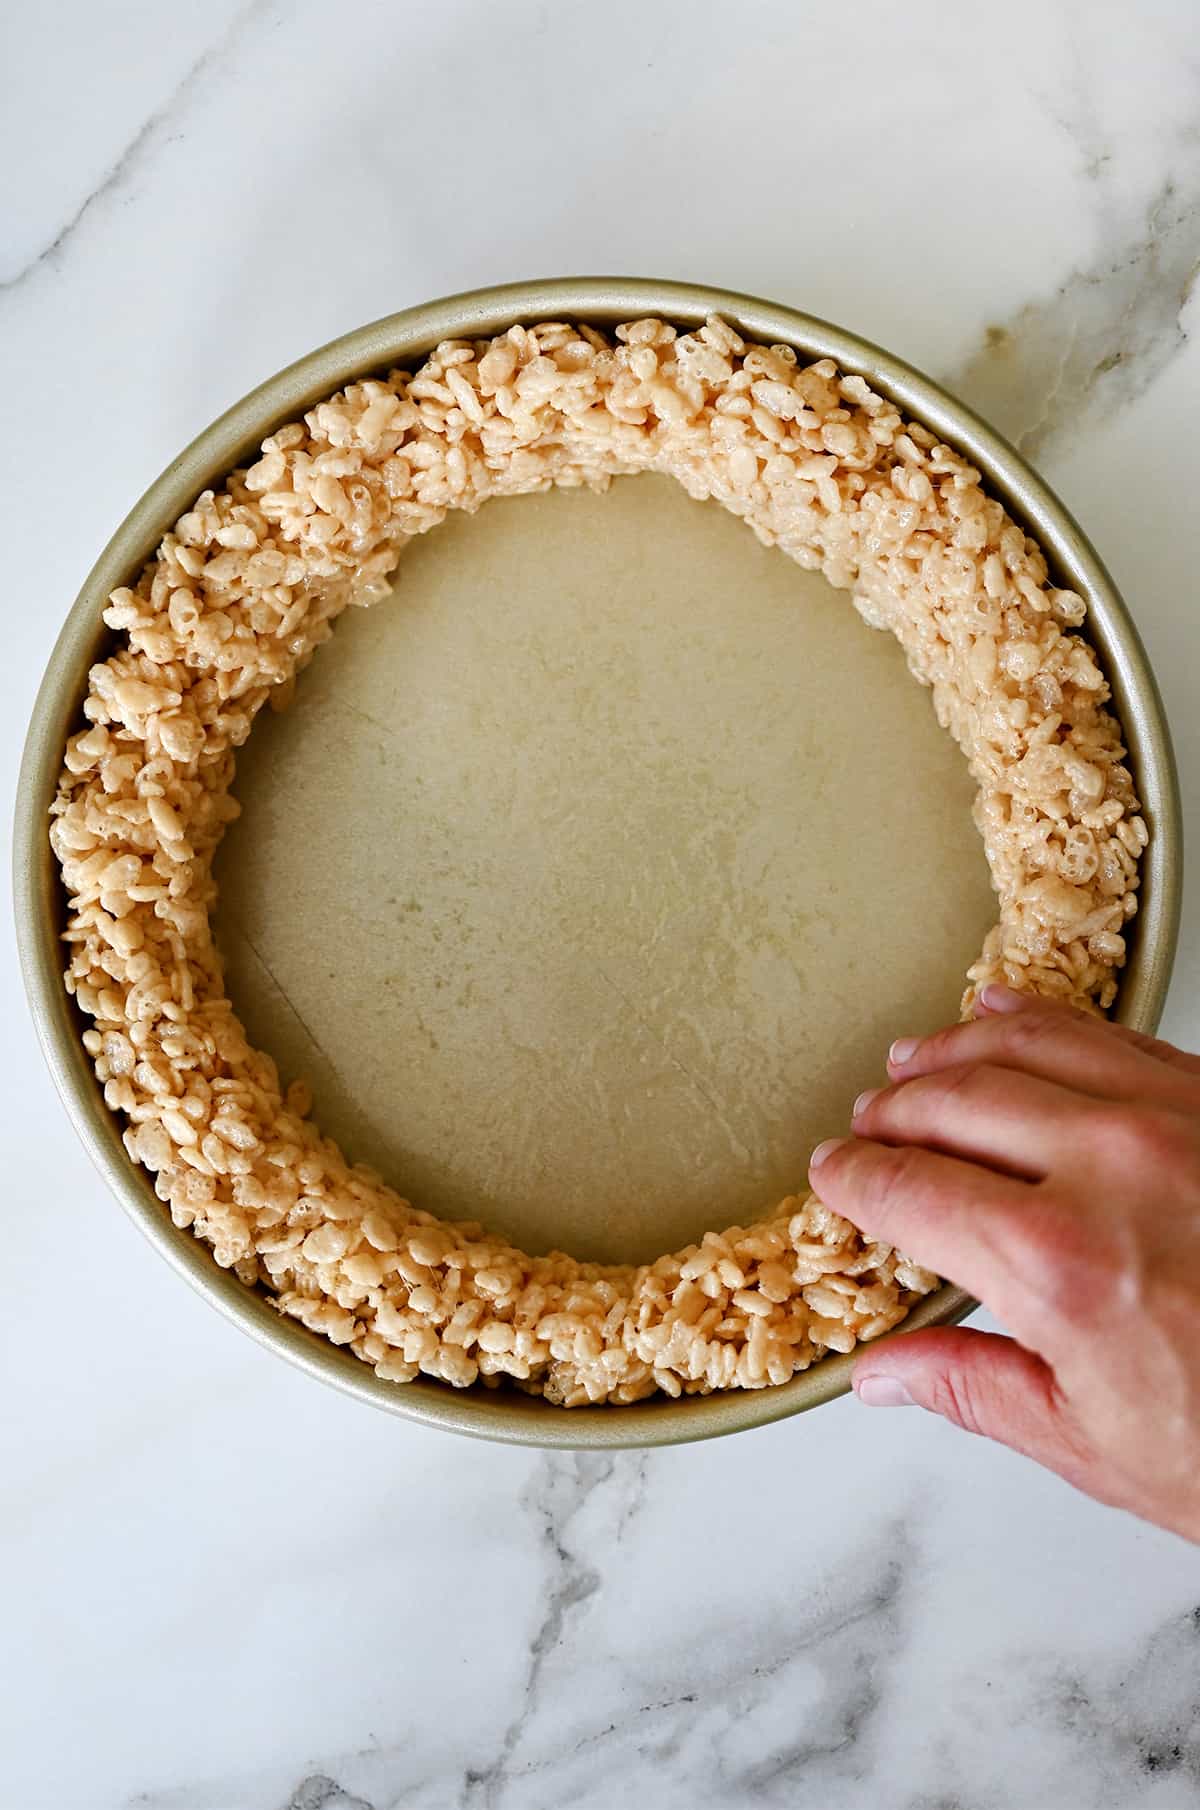
The setup is simple: First up is the pie crust, which is made with the classic, vanilla-flavored treats that are molded along the inside edge of a round cake pan.
Next up is the pumpkin pie filling, which is made with pumpkin spice and a splash of vibrant orange food coloring.
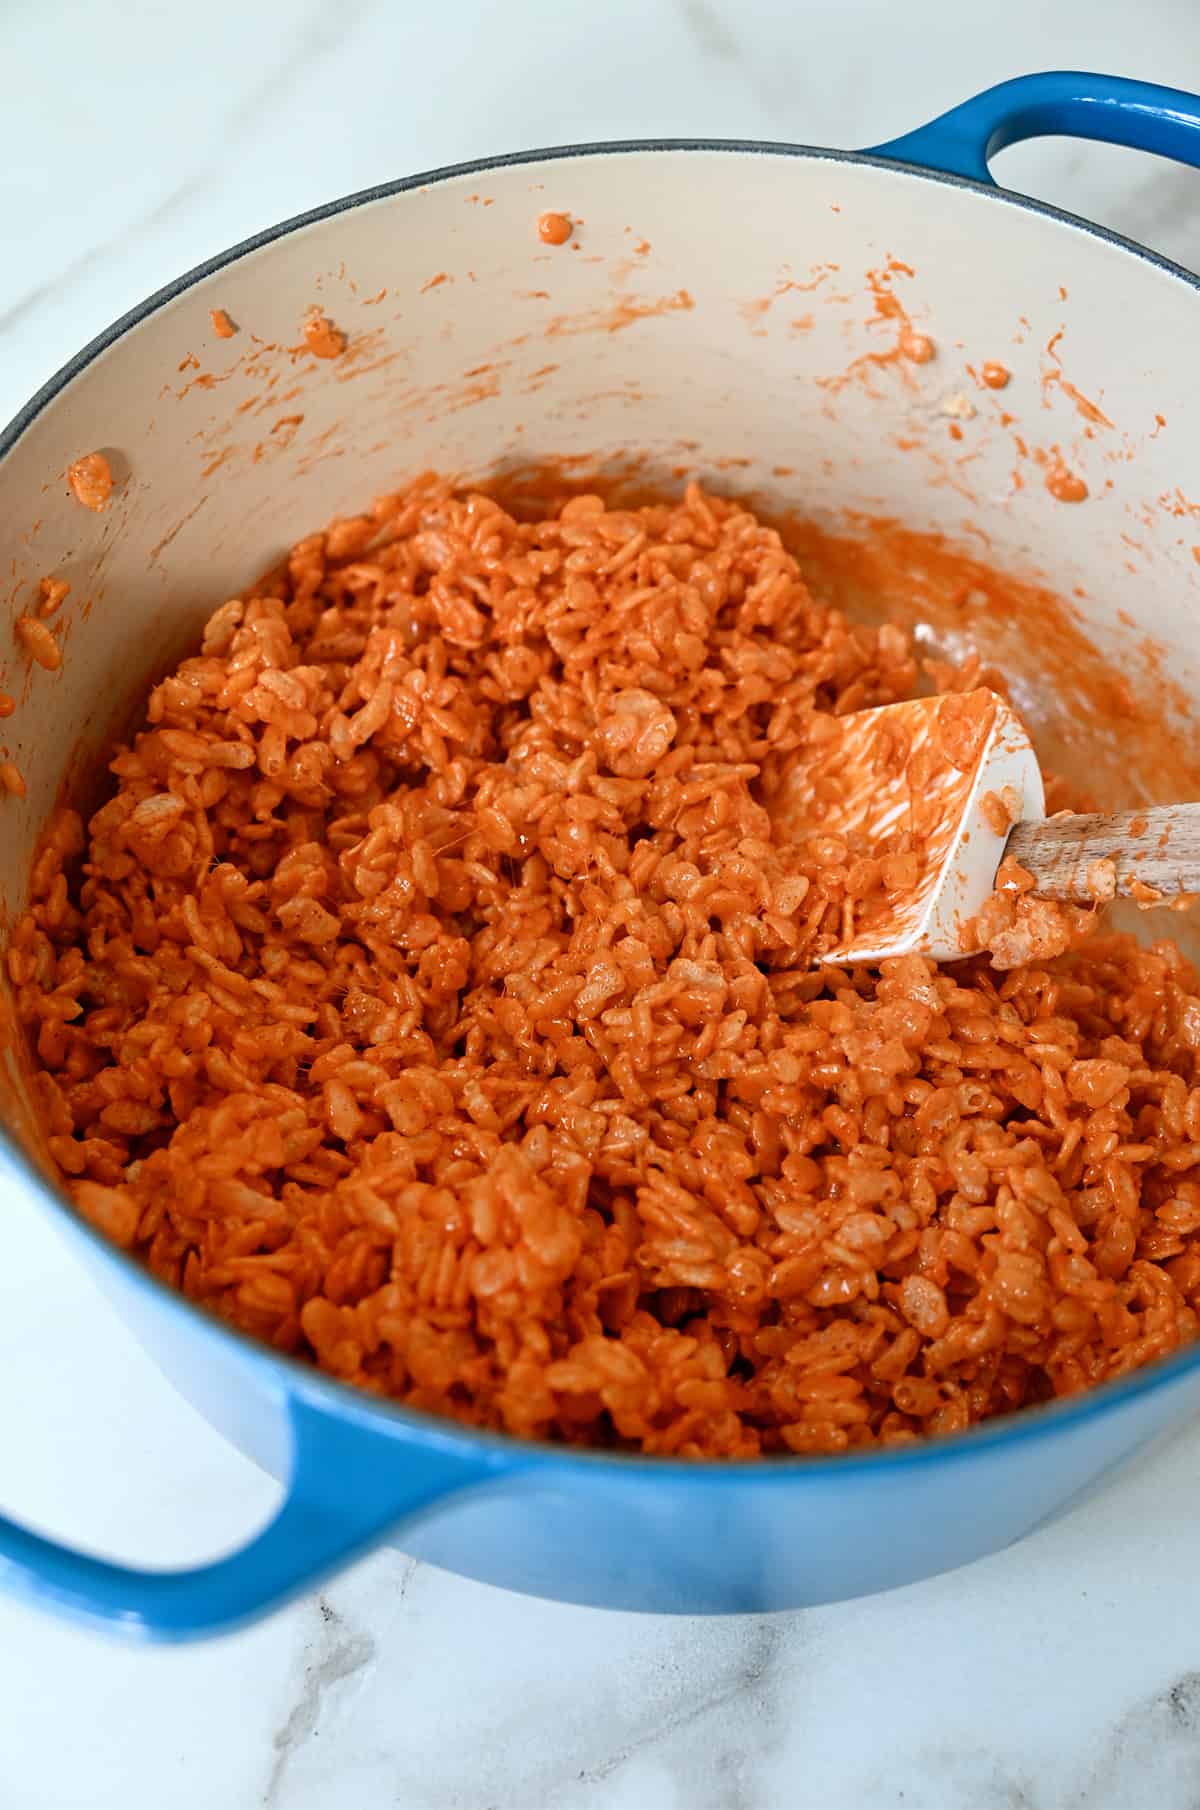
Then, it gets pressed inside the crust.
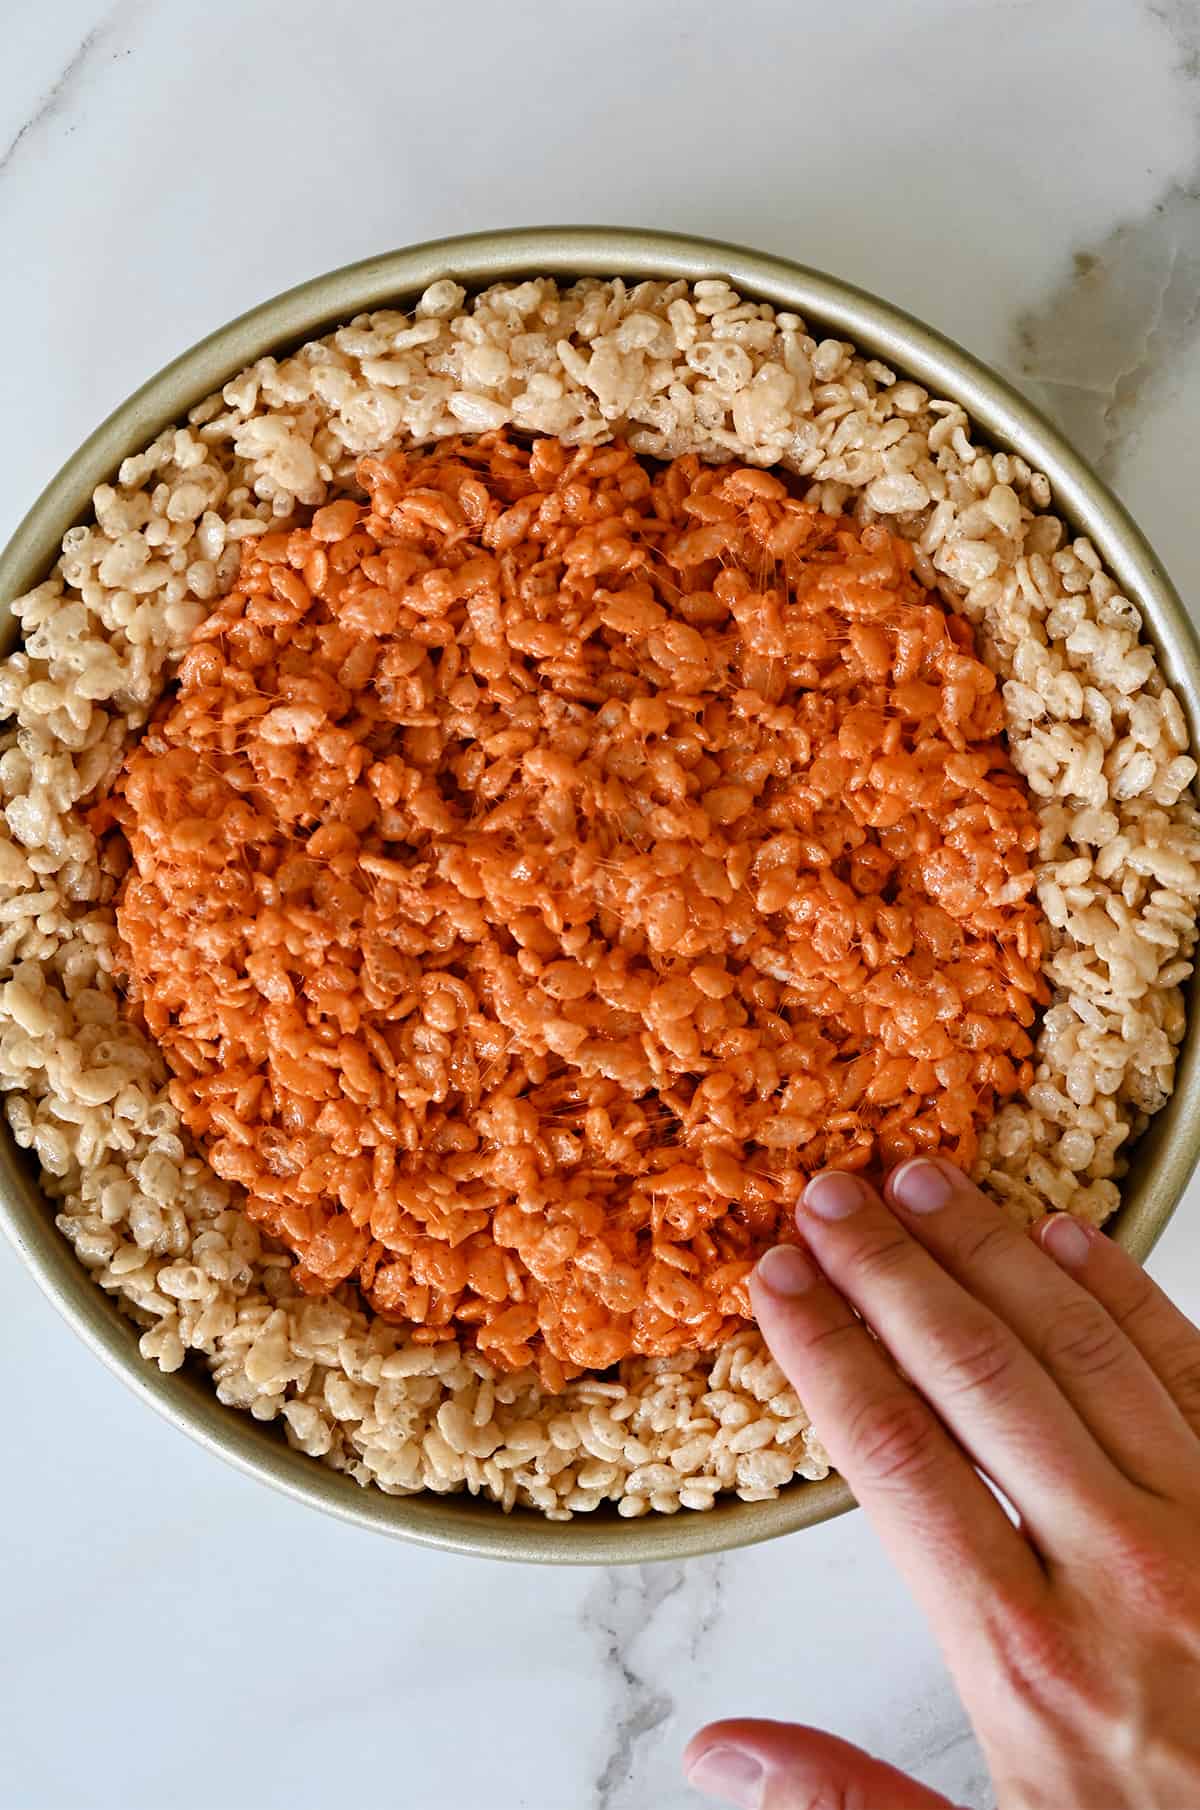
And just like that we’ve cut the pie prep time from a few hours to a few minutes, and you can still enjoy the taste of fall’s most famous dessert. Now that’s something to be thankful for!
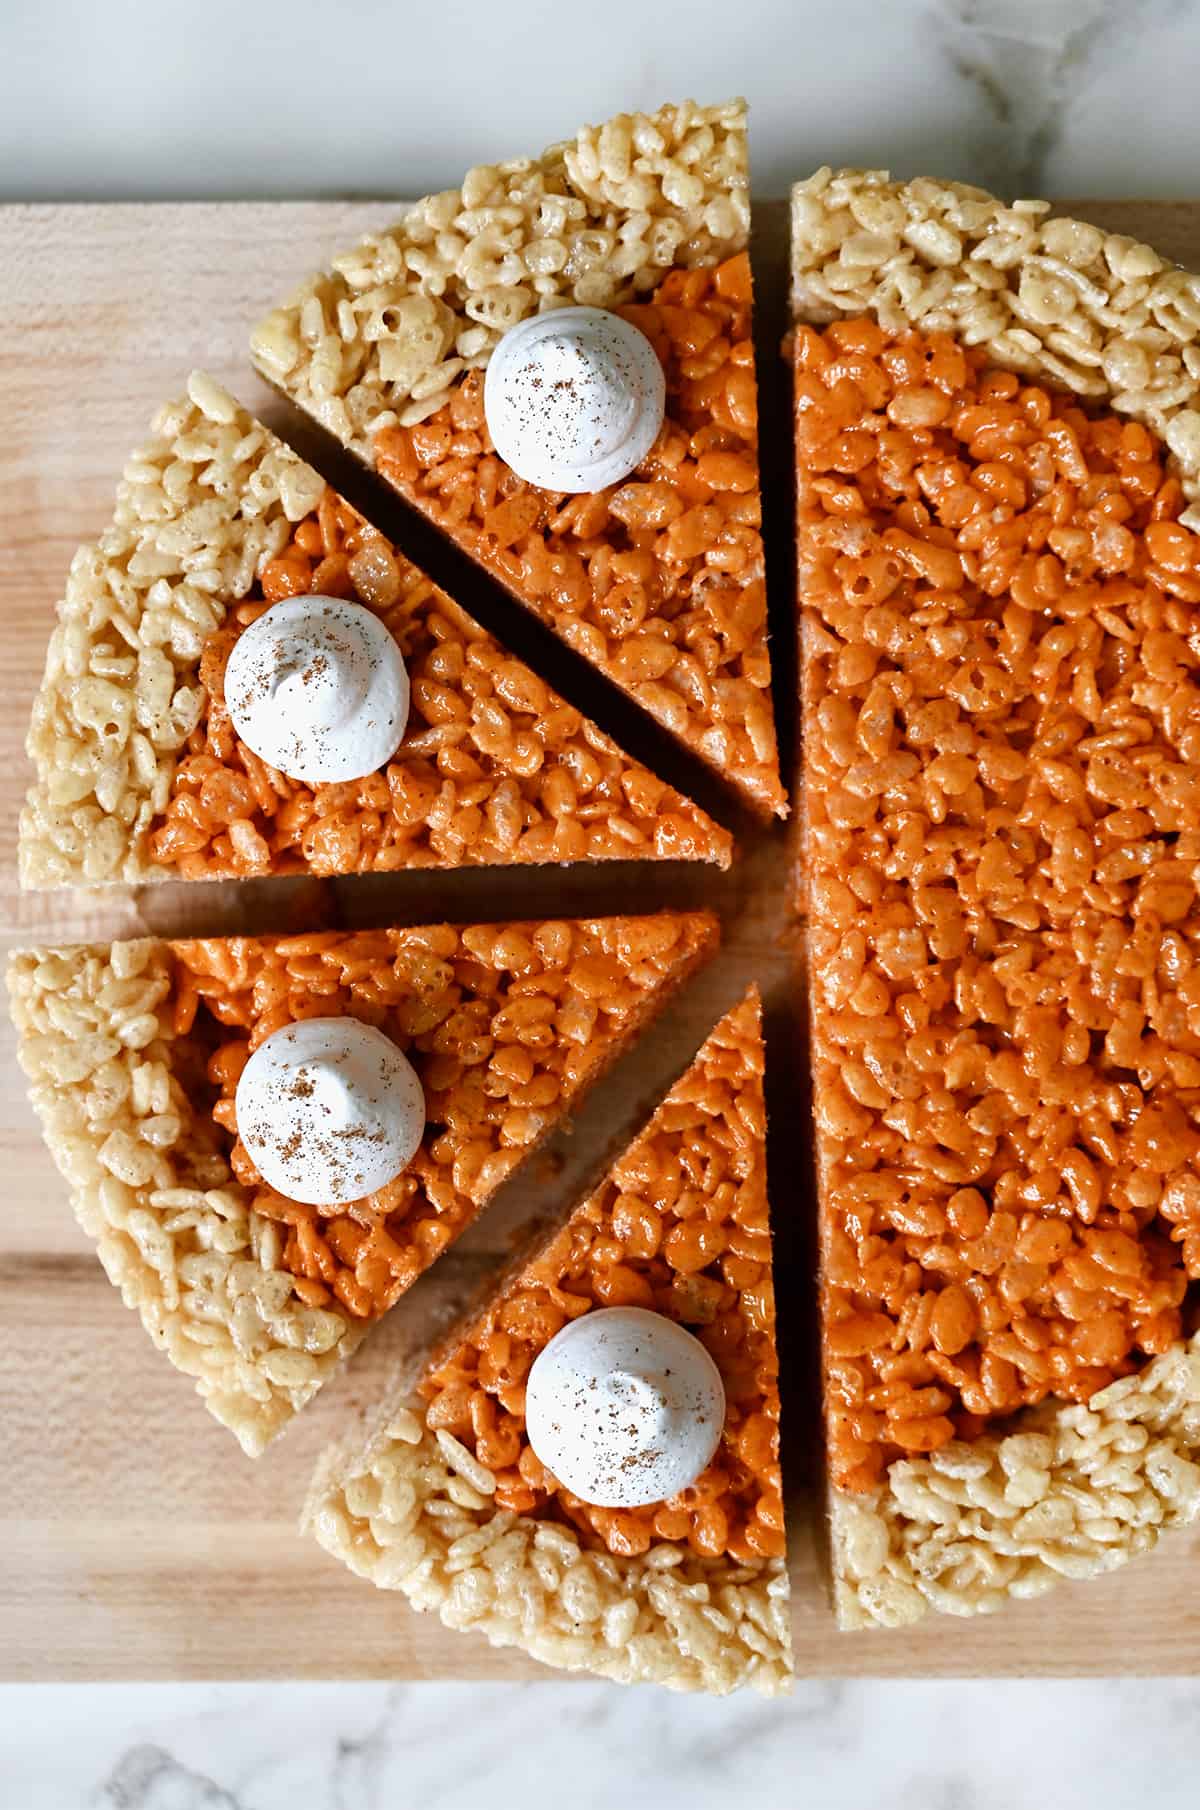
Ready to keep the pie party rollin’? Don’t miss my top-rated fall pie recipes for Salted Caramel Apple Hand Pies, Muffin Tin Mini Apple Pies and Muffin Tin Mini Pecan Pies.
- Non-Stick Prep: Grease your baking dish and any utensils (spatulas or hands) you’ll be using with a thin layer of butter or cooking spray to prevent sticking.
- Work Quickly: Once you’ve melted the marshmallows, work swiftly when folding in the cereal. The mixture can set rapidly, so have everything ready before you start.
- Create Uniform Thickness: When pressing the mixture into the baking dish, aim for a uniform thickness.
- Allow for Proper Cooling: I know it’s tempting to dig into these right away, but patience is key when it comes to marshmallow crispy treats. To ensure they retain their perfect shape and don’t crumble into a gooey mess, allow them to cool completely in the pan before cutting.
- Sharp Knife: Use a sharp knife, dipped in hot water or buttered, to cut your treats. This will help you achieve perfect pie wedges.
- Get Creative with Toppings: Chocolate chips, chopped nuts or a drizzle of homemade butterscotch sauce can take these treats to the next level. Let your imagination run wild!
- Store Properly: To keep your treats fresh, store them in an airtight container at room temperature for up to 4-5 days.
Frequently Asked Questions
It’s best to avoid using old or stale marshmallows as they may not melt properly, resulting in clumps or uneven texture. For the best results, use fresh, soft marshmallows.
I haven’t made this recipe using marshmallow fluff so I can’t say with certainty what the results would be, but my initial thought is that it *should* work. When using marshmallow fluff, you’ll typically use about 1 ½ cups of marshmallow fluff for every 10 ounces of regular marshmallows. However, keep in mind that using marshmallow fluff may result in slightly different texture and sweetness compared to using regular marshmallows, so it’s a good idea to adjust the quantities based on your taste preferences.
You can make these marshmallow treats a day or two in advance of your party and store them in an airtight container at room temp. They’ll remain fresh and delicious for up to 4-5 days.
- Pumpkin Dip with Pie Fries
- Easy Pumpkin Bundt Cake
- No-Bake Pumpkin Cheesecake Parfaits
- Pumpkin Cheesecake Brownies
- Pumpkin Bars with Cream Cheese Frosting
- Pumpkin Cheesecake Cookies
- The Best Pumpkin Whoopie Pies with Cream Cheese Frosting

Ingredients
For the Rice Krispies crust:
- 1 1/2 Tablespoons unsalted butter
- 2 cups (about 16) marshmallows
- 1/2 teaspoon vanilla extract
- 3 cups Rice Krispies cereal
For the Rice Krispies filling:
- 2 1/2 Tablespoons unsalted butter
- 1 teaspoon pumpkin pie spice
- 3 cups (about 24) marshmallows (See Kelly’s Note)
- 2 teaspoons orange food coloring
- 4 cups Rice Krispies cereal
- Whipped cream, for decorating (optional)
- Equipment: 8-inch round cake pan; Piping bag; Star-shaped piping tip
Instructions
Make the Rice Krispies crust:
- Coat an 8-inch round cake pan with cooking spray. Set it aside.
- Add the butter to a medium saucepan set over medium-low heat. Once the butter has melted, add the marshmallows and cook, stirring constantly, until the marshmallows are melted. Stir in the vanilla extract and then the Rice Krispies cereal until the cereal is well coated.
- Transfer the mixture into the prepared cake pan an press it firmly against the inside edge of the pan to form about a 1-inch crust. Let it cool while you prepare the filling.
Make the Rice Krispies filling:
- Add the butter and pumpkin pie spice to a medium saucepan set over medium-low heat. Once the mixture has melted, add the marshmallows and cook, stirring constantly, until the marshmallows are melted. Stir in the orange food coloring then stir in the Rice Krispies cereal until the cereal is well coated.
- Press the mixture firmly inside the crust border, pushing it down to compact it, and allow it to cool completely in the pan. Once cooled, place a serving plate on top of the pan and invert the pan. Slice the pie into wedges and top with a dollop of whipped cream (optional).
Kelly’s Notes
- In place of the regular marshmallows and the pumpkin pie spice, you can use the Pumpkin Spice Mallows for the pumpkin filling.
- Grease your baking dish and any utensils (spatulas or hands) you’ll be using with a thin layer of butter or cooking spray to prevent sticking.
- Once you’ve melted the marshmallows, work swiftly when folding in the cereal. The mixture can set rapidly, so have everything ready before you start.
- When pressing the mixture into the baking dish, aim for a uniform thickness.
- I know it’s tempting to dig into these right away, but patience is key when it comes to marshmallow crispy treats. To ensure they retain their perfect shape and don’t crumble into a gooey mess, allow them to cool completely in the pan before cutting.
- Use a sharp knife, dipped in hot water or buttered, to cut your treats. This will help you achieve perfect pie wedges.
- To keep your treats fresh, store them in an airtight container at room temperature for up to 4-5 days.
- ★ Did you make this recipe? Don’t forget to give it a star rating below!
Nutrition
Shoutout
Did you try this recipe?
Share it with the world! Mention @justataste or tag #justatasterecipes!
This post may contain affiliate links.
Recipe by Kelly Senyei of Just a Taste. Please do not reprint this recipe without my permission. If you'd like to feature this recipe on your site, please rewrite the method of preparation and link to this post as the original source.


Made this but because of interruptions I forgot to put the pumpkin spice in the filling.. is there anyway to fix this
Hi Colette! Once the cereal is set, you can’t really add the spice to the treats themselves, but you could top them with a pumpkin spice-flavored whipped cream! Check out my Secret Ingredient Whipped Cream recipe and add 2 teaspoons pumpkin pie spice to it. Hope this helps!
This looks like a good idea but was wondering if you could use marshmallow cream? My grandson loves rice crispy treats!
Hi Stella! I haven’t made this recipe using marshmallow fluff so I can’t say with certainty what the results would be, but my initial thought is that it *should* work.
I used mini marshmallows and kept the amount of cups the same as the recipe, and it turned out great! Looks super cute, and will make my husband, who’s not much of a pie guy, happy on Thanksgiving. Thanks!
I’m so thrilled you enjoyed the recipe, Lindsey!
I us d a spring-form pan and it came out great. Didn’t attempt the 2tsp of food coloring, though, as 15 drops made it a nice/realistic tan color.
I’m so glad you enjoyed the recipe, Briana!
What if I only have miniature marshmallows on hand? What would the equivalent be?
Hi there, Jessica! I’ve never done the measurements with mini marshmallows, but I looked up that one regular marshmallow = about 13 mini marshmallows, so you could convert the recipe from there. :)