Step away from the freezer aisle—my easy Belgian waffle recipe will make you forget store-bought ever existed! Fluffy and tender on the inside, golden and crispy on the outside, and perfect for topping with homemade strawberry sauce or butter and warm maple syrup. Trust me, these will be the best waffles you’ll ever make!
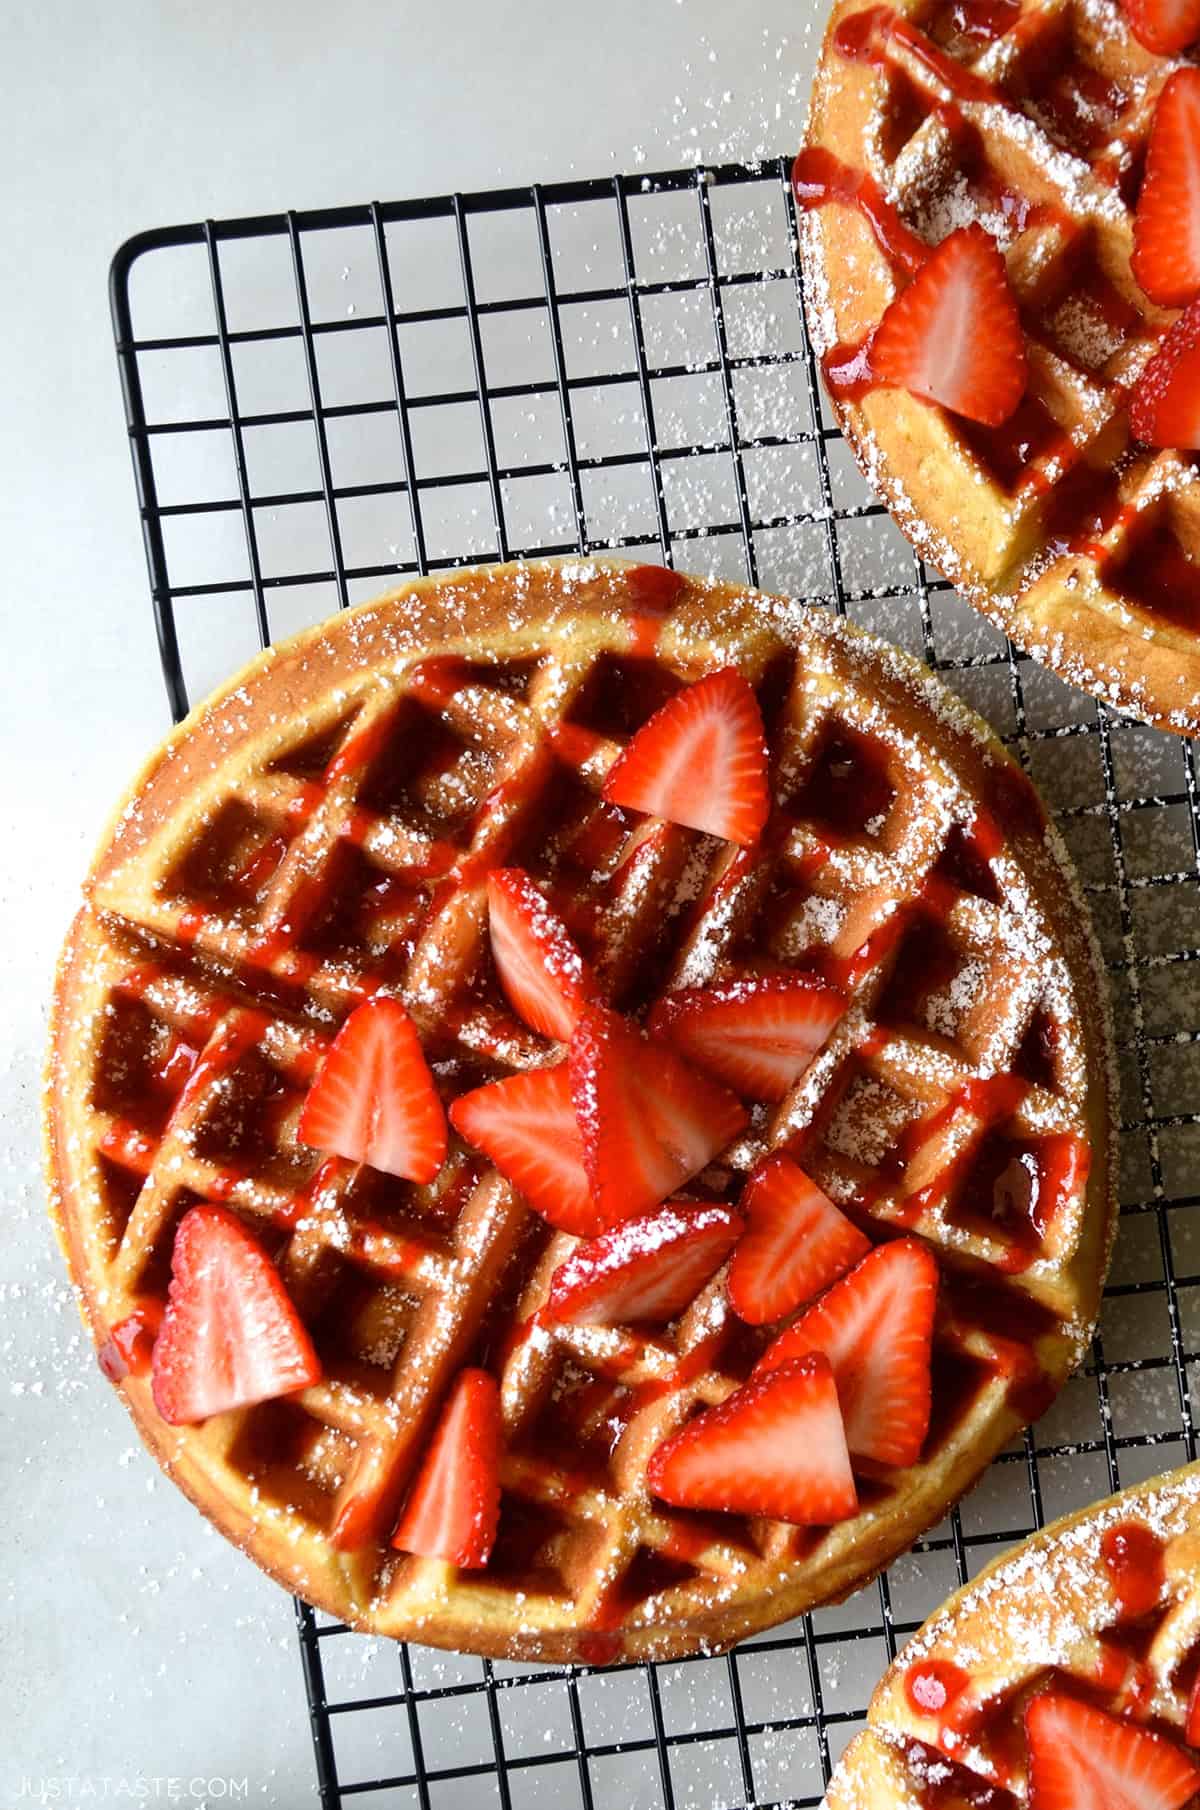
Table of Contents
- What’s the Difference Between Belgian Waffles and Regular Waffles?
- Ingredients You’ll Need
- Buttermilk vs. Regular Milk in Waffles
- How to Make The Best Belgian Waffles
- How to Keep Waffles Warm While You Cook
- Kelly’s Recipe Tips
- Waffle Toppings
- Storage and Freezer Instructions
- More Breakfast Recipes You’ll Love
- Belgian Waffles Recipe Recipe
When I think of the perfect waffle, I picture a Belgian waffle: thick, fluffy and loaded with deep pockets. This breakfast and brunch favorite deserves a spot in everyone’s recipe repertoire! I’ll walk you through every step, plus share all my best tips to help you make homemade Belgian waffles that turn out perfect every time.
What’s the Difference Between Belgian Waffles and Regular Waffles?
The main difference between Belgian waffles and regular waffles is in their thickness and texture. Belgian waffles are usually thicker and made in a waffle iron with deep grids, so they have extra-deep pockets—perfect for catching pools of maple syrup, fresh berries and fluffy whipped cream. While regular waffles tend to be denser, Belgian-style waffles are light and airy inside with a crisp, golden exterior.
The secret? It’s all about the batter. Traditional Belgian waffle recipes use yeast or whipped egg whites to achieve that signature fluffy texture. My recipe skips the yeast but keeps the whipped egg whites, plus a splash of buttermilk for extra flavor and tenderness. The result? The lightest, fluffiest homemade Belgian waffles you’ve ever had!
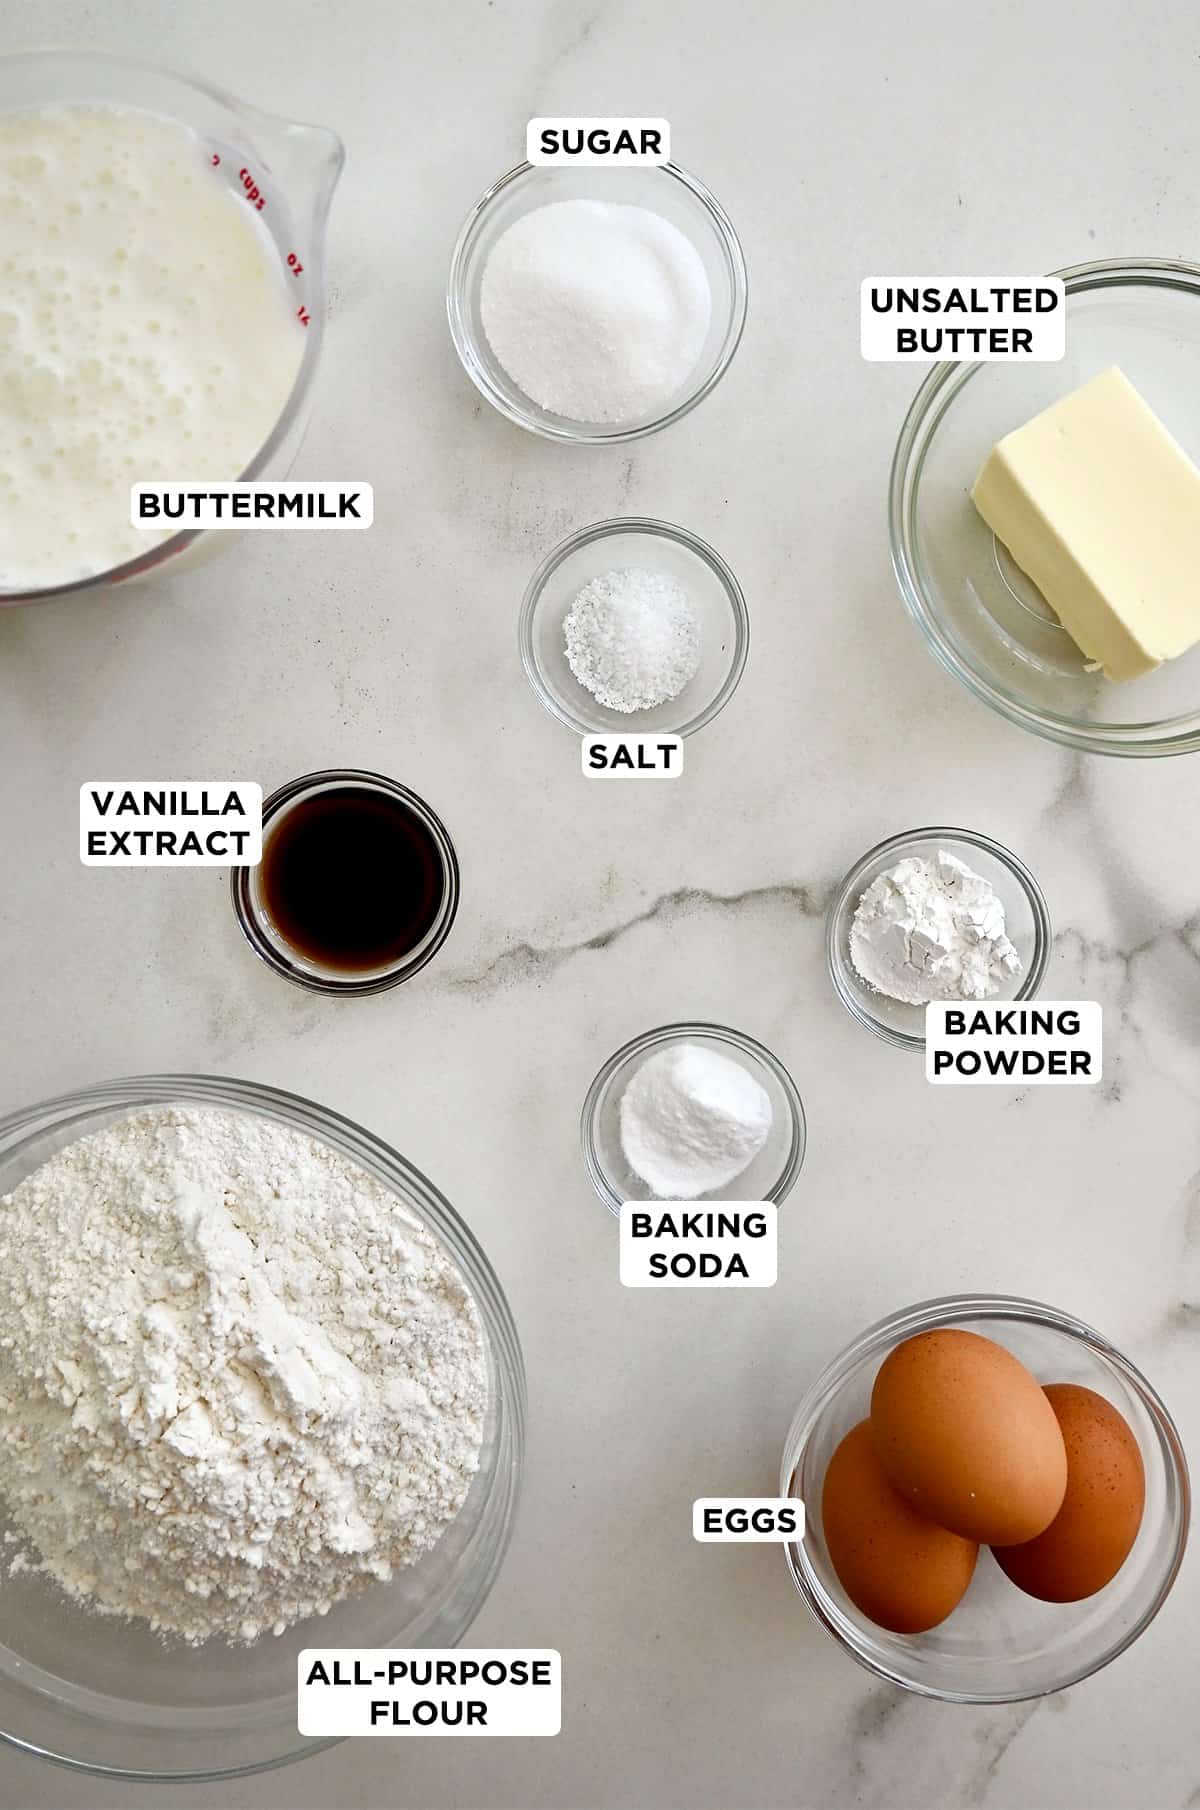
- Eggs: The easiest way to separate eggs is to crack the egg and transfer the yolk back and forth between the shell halves, letting the whites drip into a bowl. Or, use your hands—just gently cradle the yolk and let the whites slip through your fingers.
- Buttermilk: Adds a slight tang and helps create tender waffles. No buttermilk? No problem! You can make a quick buttermilk substitute by adding 1 tablespoon of lemon juice or white vinegar to 1 cup of milk and letting it sit for about 5 minutes before using. Don’t have those on hand? Check out my easy guide to making buttermilk for more substitutes.
- Flour: All-purpose flour provides the perfect balance of structure and tenderness for these Belgian waffles. If you’re looking for a gluten-free option, a 1:1 gluten-free flour blend (such as Cup4Cup or King Arthur’s Measure for Measure) should work, though the texture may be slightly different.
- Baking powder & baking soda: When combined with whipped egg whites, these leavening agents create tiny air pockets throughout the batter, resulting in extra fluffy waffles.
- Melted butter: I am Team Butter all the way when it comes to waffles! While some waffle recipes use oil, I find that those made with butter taste so much better. The richness it adds is unmatched. (Pro tip: Don’t use butter to grease your waffle iron, though—it burns too quickly! More on that below.)
- Sugar: Waffle recipes rely on sugar not just to sweeten the batter but to create that golden, crispy exterior by caramelizing as the waffle cooks. Don’t skip it! It’s the secret to waffles that get and stay crispy.
- Vanilla Extract: For flavor.
See the recipe card for full information on ingredients and quantities.
Buttermilk vs. Regular Milk in Waffles
When you use buttermilk in waffles, it reacts with the baking soda to create bubbles that make the batter rise, giving you light, fluffy waffles with perfect crispy edges. Regular milk won’t have the same effect, and the texture might be a bit denser. So, while you can use regular milk in a pinch, buttermilk is definitely the ingredient that elevates this recipe to next-level deliciousness.
Preheat your waffle maker and follow these steps to whip up a batch of golden, crispy and fluffy Belgian waffles (note: you can still use this recipe to make delicious waffles in a regular waffle iron!):
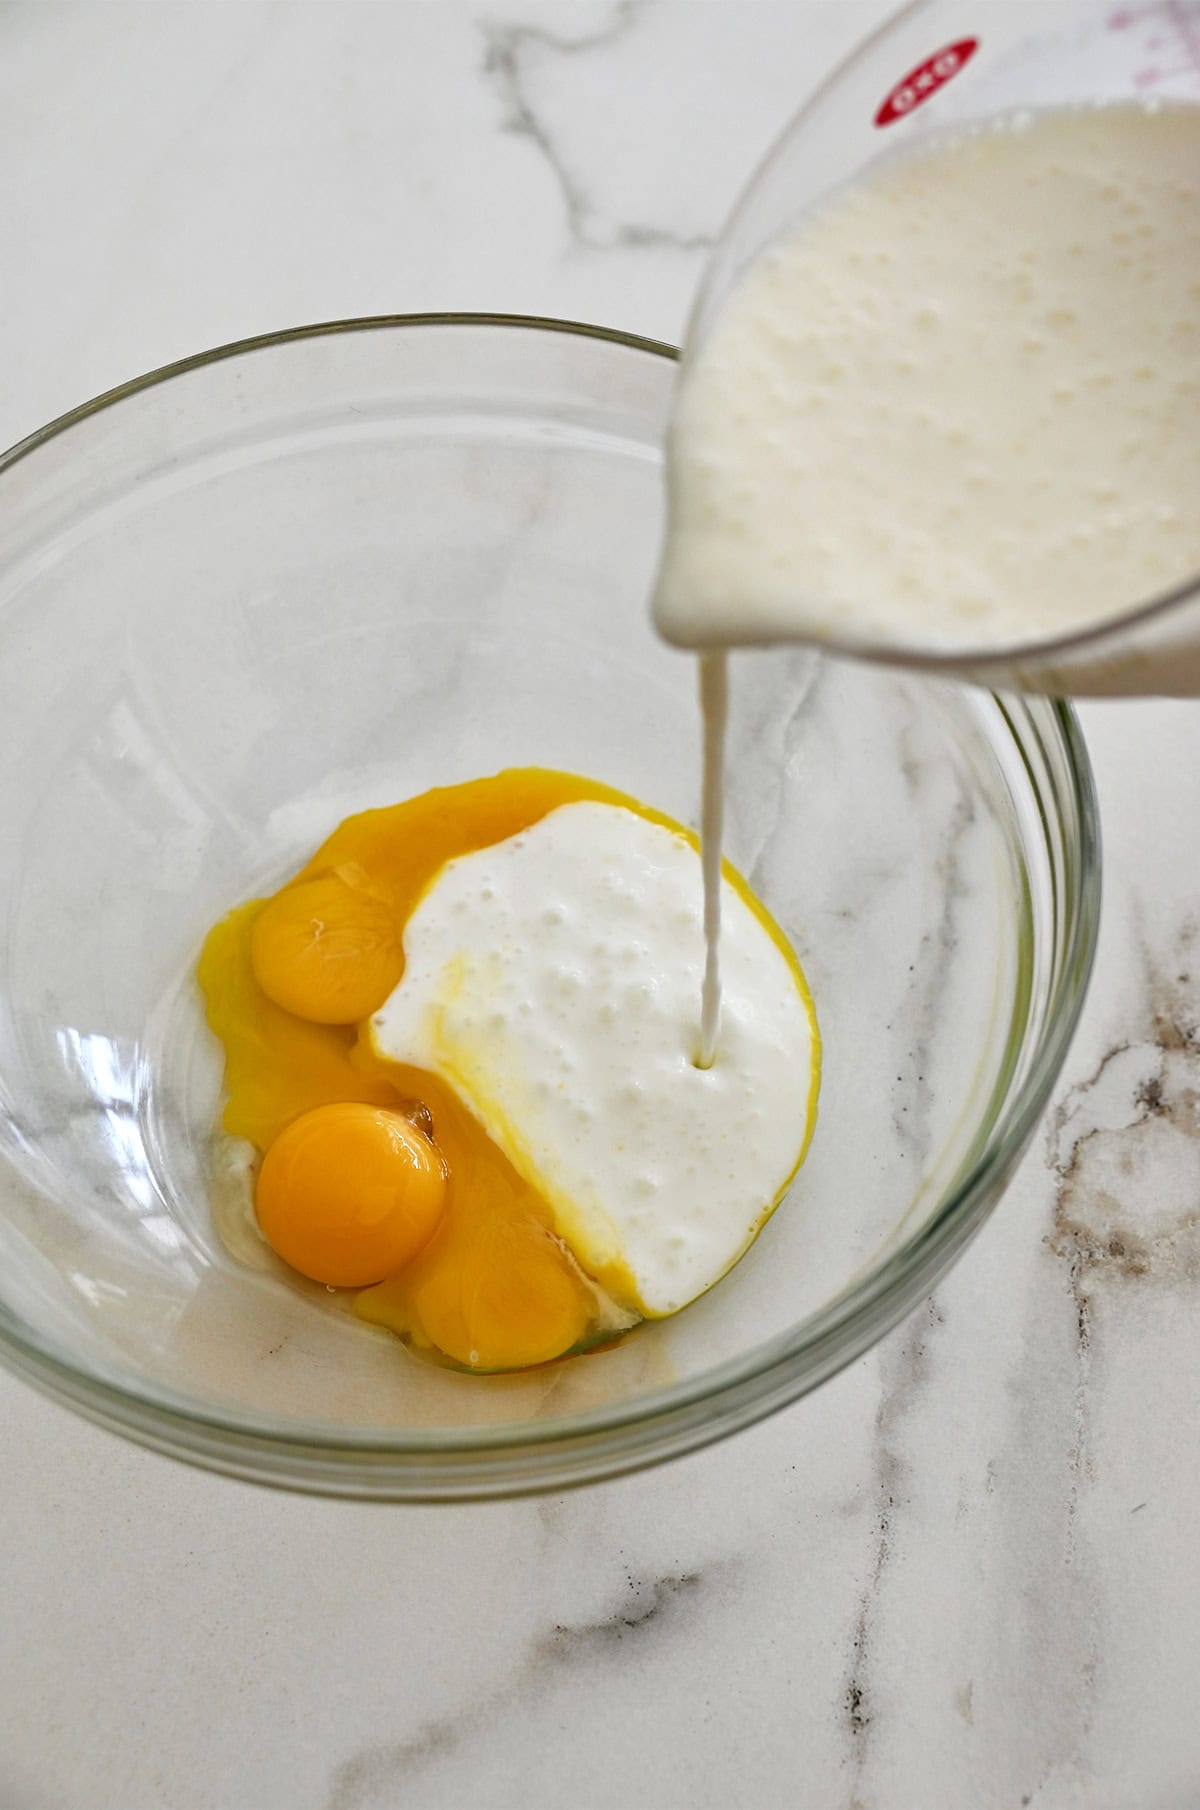
- Start by separating your eggs into yolks and whites. In a large mixing bowl, whisk together the egg yolks with 1 cup of buttermilk.

- In a separate bowl, combine your dry ingredients.
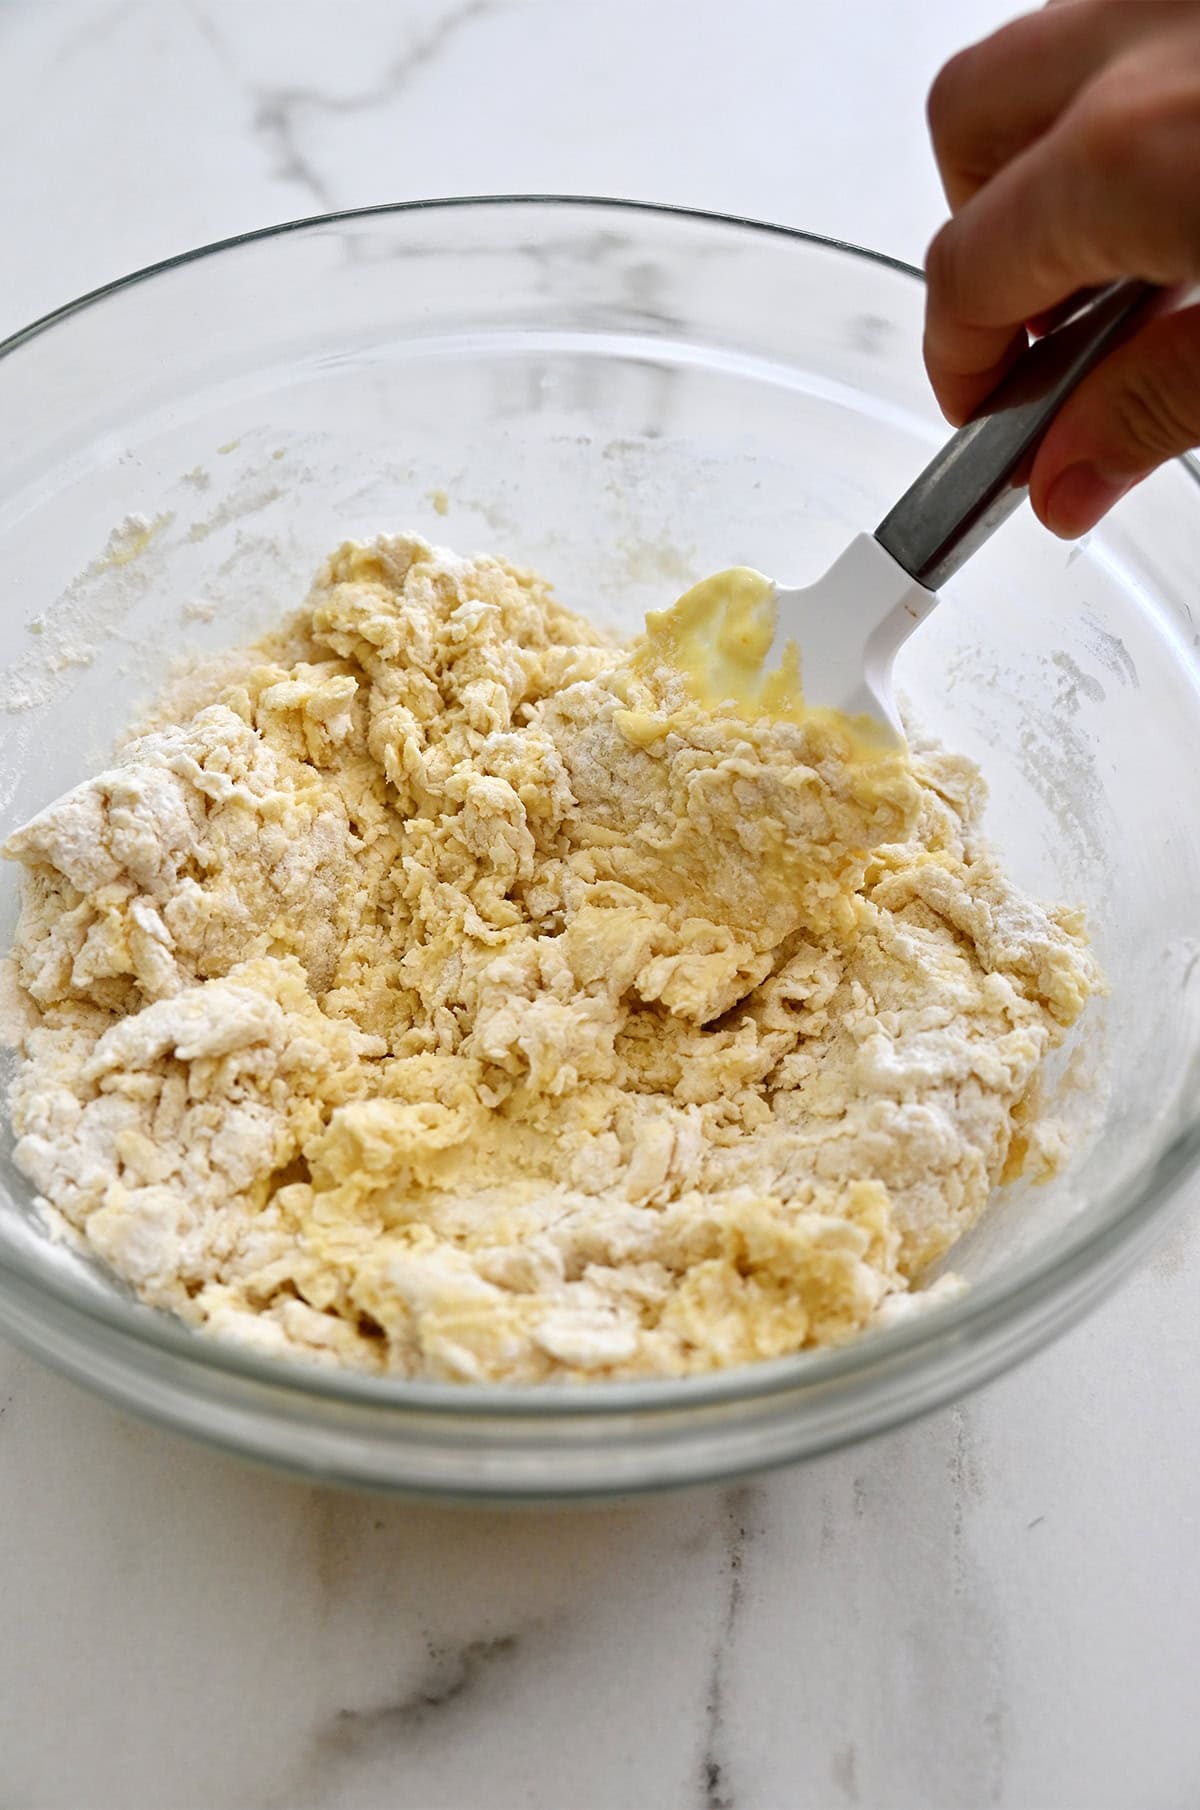
- Add the dry ingredients to the egg yolk mixture, stirring just until combined. Don’t worry if the batter looks a bit lumpy at this stage—it’s supposed to be. Add the remaining buttermilk, along with the melted butter and vanilla extract, and stir until the mixture is just combined.
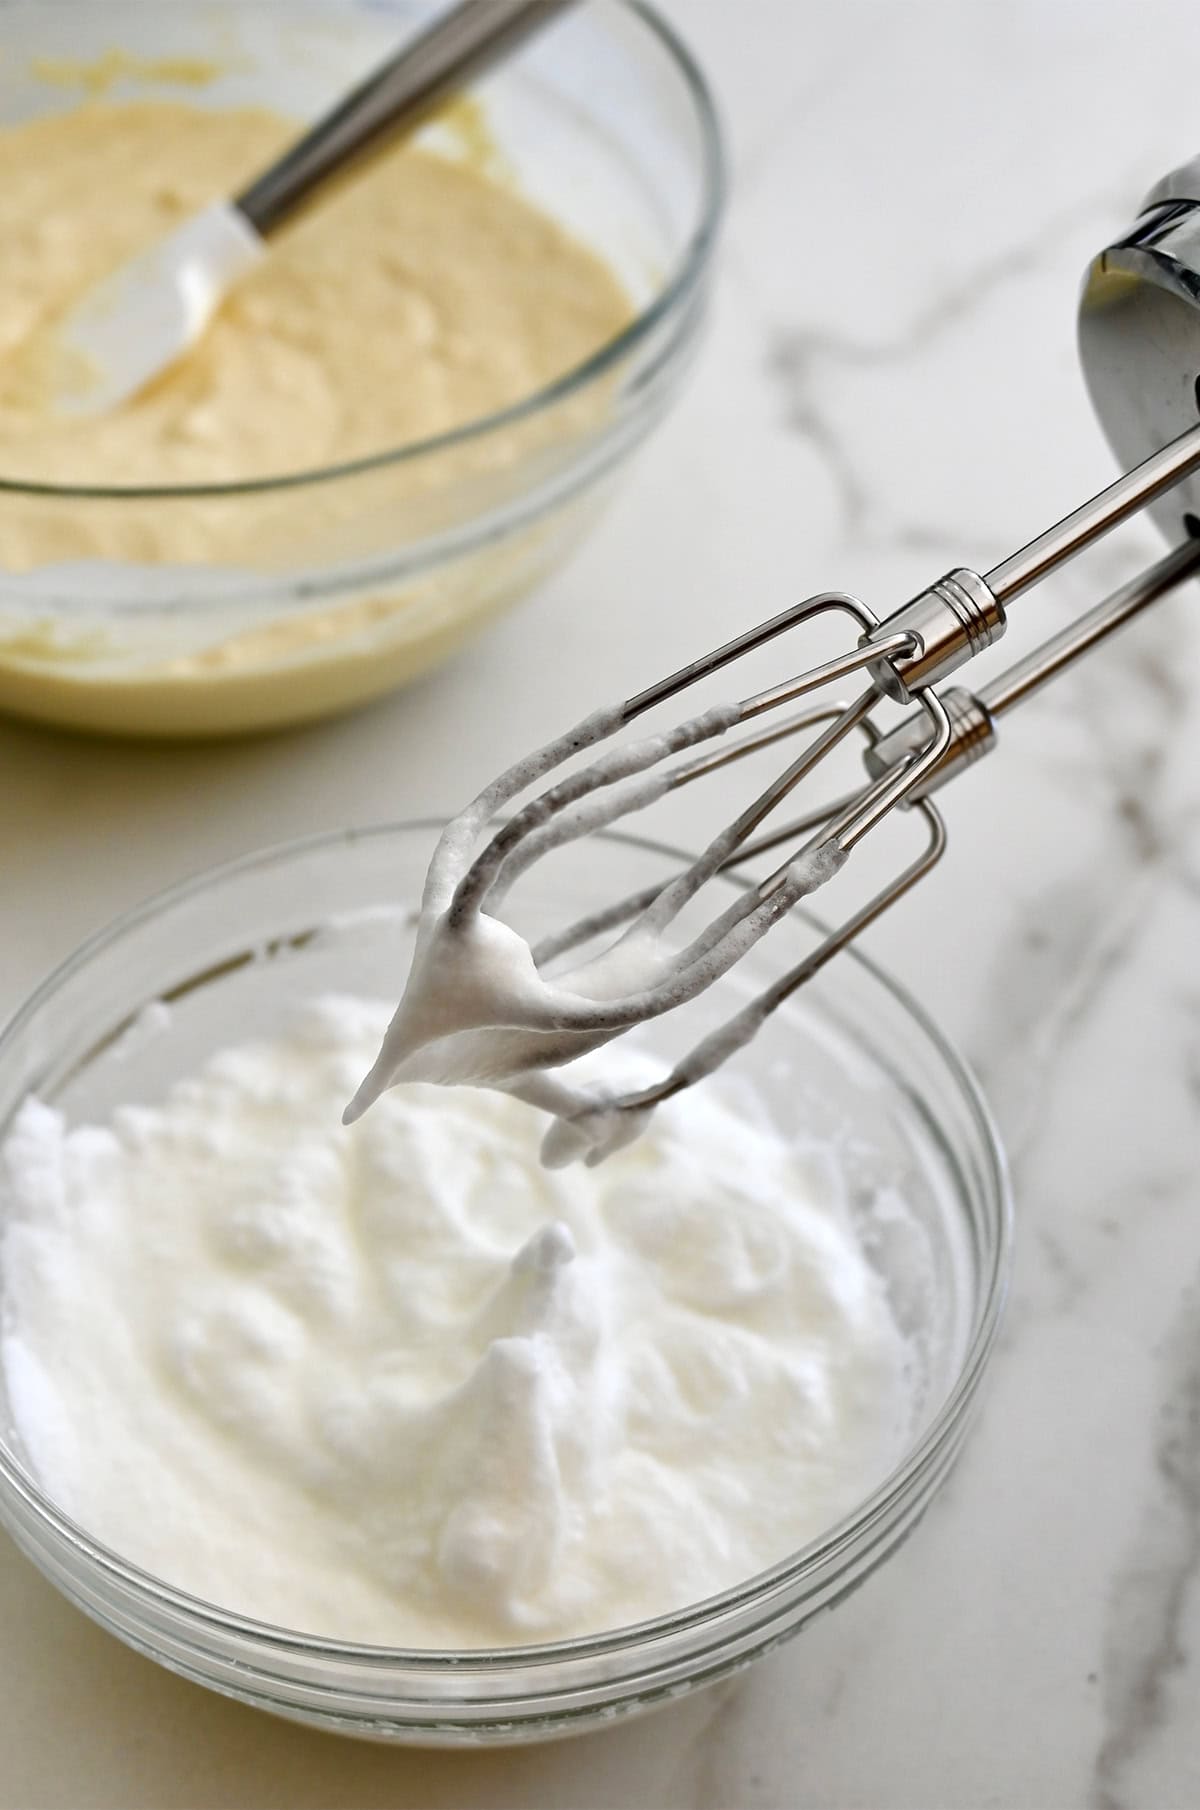
- In a separate, clean bowl, use a stand mixer or hand mixer to beat the egg whites until they form stiff peaks.
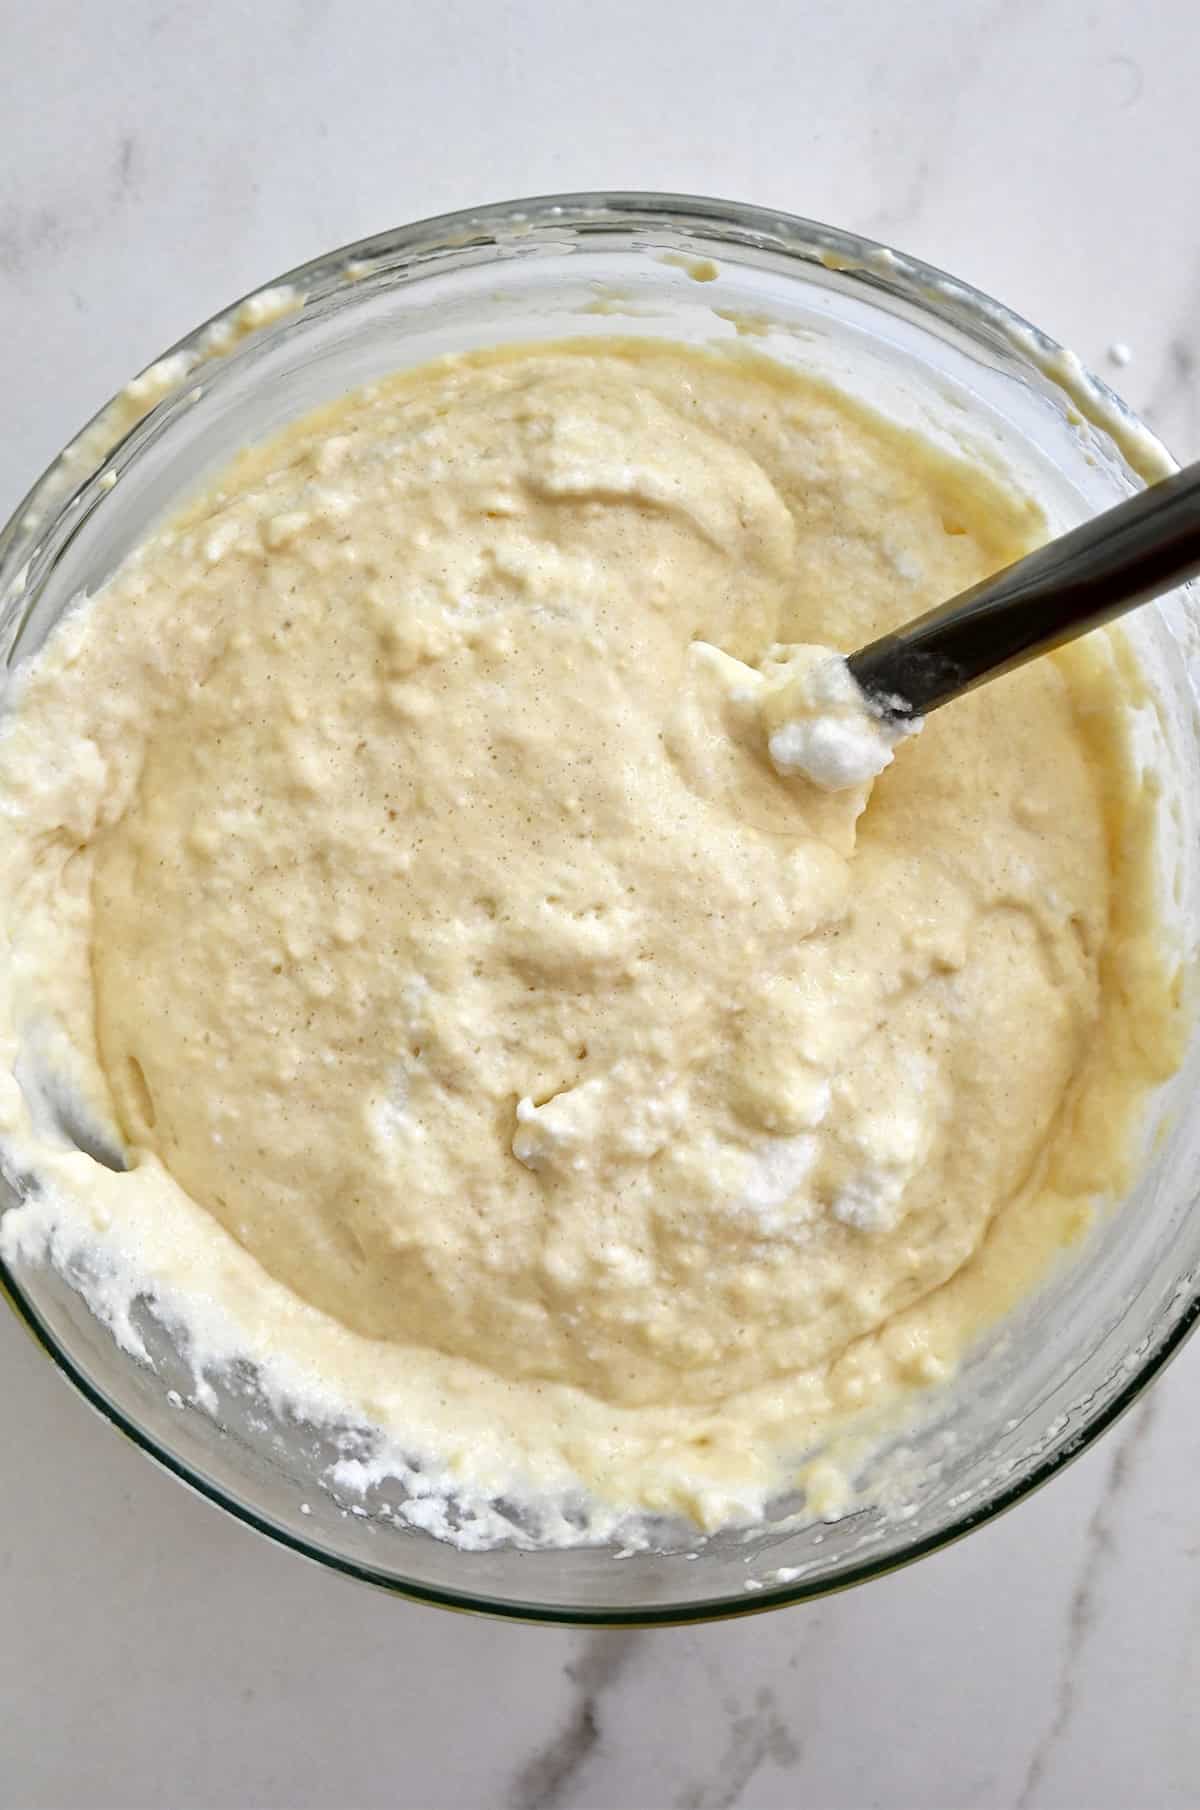
- Gently fold the whipped egg whites into the waffle batter, taking care not to deflate them. This will give you those soft, airy pockets in the center of each waffle.
- Rest the batter. Cover the batter and let it rest at room temperature for about 30 minutes.
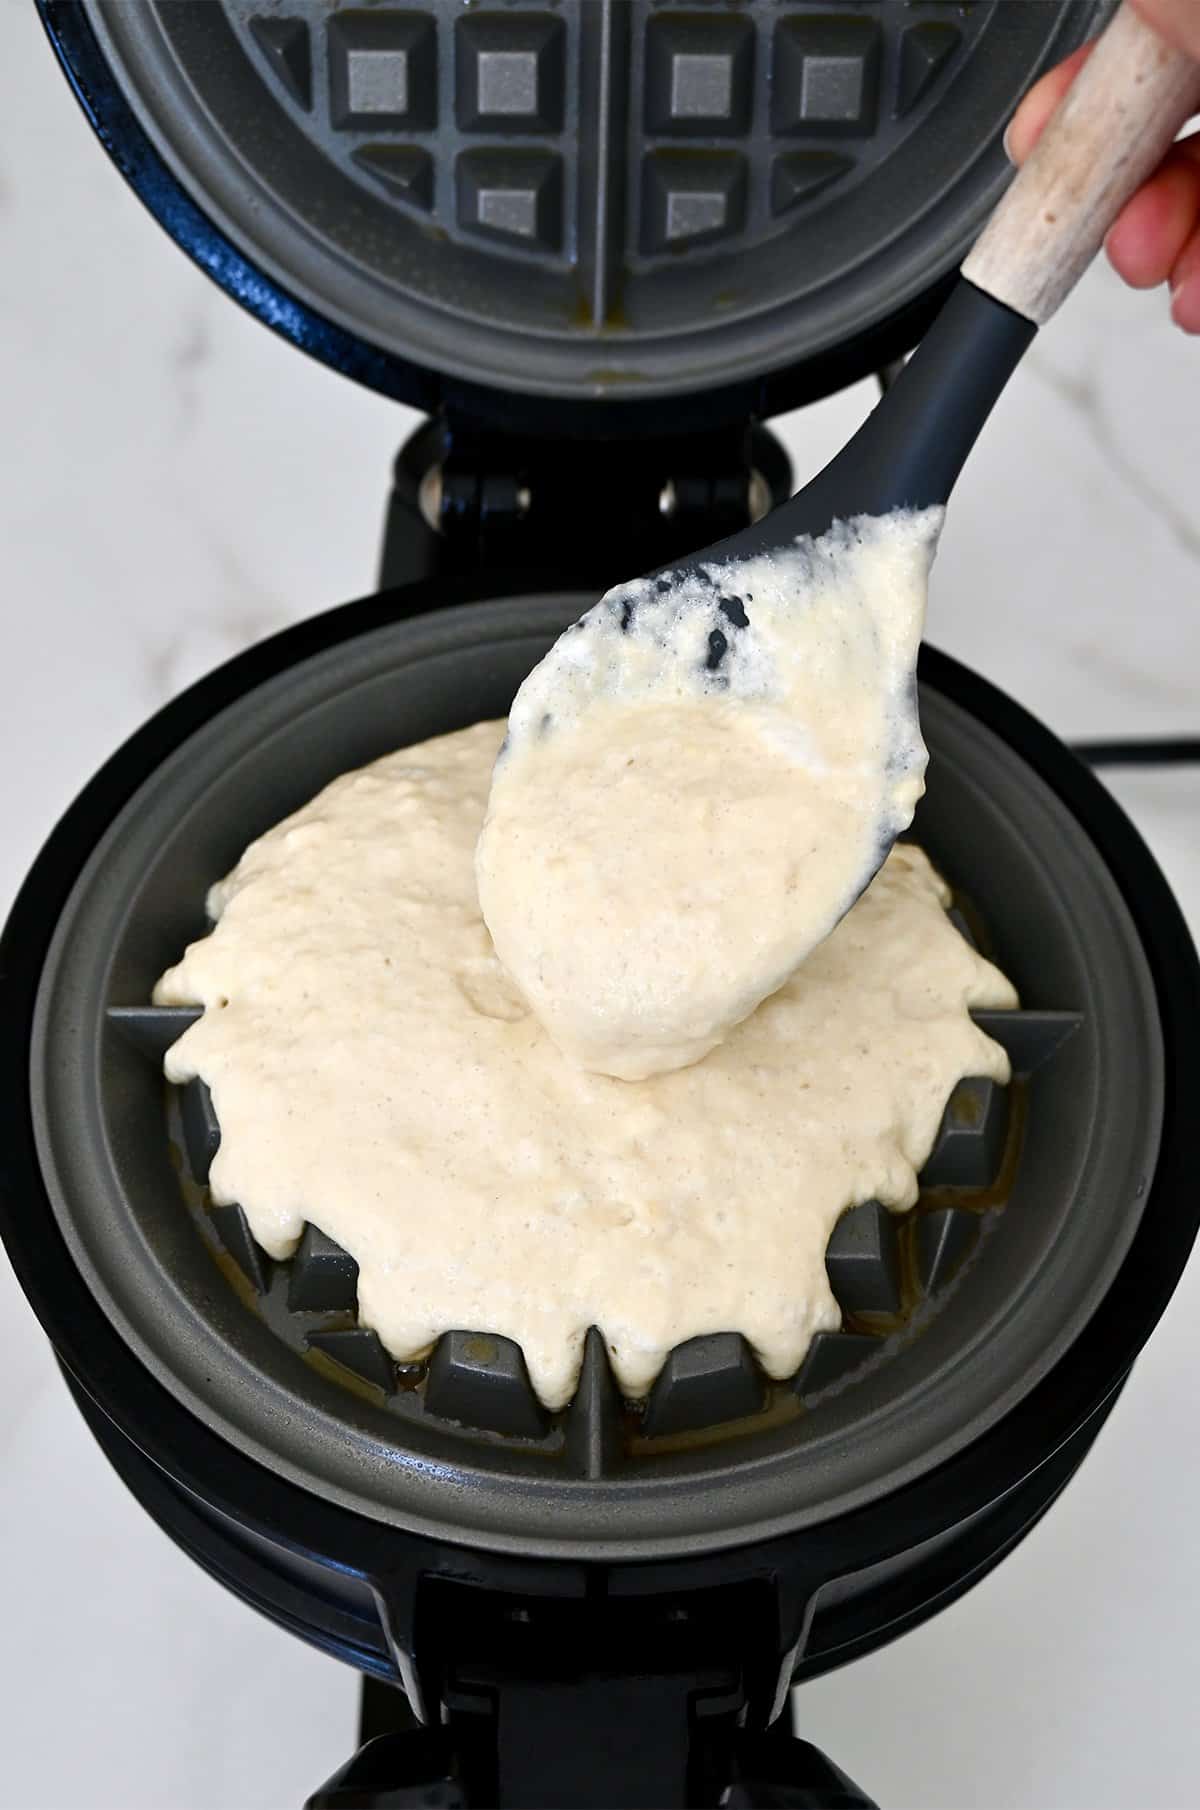
- Preheat your waffle iron and lightly grease it with cooking spray. Pour the batter into the heated waffle iron, using just enough to fill the waffle grids. Close the lid and cook the waffles until they’re golden and crispy on the outside.
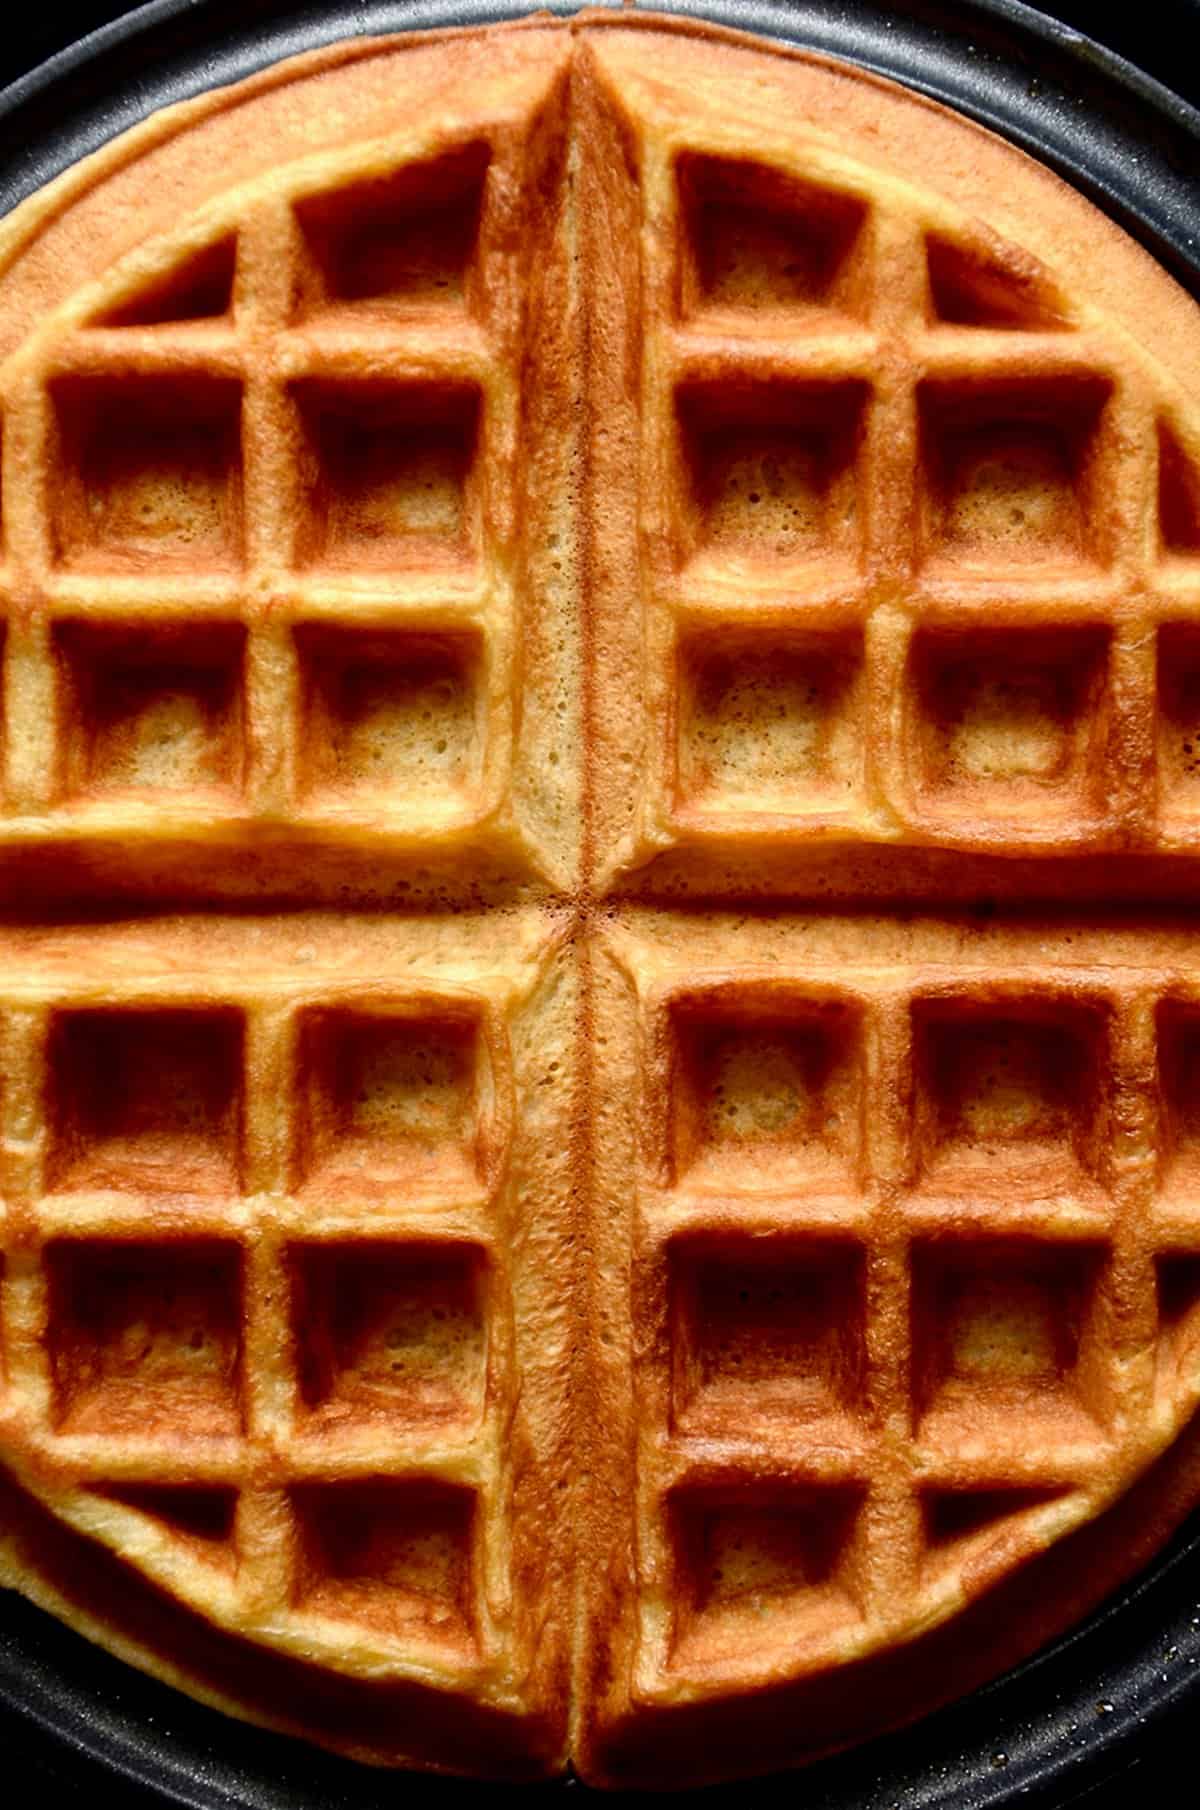
- Cooking times will vary based on your waffle iron, but the waffles should have deep golden color and a crisp exterior.
How to Keep Waffles Warm While You Cook
If you’re making a big batch, keep your Belgian waffles warm and crispy by placing them in a 200°F oven directly on the oven rack (or on a wire rack set over a baking sheet). This keeps air circulating around the waffles, preventing them from getting soggy. Avoid stacking them! Stacked waffles trap steam and lose their crispiness.
- Let the batter rest. This allows the flour to fully hydrate and the gluten to relax, resulting in waffles that are fluffier and more tender.
- Preheat your waffle iron properly. A hot waffle iron ensures crispy, golden edges and prevents sticking. Give it plenty of time to heat up before cooking.
- Make them extra crispy. If you like your waffles extra crispy, you can leave them in the waffle iron a little longer. Just keep an eye on them to make sure they don’t burn!
- Don’t trust the indicator light on your waffle iron. Instead, to know when your waffle is done cooking, watch the steam. As it cooks, the waffle batter will release steam. When steam stops escaping from the waffle iron, your waffles are ready.
- Use cooking spray, not butter to grease your waffle iron. While butter makes the best waffle batter, it burns too fast on a hot waffle iron. A quick spritz of cooking spray between batches keeps things non-stick without burning.
- Go for deep golden brown. Waffles that are cooked a little darker stay crisp longer. Light golden waffles may soften too quickly.
Waffle Toppings
From savory to sweet, there are so many delicious toppings you can add to your buttermilk waffles! Here are a few of my favorites:
- Maple syrup
- Homemade whipped cream
- Fresh berries
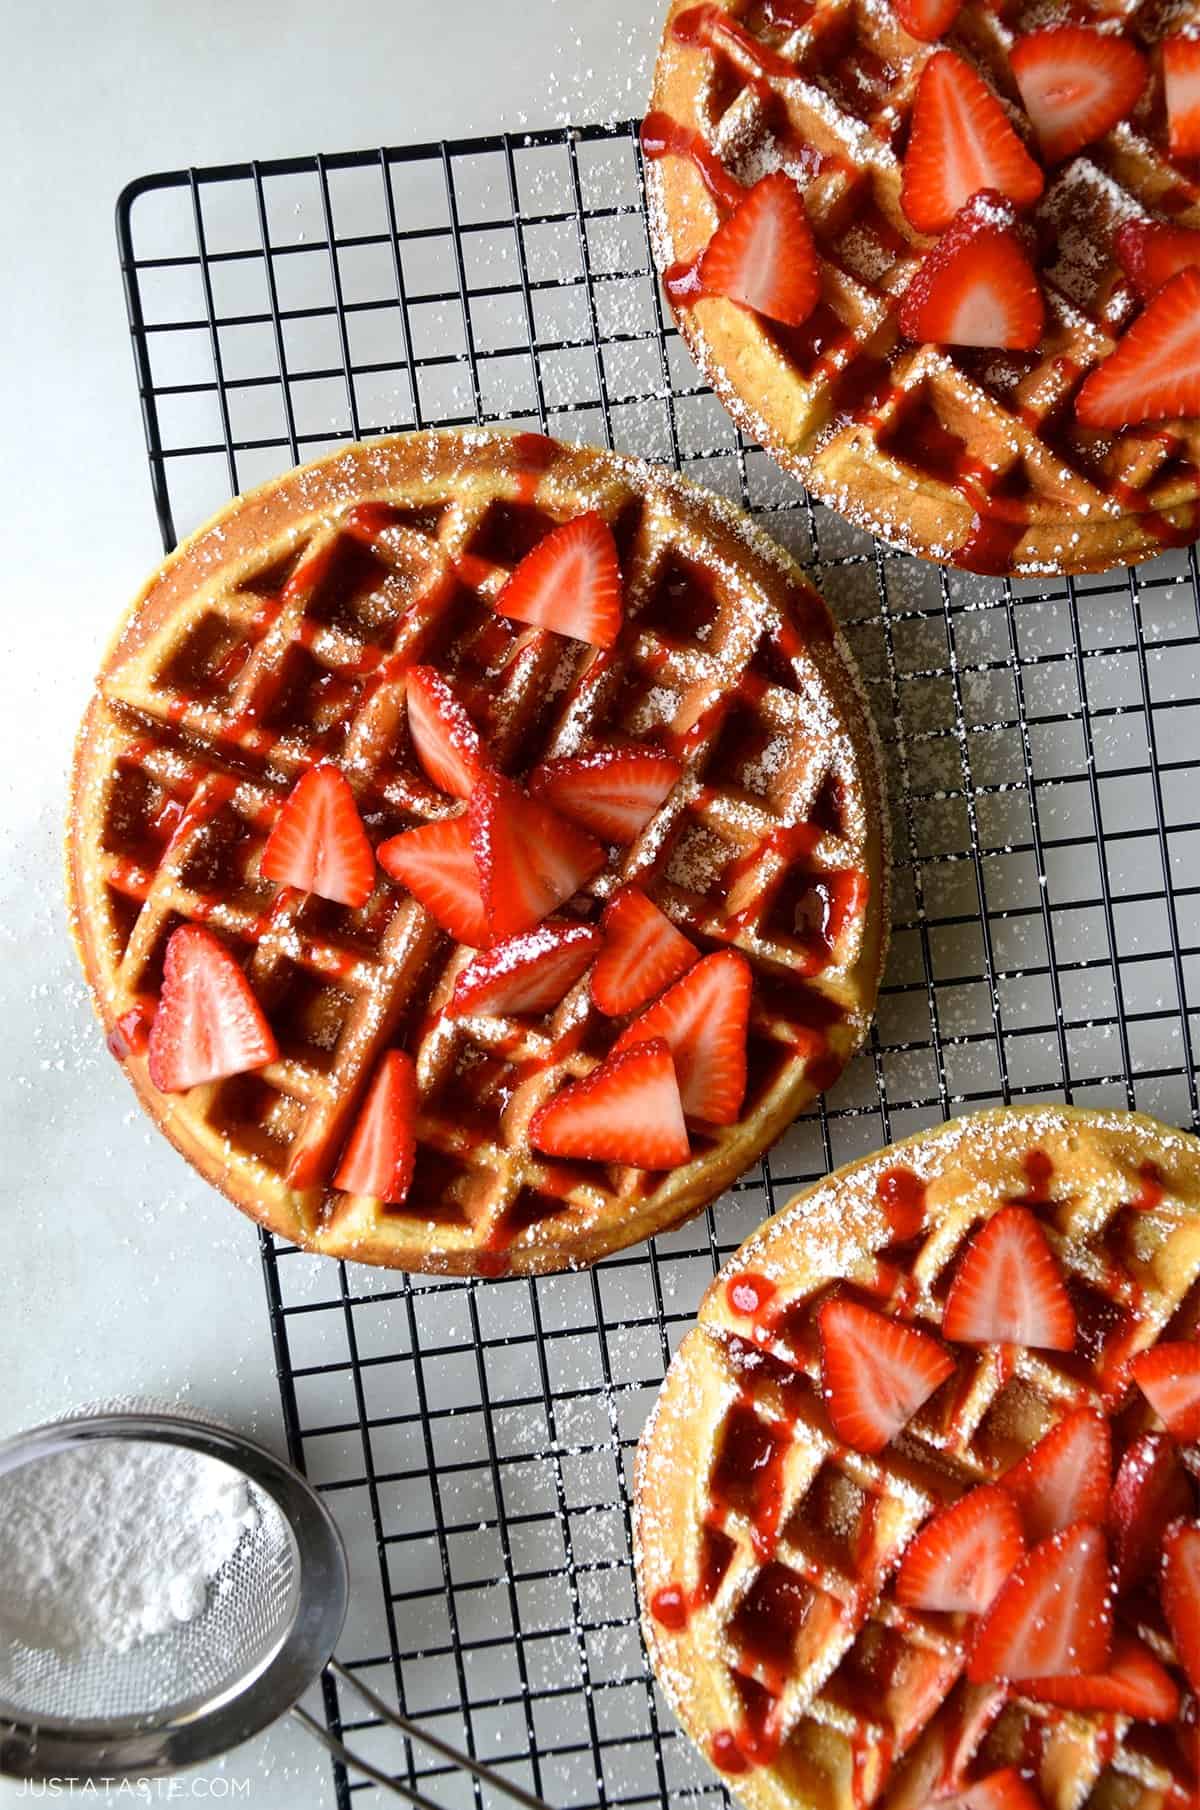
- Homemade Strawberry Topping (This is what you see in my photos!)
- Nut butter & banana slices (This makes for a delicious protein-packed breakfast!)
- Powdered sugar
- Strawberry Butter
- Homemade blueberry sauce
- Greek yogurt
- Homemade sausage gravy
- Fried egg
- Sliced avocado & tomato
Storage and Freezer Instructions
- In the fridge: Store leftover waffles in an airtight container or sealable plastic bag in the fridge for up to 3 days.
- In the freezer: To freeze waffles, let them cool completely, then wrap them in foil or plastic wrap and store in a freezer-safe bag for up to 3 months. When you’re ready to eat, pop them in the toaster or reheat in the oven for a crispy, fresh texture.
What to do with leftover buttermilk? Don’t let it go to waste! Try it in my buttermilk banana bread, fluffy buttermilk pancakes or homemade buttermilk biscuits.
You can also freeze buttermilk for later use! Just pour it into an ice cube tray, freeze it in individual cubes and store them in a freezer-safe bag. When you’re ready to bake, just pull out the amount you need.
Complete your brunch spread with more of these favorite recipes! Pair your buttermilk waffles with:
Equipment
- Waffle maker
Ingredients
- 3 large eggs, separated
- 2 cups buttermilk, divided
- 2 cups all-purpose flour
- 2 Tablespoons sugar
- 2 teaspoons baking powder
- 1/4 teaspoon salt
- 1 teaspoon baking soda
- 6 Tablespoons unsalted butter, melted
- 1 Tablespoon vanilla extract
Instructions
- In a large bowl, whisk together the egg yolks with 1 cup of buttermilk.
- In a separate medium bowl, whisk together the flour, sugar, baking powder, salt and baking soda. Add the dry ingredients to the bowl with the eggs, stirring just until combined.
- Add the remaining 1 cup buttermilk, melted butter and vanilla extract to the bowl, stirring just until combined. (The batter will be lumpy.)
- Add the egg whites to the bowl of a stand mixer fitted with the whisk attachment. Beat the egg whites at medium-high speed until stiff peaks form. Fold the egg whites into the batter then cover the batter and allow it to rest at room temperature for 30 minutes.
- When ready to serve, preheat your waffle iron according to the manufacturer's directions and lightly grease it with cooking spray. Pour a portion of the batter into the heated waffle iron and cook the waffle to your desired doneness. Top the waffles with your favorite toppings and serve immediately.
Kelly’s Notes
- The strawberry sauce you see drizzled over the waffles in the photos is my Homemade Strawberry Sauce. It’s made with just 4 ingredients and comes together in 15 minutes.
- To store: Store leftover waffles in an airtight container or sealable plastic bag in the fridge for up to 3 days.
- To freeze: Let the waffles cool completely, then wrap them in foil or plastic wrap and store in a freezer-safe bag for up to 3 months. When you’re ready to eat, pop them in the toaster or reheat in the oven for a crispy, fresh texture.
- ★ Did you make this recipe? Don’t forget to give it a star rating below!
Nutrition
Did you try this recipe?
Leave a comment below with your star rating!
This post may contain affiliate links.
Waffle batter recipe adapted from Food.com.


Our delicious go-to waffle recipe every weekend! Yum… :-)
So glad you enjoyed the recipe, Karen!
Best waffles ever!!!!
So glad you enjoyed them!
Light, fluffy and crispy–everything a Belgian waffle should be! I topped mine with yogurt, strawberries and a light drizzle of maple syrup.
So glad you enjoyed it!
Fantastic! Exactly as described and I loved the tip about watching the steam from the waffle maker – I’ve never had waffles turn out so perfectly. Thanks Kelly!
So glad you enjoyed it, Diane!
These made for great Father’s Day waffles! I loved the way that the egg whites made even the batter fluffy :) the compote was also a great way to use the last of our seasonal strawberries.
So glad you enjoyed it, C!
Can we make the batter the night before? Thanks
Hi Armineh – I wouldn’t recommend that as the leavening agents won’t retain as much ability to cause the waffles to puff (and hence, be fluffy instead of dense!).
You could mix the dry ingredients the night before to save time.
Absolutely, Michele!
Excellent recipe!
I’m thrilled you enjoyed it, Kelsey!
How can I make it without eggs… substitute for eggs pls
Hi there! I’ve never tried this recipe without eggs so I’m not certain of a substitute.
I made this strawberry syrup this morning to go with my waffles…it was SO GOOD! What a delicious recipe. :)
So glad you enjoyed the recipe, Sara!