Hot, cheesy, and guaranteed to please a hungry crowd—these baked ham and cheese sliders are my secret weapon for busy weeknights, game days and everything in between.
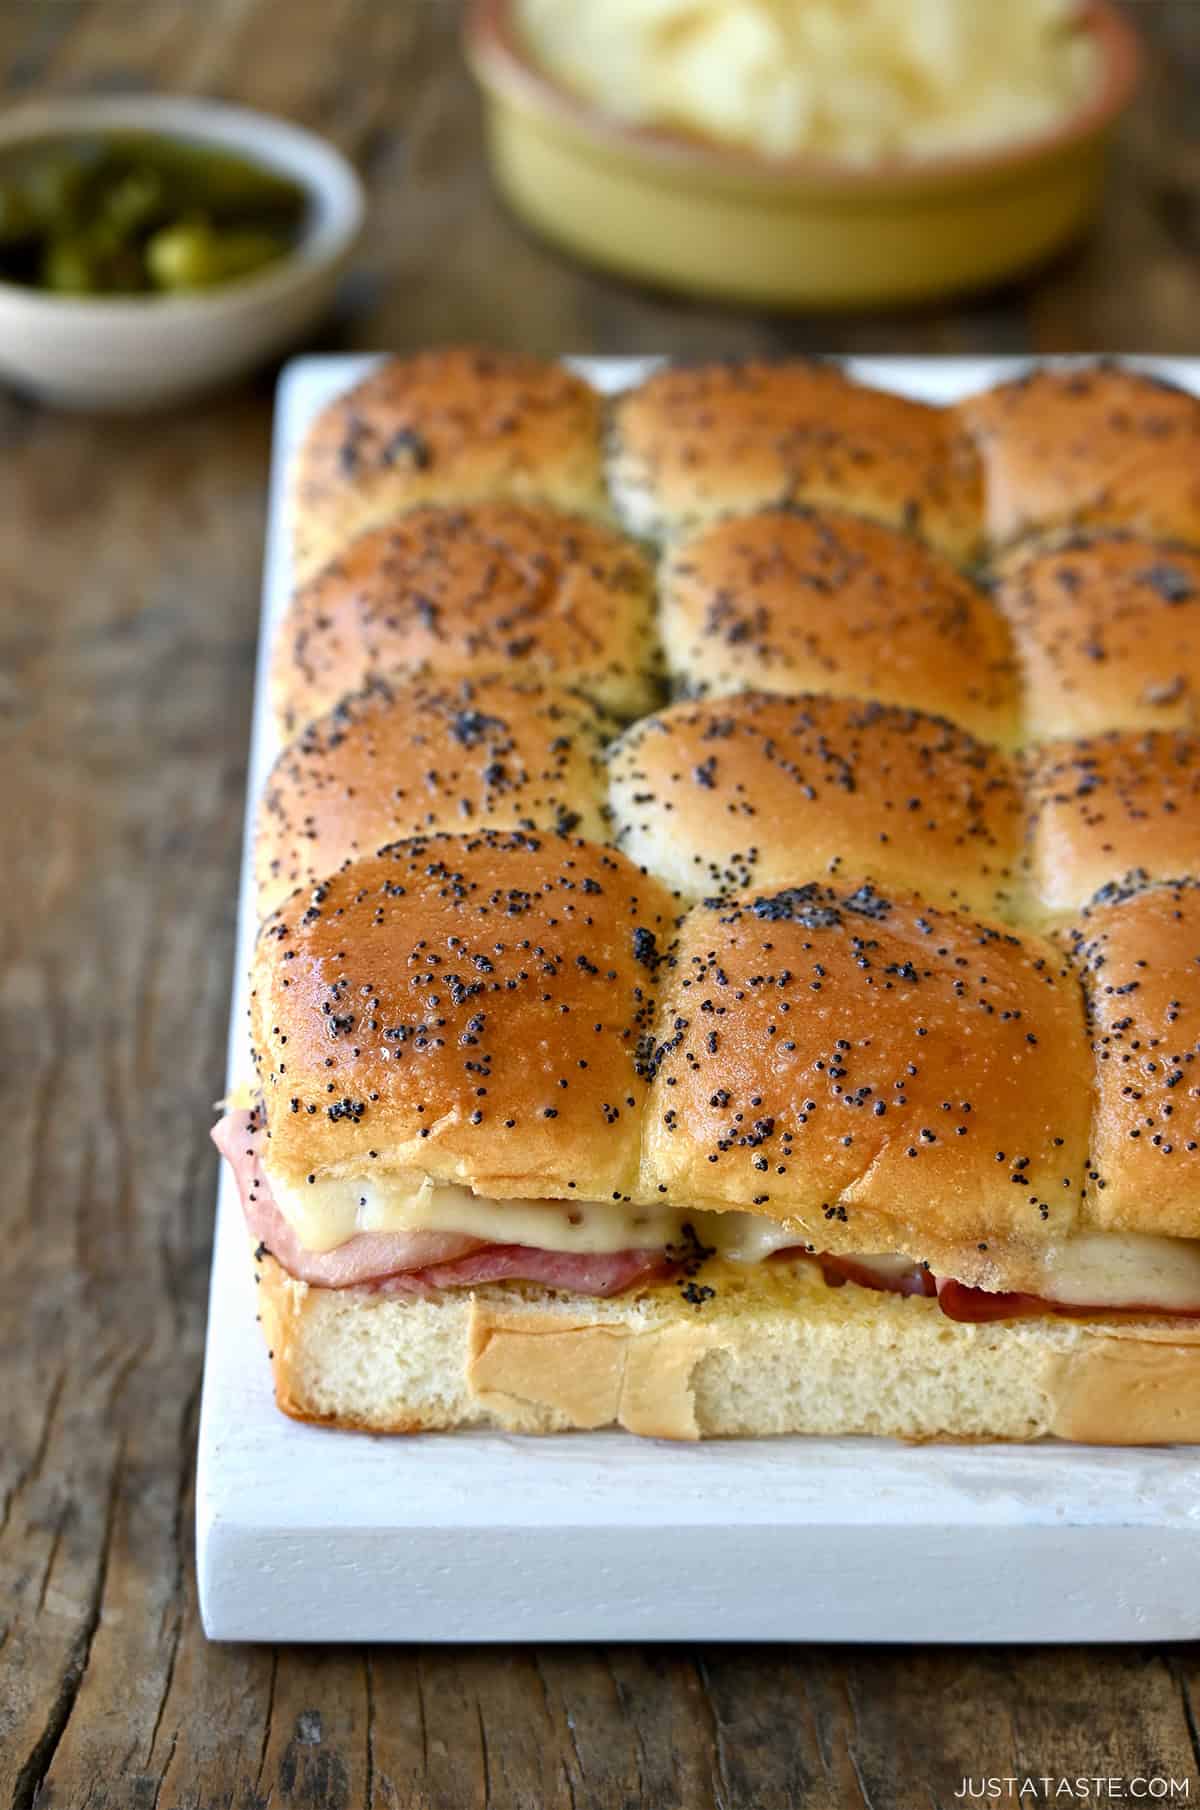
Table of Contents
I am a sliders superfan. Hot, cheesy little sandwiches that check all the boxes for this busy mama of four: quick, customizable with whatever deli ham and cheese I have on hand, and guaranteed to please a crowd (or my always-hungry crew of kids). Whether I’m whipping them up on a busy weeknight or tossing them in the oven during halftime while cheering on my Chiefs, these ham and cheese sliders always hit the spot. (Bonus points if I’ve got a batch of my Mama Kelce Cookies ready for dessert!)
And yes, I’m absolutely that person who’s made every kind of slider under the sun—from classic cheeseburger sliders to leftover turkey sliders after the holidays. But these? These are my MVP.
3 Reasons I Make These on Repeat
- They’re a slam dunk for any occasion. From game day spreads to lunch boxes, these sliders are always the first thing to disappear.
- Perfect for busy families. Just a handful of ingredients and a few minutes of hands-on time, and you’ve got 12 mini sandwiches ready to feed your crew.
- They’re freezer-friendly. I love having a batch in the freezer for quick dinners or last-minute party food. (See below for my freezing + reheating tips!)
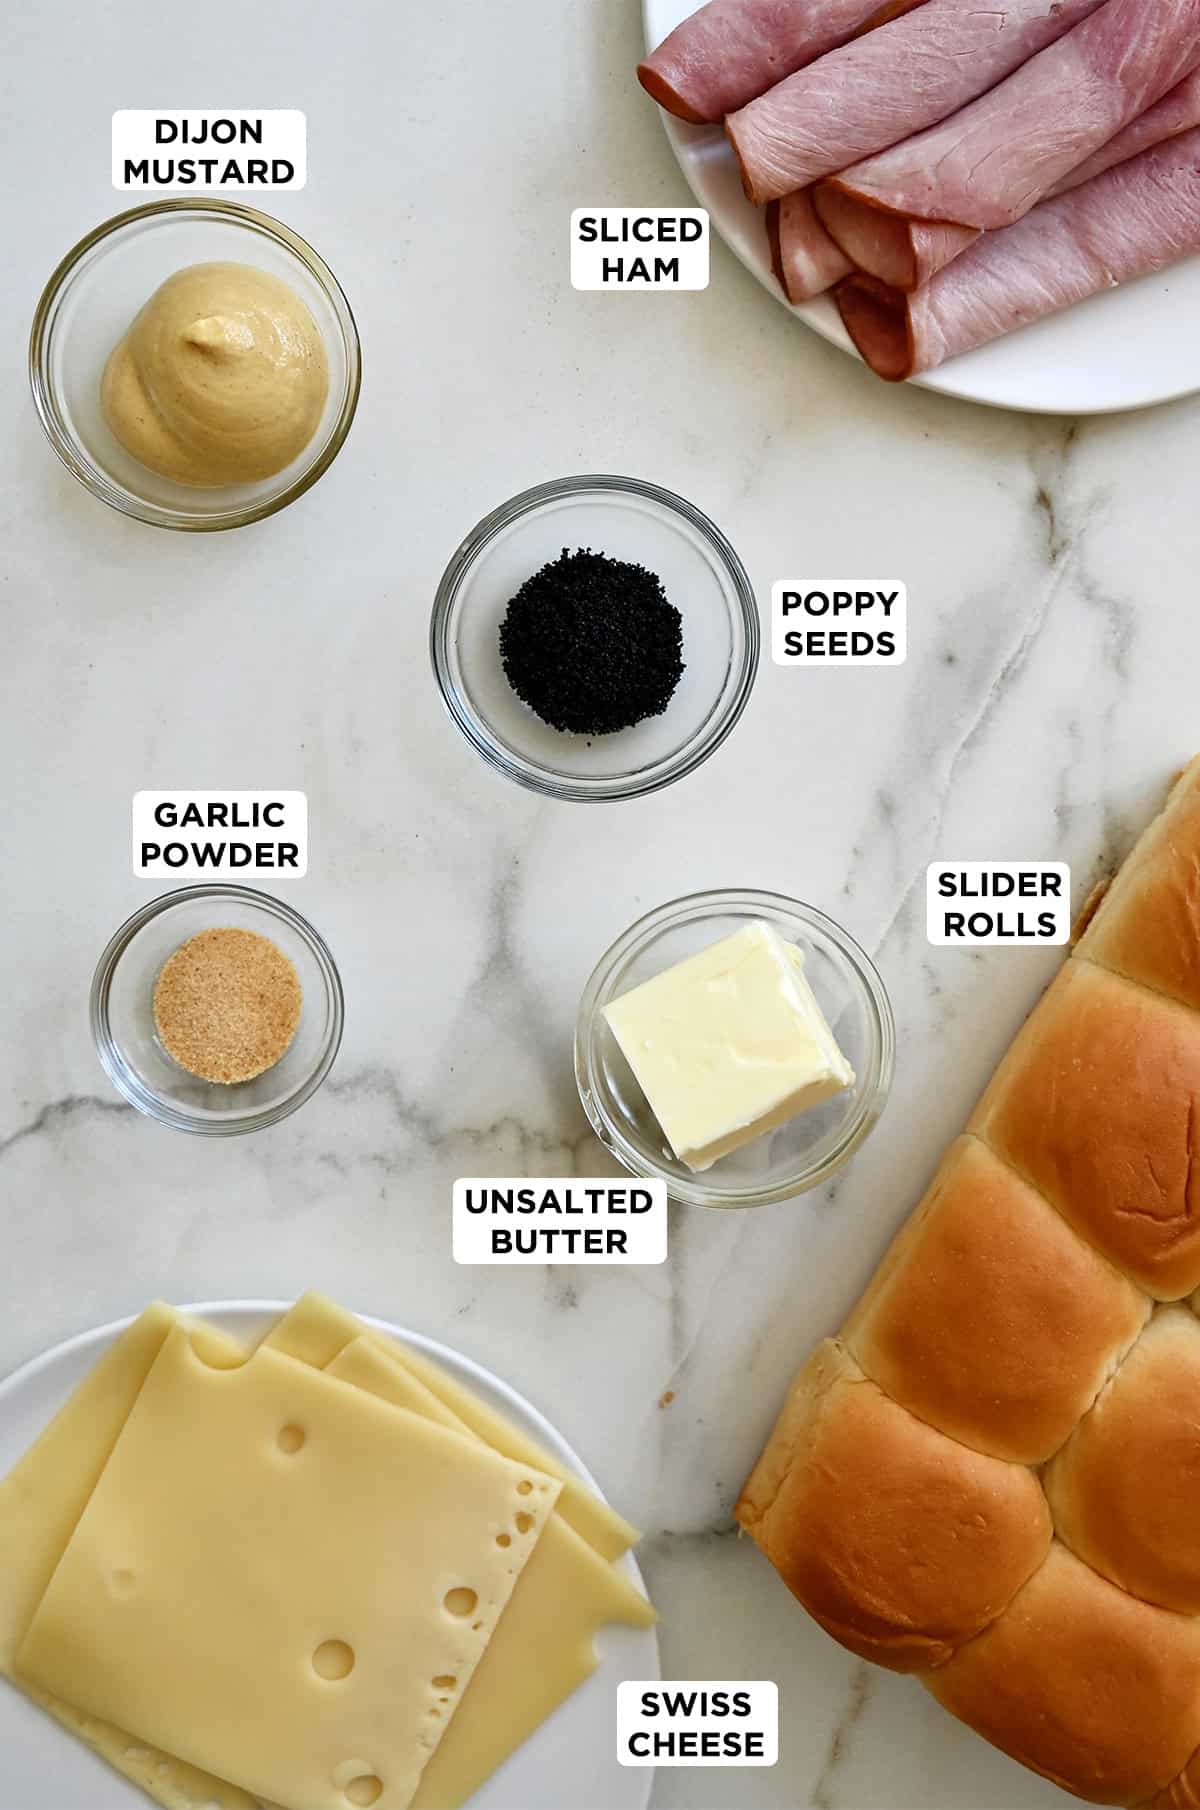
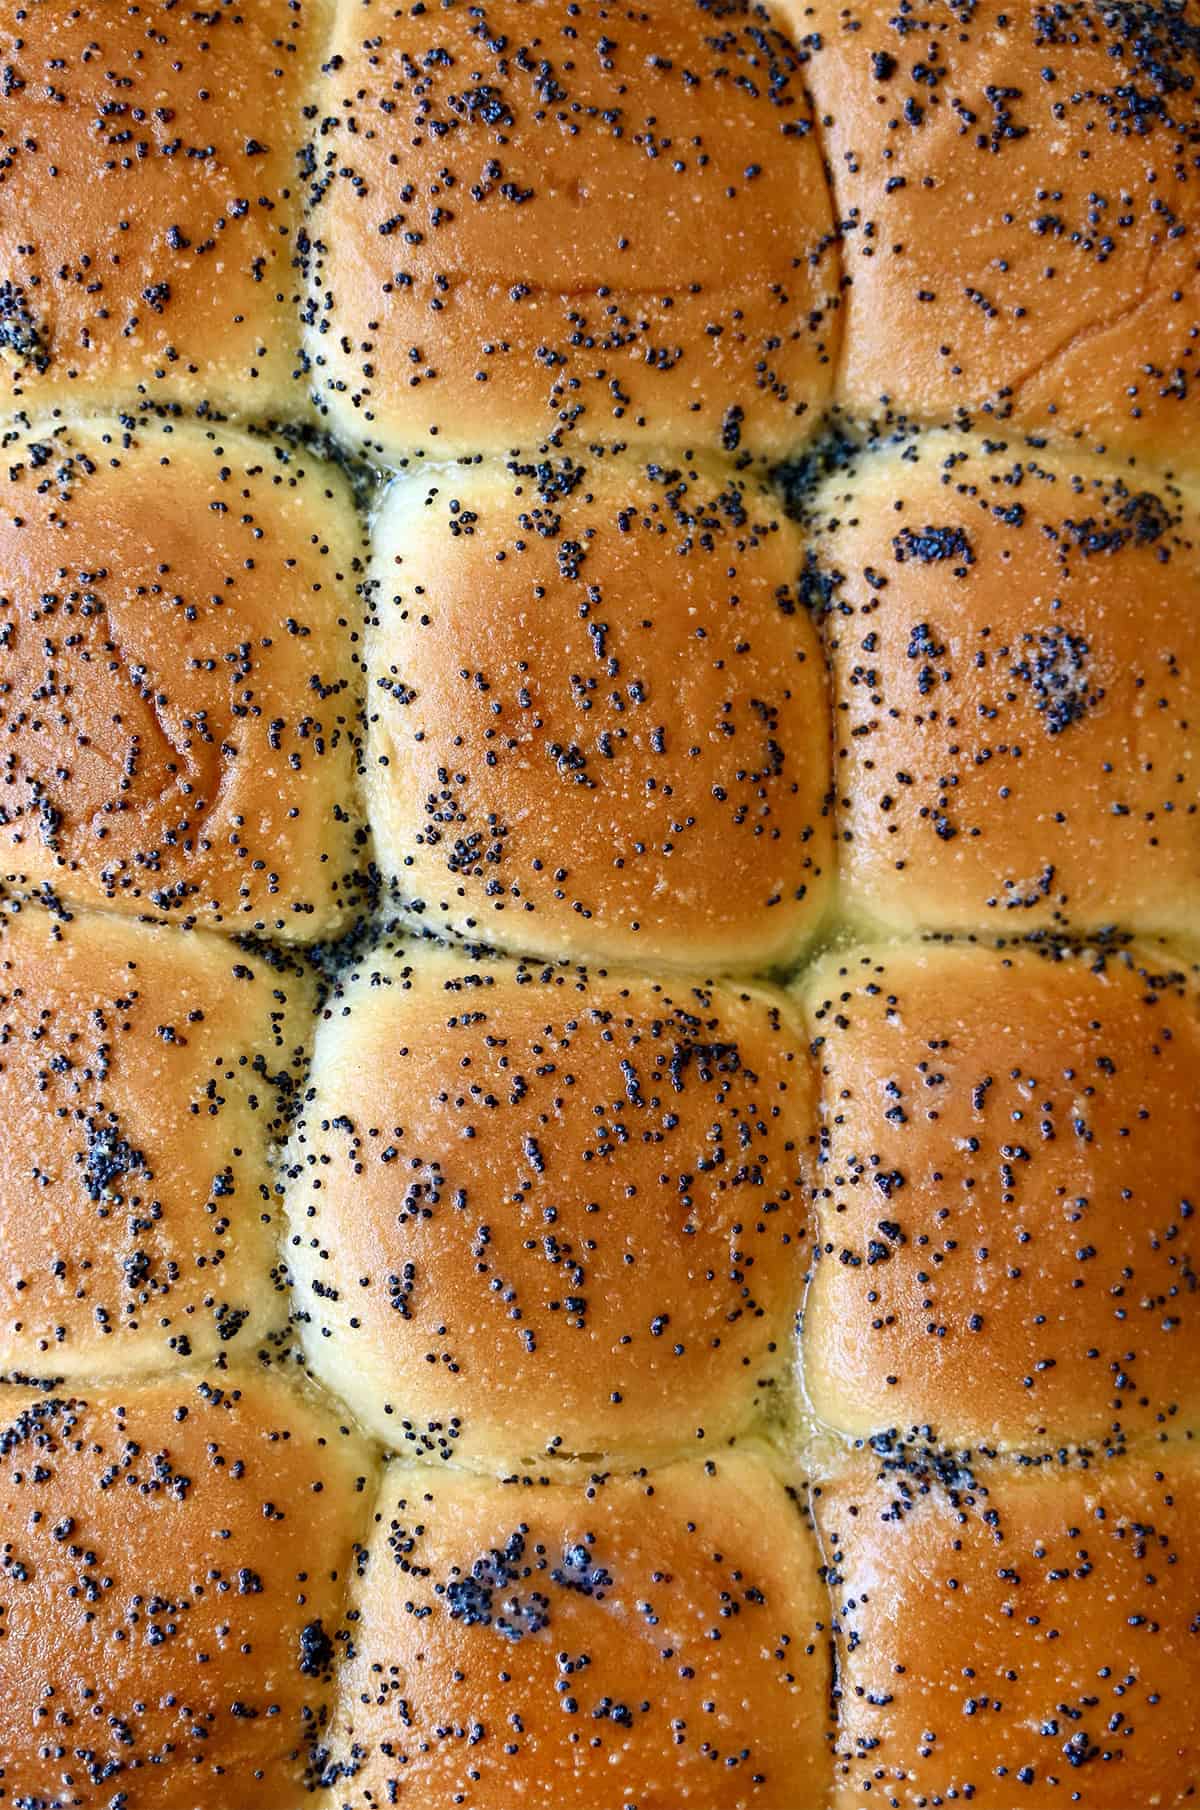
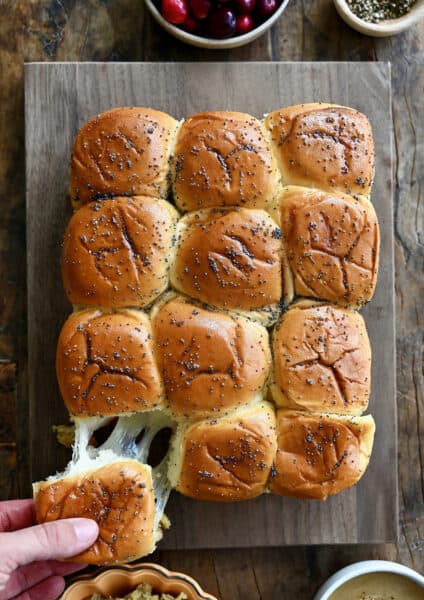
- Slider rolls: I use King’s Hawaiian for their soft texture and just-sweet-enough flavor that pairs perfectly with the savory filling, and since they come connected, you can slice, fill and top them all at once.
- Dijon mustard: Adds just the right amount of tang. I like to spread a generous amount on the bottom half of the rolls, but you can skip it if your crew isn’t into mustard.
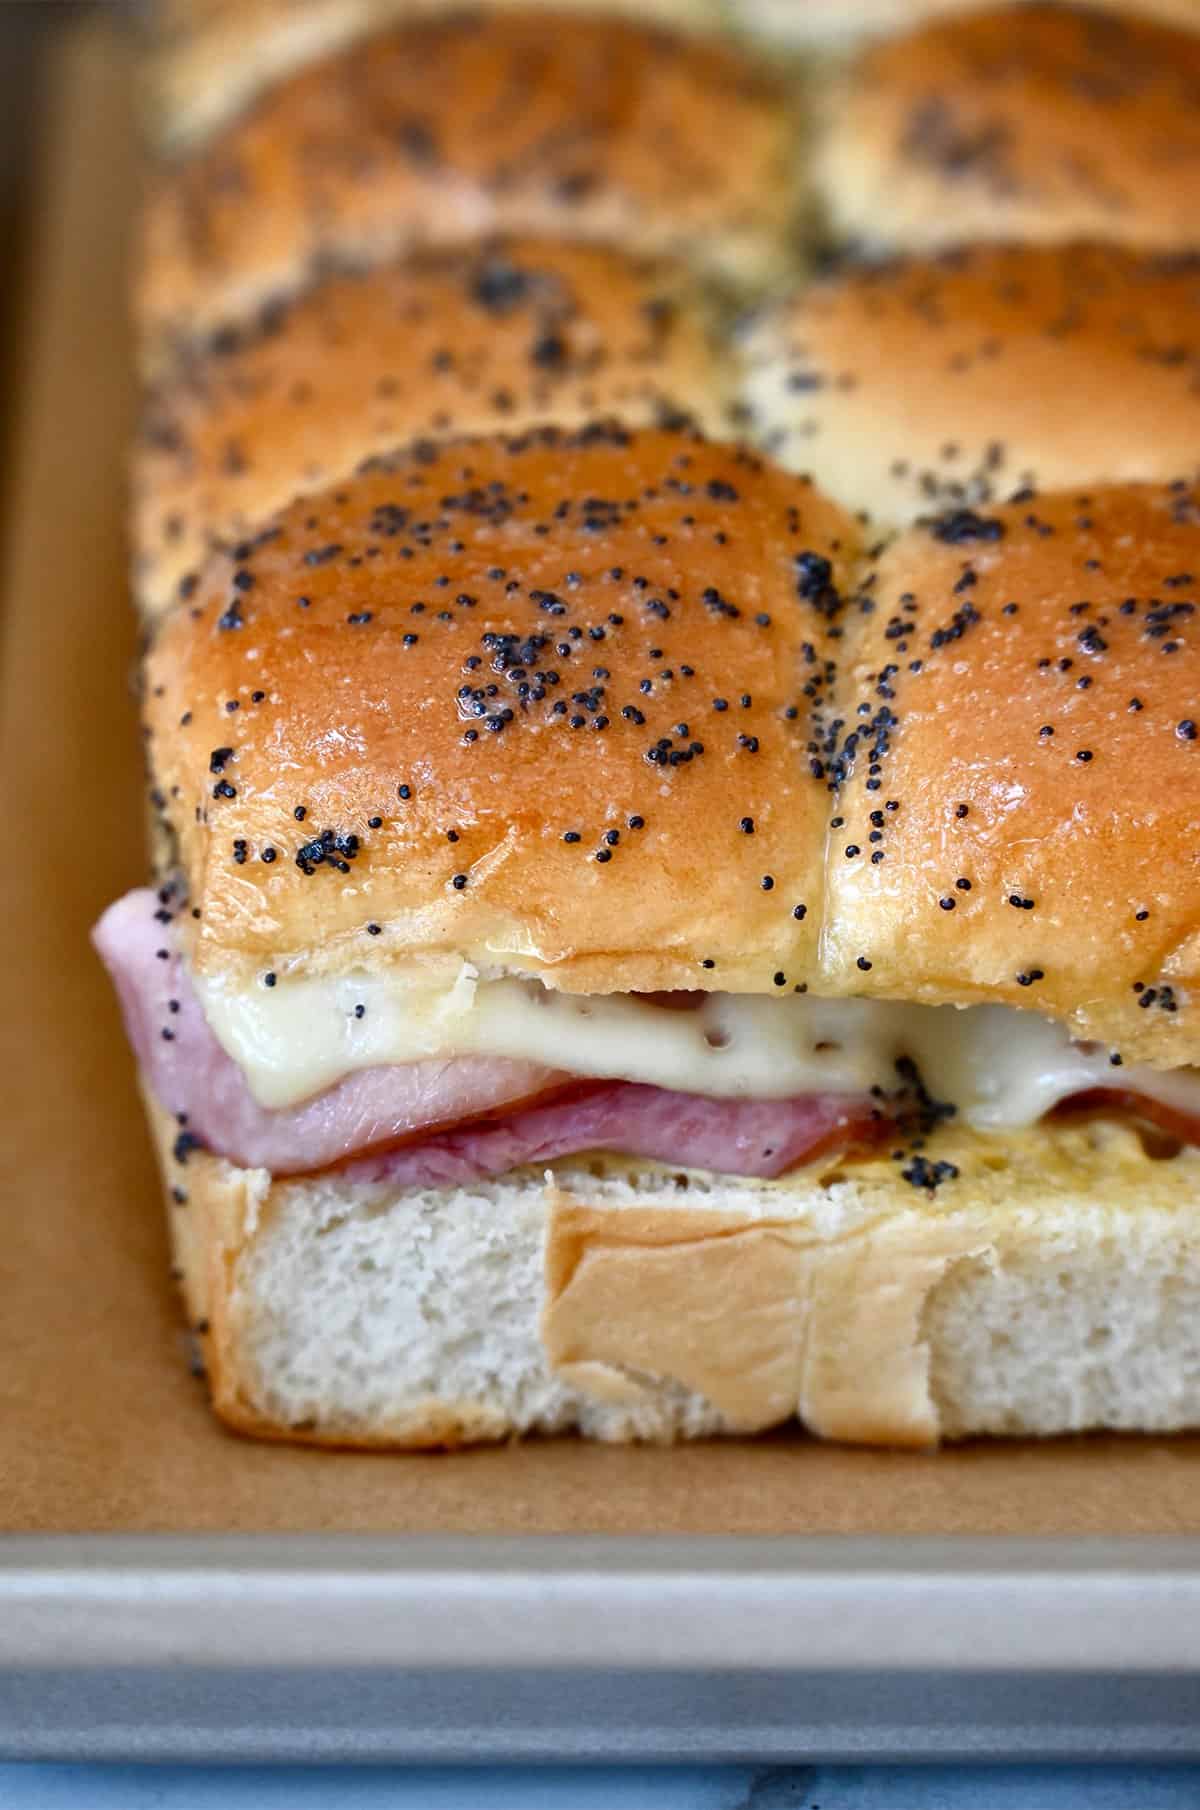
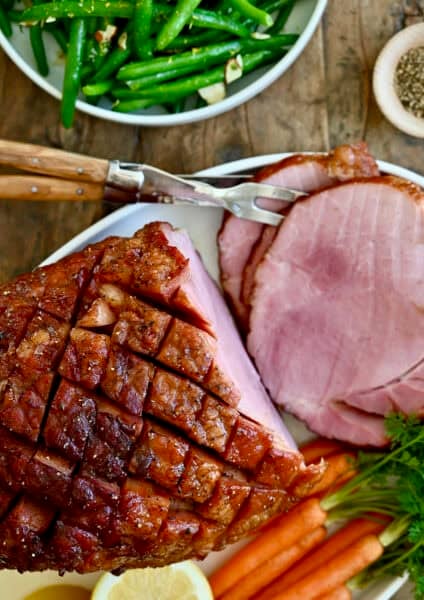
- Ham: I usually go with deli-sliced Black Forest ham, but leftover baked ham from the holidays works great, too.
- Swiss cheese: A must for any good ham sandwich—but don’t be afraid to mix it up. Provolone, cheddar, or pepper jack are all delicious options, and I love combining a couple for extra flavor (Swiss + cheddar is a personal fave!). Pre-sliced cheese makes layering easy, and for extra-cheesy sliders, add a layer on both the top and bottom.
- Butter sauce: Melted butter gets mixed with garlic powder and poppy seeds, then brushed over the tops before baking. It’s the finishing touch that gives these sliders their signature golden brown tops and flavor.
See the recipe card for full information on ingredients and quantities.
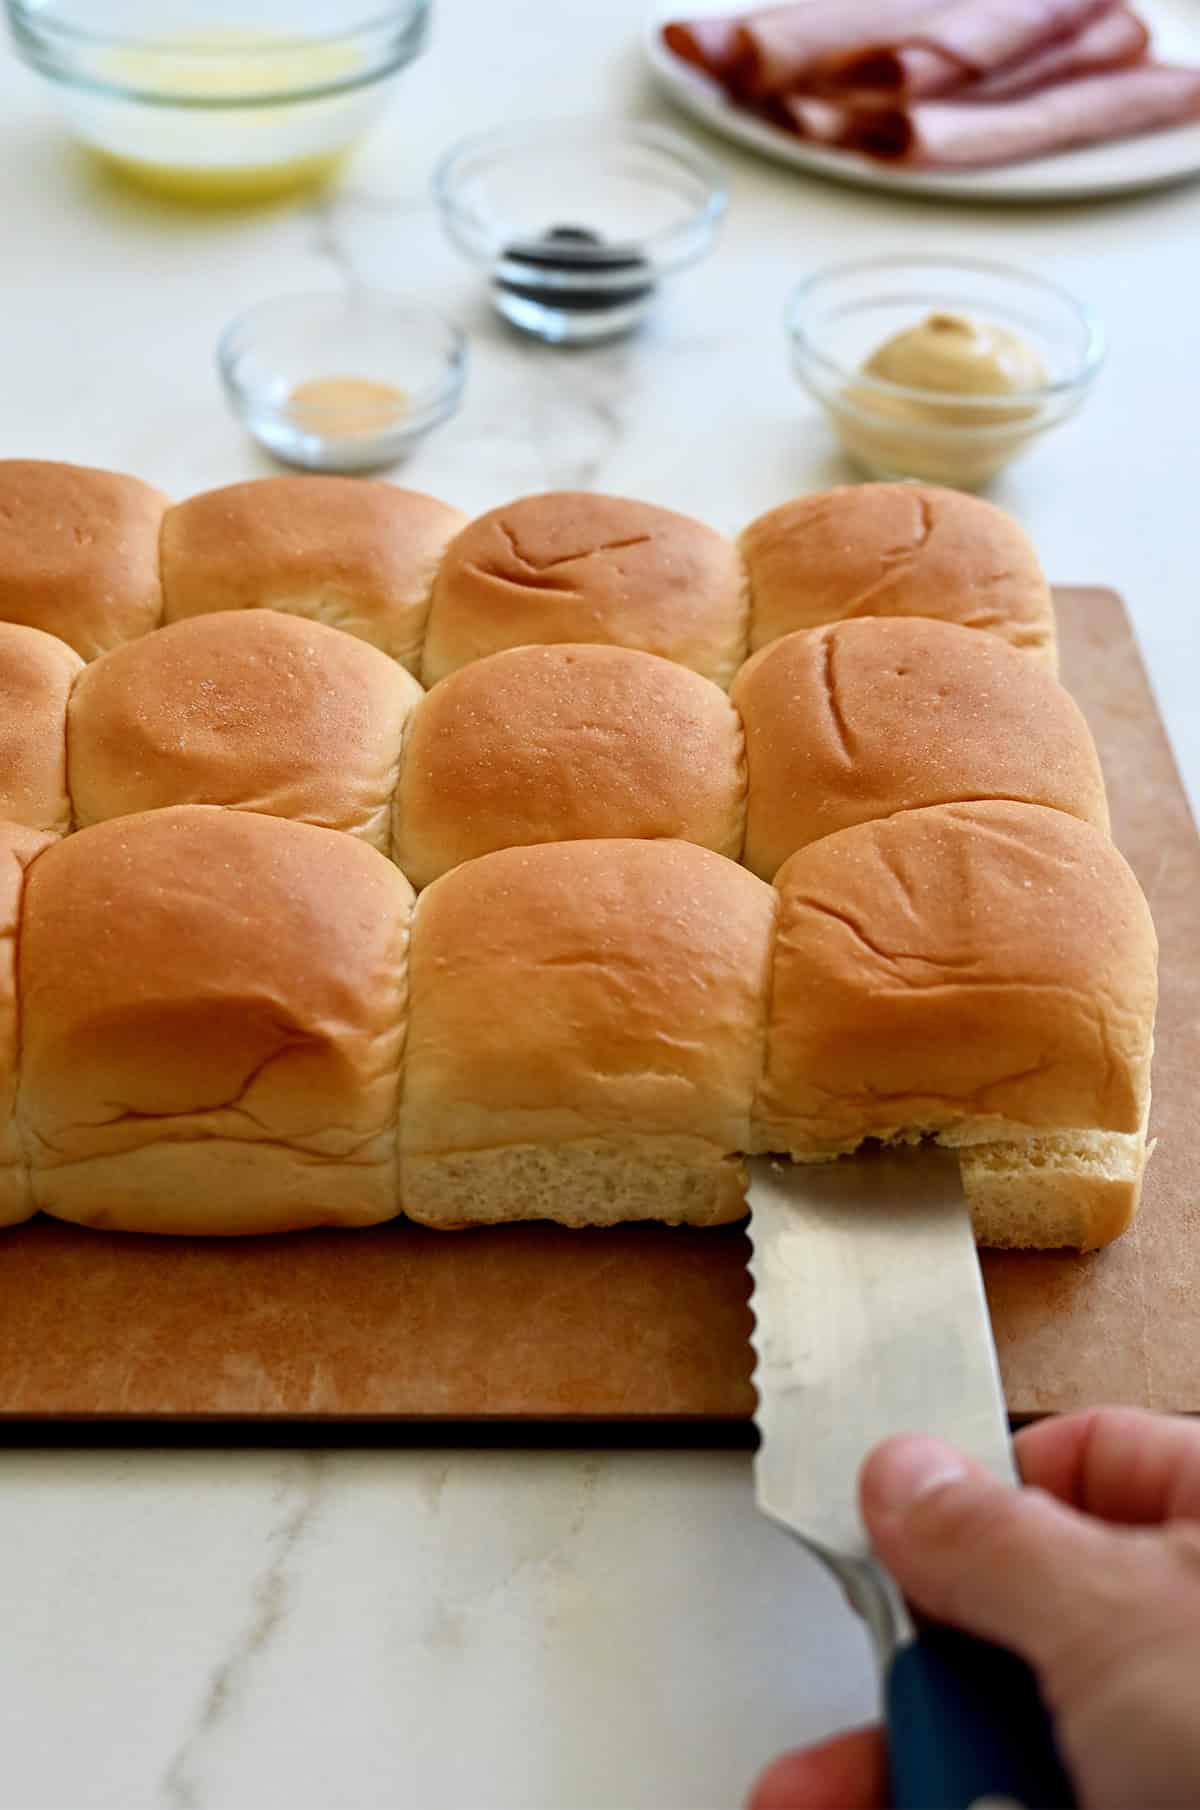
- Use a serrated knife to slice the rolls. Don’t separate them—just slice the entire package of rolls in half horizontally so you have a top and a bottom slab. Place the bottoms in a greased baking dish or on a parchment-lined sheet pan.
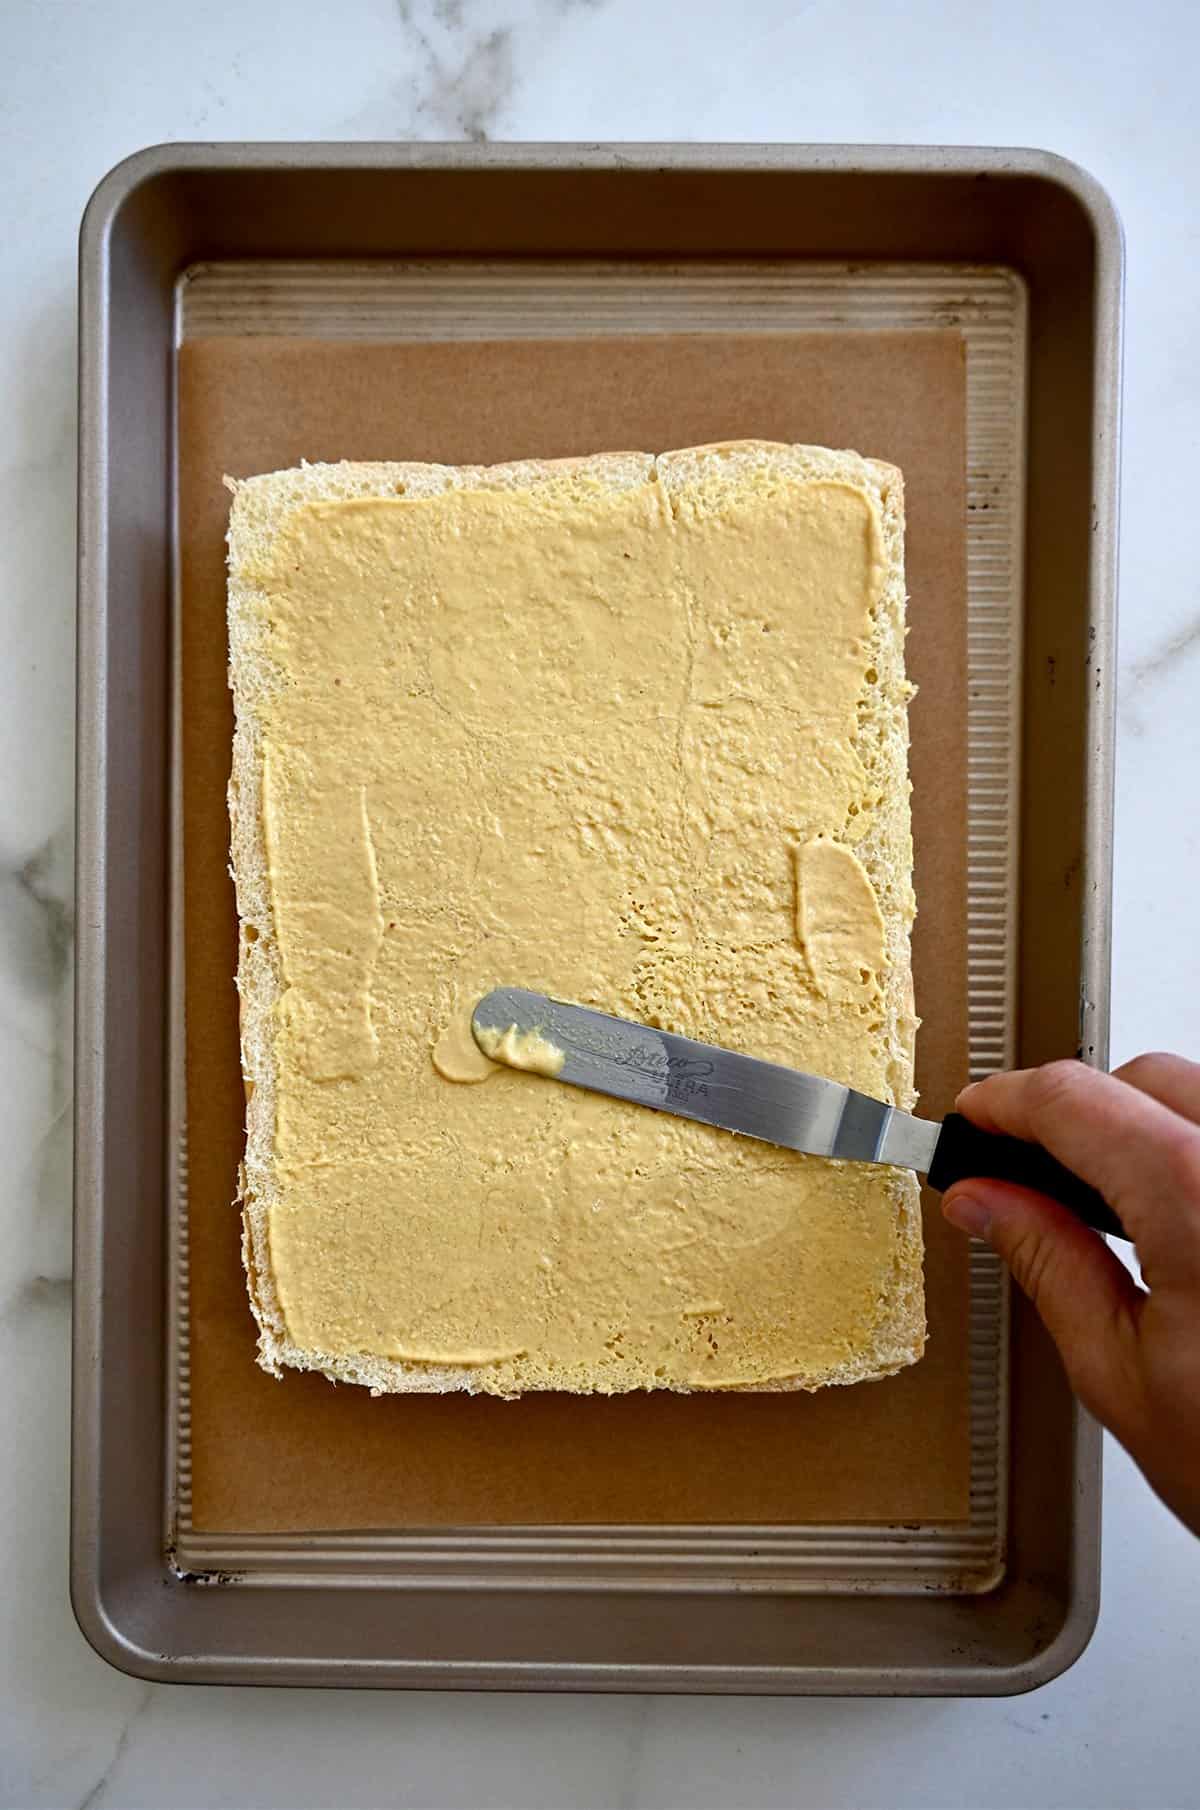
- Spread Dijon mustard on the bottom half of the rolls. Want extra cheesy sliders? Add a layer of cheese here, too!
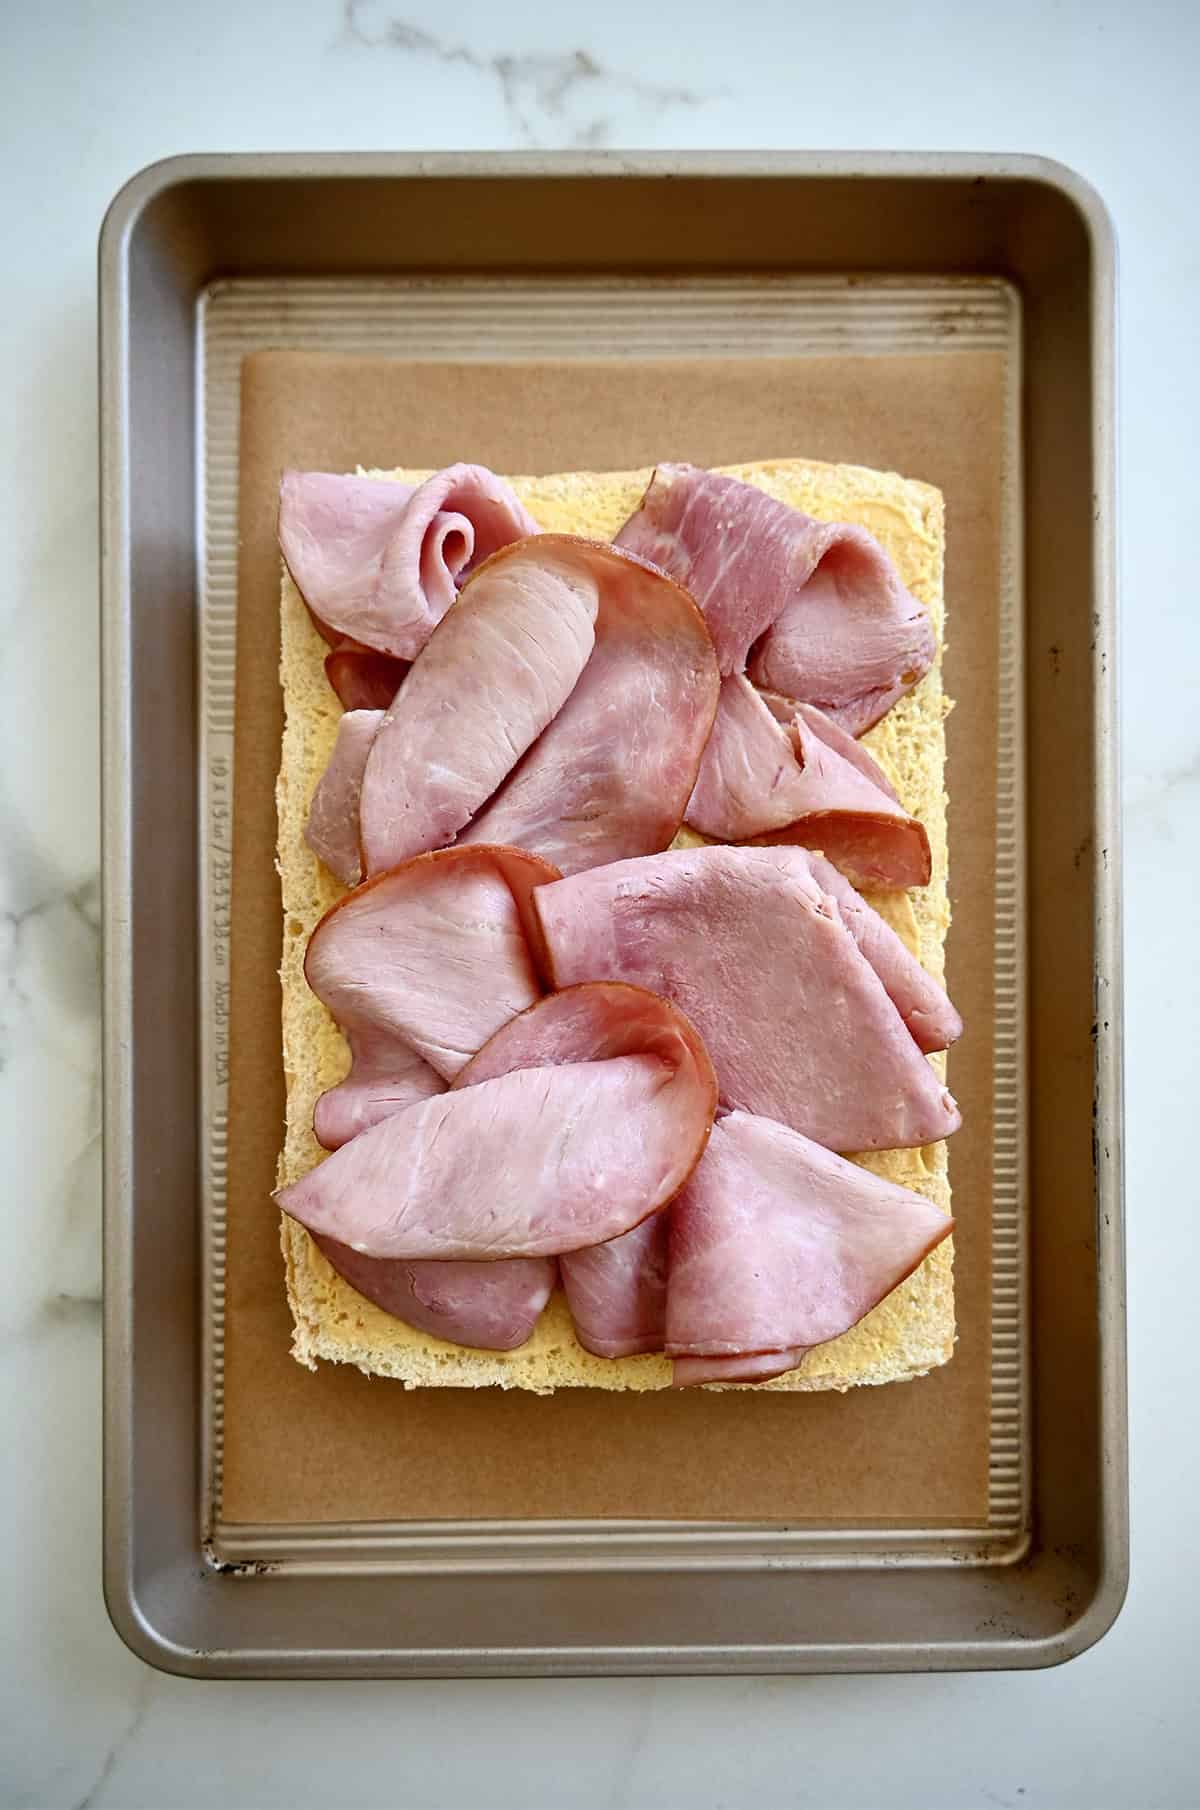
- Pile on the ham. Fold or layer the ham slices generously over the bottom half.
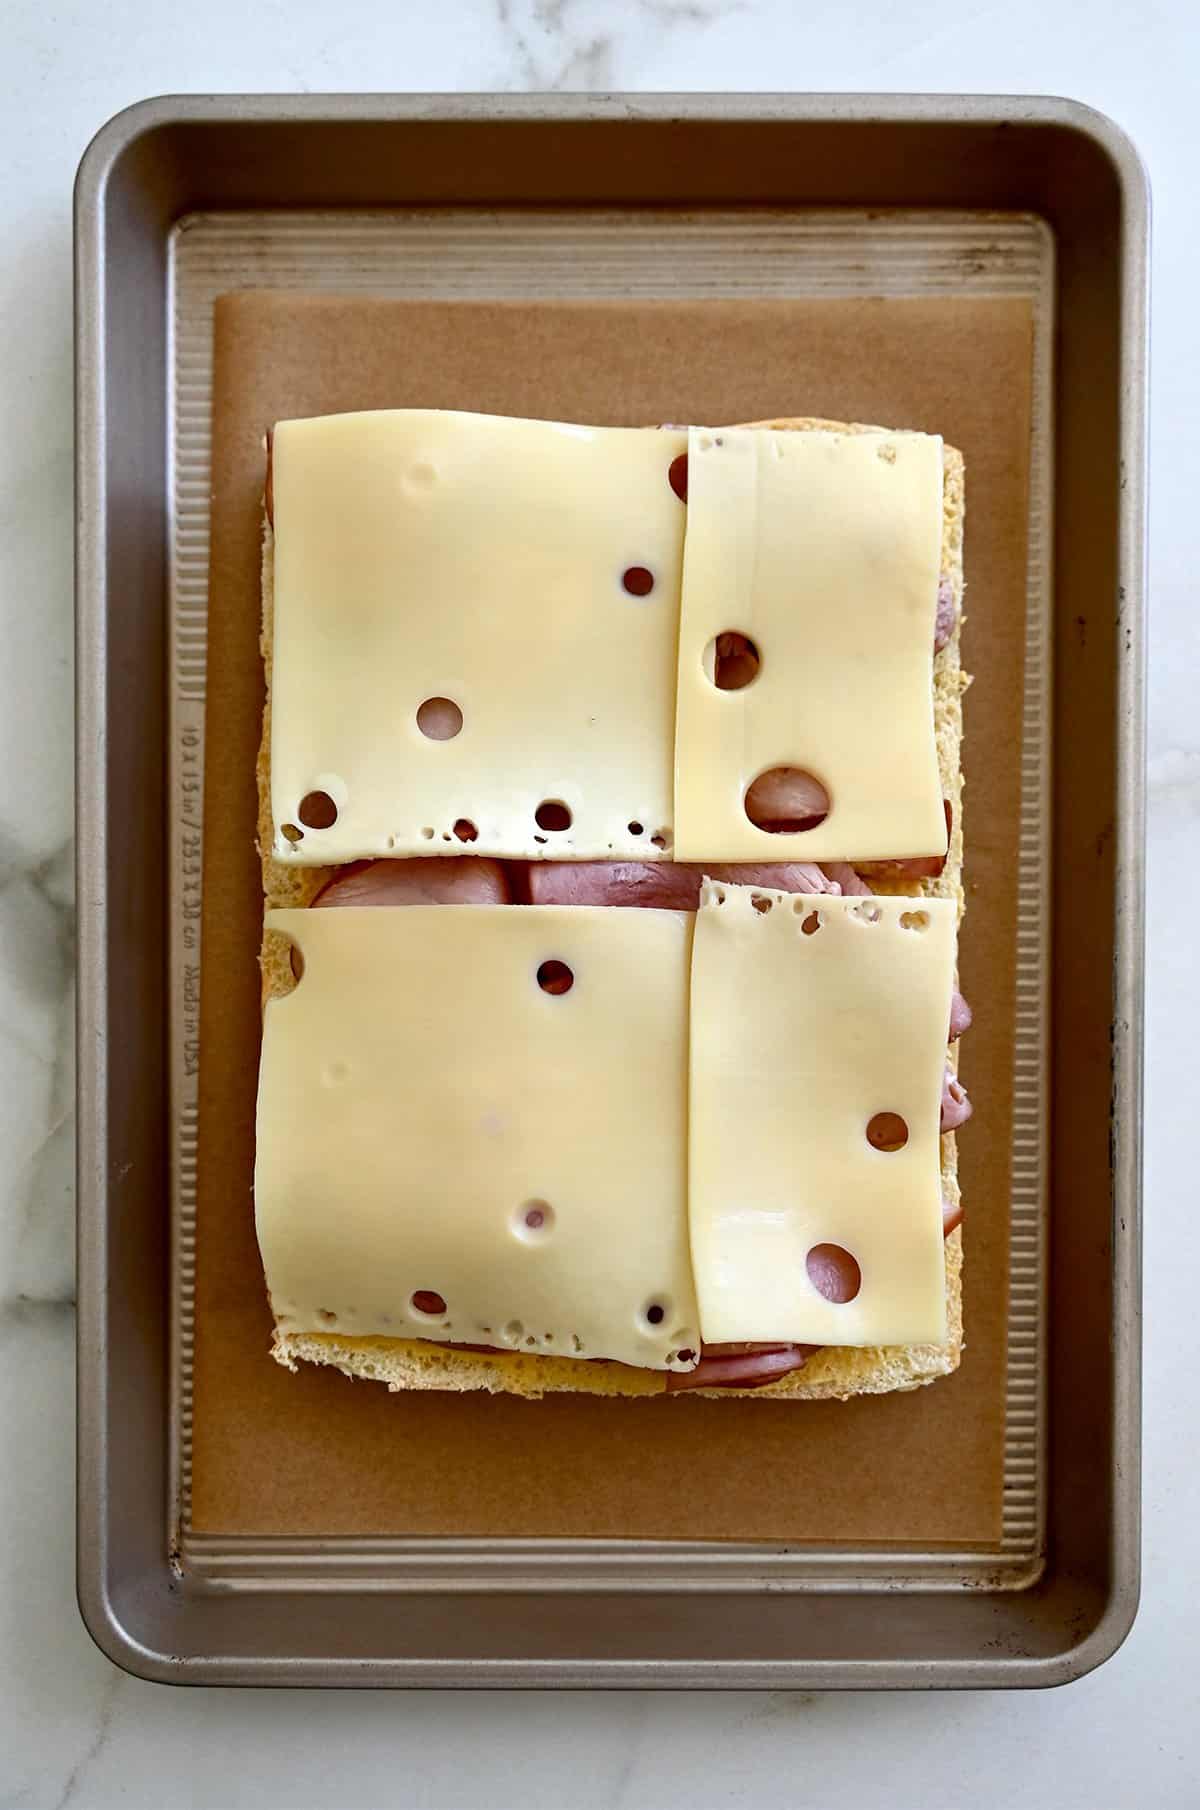
- Add the Swiss and top. Layer on the Swiss cheese, then place the top half of the rolls back on.
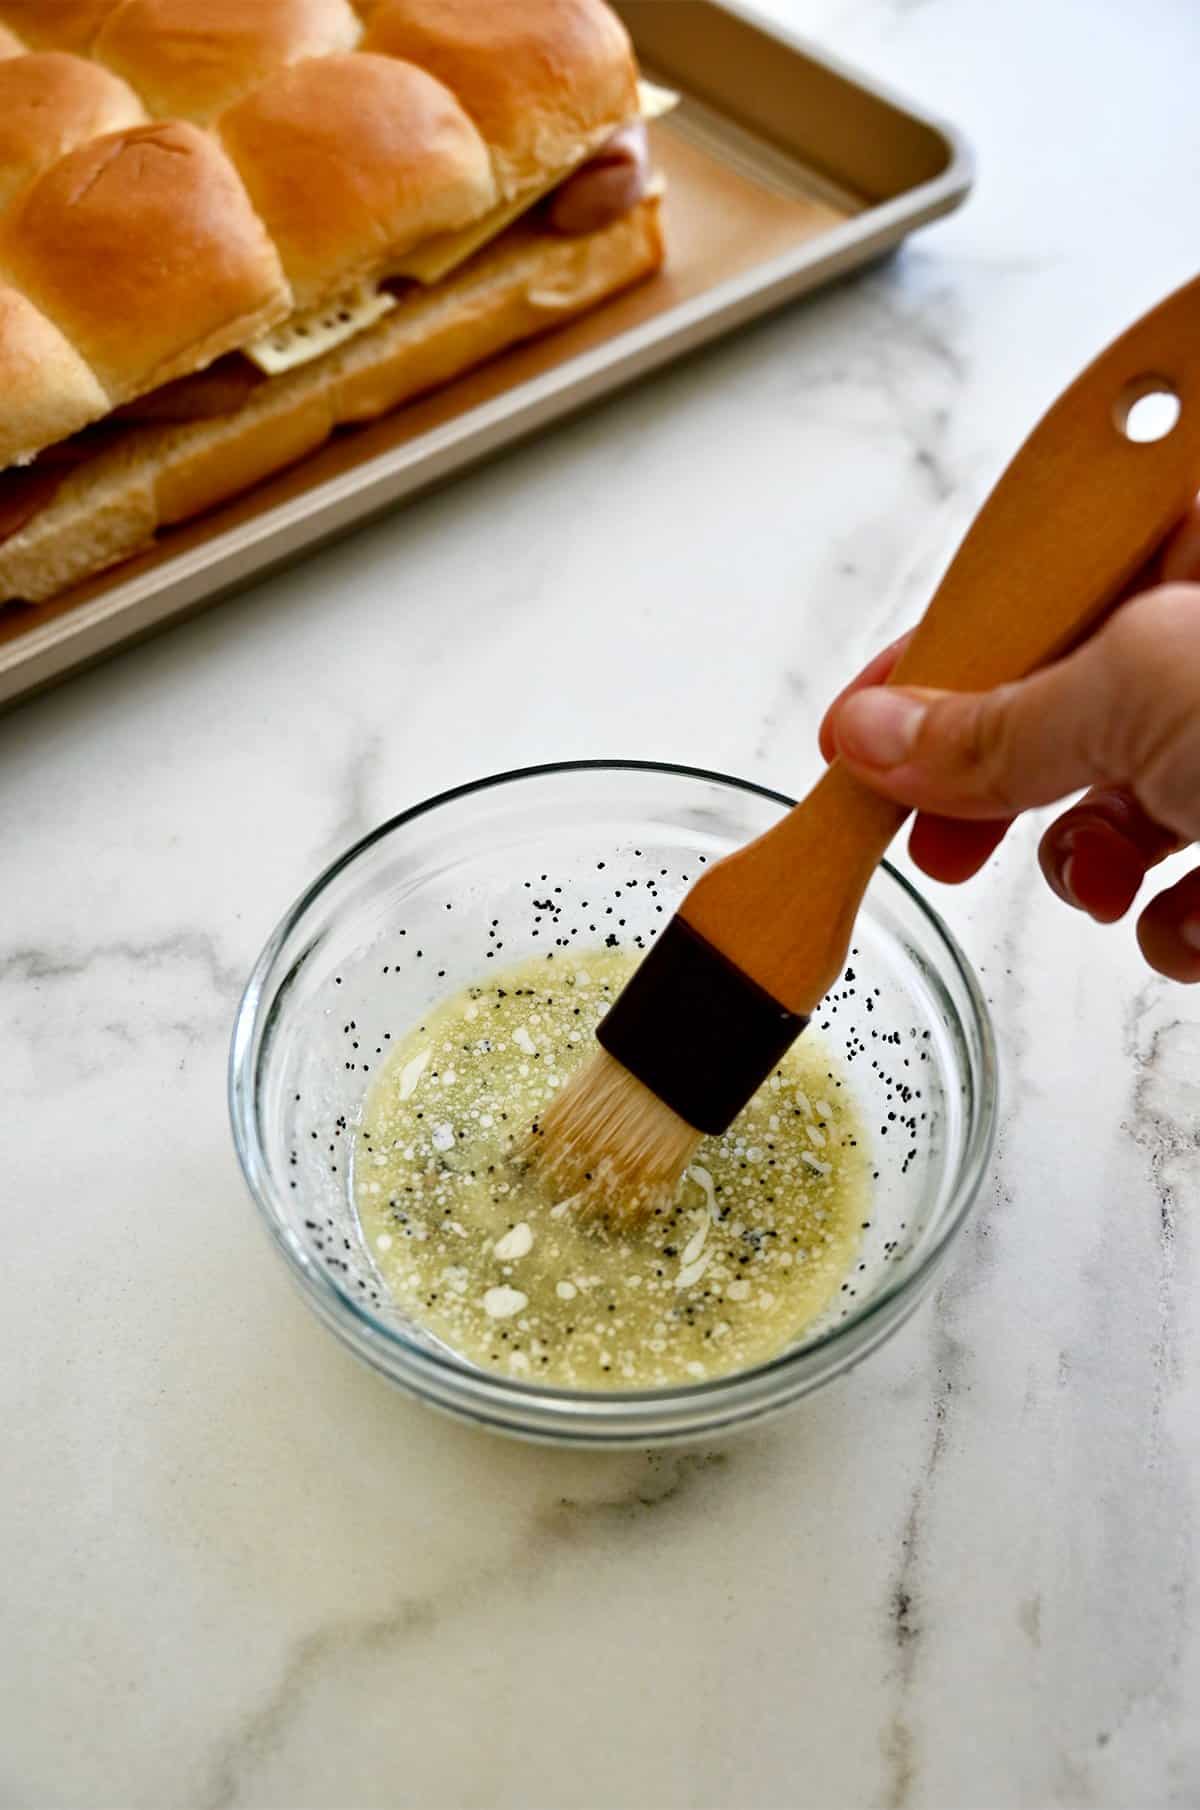
- Make the butter sauce. Melt butter and stir in the garlic powder and poppy seeds.
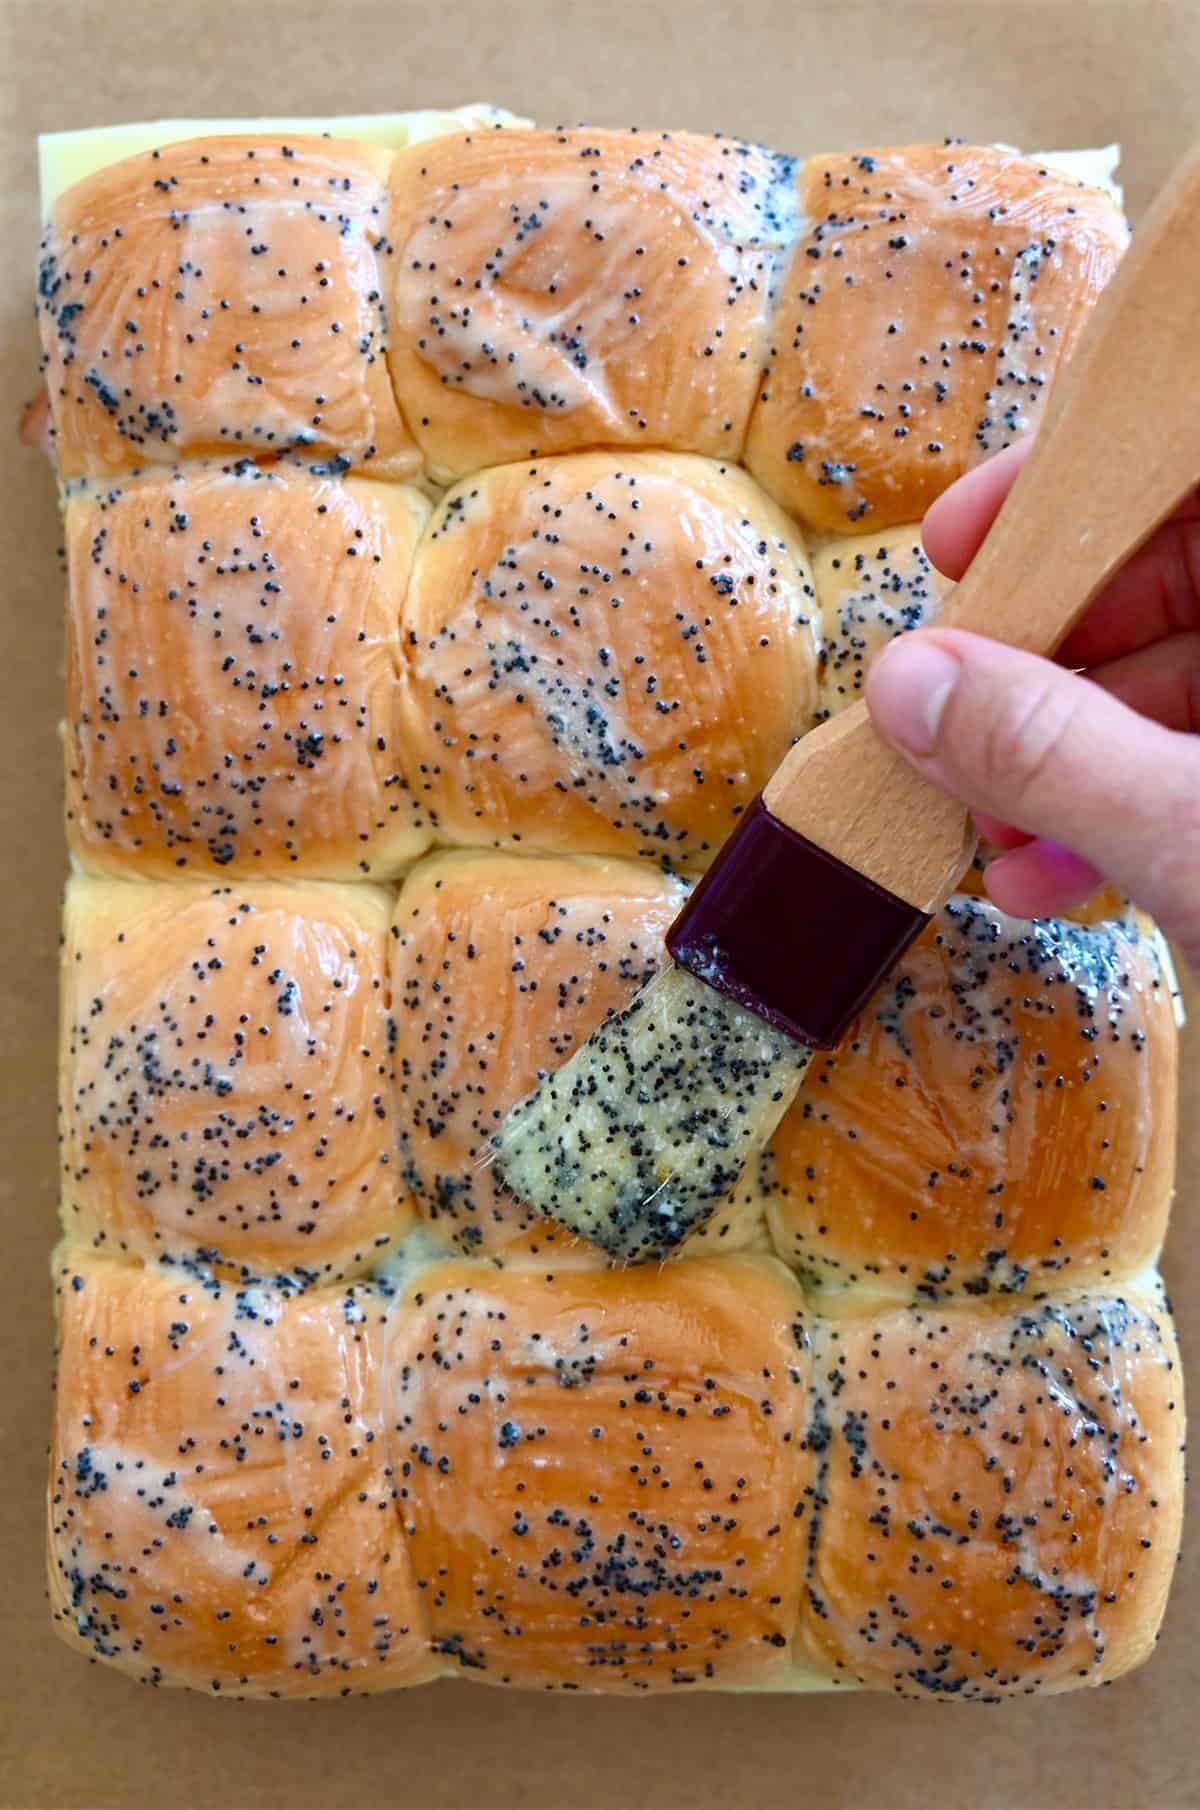
- Brush and bake. Brush the tops generously with the butter mixture, then bake until the rolls are golden and the cheese is melted, 8 to 10 minutes.
Variations
These easy baked sliders are endlessly customizable—perfect for using up odds and ends in the fridge. The amounts of ham and cheese listed are just a starting point. Depending on how thick your slices are or how meaty and cheesy you want your sliders, feel free to adjust. Think of this as more template than recipe—make it your own!
- Use any slider buns you love. Even my homemade pretzel rolls or soft dinner rolls would work great in this recipe.
- Use your favorite deli meat. These sliders are just as tasty with sliced turkey, roast beef, chicken, or even leftover roasted turkey from Thanksgiving.
- Swap the seasoning. Poppy seeds are a classic topping for ham and cheese sliders, so that’s what I used, but if your spice drawer is missing them, try a sprinkle of Everything Bagel Seasoning instead. It’s got garlic, onion, sesame seeds, and tons of flavor in one sprinkle.
- Change up the spread. Swap the Dijon for mayo, honey mustard, onion jam or even Thousand Island dressing. You can’t go wrong here.
Make-Ahead and Storage Tips
- Make ahead: You can prep the sandwiches and butter mixture up to 1 day in advance. Cover tightly and refrigerate separately. When you’re ready to bake, melt the butter mixture and brush it over the tops.
- Make and freeze: Assemble fully, then wrap tightly in a layer of plastic wrap followed by a layer of foil to prevent freezer burn. Freeze for up to 3 months. No need to thaw—just add 5–10 minutes to the bake time or until the sliders are hot and melty.
- Storing leftovers: Leftover sliders keep well in an airtight container in the fridge for up to 3 days. Reheat in the oven or air fryer for the best texture.
What to Serve with Sliders
Whether you’re feeding a hungry crew after soccer practice or serving these at your next tailgate, here are a few of my favorite sides to round out the meal:
- Lunchbox wins: Barbecue potato chips, fresh fruit salad or veggie sticks with buttermilk ranch
- Game day eats: Cottage cheese pizza dip, Texas caviar or beer-battered onion rings
- Easy dinner: Zucchini fritters, baked sweet potato fries or my Greek cucumber tomato salad
And don’t forget the bread and butter pickles—always a must on the side!
However you serve them, these hot ham and cheese sliders are always a hit. I hope they become a repeat favorite in your house, too. If you give the recipe a try, don’t forget to leave a rating and comment below—I love hearing what you think!

Ingredients
- 1 (12-oz.) package Hawaiian sweet rolls
- 2 Tablespoons Dijon mustard
- 10 slices deli ham
- 6 slices Swiss cheese
- 4 Tablespoons unsalted butter, melted
- 1 teaspoon garlic powder
- 2 teaspoons poppy seeds
Instructions
- Preheat the oven to 300°F. Line a baking sheet with parchment paper.
- Using a serrated knife, halve the rolls width-wise, then spread the Dijon mustard on the bottom half.
- Top the mustard with the ham and cheese. Return the tops to the rolls.
- In a small bowl, whisk together the melted butter, garlic powder and poppy seeds. Brush the butter on top of the rolls, then bake until the rolls are golden and the cheese is melted, 8 to 10 minutes.
Kelly’s Notes
- The amounts of ham and cheese listed are just a starting point. Depending on how thick your slices are or how meaty and cheesy you want your sliders, feel free to adjust. Think of this as more template than recipe—make it your own!
- Make ahead: You can prep the sandwiches and butter mixture up to 1 day in advance. Cover tightly and refrigerate separately. When you’re ready to bake, melt the butter mixture and brush it over the tops.
- Make and freeze: Assemble fully, then wrap tightly in a layer of plastic wrap followed by a layer of foil to prevent freezer burn. Freeze for up to 3 months. No need to thaw—just add 5–10 minutes to the bake time or until the sliders are hot and melty.
- Storing leftovers: Leftover sliders keep well in an airtight container in the fridge for up to 3 days. Reheat in the oven or air fryer for the best texture.
- ★ Did you make this recipe? Don’t forget to give it a star rating below!
Nutrition
Did you try this recipe?
Leave a comment below with your star rating!
This post may contain affiliate links.


Used some leftover ham from Easter brunch to make these for a little snack in the evening. That poppy seed butter really takes them from plain to flavor packed sandwich! Everyone loved them.
So glad you enjoyed the recipe, Elaine!
Made these with leftover Easter ham and they were so good. Added some chopped spicy peppers too and everything melted together beautifully.
So glad you enjoyed the recipe, Erin!